

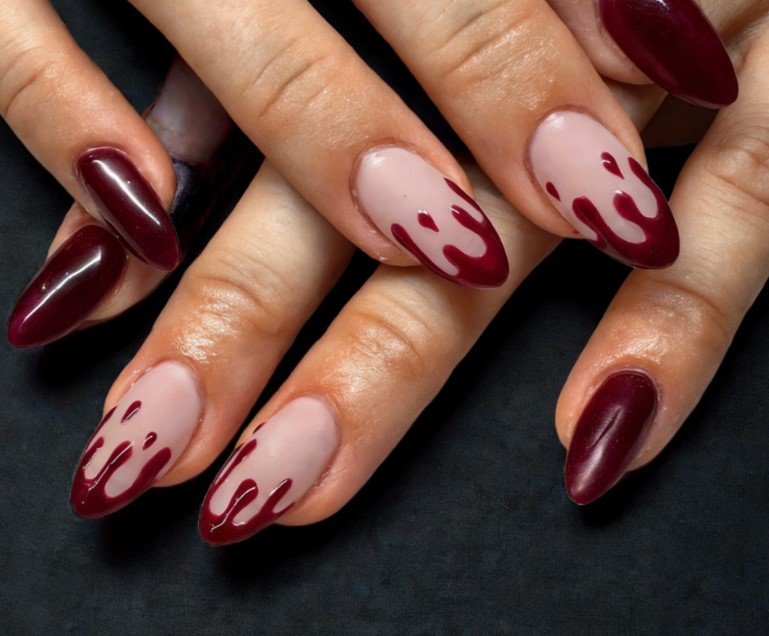
Bloody nail designs bring a dramatic Halloween mood to your manicure without requiring every nail to look overly complicated. From delicate red accents to bold dripping effects, blood drip nails can work with short, medium, or long shapes and suit many different base colors. Creative bloody nail art also gives you plenty of room to mix finishes, textures, French tips, glitter, and spooky details for a manicure that feels personal and striking.
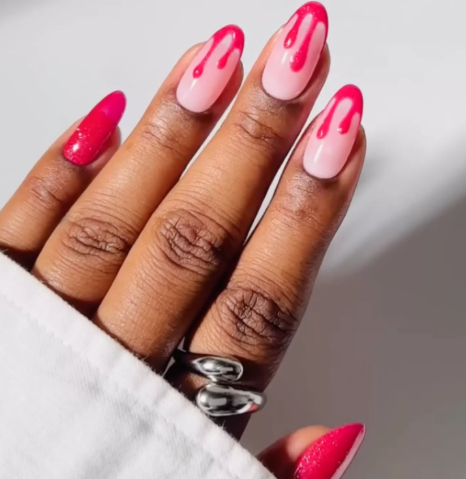
1. Sweet Red Drips
Soft red drips can give a spooky manicure a surprisingly cute personality. Starting with a sheer or nude base keeps the design light while bright red polish creates clear contrast along the tips. Rounded drip shapes work especially well when you want a playful finish instead of a frightening one. Small details, such as uneven drops and different drip lengths, can make each nail look slightly different while keeping the whole set coordinated.
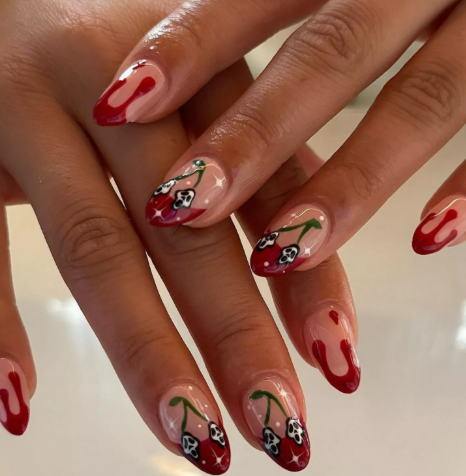
Credit: @myprettyset / Instagram
2. Spooky Mismatch
Mixing several Halloween-inspired details creates an eye-catching set without relying on one repeated pattern. Red drips can sit beside spooky symbols, contrasting colors, or small decorative accents to give every nail its own character. Choosing one dominant shade helps connect the mismatched elements visually. Shorter nails can carry this style beautifully because smaller details remain noticeable without overwhelming the available nail space.
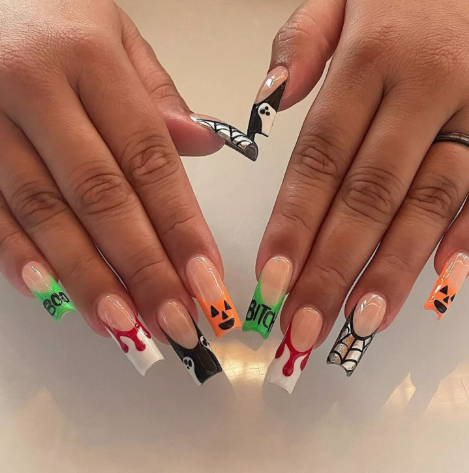
Credit: @myprettyset / Instagram
3. Micro Blood Drip
Tiny blood drips offer a subtle approach for anyone who likes spooky nail art with a cleaner appearance. Nude or pale bases provide enough empty space for miniature red details to stand out clearly. Keeping the drips narrow and carefully spaced creates a delicate effect that feels more polished than dramatic. Short nails especially benefit from micro details because they add personality without covering most of the natural-looking base.
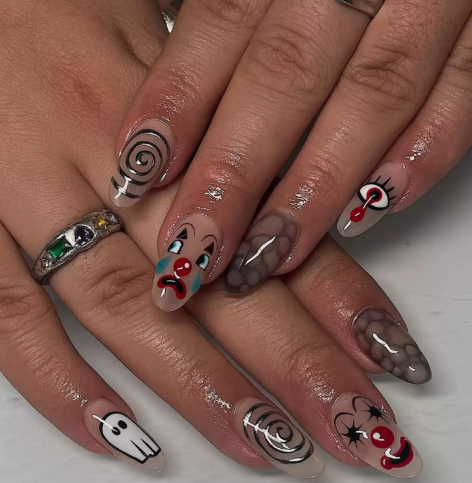
Credit: @myprettyset / Instagram
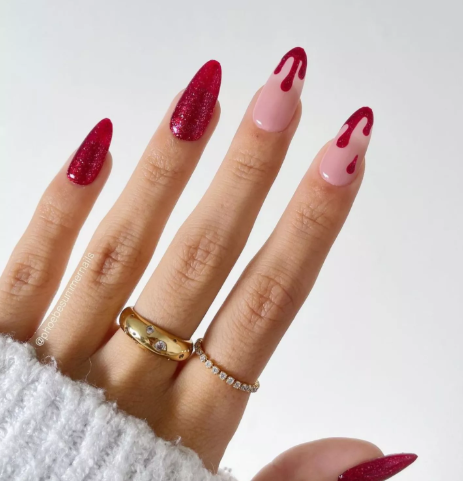
4. Red Glitter Blood Drip
Sparkling red polish adds another dimension to the traditional blood drip manicure. Fine glitter catches the light across each drip, making the design look more decorative while preserving its Halloween character. Pairing the glitter with a neutral base allows the red shimmer to remain the main attraction. Different glitter sizes can also create additional texture, while a glossy top coat helps smooth the surface and enhance the reflective finish.
Credit: @brushedbyb_ / Instagram
5. Blood-Splattered French
French tips become much more dramatic when traditional white ends are replaced with scattered red accents. Blood-like splashes can follow the natural curve of each tip while leaving plenty of the base visible underneath. Using irregular shapes prevents the manicure from looking too uniform and gives it a hand-painted quality. Sheer pink, nude, or milky bases work particularly well because they create a clean background for the darker red details.
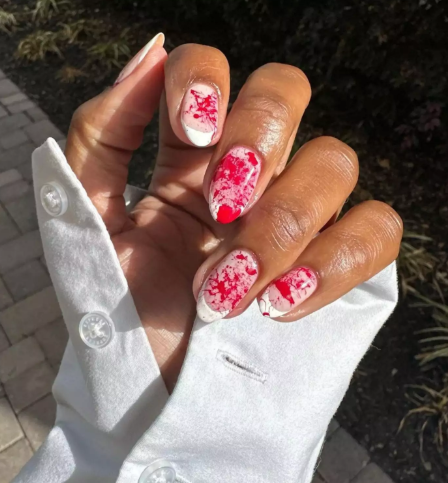
Credit: @lolo.nailedit / Instagram
6. A Drippy Red French
Combining French tips with elongated red drips creates a bold manicure that feels both polished and spooky. Red polish can begin along the tip and extend downward in different lengths for a fluid appearance. Keeping the base sheer gives the design a modern contrast and stops the nails from appearing visually heavy. Long almond or coffin shapes provide extra space for dramatic drips, while shorter shapes can use smaller versions.
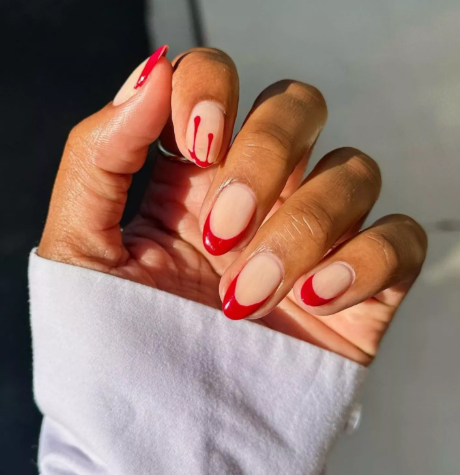
Credit: @lolo.nailedit / Instagram
7. Ultra-Detailed Drips
Intricate drip work can transform a familiar Halloween motif into a detailed nail-art statement. Multiple curves, varying drop sizes, and carefully placed highlights give the red polish more visual depth. Precision matters with this style because small changes in line thickness can alter the overall appearance. Using a fine nail-art brush makes it easier to control narrow edges and create smooth transitions between the main drip shapes.
Credit: @phoebesummernails / Instagram
8. Dual-Toned Blood Drip
Two shades of red can make a simple drip pattern look considerably richer. Dark burgundy paired with brighter crimson creates contrast between individual sections while maintaining a cohesive color palette. Layering the shades carefully can suggest depth without requiring complicated 3D products. Neutral or transparent bases keep the manicure balanced, allowing the dual-toned effect to remain visible instead of competing with additional decorations.
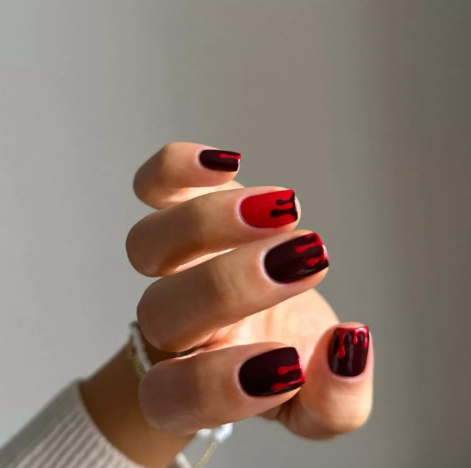
Credit: @thehangedit / Instagram
9. Solid Red
Solid red nails provide a simpler option for people who want Halloween drama without detailed artwork. Deep crimson, classic red, or darker cherry shades can each create a different mood depending on the finish. Choosing a high-shine top coat gives the manicure a sleek appearance, while a matte finish makes the color feel more muted and dramatic. Short nails can look especially striking with this low-maintenance approach.
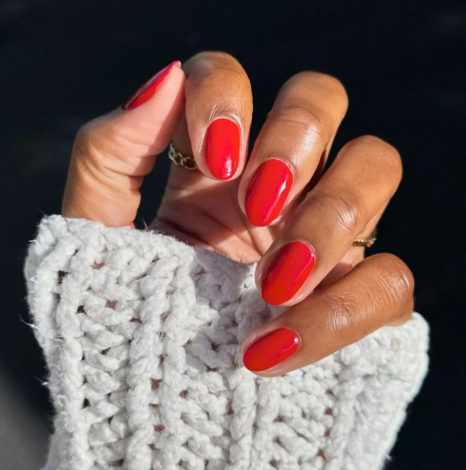
Credit: @lolo.nailedit / Instagram
10. Bloody Drips on a Nude Base
Nude backgrounds create an excellent canvas for bold red drip artwork because they leave strong negative space around every detail. Different drip lengths can make the manicure feel more natural and less repetitive across the fingers. Warm beige, pink nude, or pale peach bases can change the overall character while keeping the red elements prominent. Careful placement near the tips also helps preserve a neat appearance as the nails grow.
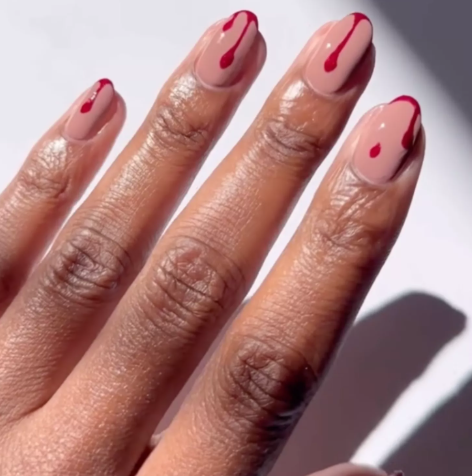
Credit: @lolo.nailedit / Instagram
11. The Solo Drip
One carefully placed drip can make a bigger statement than covering every nail with the same artwork. Keeping most of the manicure simple draws attention toward the single decorated nail and creates an intentional focal point. Neutral polish works well for the surrounding nails, while one strong red accent supplies the Halloween detail. Minimal placement also makes this option practical for beginners who want something easier to recreate.
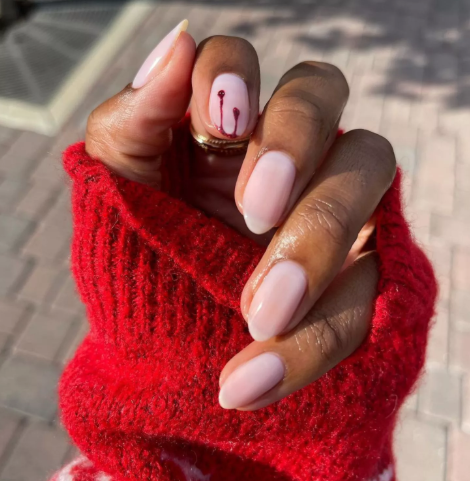
Credit: @lolo.nailedit / Instagram
12. Spooky Drip Set
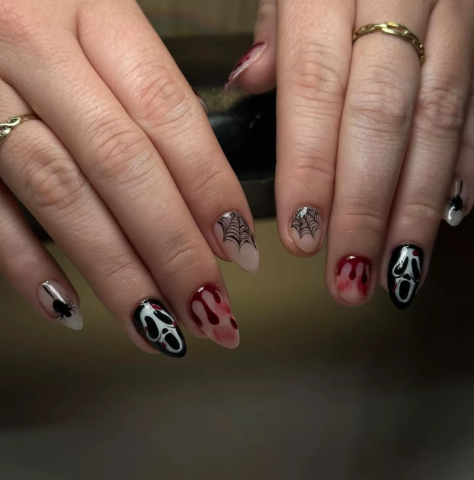
A spooky drip set can combine traditional red accents with additional Halloween-inspired details for a more complete seasonal manicure. Mixing patterns across the nails creates movement while keeping the blood drip element as the central theme. Coordinating colors prevents the collection from looking disconnected, especially when several decorations appear together. Black, nude, white, and deep red make a reliable palette for creating contrast without introducing too many competing shades.
Credit: @afreshset / Instagram
13. Gradient Blood Drip Claws
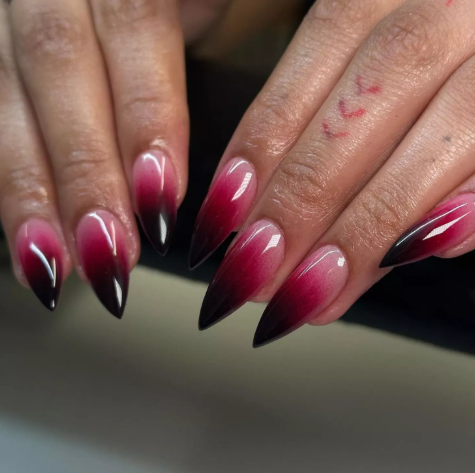
Gradient color can make blood drip claws appear more dimensional and dramatic. Blending a lighter red into a deeper shade creates visual movement along the nail while extending the effect toward the tips. Long stiletto, almond, or coffin shapes provide enough surface area for a noticeable transition. Applying thin layers gradually helps maintain a smooth gradient, while a glossy finish can enhance the depth of the darker sections.
Credit: @afreshset / Instagram
14. 3D Blood Drips
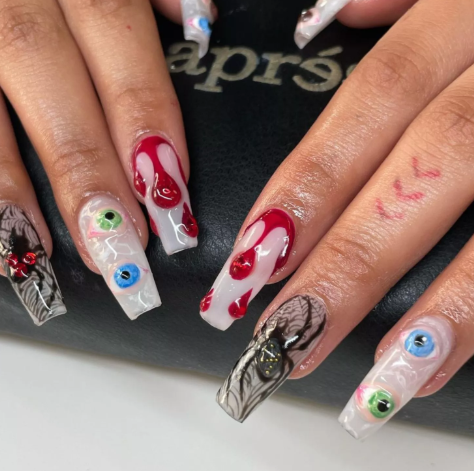
Raised details give blood drip nails a tactile finish that flat polish cannot provide. Builder gel or suitable 3D nail products can create carefully shaped droplets that catch light from different angles. Keeping the raised elements limited to selected areas helps preserve the manicure’s structure and reduces visual clutter. Anyone recreating this style should allow each layer to cure according to the product instructions for a secure and even result.
Credit: @afreshset / Instagram
15. Bloody Prints
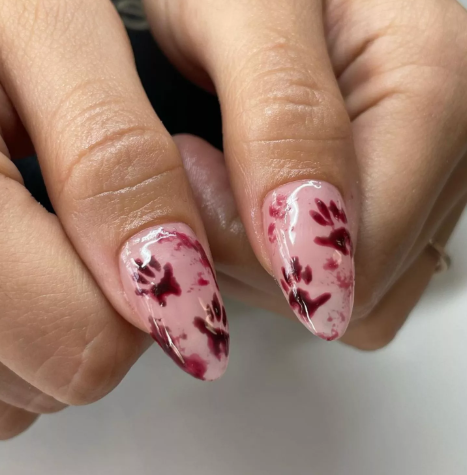
Printed or stamped blood-inspired details offer an alternative to hand-drawn drip patterns. Repeated marks can create a coordinated look across several nails while reducing the need for precise brushwork. Combining printed elements with a simple base makes the design easier to read from a distance. Red and burgundy shades work naturally for the theme, while small variations in placement can keep each nail from looking like an exact duplicate.
Credit: @afreshset / Instagram
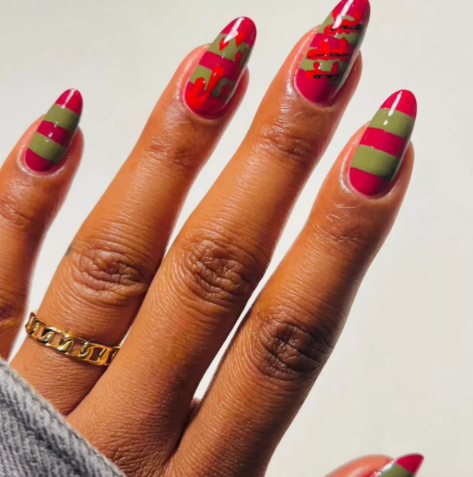
16. Freddy Kreuger-Inspired
Horror-film inspiration can turn a standard red manicure into a recognizable character-inspired design. Striped accents, dark tones, and sharp red details can reference Freddy Krueger’s familiar visual style without requiring every nail to carry the same pattern. Using one or two recognizable elements keeps the set balanced. Detailed artwork benefits from a thin brush, while a neutral accent nail can provide breathing room between stronger character references.
Credit: @brushedbyb_ / Instagram
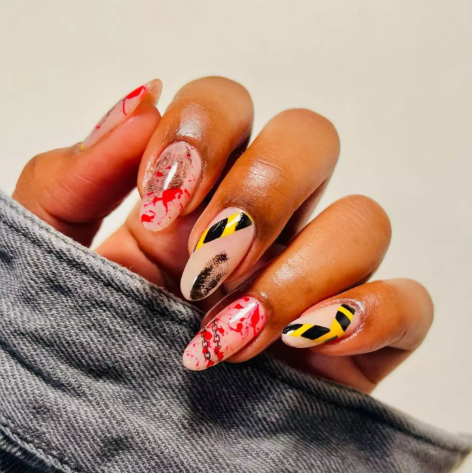
17. Crime Scene Nails
Crime-scene-inspired nails create a darker Halloween aesthetic by combining red marks with stark contrasting details. White, nude, or black backgrounds can make the red artwork stand out while giving the manicure a graphic appearance. Small lettering, splatter effects, or evidence-style motifs can add storytelling without covering every available surface. Keeping the decorative elements carefully spaced helps maintain clarity and prevents the design from becoming difficult to distinguish.
Credit: @brushedbyb_ / Instagram
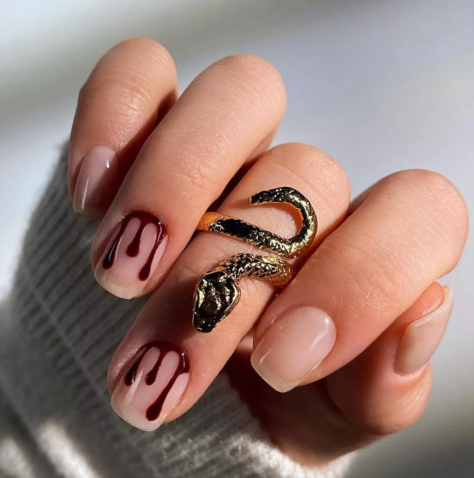
18. Vampy Vibes
Deep red shades bring a sophisticated vampire-inspired mood to seasonal nail art. Burgundy, oxblood, wine, and blackened cherry tones can create intensity while remaining wearable beyond Halloween. High-gloss finishes emphasize the richness of darker colors, whereas matte polish creates a softer appearance. Adding subtle drip details, pointed shapes, or one contrasting accent nail can connect the vampy theme to traditional bloody nail designs without making the manicure overly busy.
Credit: @amyle.nails / Instagram
Conclusion
Choosing Halloween blood nails does not mean committing to an extremely dramatic manicure. Subtle crimson accents, deep red French tips, and miniature drip details can create seasonal character, while 3D elements and layered artwork offer more elaborate options. Creative bloody manicure ideas can also adapt to different nail lengths, finishes, and personal styles. Whether you prefer dark red nail art or playful spooky details, thoughtful color choices and clean placement can make the final set feel polished and distinctive.