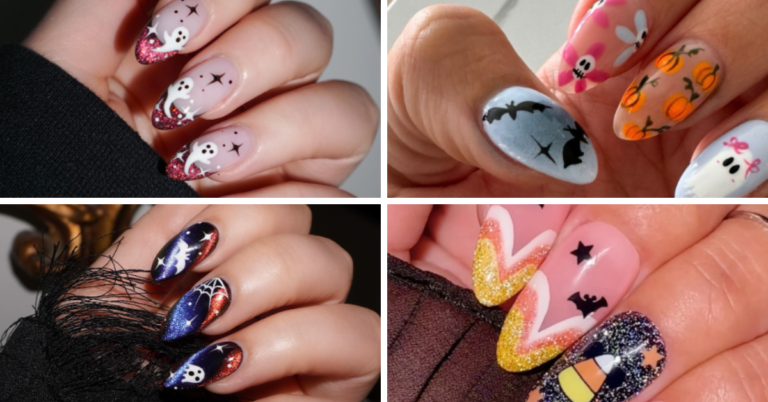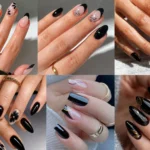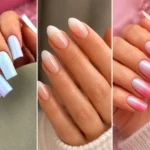

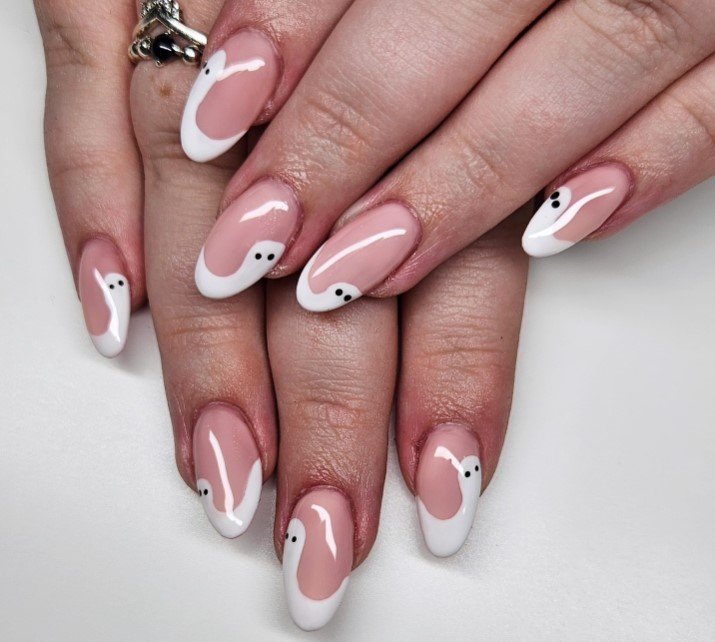
Ghost nail art is one of the easiest ways to bring Halloween spirit to your manicure without making every nail look dark or dramatic. From tiny smiling ghosts and delicate French tips to holographic foil, velvet textures, glitter, and colorful autumn shades, there are plenty of ways to make the theme your own. Whether you prefer a subtle everyday manicure or a playful October statement, these ghost nail art ideas offer styles for every mood, nail shape, and level of creativity.
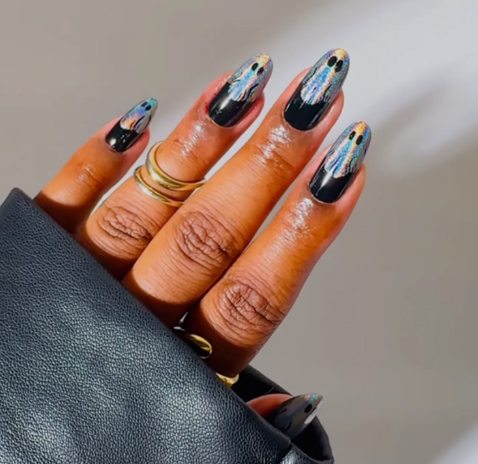
1. Holographic Foil Ghosts
Holographic foil gives classic ghost shapes a striking, reflective finish that catches the light from every angle. Against a black or deep charcoal base, the shifting silver, purple, and blue tones stand out beautifully. Keep the ghosts slightly irregular to make them feel hand-drawn and playful rather than too polished.
Credit: brushedbyb_
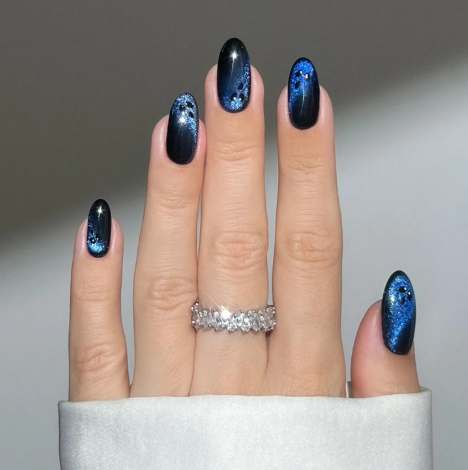
2. Spooky Velvet
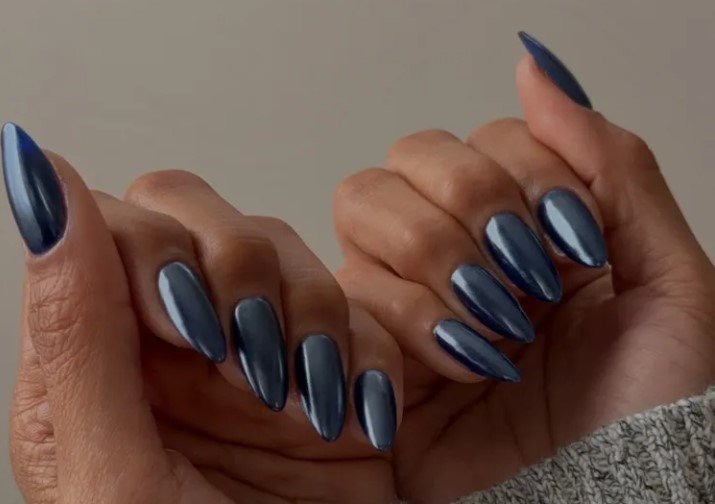
A dark velvet manicure creates a mysterious background for a subtle Halloween design. Deep black and navy magnetic polish can create a soft, glowing effect that resembles a moonlit night. Tiny ghost details add just enough character while allowing the rich velvet texture to remain the main feature.
Credit: heygreatnails
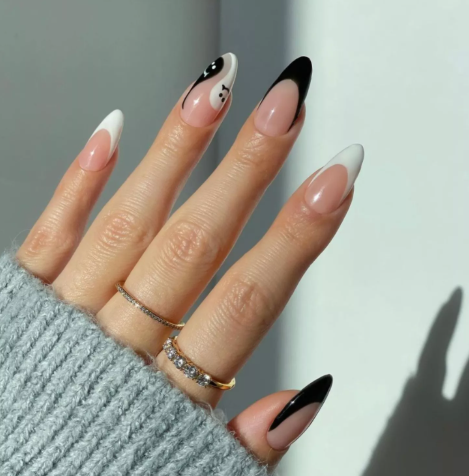
3. Frightening French
Give the traditional French manicure a Halloween update with crisp black tips and tiny ghost accents. White and black ghosts on an accent nail create a playful contrast without making the entire manicure feel overly busy. A nude or sheer base keeps the design polished and lets the spooky details stand out.
Credit: disseynails
4. Mismatched Accents
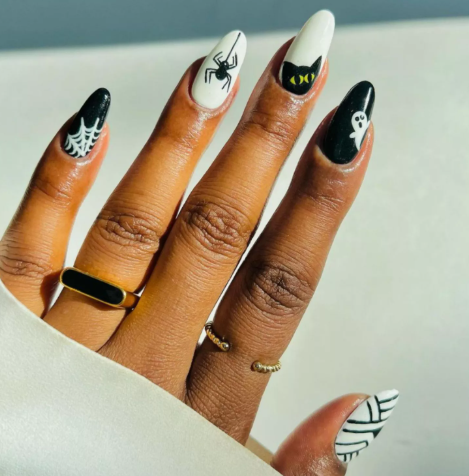
This manicure brings several Halloween favorites together, including ghosts, spiders, webs, black cats, and mummy details. Using a simple black-and-white palette keeps the different motifs connected instead of making the nails look chaotic. Each finger can feature its own tiny illustration while the consistent colors create a cohesive finish.
Credit: brushedbyb_
5. Ghostly Negative Space
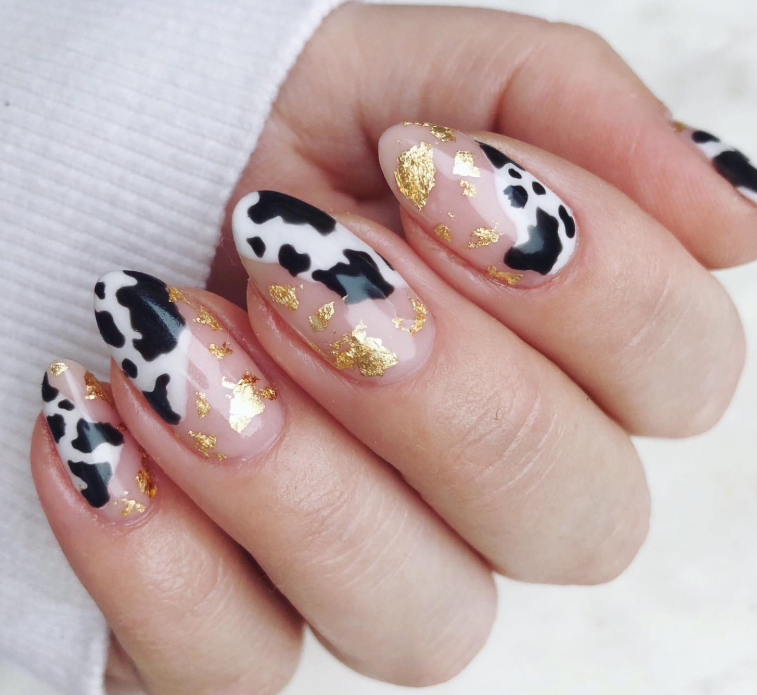
Negative space makes ghost nail art feel light, modern, and surprisingly easy to wear. Start with a nude or clear base, then place small white ghosts directly onto the natural-looking background. Tiny black eyes and mouths give each figure personality while leaving plenty of open space between the designs.
6. Ghost Tips
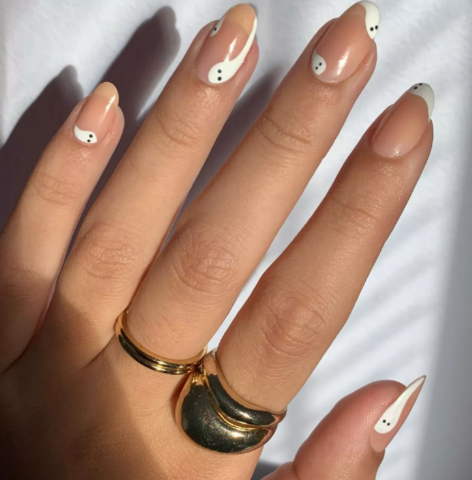
Turn the classic French tip into a row of little floating ghosts for a sweet Halloween manicure. The white shapes should extend over the nail tips with softly curved edges and small folds at the bottom. A sheer nude base keeps the look delicate, while the ghost shapes provide an unmistakable seasonal detail.
Credit: samrosenails
7. Chrome Ghosts
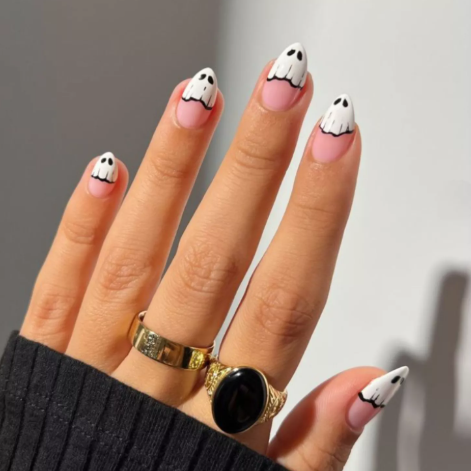
Chrome finishes bring a modern edge to otherwise simple ghost artwork. Use a nude or milky base with subtle metallic accents, then place small white or silver ghosts across selected nails. Their curved shapes work especially well with almond or oval nails, creating a sleek manicure that feels spooky without looking too dark.
Credit: ethanesthetician
8. Disney Style
For a playful twist, combine classic ghost shapes with recognizable Mickey-inspired details. Tiny spiders, ghost figures, and mouse-ear silhouettes can create a fun theme without covering every nail in large artwork. Black, white, and small pops of Halloween color keep the manicure cheerful while giving it plenty of seasonal personality.
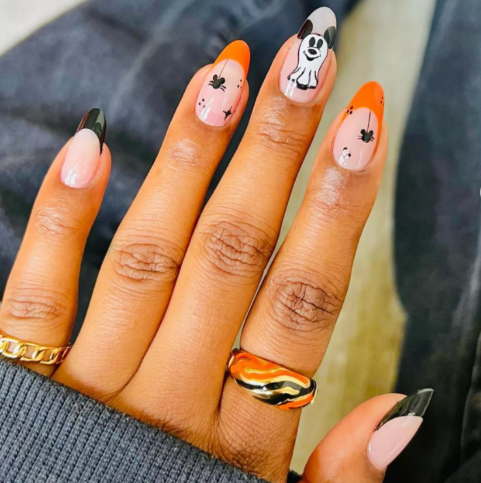
Credit: brushedbyb_
9. Pops of Pink
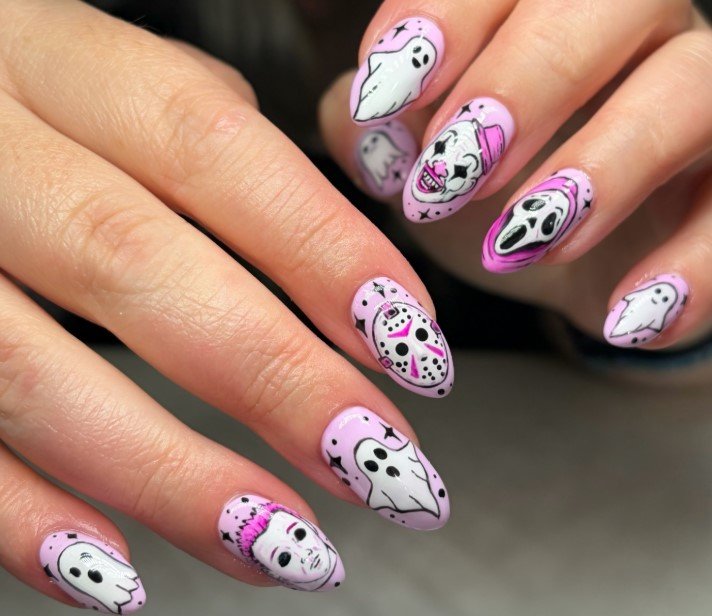
Pink gives traditional Halloween nail art a softer and more unexpected direction. Pair tiny ghosts, spiders, bats, or other seasonal details with a pale pink or brighter rosy accent. Keeping the artwork small allows the color to shine without overpowering the manicure, making this style especially cute for those who prefer playful designs.
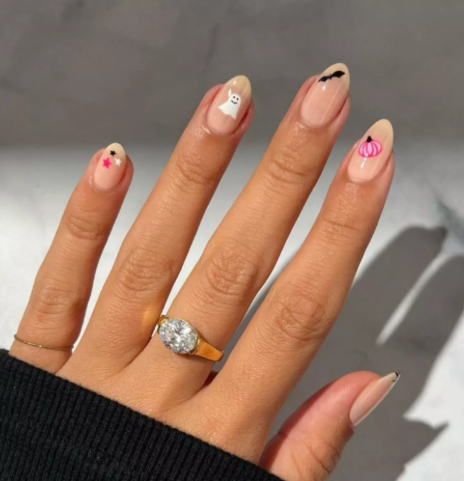
Credit: samrosenails
10. Tortoise Shell
Warm tortoise-shell patterns create a sophisticated background for crisp white ghost details. The mixture of caramel, brown, amber, and darker spots gives the manicure an autumn feel while the ghosts add a clear Halloween touch. Place the ghosts near the tips for a French-inspired effect that looks stylish and distinctive.
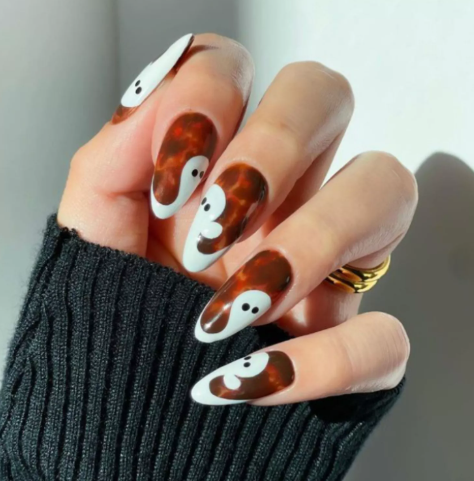
Credit: disseynails
11. Sparkly Orange
Sparkly orange polish instantly brings Halloween energy to the manicure with its bright seasonal color. Add small white ghosts near the tips or between sections of the glitter for a fun contrast. A reverse French placement can make the ghosts appear as though they are floating, adding dimension to the overall design.
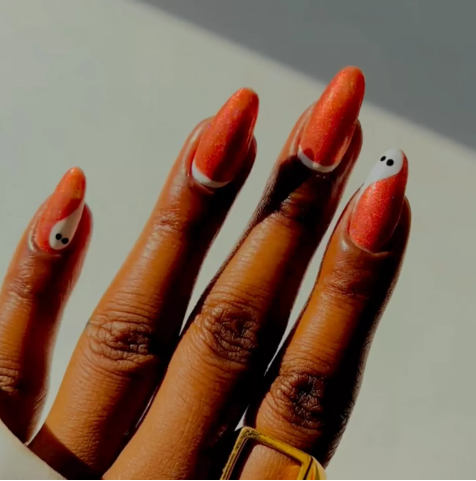
Credit: brushedbyb_
12. Barely There Boos
For a subtle approach, use a dark gray or silver magnetic base with a soft velvet-like glow. Instead of painting full ghost bodies, create tiny faces with simple eyes and mouths over the lighter areas of the polish. The result is understated enough for everyday wear while still giving the nails a clever Halloween detail.
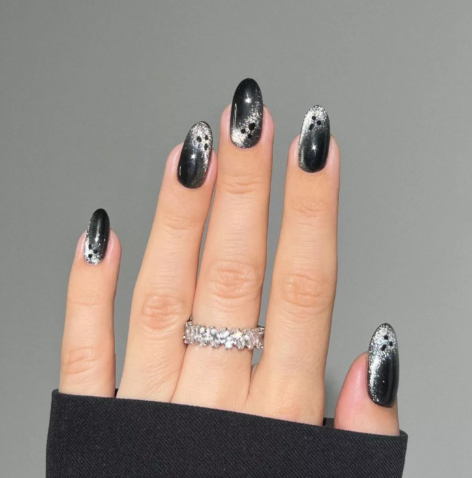
Credit: heygreatnails
13. Purple Is the New Orange
Purple offers a fresh alternative to the familiar orange-and-black Halloween palette. Try a vivid amethyst, rich plum, or muted mauve base and add white ghost shapes for contrast. The combination feels mysterious and seasonal while giving your manicure a more colorful finish than traditional Halloween shades.
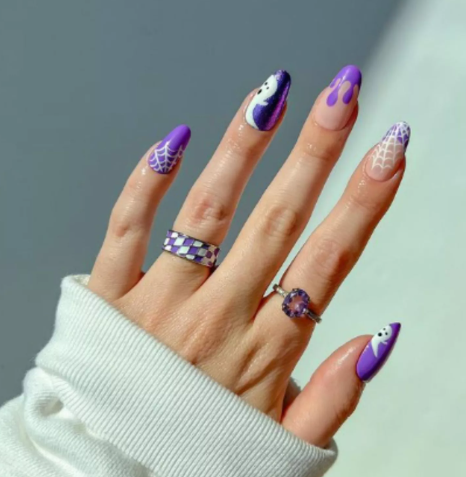
Credit: pop_polished
14. Halloween Core
A black base makes bright orange Halloween artwork stand out with a bold, graphic effect. Add pumpkins, stars, webs, or other tiny motifs across different nails, then use one accent nail for delicate cobweb details. Mixing thick orange shapes with fine black-and-white lines gives the manicure plenty of visual variety.
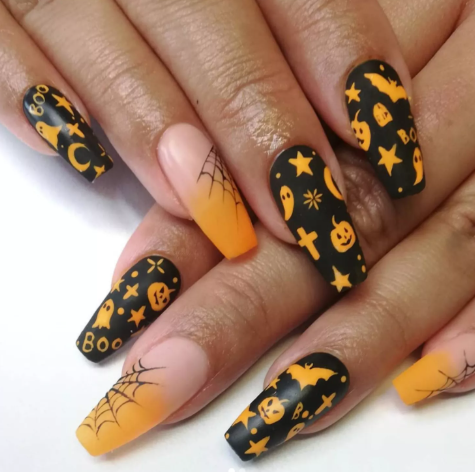
Credit: bhambnails
15. Groovy Ghost
Give ghost nail art a retro feel by pairing it with warm brown, cream, and muted autumn shades. Tiny flowers and rounded shapes can create a playful 1970s-inspired pattern around the ghost details. This approach feels more nostalgic than frightening, making it a great option for anyone who wants Halloween style without the usual dark palette.
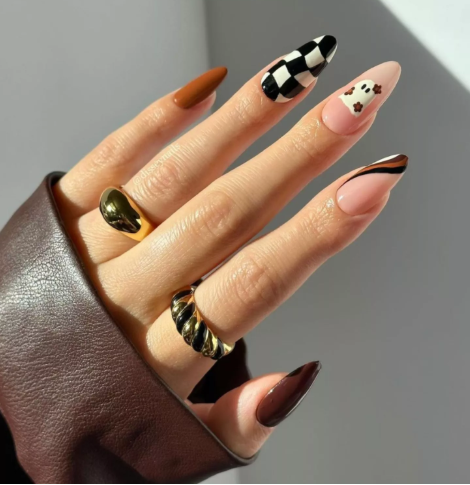
Credit: disseynails
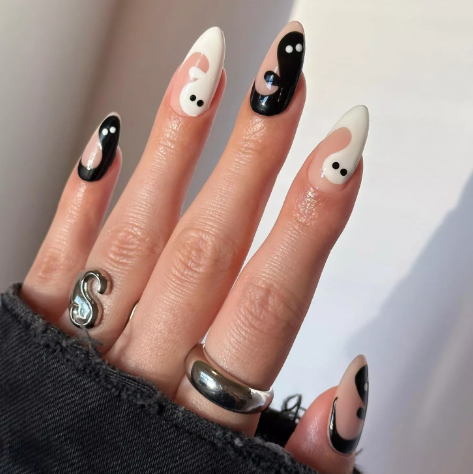
16. Black and White Ghosts
Simple black and white ghosts can create a bold manicure without requiring complicated artwork. Alternate the ghost colors across the nails or use white ghosts on black nails and black ghosts on lighter ones. Almond-shaped nails provide plenty of length for repeating the design while keeping the overall look clean and coordinated.
Credit: disseynails
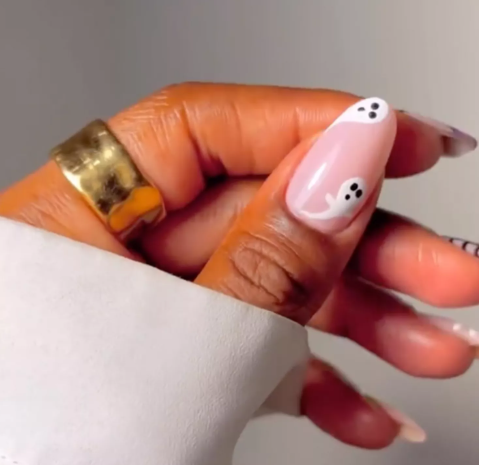
17. Peak-a-Boo
Sometimes just a couple of tiny ghosts can carry the entire Halloween theme. Place small white ghost accents on a pale pink, nude, or sheer base so they look like little figures peeking into the design. Keeping the artwork limited to a few nails makes the manicure feel delicate while still giving it a playful spooky touch.
Credit: brushedbyb_
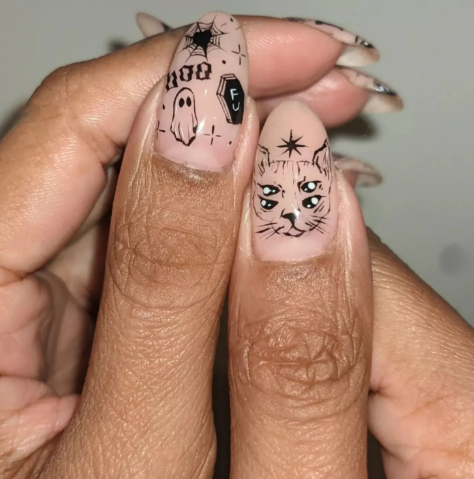
18. Tattoo Ghosts
Tattoo-inspired ghost nail art focuses on fine outlines, intricate details, and a slightly edgier appearance. Combine a small ghost with motifs such as webs, unusual cats, stars, or decorative linework to create a miniature illustrated scene. A neutral or muted base helps the detailed black artwork remain sharp and easy to notice.
Credit: bhambnails
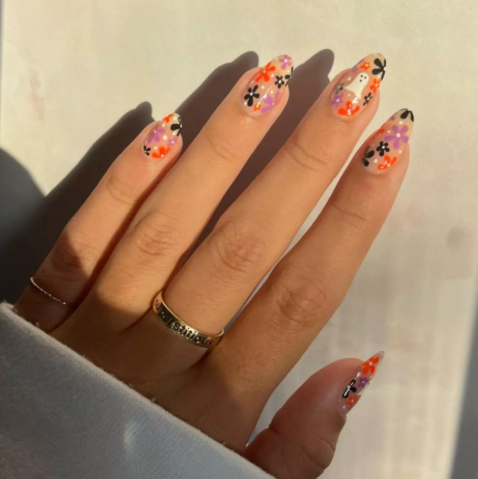
19. Fearful Florals
Halloween flowers can make ghost nail art feel colorful rather than frightening. Combine purple, orange, and black flowers with a small white ghost for a design that blends autumn beauty with spooky details. The floral elements soften the manicure, while the ghost keeps the theme recognizable and fun.
Credit: samrosenails
20. Halloween French
A Halloween French manicure is an easy way to transform a familiar nail shape for October. Replace traditional white tips with black ones, then add tiny ghosts, pumpkins, stars, or other seasonal artwork. The simple base keeps the manicure refined, while the themed tips make it instantly more festive.
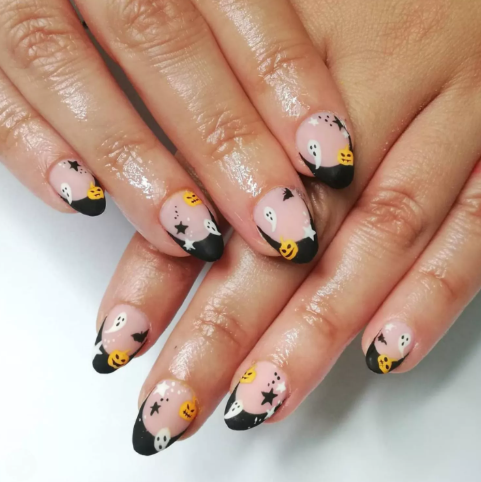
Credit: bhambnails
21. Happy Ghost
A smiling ghost can make even a dark Halloween manicure feel cheerful. Pair the little character with black French tips, deep floral details, or other dark accents for an interesting contrast between spooky and sweet. Keep the ghost’s expression simple, using a tiny smile and rounded eyes to give it personality.
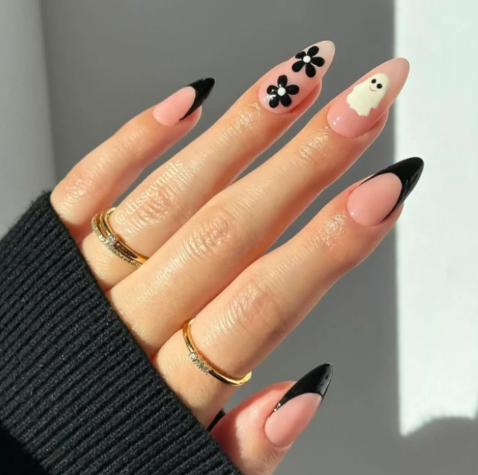
Credit: disseynails
22. Cute Ghost Faces
Instead of painting full ghost figures, focus on tiny faces for a minimalist and adorable manicure. Use a sheer, nude, or soft pink base and add small oval eyes with simple curved mouths. Varying the expressions slightly can make each ghost feel different while keeping the overall design neat and easy to wear.
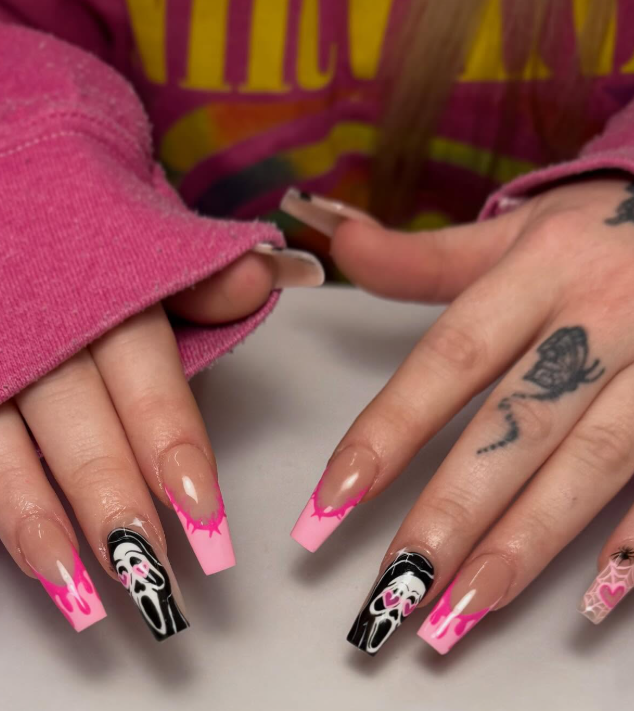
23. Ghost and Moonlight Nails
Create a nighttime Halloween scene with pale ghosts set against deep blue, charcoal, or black nails. Tiny moon and star details can surround the ghosts, giving the manicure a quiet, mysterious atmosphere. Silver or soft white accents work especially well because they mimic the glow of moonlight against a dark background.
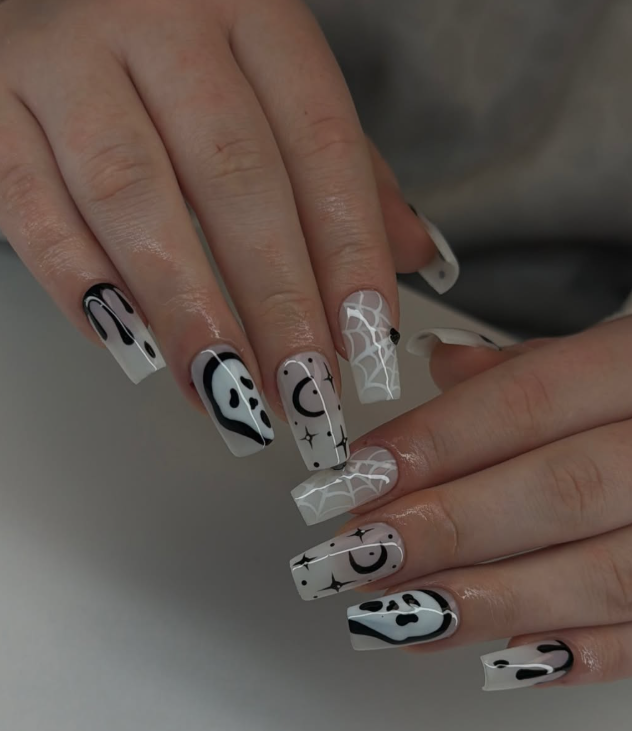
nailsbyanza
24. Mini Ghost Parade
A row of tiny ghosts can turn every nail into part of one playful Halloween story. Use a neutral base and repeat small white ghost shapes across the nails, giving each one slightly different eyes or expressions. Keeping the figures miniature allows the manicure to look detailed without becoming crowded or difficult to style.
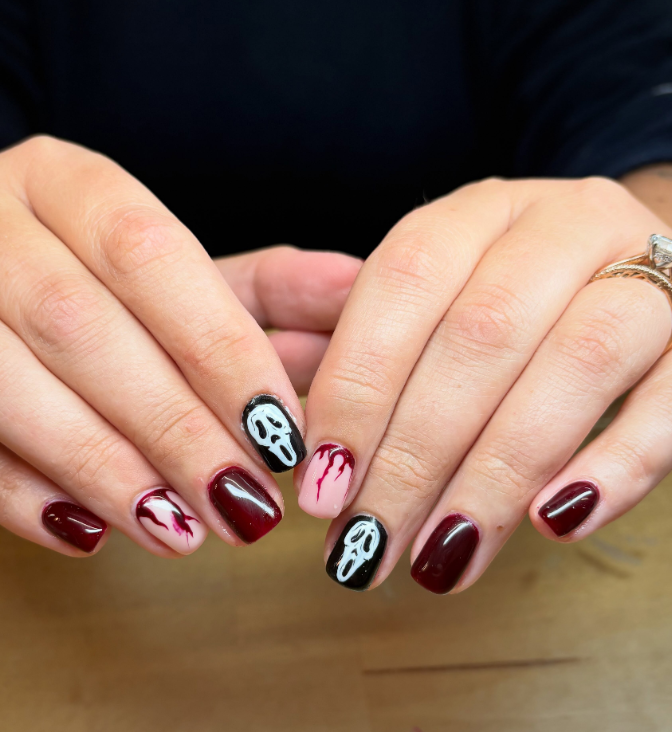
25. Ghosts Among the Stars
Tiny ghosts surrounded by stars create a whimsical design with a dreamy Halloween mood. A dark navy, black, or deep purple base makes the white figures and small metallic stars stand out clearly. Scatter the stars rather than placing them evenly so the manicure feels more like a little night sky.
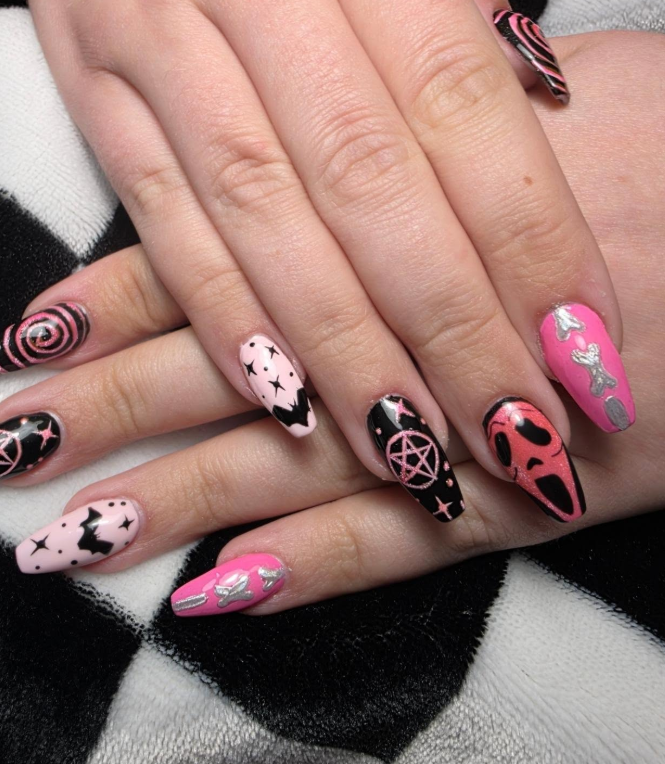
shearmagic.hair
26. Sweet Ghost French Tips
For a softer Halloween look, replace ordinary French tips with tiny ghost silhouettes. A sheer nude or milky base keeps the manicure elegant, while the white figures create a charming seasonal border. Small black eyes and mouths complete the design without adding too much visual weight to the tips.
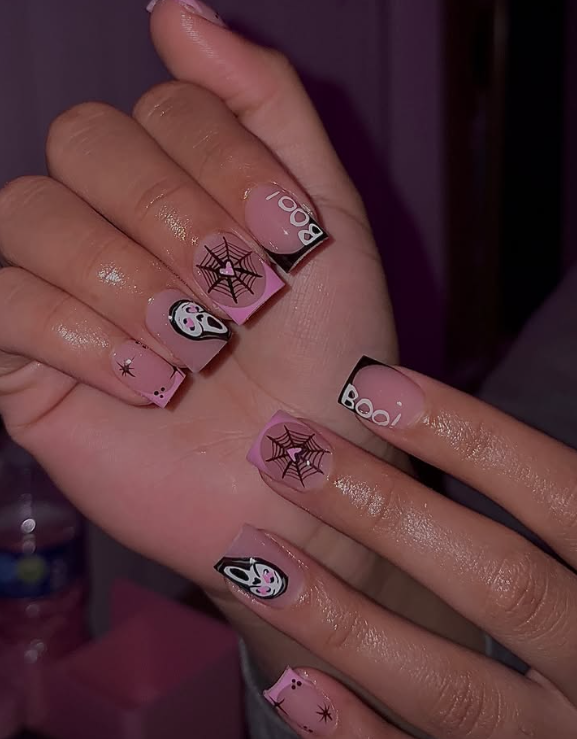
nailzby.nia
27. Pastel Ghost Nails
Pastel shades can make Halloween ghost art feel cute, youthful, and less traditional. Try lavender, baby pink, pale blue, mint, or soft peach as the base, then add white ghosts with tiny expressive faces. Mixing two or three pastel shades across the manicure creates variety while maintaining a soft color story.
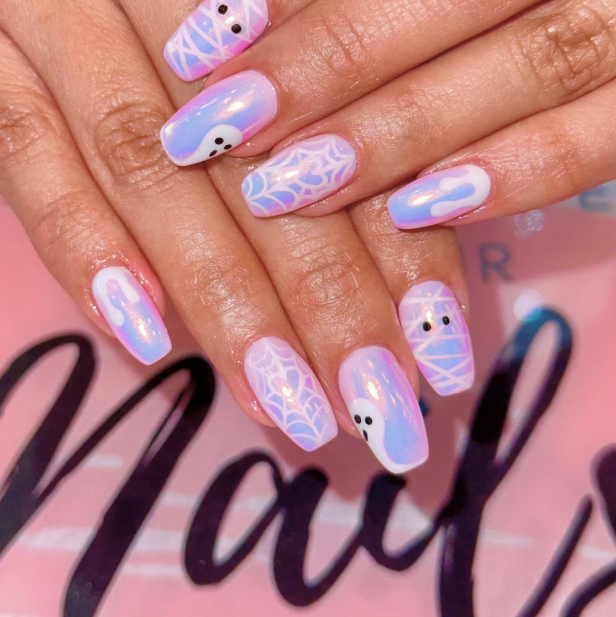
Credit: pacfenails
28. Ghosts and Little Bats
Combine two classic Halloween characters by pairing friendly ghosts with tiny flying bats. White ghosts stand out beautifully against black, gray, or deep purple polish, while small black bat silhouettes add movement between them. Keep the bats simple and small so the ghosts remain the main focus of the manicure.
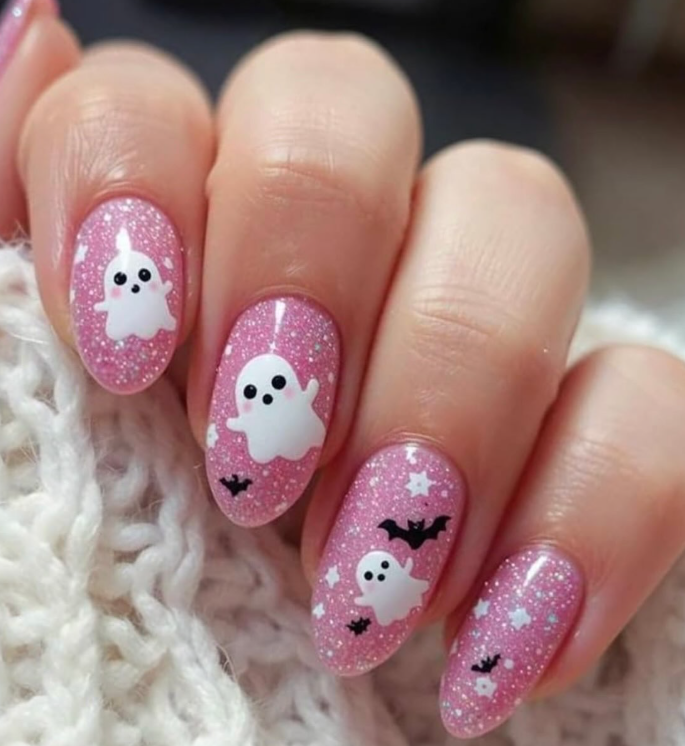
Credit: solangeklais
29. Glittery Ghost Accents
A touch of glitter can make simple ghost accents feel much more festive. Start with a nude, black, or deep seasonal base and reserve glitter for one or two accent nails. White ghosts placed over or beside the sparkle create an eye-catching contrast without covering the entire manicure in glitter.
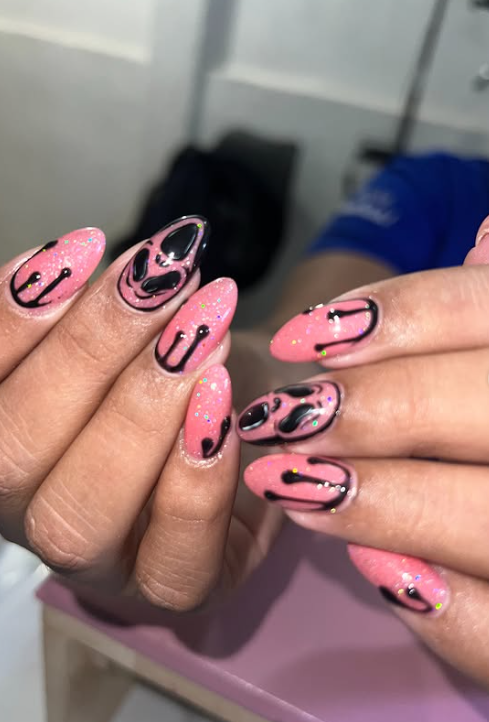
anavelnails
30. Midnight Ghost Nails
Deep midnight shades create an atmospheric background for bright ghost artwork. Try navy, black, charcoal, or dark plum with crisp white ghosts that appear almost illuminated against the darker base. Tiny stars, moons, or scattered dots can add depth while keeping the overall manicure mysterious and elegant.
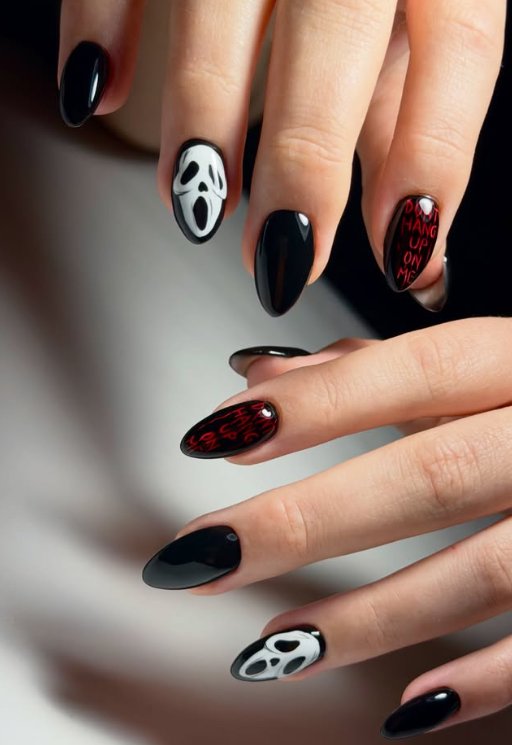
nailxkc
31. Playful Ghost Halloween Nails
For a cheerful finish, mix smiling ghosts with colorful Halloween accents and tiny seasonal motifs. Use contrasting shades such as white, orange, purple, pink, and black to give each nail its own personality. The key is to keep the illustrations small and expressive so the manicure feels playful, cute, and unmistakably Halloween-ready.
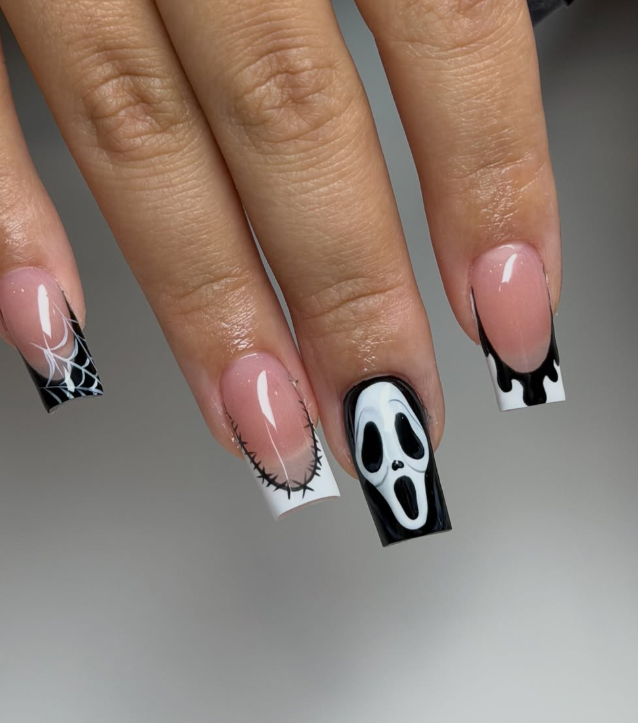
xnailsbystef
Conclusion
A ghost manicure can be much more than simple white shapes on a dark background. Mixing ghosts with French tips, chrome finishes, florals, stars, bats, glitter, and unexpected colors creates a fresh look that feels personal and seasonal. Whether you choose a minimalist accent or cover every nail with playful Halloween details, these ideas make it easy to give your October manicure a cute, spooky finish.