


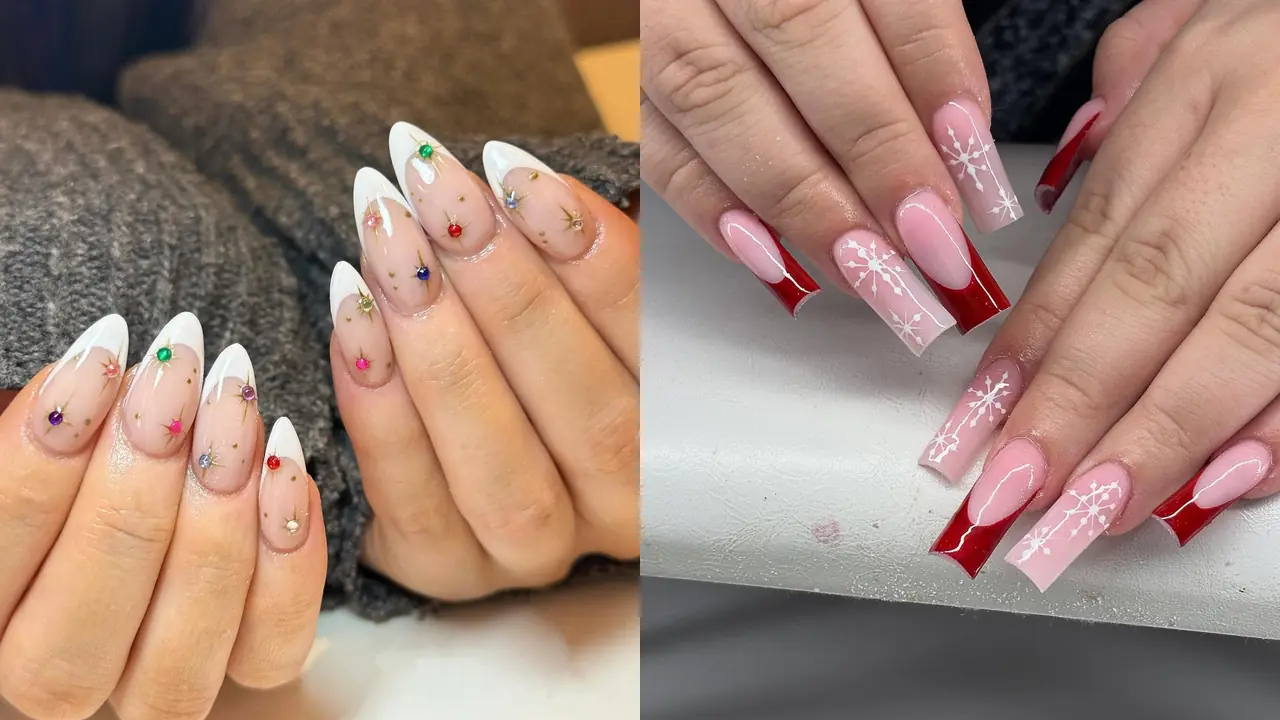
Red, green, gold, and silver bring a festive finish to classic French tips. Delicate snowflakes, candy-cane stripes, holly leaves, tiny bows, and sparkling gems add character without making the nails look crowded. Christmas French Tip Nails combine familiar French styling with seasonal colours and carefully placed artwork. Crisp white edges offer a timeless base, while deep burgundy, forest green, and metallic accents introduce richer holiday tones. Glossy finishes highlight the fine details, and subtle glitter adds extra sparkle. From delicate winter patterns to bold festive accents, Christmas French tip designs offer plenty of ways to celebrate the season with beautifully detailed nails.
1. Colorful Gem Starbursts on White Tips
White tips cap sheer nude nails with a clean, curved smile line. Multicolour rhinestones scatter across the tips in red, green, blue, pink, purple, and clear. Gold starbursts sit between the stones, and tiny gold dots fill the gaps. Grey knit shows behind the hands, so the bright stones stand out more. Each stone catches light at a different angle, because the facets sit at varied heights.

Paint the pale ends first with two thin coats, then add the sheer pink layer. Set each gem with tweezers while the top coat stays tacky, and press gently. Draw the star shapes with a thin brush, keeping the arms slim and even. Place the smallest dots last, spacing them between the larger gems. Seal the set with a clear top coat, and cap the free edge so nothing lifts.
2. Red Tips with Pink Snowflake Nails
Bold red tips cap sheer pink nails with a deep, glossy curve. Pale pink nails alternate with the red, and white snowflakes spread across them. Each flake has fine arms and small dots, so the pattern stays crisp. Gloss runs across the whole set, and light slides along the red without dulling it. Red, pink, and white share the set, because the three shades balance each other.
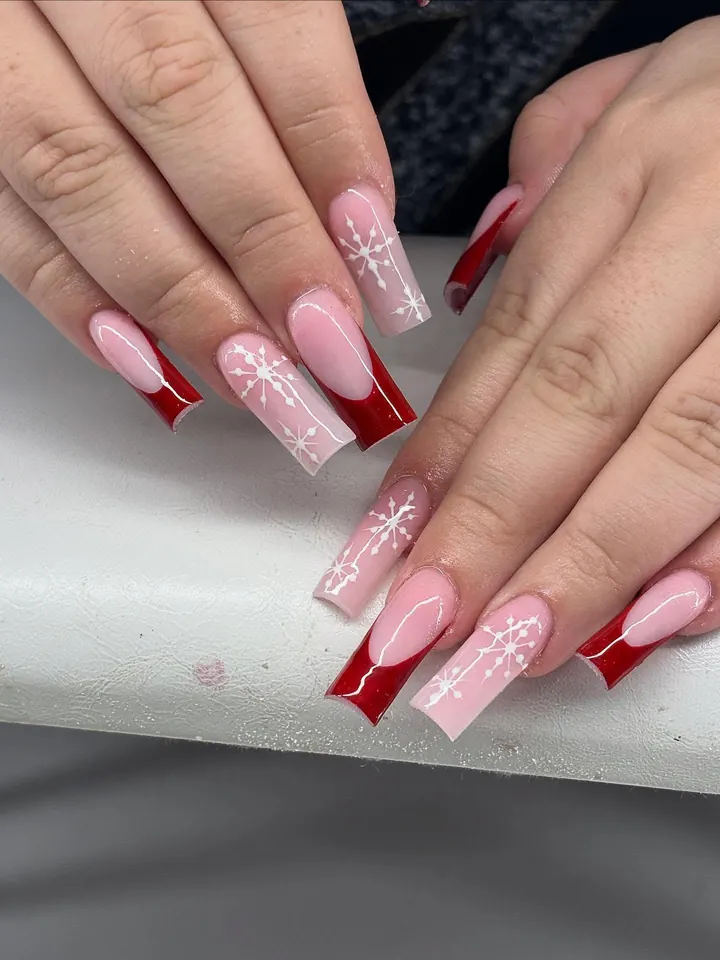
Start with the crimson ends in two thin coats, then let each dry fully. Fill the accent nails with a blush lacquer, and keep the edges neat. Draw each flake with a thin brush, starting at the centre and working outward. Dot the spaces with a dotting tool, keeping the spacing loose and uneven. Seal the set with a clear top coat, because the pale lacquer shows scuffs fast.
3. Gold Starbursts and Snowflakes on Pink
White tips frame pale pink nails, and gold starbursts scatter across the set. Tiny gold dots sit between the stars, while white snowflakes fill the remaining space. Each snowflake carries a gold centre, so the white and gold tie together. Hands hold a pink bauble among frosted pine, and the soft background keeps the nails central. Gloss gives the pink a gentle shine, because the light stays soft and even.

Start with a sheer blush foundation, then shape the pale ends with a guide. Draw the star shapes with a thin brush, keeping each arm straight and even. Add the metallic dots with a dotting tool, spacing them between the stars. Paint the flakes last, because the fine lines need a steady hand and dry lacquer. Seal with a clear top coat, and cap the free edge so nothing lifts.
4. Candy-Cane Stripes with Gold Glitter Bows
Red tips mix with candy-cane stripes, red glitter, and gold bows across the set. Two tips carry bold red and white diagonal stripes, while two more shine. Gold glitter bows sit on the red tips, so the metallic shapes catch light first. Each nail keeps the same nude base, because pale pink lets red stay loud. Gloss coats every tip, and the stripes stay sharp against the smooth red.
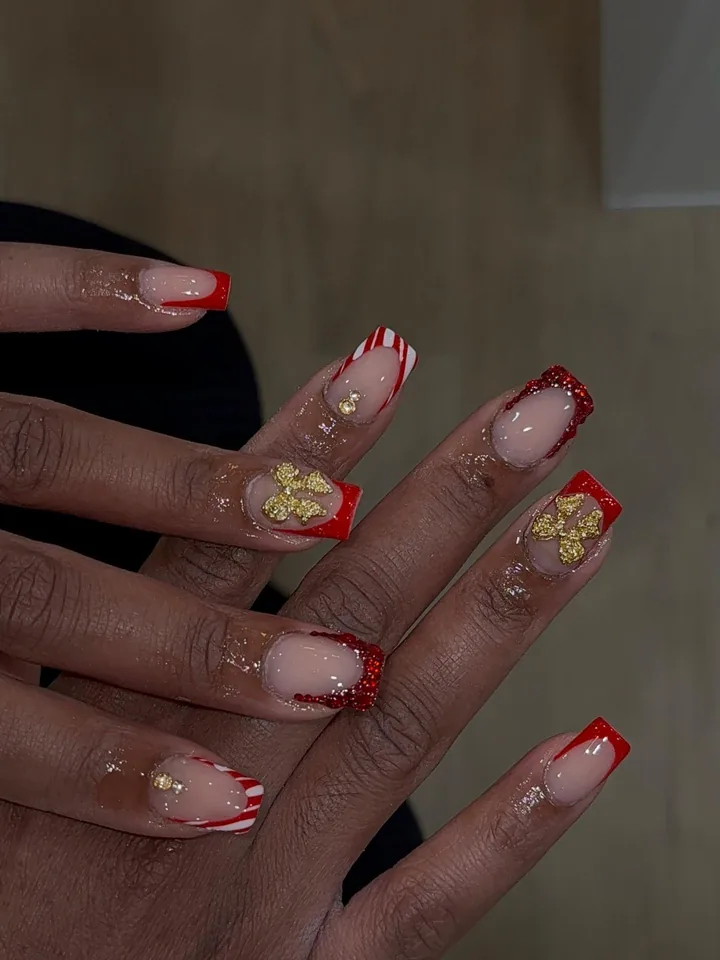
Lay the crimson ends in place, then paint the diagonal stripes with a striping brush. Pack sparkle onto the glitter tips with a flat brush while lacquer stays tacky. Shape the bows from metallic paste, pressing one loop into wet top coat. Clean the smile line with a small brush, and wipe stray sparkle away. Seal twice for a smooth finish, since glitter texture can feel rough without cover.
5. Green Trees with Gold Stars and Snowflakes
Sheer pink forms the base, while white tips and green trees finish the set. Each tree wears a tiny gold star, and white snowflakes drift across the pink. Thin gold glitter arcs curve above the tips, so light runs along the set. Green stays deep and even, because the trees need a strong colour to read clearly. Gloss seals the pink, and the trees hold their shape from every angle.

Begin with a blush foundation in two thin coats, then shape the pale ends. Paint the pines with a small brush, starting wide and narrowing upward. Add the metallic stars with a dotting tool, keeping each one centred on its pine. Draw the flakes with white lacquer, because the pale lines show best on blush. Sweep the sparkle arcs last, and seal with a clear top coat.
6. Tricolour Glitter Tips in Red and Green
Red, white, and green tips alternate across sheer pink nails in a bright mix. Each tip carries a silver glitter line along its edge, so the colours stay separate. Gloss coats the set, and the glitter line catches light on every nail. Pink base keeps the set soft, because the three tip colours could crowd each other. No single colour wins, and the mix reads festive from every angle.
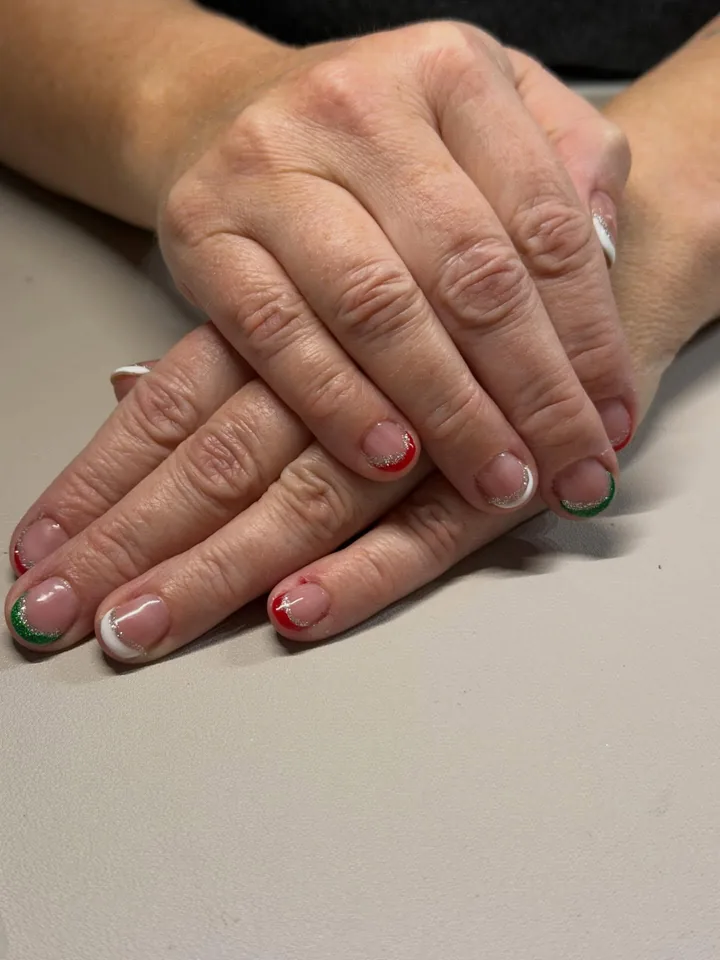
Shape the ends one colour at a time, then let each shade dry first. Paint the metallic line with a thin brush, keeping it even along the curve. Work nail by nail, because the sparkle needs a tacky coat to hold. Brush stray marks away with a small brush dipped in remover before sealing. Seal with a clear top coat, and cap the free edge so the glitter stays put.
7. Silver Glitter Smile Lines with Snowflakes
Silver glitter lines follow the smile curve beneath white tips. Pale pink nails hold the set, and white snowflakes sit on two of them. Each flake spreads fine arms across the pink, so the white reads sharp. Gloss runs smooth over the glitter, because the sparkle needs a level seal. Soft light moves across the nails, and the silver line glints at every turn.

Map the pale ends first with a guide, then fill them with bright lacquer. Paint the metallic line with a thin brush, following the curve in one pass. Draw the flakes with white lacquer, keeping each arm thin and even. Press the sparkle down with a flat brush, because loose grains lift under top coat. Seal twice for a smooth finish, since the glitter edge can feel rough.
8. Deep Red Tips with a Gold Bow
Deep red tips cap pale pink nails with a thin white outline. Gloss makes the red look wet, while the white line keeps the edge crisp. Gold bow charm sits on the ring finger, so the metal catches light first. Red and gold share the set, because the warm metal suits the deep shade. Each tip holds the same curve, and the bow gives one nail a clear focus.
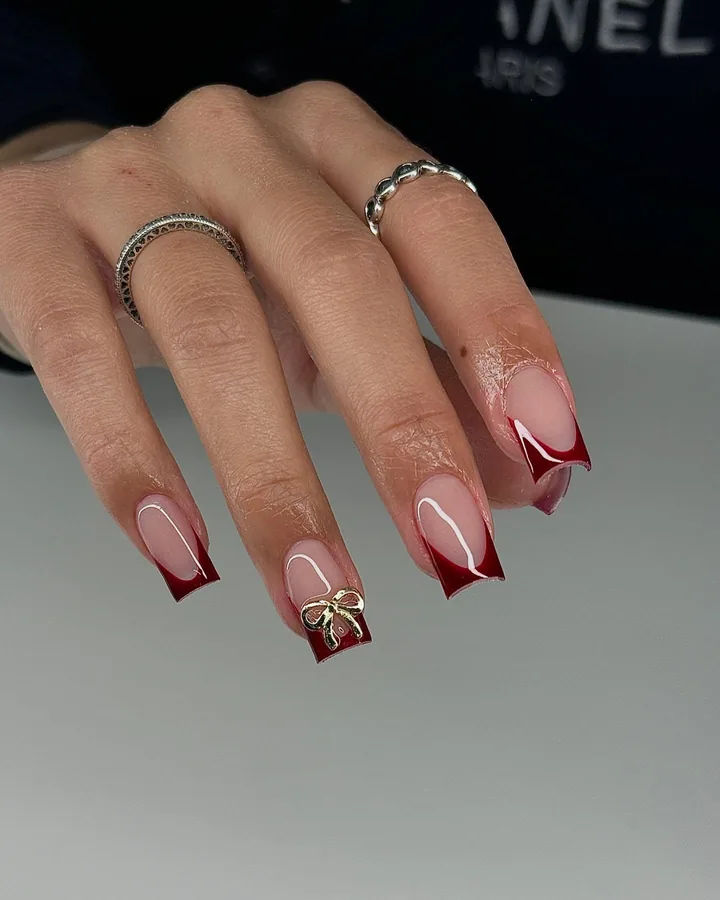
Paint the crimson ends in two thin coats, then let each dry fully. Draw the pale outline with a striping brush, following the curve in one pass. Set the bow with tweezers, pressing it into wet top coat so it holds. Clean stray marks with a small brush dipped in remover before sealing. Seal with a glossy top coat, because shine makes the contrast sharper.
9. Wide White Tips with Snowflakes and Dots
Wide white tips cover the ends of dusty pink nails in a bold band. White snowflakes spread across the pink, and small dots scatter between them. Each flake has fine arms with dotted ends, so the pattern feels airy. Pink base stays muted, because the bright white needs a quiet backdrop. Gloss runs over the set, and the flakes stay crisp against the pink.
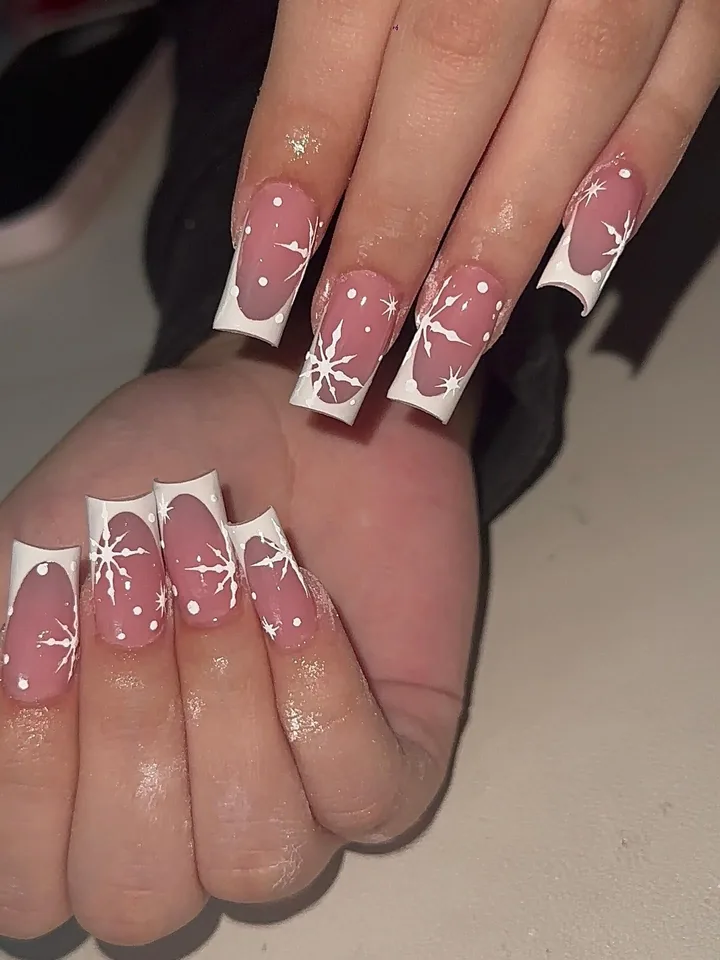
Shape the pale ends wide with tape, then paint them in two thin coats. Draw each flake with a thin brush, starting from the centre and working outward. Dot the gaps with a dotting tool, keeping the spacing loose and uneven. Keep the blush layer sheer, because a heavy base hides the flake lines. Finish with a clear top coat, and cap the free edge to guard against chips.
10. Dark Green Glitter Tips with Holly
Dark green glitter tips cap pale pink nails with a deep, sparkling edge. Holly leaves and red berries sit on one nail, while gold snowflake rests nearby. Small gold script lettering curves across one nail, so the set gains a quiet message. Green glitter catches light at every move, because the grains sit close together. Pink base stays pale and calm, and the green tips read rich against it.

Lay the forest ends in two thin coats, then pack sparkle on while tacky. Draw the holly with a small brush, keeping the leaves pointed and even. Dot the berries with a dotting tool, placing three in a tight group. Add the metallic flake last, because the fine lines need a steady hand. Seal with two coats of clear top coat, and let each dry fully.
11. Shimmering Red Tips with Christmas Baubles
Deep red tips cap sheer pink nails, and silver shimmer runs through the pink. Green knit fills the background, while red baubles and a Santa ornament sit nearby. Gloss gives the red a wet shine, so the tips stand out. Each tip holds a smooth curve, because the red needs a clean edge. Silver sparkle lifts the pink, and the set feels warm beside the knit.

Brush a sheer blush foundation first, then shape the crimson ends with a guide. Dust silver sparkle over the wet layer, pressing it down with a flat brush. Paint the crimson ends in two thin coats, keeping the curve even on each nail. Clean the smile line with a small brush, because stray colour shows fast on pink. Seal with a glossy top coat, and cap the free edge.
12. Fir Garland and Berries on White Tips
Green fir garland runs along the smile line, with red berries tucked between the fronds. Each nail carries the same garland, so the green reads as one unbroken line. Berries sit in small clusters, and the fronds point toward the tip. Nude base stays pale and calm, because the green and red need room to show. Gloss seals the garland, and the berries hold a soft shine in the light.

Form the pale ends first, then paint the garland with a small brush. Draw the fronds in fine strokes, working from the centre line outward. Add the berries with a dotting tool, grouping three close together. Keep the foundation sheer, because a heavy base hides the fine green lines. Finish with a clear top coat, and let each layer dry before the next.
13. Burgundy Tips with White Snowflakes
Burgundy tips cap pale pink nails with a rich, glossy curve. White snowflakes sit on two nails, and each flake spreads fine arms. Gloss runs deep over the burgundy, so the dark shade holds a wet shine. Pink base stays soft, because the burgundy needs a quiet backdrop to read clearly. Each flake stays white and crisp, and the contrast reads bold at once.
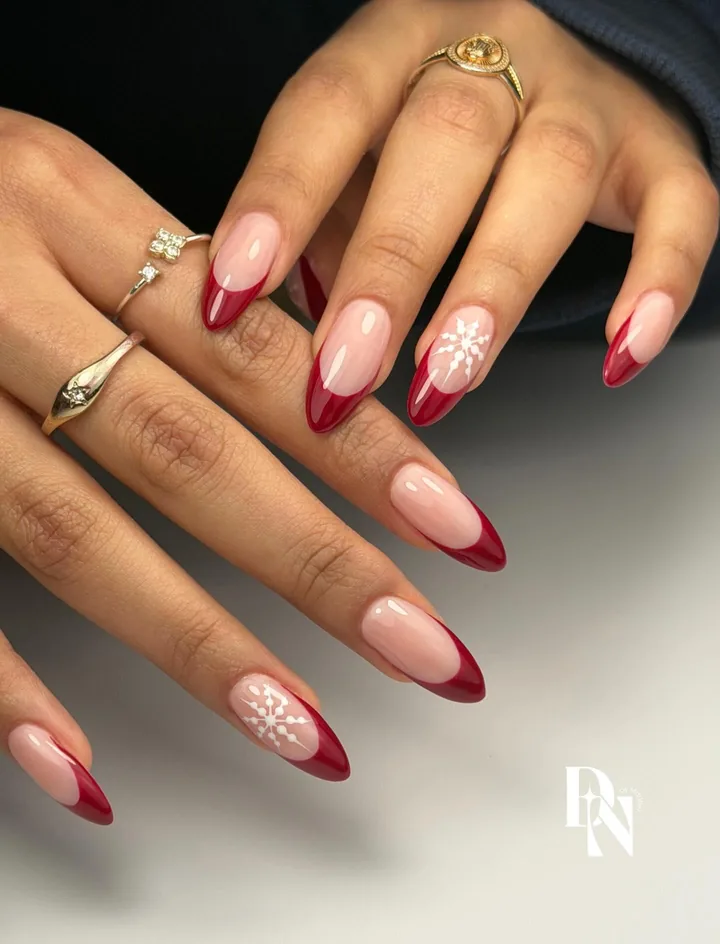
Build the wine ends in two thin coats, then let each dry fully. Draw the flakes with white lacquer, starting at the centre of each nail. Keep the blush layer sheer, so the pale backdrop stays quiet behind the flakes. Wipe stray marks with a small brush dipped in remover before sealing. Seal with a glossy top coat, because shine makes the dark shade richer.
14. White Bow Lines with Candy Stripes
Shimmery nude forms the base, while white tips carry a thin gift bow. Another nail carries white candy-cane stripes, while pine fills the background behind the hands. Shimmer runs through the nude base, so the set glows softly in low light. Gloss seals the lines, because fine white art needs a level coat to last. Each detail stays small and neat, and the bow gives focus.
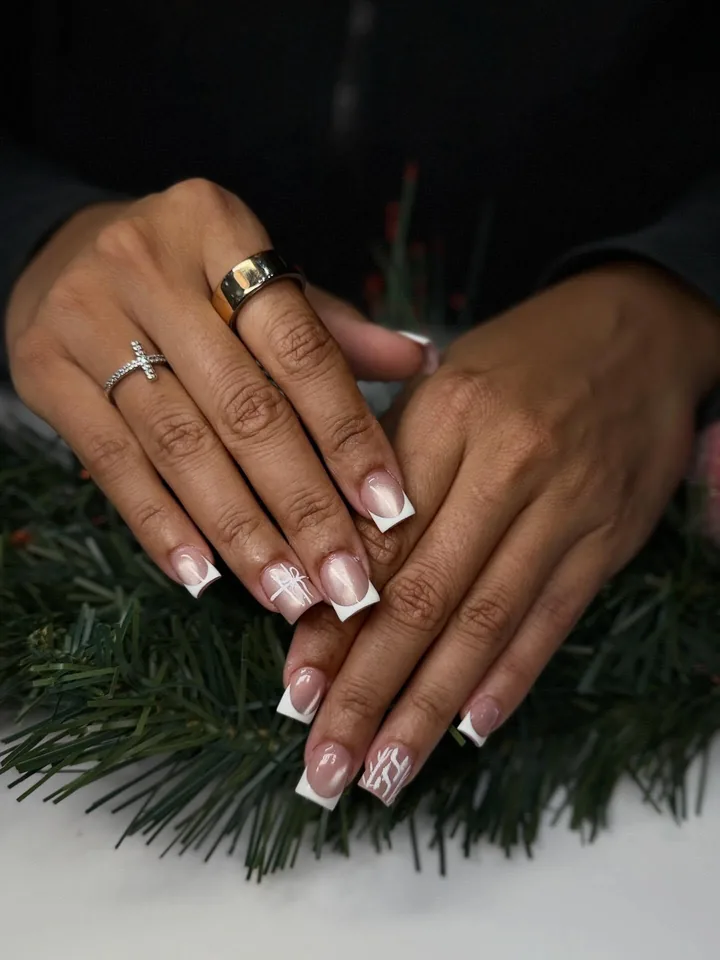
Begin with a shimmery nude foundation, then shape the pale ends with a guide. Draw the bow with a thin brush, looping two lines and tying them at the centre. Paint the stripes with a striping brush, keeping the bands even and diagonal. Keep the lines thin, because thick art crowds the pale ends fast. Finish with a clear top coat, and let the set dry before handling anything.
15. Mixed Red and White Tips with Snowflakes
Two tip colours share the set, with red snowflake stars on two nails. Dotted curves in red and white wind across the pink, like candy-cane ribbons. Each nail keeps a glossy finish, so the dots and stars stay crisp. Pink base stays soft, because the bold red needs a quiet backdrop. Red, white, and pink sit side by side, and the mix feels playful.

Work the crimson ends first, then shape the pale ends on the next nails. Draw the red stars with a thin brush, keeping each arm straight and even. Add the dots with a dotting tool, spacing them along the curves in pairs. Keep the blush layer sheer, because a heavy base hides the fine red lines. Seal with a clear top coat, and let the set dry fully before use.
16. Glitter Pink Tips with a Rhinestone Snowflake
Glittery pink fills the base, while white tips cap each nail. White snowflake sits on the ring finger, with a clear rhinestone at its centre. Gloss runs over the glitter, so the pink keeps a soft, wet shine. Each nail holds the same pink, because the single flake needs a calm backdrop. Dim light softens the set, and the rhinestone still catches a small glint.
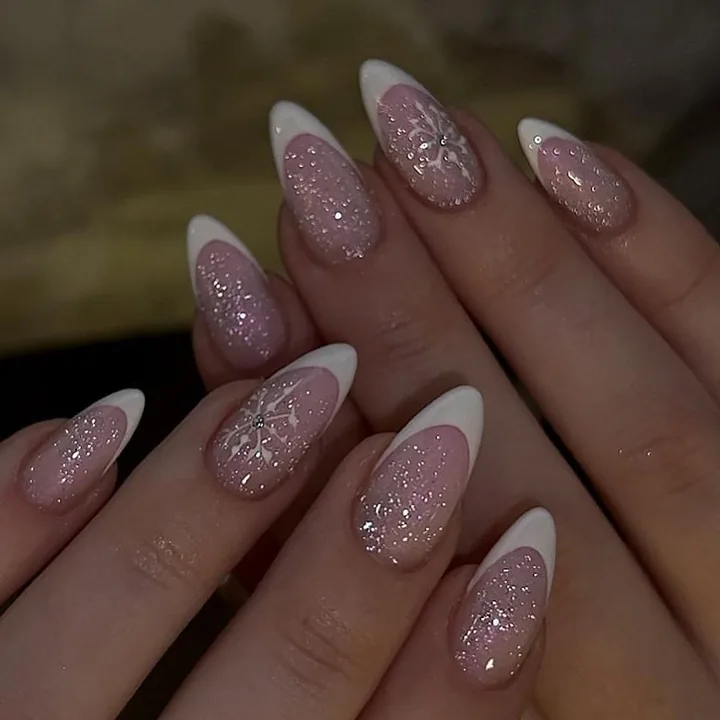
Brush a sparkly blush foundation first, then shape the pale ends with a guide. Draw the flake with white lacquer, starting at the centre and working outward. Set the gem with tweezers, pressing it into wet top coat so it holds. Dust extra sparkle over the wet layer, because the pink needs depth to glow. Finish with a clear top coat, and wear gloves for wet work.
17. Red and White Tips with Tiny Bows
One hand wears red tips, while the other wears white in a neat pair. Tiny bows sit on the tips, with white loops on red and red loops on white. Snowy tree branches fill the background, so the red and white read festive. Gloss coats every tip, because the smooth shine keeps the bows crisp. Each hand mirrors the other, and the swap keeps the set lively.
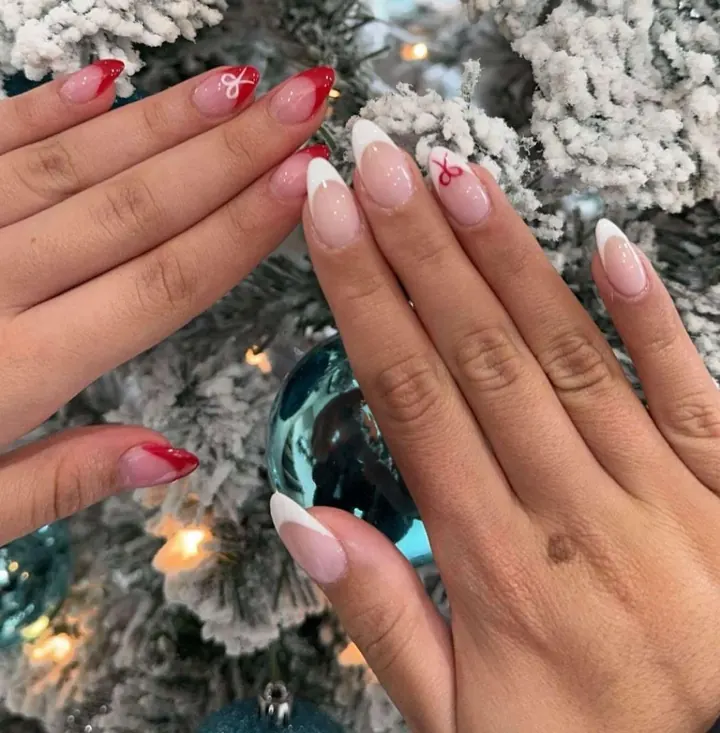
Work the crimson ends on one hand, then shape the pale ends on the other. Draw each bow with a thin brush, crossing two loops at the centre. Keep the loops small, because large bows crowd the narrow ends fast. Fix stray marks with a small brush dipped in remover before sealing. Seal with a clear top coat, and avoid water for an hour after sealing.
18. Thin Red Glitter Tips with Holly
Thin red glitter tips edge pale pink nails with a fine, sparkling line. Tiny green holly leaves sit on two nails, with red dots tucked beside them. Gloss runs over the set, so the glitter line catches light at every turn. Pink base stays pale and calm, because the thin red line needs room to show. Each leaf holds a pointed shape, and the dots add a small festive note.
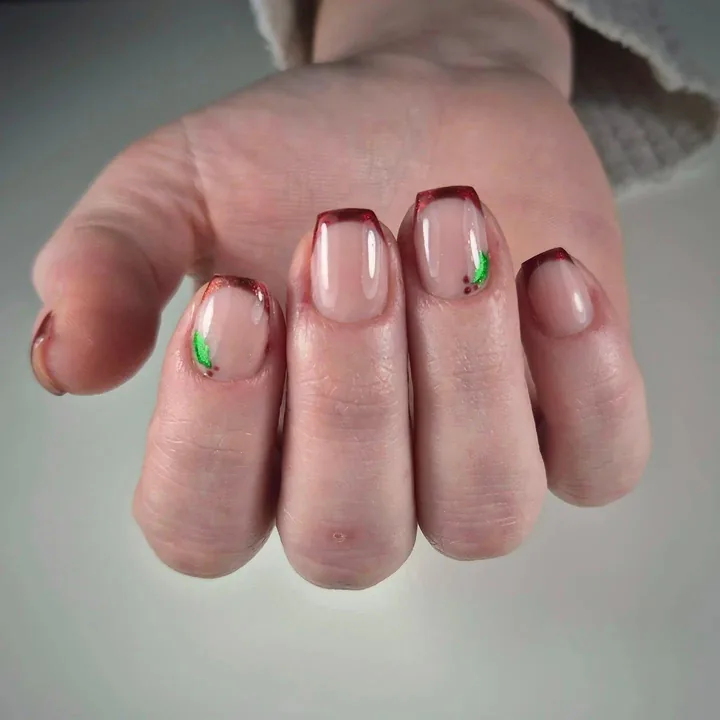
Sweep the crimson sparkle ends on with a thin brush, keeping the line even. Draw the green sprigs with a small brush, keeping each one pointed. Place the berries with a dotting tool, three red spots in a small group. Keep the foundation sheer, so the soft backdrop stays quiet behind the green. Seal with a glossy top coat, and cap the free end to guard the sparkle.
19. Bright Red Tips with Snowflakes on Top
Bright red tips cap nude nails, and white snowflakes spread across the set. Some flakes sit on the red tips, while others rest on the nude base. Each flake has fine arms and small dots, so the white reads sharp. Gloss runs deep over the red, because the bright shade needs a level seal. Red and white share the set, and the flakes give every nail a festive mark.

Coat the scarlet ends in two thin layers, then let each dry fully. Draw the flakes with white lacquer, using a thin brush and fine strokes. Place the dots with a dotting tool, spacing them wide across each flake. Keep the nude layer sheer, because a heavy base hides the flake lines. Seal with a clear top coat, and keep hands dry for an hour after sealing.
20. Green and Red Gift Bows on White
Pink nails carry white tips, while green and red lines form gift bows. Each bow crosses the tip in thin strokes, with a small knot at the centre. Gloss seals the lines, so the bows stay crisp against the pink. One bow uses green lines, while the other uses red for a clear swap. Soft pink fills the base, because the pale shade lets the bows stand out.

Prep the pale ends first, then paint the ribbon loops with a thin brush. Draw each ribbon shape with two loops, crossing them at the middle. Swap the ribbon colours between nails, green on one and red on the other. Keep the ribbon strokes thin, so the shapes stay neat on the narrow ends. Seal with a clear top coat, and cap the free edge to guard the art.
21. Red and White Bows on Matching Tips
One hand wears red tips, while the other wears white tips instead. White bow sits on a red tip, and a red bow outline marks a white tip. Gloss coats every tip, so the bows stand out against the smooth shine. Each bow uses thin lines, because the loops need a steady hand to stay neat. Red and white share the set, and the swap keeps the look lively.

Colour one hand crimson at the ends, then shape the pale ends on the other. Sketch each bow with a thin brush, keeping the loops small and even. Swap the bow colours between hands, keeping white on crimson and crimson on white. Keep the bows small, because large loops crowd the narrow ends fast. Finish with a glossy top coat, so the contrast reads sharper.
22. Holly Sprigs Along the Smile Line
Holly sprigs run along the smile line, with red berries tucked between the leaves. Each nail carries the same sprig, so the green reads as one unbroken line. Berries sit in small clusters, while the leaves point toward the tip. Nude base stays pale and quiet, because the green and red need room to show. Gloss seals the sprigs, and the berries hold a soft shine in the light.

Map the pale ends first with a guide, then paint the sprigs with a small brush. Draw the leaves in fine strokes, working from the centre line outward. Set the berries with a dotting tool, three red dots in each group. Keep the foundation sheer, so the pale backdrop stays quiet behind the sprigs. Seal with a clear top coat, and cap the free edge to guard the sprigs.
23. Candy-Cane Stripes on White French Tips
Pink nails carry white tips, while two nails wear full candy-cane stripes. Red and white bands wind across the striped nails in even diagonal lines. Gloss runs over the stripes, so the red stays bright against the white. Each striped nail mirrors the other, because the bands match in width and slant. Pink base stays soft, and the stripes give the set a clear festive mark.

Prep the pale ends first, then paint the stripes with a striping brush. Paint the bands with a striping brush, keeping each stripe even and diagonal. Alternate crimson and white bands, leaving the gaps even across each nail. Remove stray marks with a small brush dipped in remover before sealing. Finish with a glossy top coat, because shine makes the stripes sharper.
24. Small Green Trees on Shimmer Pink
Shimmery pink fills the base, while white tips cap each nail. Each tree wears a gold star dot, and the green stays soft and simple. Gloss runs over the shimmer, so the pink glows gently in the light. Two trees share the set, because a third would crowd the small design. Light moves across the nails, and the trees hold their shape from every angle.

Build a shimmery blush foundation first, then shape the pale ends with a guide. Paint each pine with a small brush, starting wide and narrowing upward. Add the gold dots with a dotting tool, keeping each one centred on its pine. Keep the shimmer light, because heavy sparkle hides the small green shapes. Seal twice for a smooth finish, since shimmer texture can feel rough without cover.
25. Rose-Gold Candy Cane with Tiny Lettering
Rose-gold glitter stripes wind across one nail, while white tips cap the rest. Tiny white lettering sits on another nail, with three small festive words. Gold ribbon and white baubles fill the background, so the set reads warm. Gloss runs over the glitter, because the metallic stripes need a level seal. Each nail keeps the same pink, and the stripes give the set a clear focus.
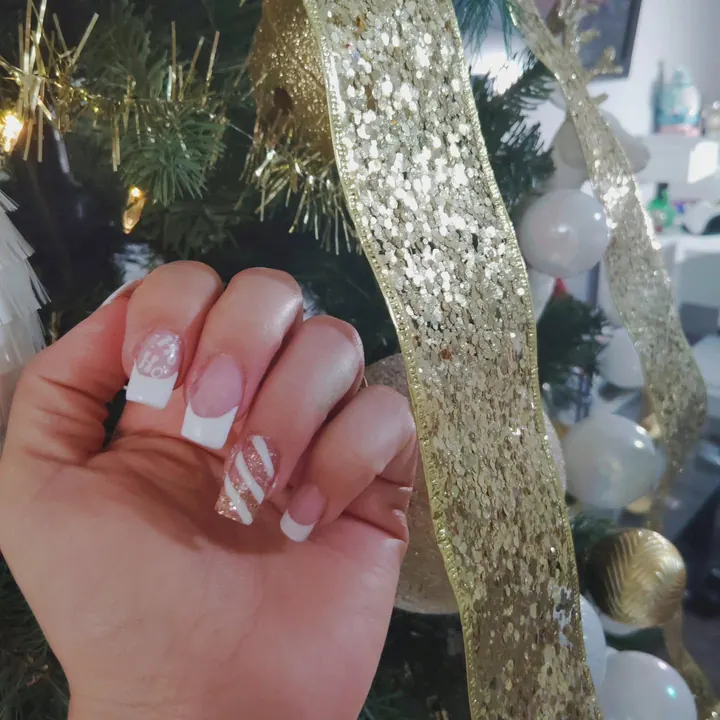
Cover the pale ends first with a guide, then paint the stripes with a striping brush. Pack rose-gold sparkle onto the striped nail, pressing it down while tacky. Add the white stripes with a striping brush, keeping the bands even and diagonal. Keep the lettering tiny, because large words crowd the narrow nail fast. Seal with a glossy top coat, and cap the free edge to guard the stripes.
Conclusion
Color choice does most of the work here, since each shade sets a different mood. Keep the busiest detail on one or two nails, then let the rest of the set stay calm. Thin coats dry more evenly, and capping the free edge helps color last. Pick one Christmas French Tip Nails design that fits daily routines. Wear it with clean hands and a fresh top coat.

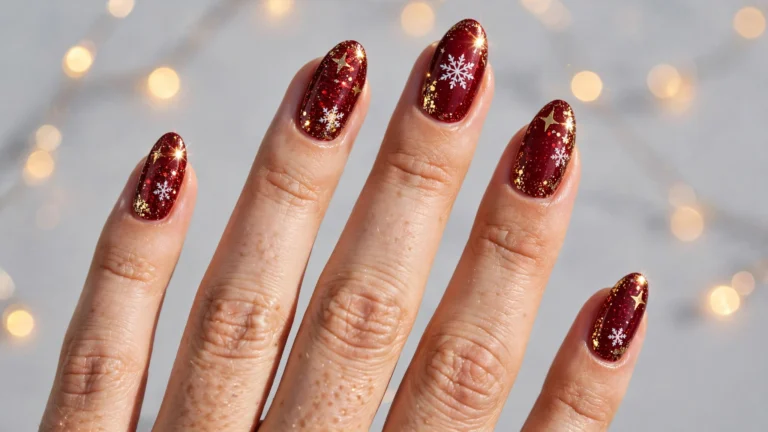
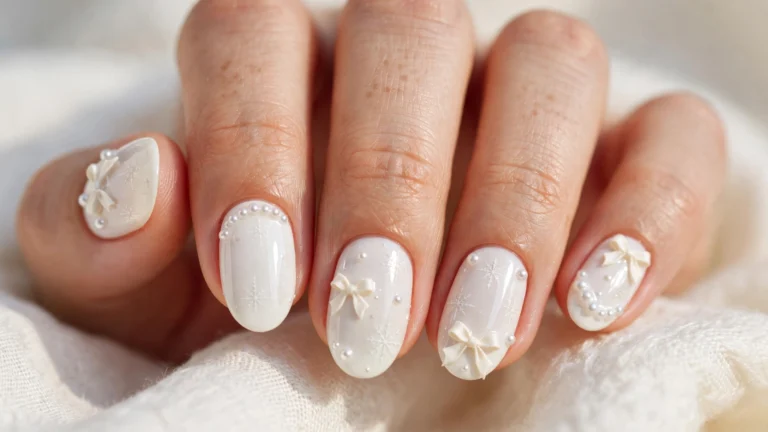
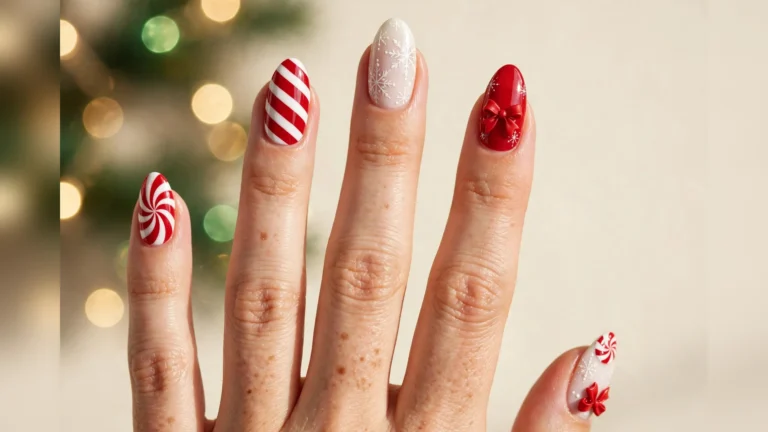
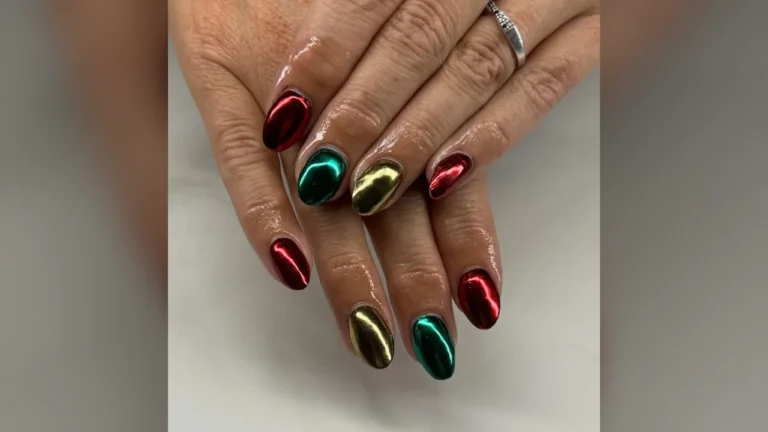


[…] red chrome coats several nails in this set. Nude pink nails wear gold French outlines above red tips. One nail shines in plain gold chrome, and a few more carry thin gold rims. Gold […]