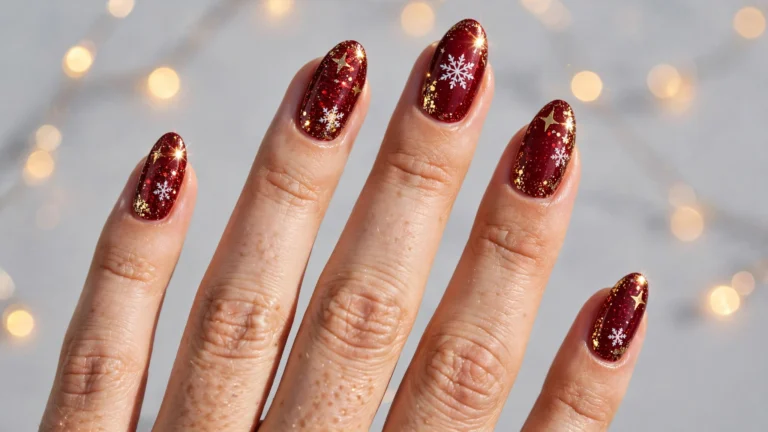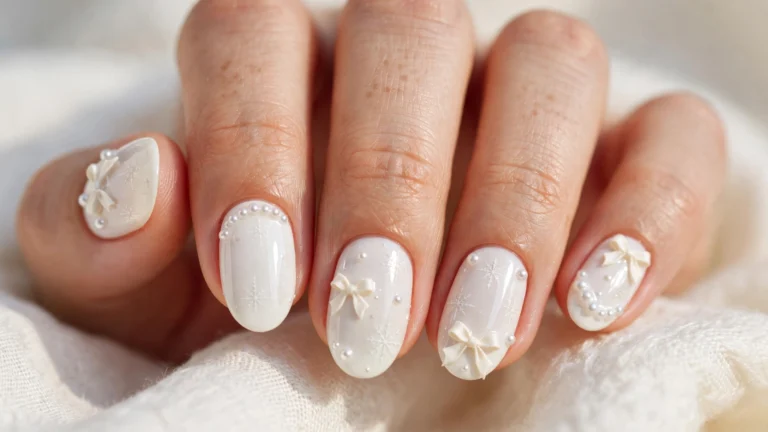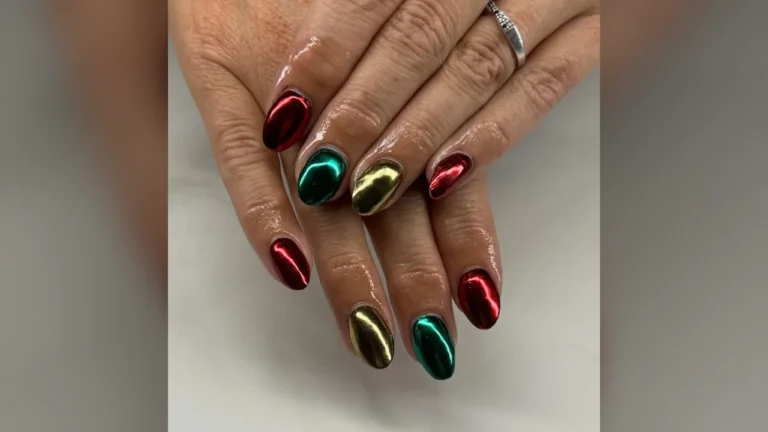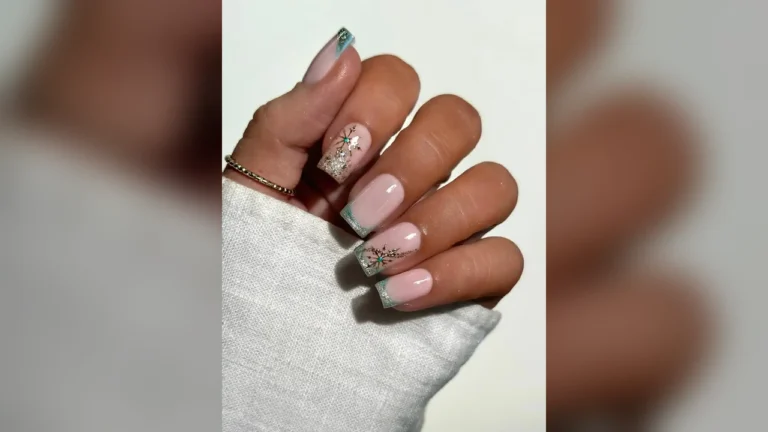


Peppermint candy, icing, and snowy hats all share the same two colours, which is why this pairing never looks out of place in December. Red and white Christmas nails take that familiar sweetness and turn it into swirls, snowflakes, ribbon bows, and thin candy stripes, with a gem or a touch of glitter here and there. Some sets stay flat and crisp, while others add raised bows, knit texture, or tiny bells for a little jingle. Pale pink and nude bases soften the contrast on busy hands, and a plain red nail between patterned ones keeps everything calm. Choose a candy cane manicure for parties or a quieter peppermint-inspired set for work.
1. Peppermint Swirls With Red Bows
Peppermint swirls spin across white tips, while deep red fills the gaps. Two candy canes bend into a heart on one nail. Small red bows sit on two nails, raised from the surface. White snowflakes dust a burgundy base, so the set mixes flat paint with raised bows. One nail carries a cursive letter in red, which adds a personal mark. Glossy shine covers every nail, and dark red reads well against white.
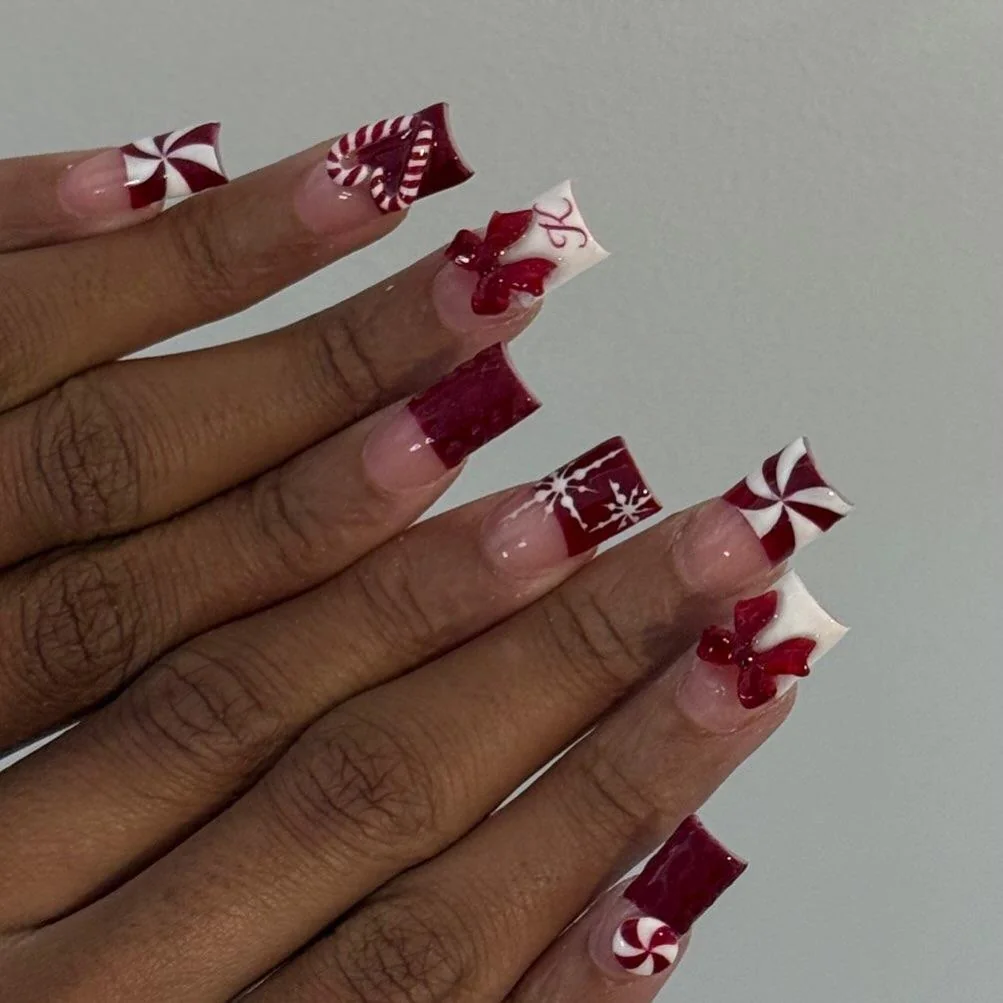
Brush two thin coats of red onto each nail, then let the base dry fully. Paint white swirls with a thin brush, curving each line toward the tip. Bend two striped lines into a heart shape with the same brush. Press each bow charm into wet top coat, so it holds through the week. Seal the set with a clear layer and cure it under light for a firm hold.
2. Candy Cane And Snowflake Mix
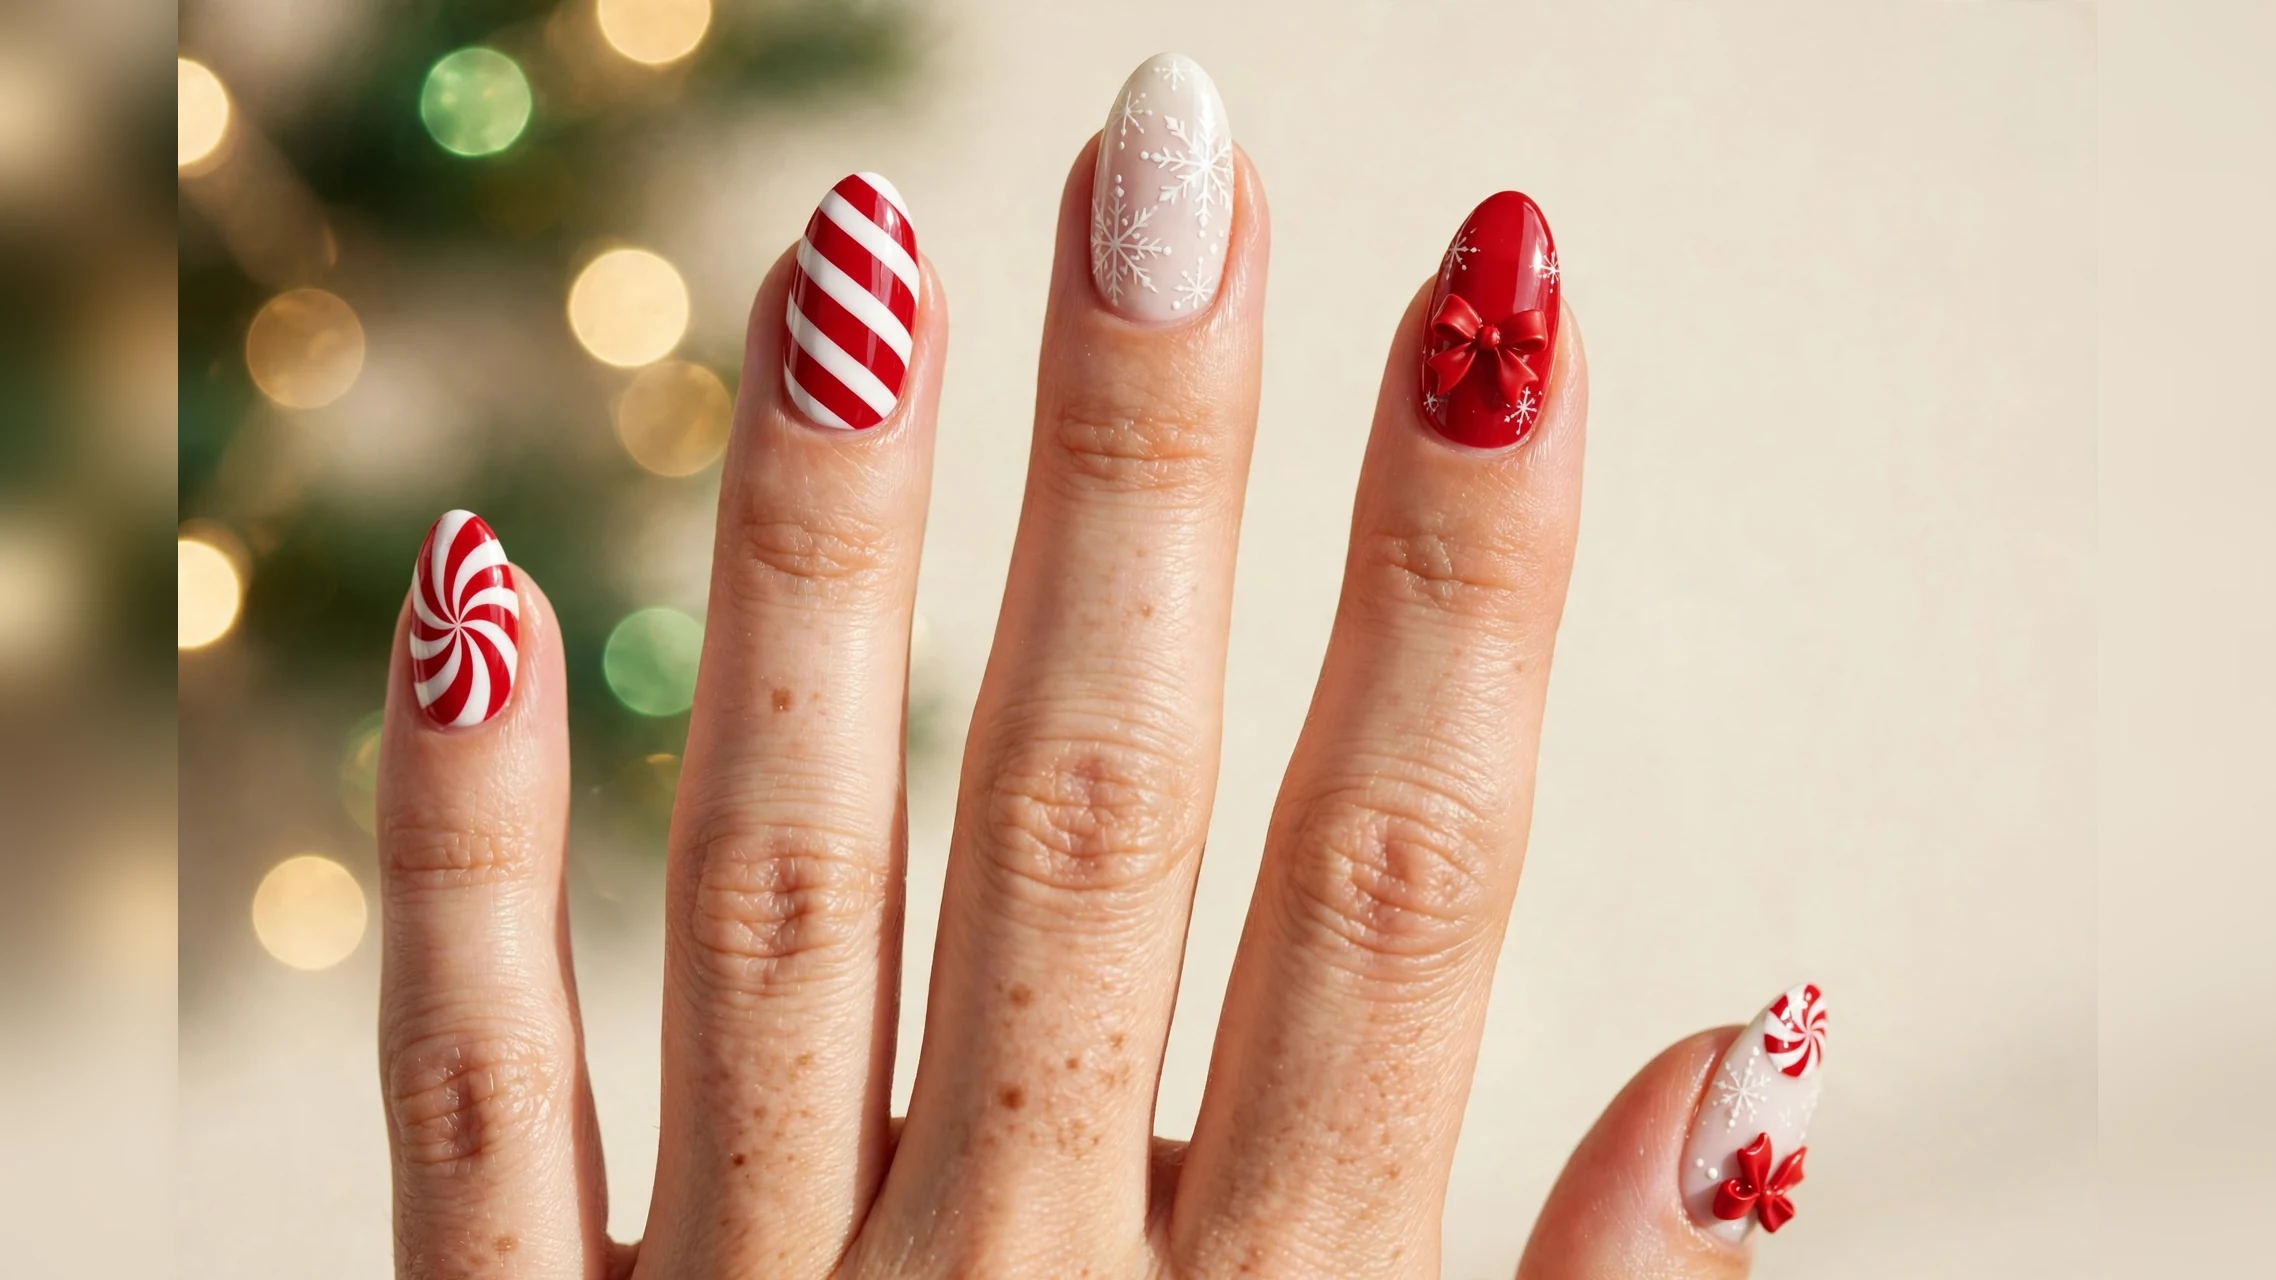
Candy stripes twist down each nail in a bold red and white swirl. White snowflakes sit on red bases, while gift bows cross two nails. Small white dots scatter near the tips, and a candy stripe wraps one thumb. Hands pose against a lit tree, so green branches and warm lights fill the background. Every nail shows the same two colors, which keeps the busy mix tied together.
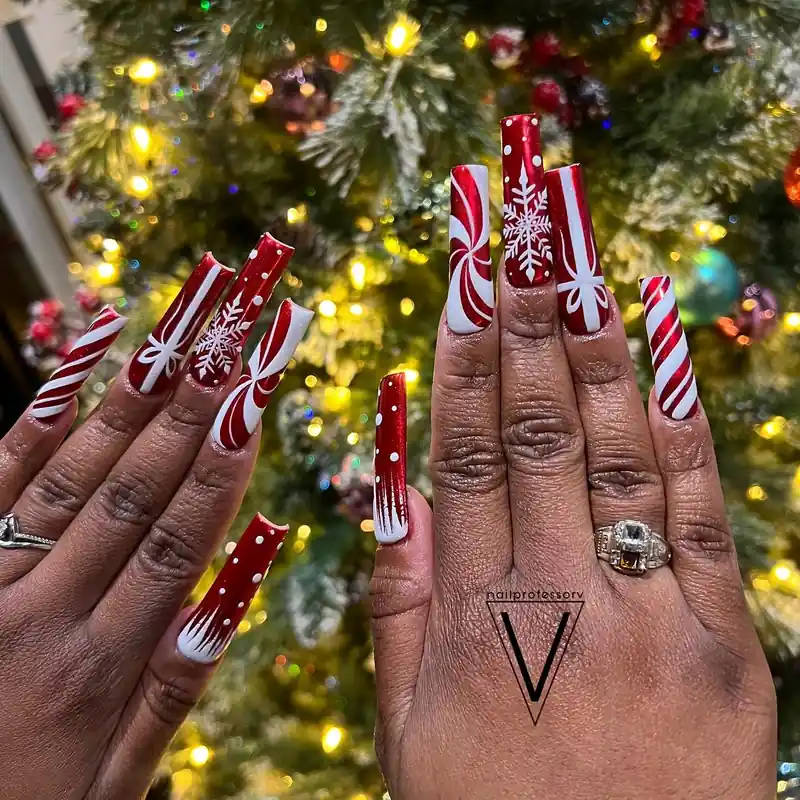
Paint each nail red first, then add white stripes with a striping brush. Drag the brush in a curve, so the stripes twist like a candy stick. Draw snowflakes with thin lines from the center outward on two nails. Cross two white lines on one nail and pinch the center into a bow shape. Finish with a clear layer and cure under light until the surface feels firm.
3. Jeweled Tips With Peppermint Swirls
Sharp pointed tips carry peppermint swirls in red and white over a pale pink base. Red and green gems sit at the center of several nails. Thin white lines cross the swirls, so the pattern reads as candy from every angle. One nail holds a tiny snowflake charm, which adds sparkle without extra shade. Glossy shine runs across the set, and the gems stay small enough to wear daily.
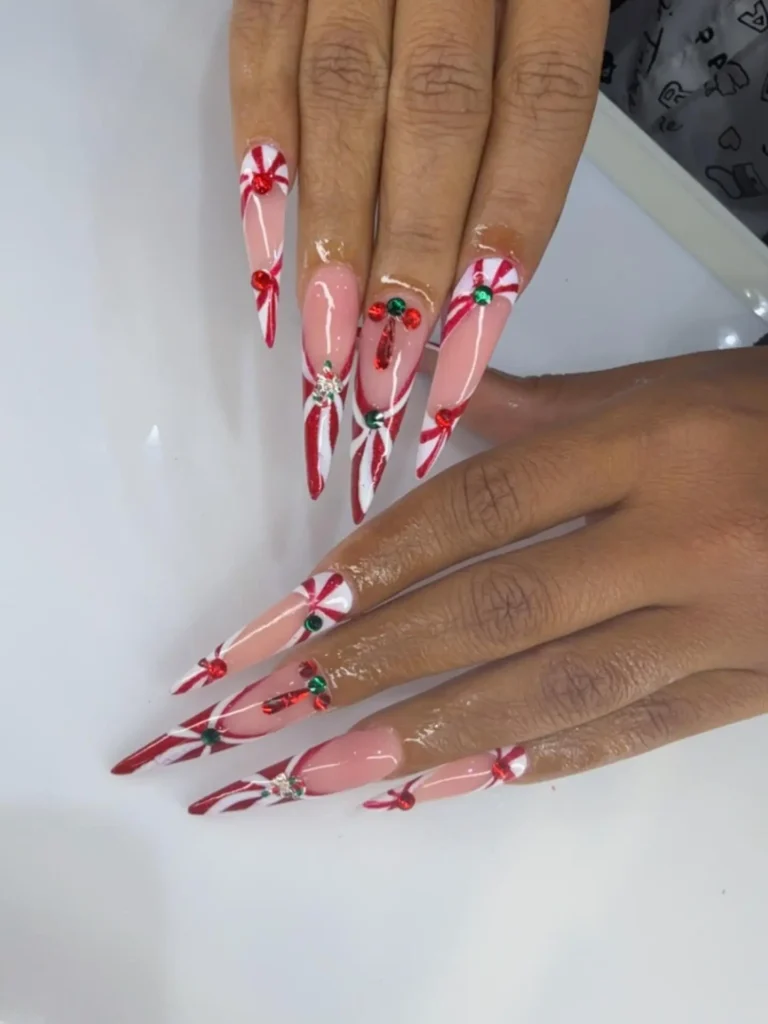
Coat each nail with pale pink, then let the base dry before adding color. Paint red and white swirls on the ends with a striping brush. Place one gem in the middle of each swirl while the polish still feels tacky. Set the snowflake charm on one accent nail with a dot of top coat. Finish with a top coat and let it harden in lamplight.
4. Twisted Swirl With Bells And Glitter
Twisted candy cane swirls run down each nail in red and white. Tiny bells hang from a red bow on one nail, so the set moves with a soft jingle. Red glitter confetti fills a clear nail, while a gold snowflake sits above it. Pale pink fills the gaps, which keeps the bold stripes from feeling heavy. White cuffs frame the hands, and the nails stretch past the fingertips.

Start with pale pink on each nail, then let the base dry fully. Paint wide red swirls with a striping brush, curving each line toward the tip. Press red glitter into a clear coat on one nail for a confetti effect. Attach a small bow and bells with a dot of glue. Seal the set with a clear layer and cure under light for a firm hold.
5. Candy Stripes And Red Snowflakes
Candy stripes wrap each nail in diagonal red and white bands. White snowflakes sit on red bases, while red snowflakes mark the pale nails. Small red gems line the cuticle of two nails, so the set gains an accent. White French tips frame the pink bases, which keeps the pattern crisp and neat. Glossy shine covers the set, and every nail repeats the same two colors.
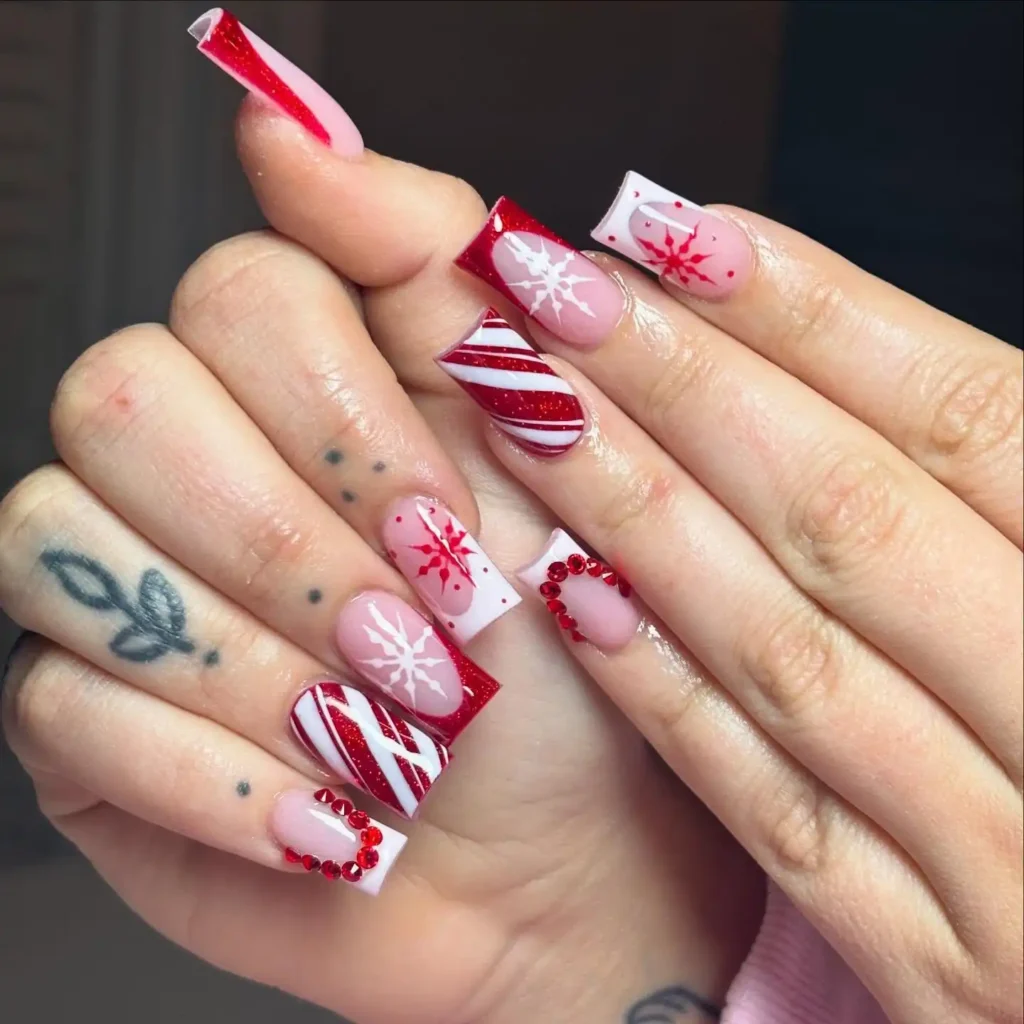
Lay two thin coats of pale pink, then let them dry. Paint diagonal stripes in red and white with a striping brush. Draw snowflakes on the red set with thin white lines from the middle. Press small gems near the base with a dot of top coat. Seal the set with a top coat and let it harden in lamplight.
6. Snowflake French Tips With Ornament
Red color sits only at the nail ends in the French style, with white snowflakes above it. Candy swirls twist across two nails in red and white. Hands hold a gold ornament, which fills the center with warm glitter light. Small white dots scatter near the snowflakes, adding a soft falling effect. Glossy shine covers the set, so the red reads deep against the pale skin.

Begin with a clear base, then paint red only at the ends. Draw snowflakes with thin white lines, starting each flake from the middle. Paint candy swirls on two nails with a striping brush. Keep the ornament aside while the polish dries, so nothing smudges the art. Brush a top coat over the set and let it harden in lamplight.
7. Red Candy Swirl Shine
Curved red stripes sweep across each nail over a shimmery pale pink base. White lines run between the red bands, so the pattern reads as a candy swirl. Light catches the curves, which makes the red look deep and the white look bright. Hands rest against a dark background, and the nails stay the clear focus. Every nail repeats the same swirl, which gives the set a calm rhythm.
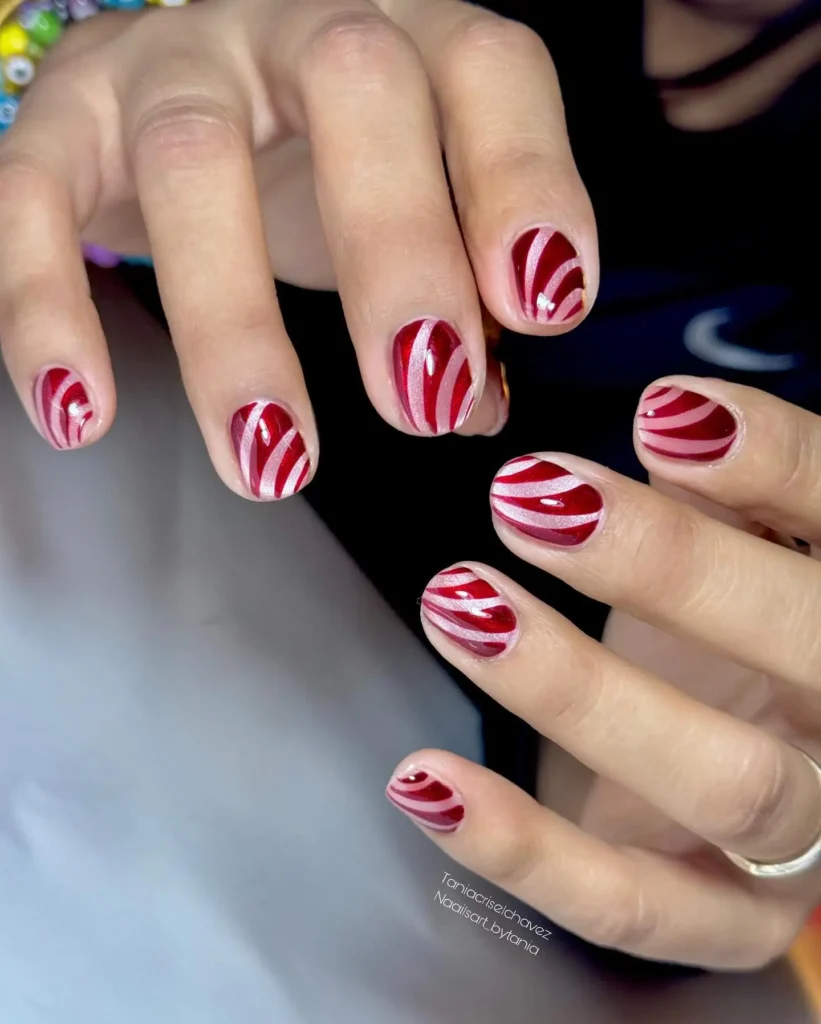
Paint pale pink over the nails, then let the base dry fully. Draw curved red stripes with a striping brush in long smooth sweeps. Add thin white lines between the red bands for the candy effect. Buff the surface smooth and seal with a top coat for shine. Cure in lamplight until the layer feels firm and the gloss holds.
8. Peppermint Swirl With White Bows
White bows sit on pale pink nails, with red glitter confetti on the next nail. Peppermint swirls spin across two nails, each one centered with a red gem. Solid red fills the outer nails, so the set balances busy art with plain color. Small white snowflakes dust the confetti nails, adding a quiet winter mark. Dark background frames the hands, and the glossy finish keeps the focus on the art.
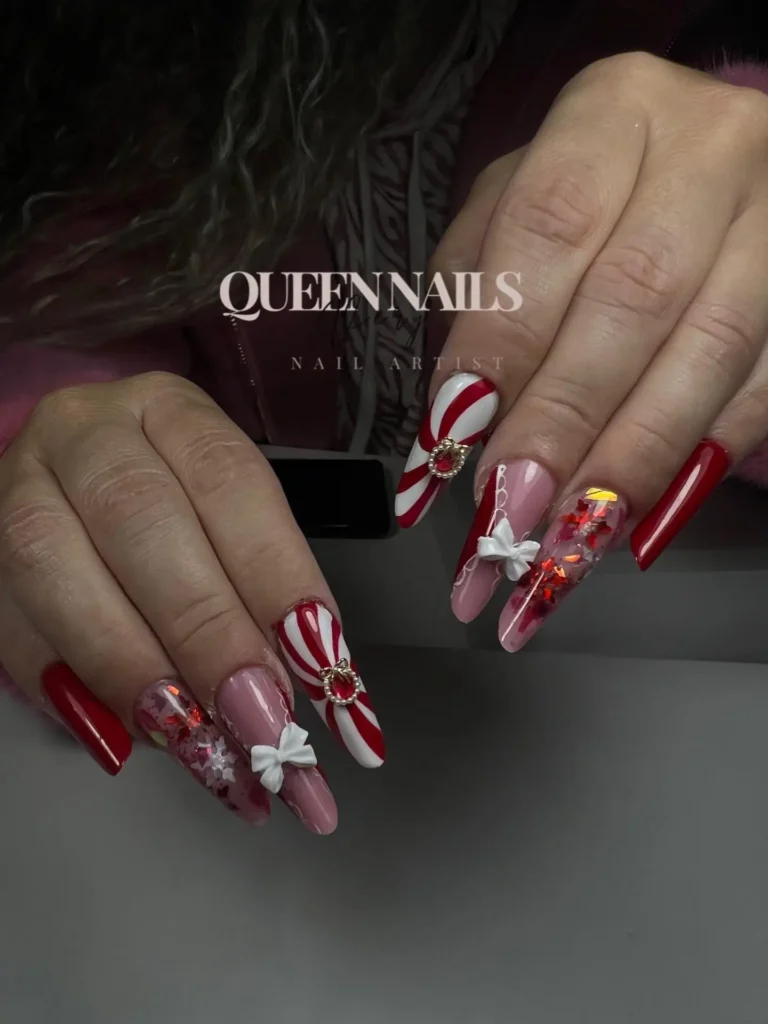
Brush two thin coats of pale pink onto each nail, then let them dry. Paint peppermint swirls on two nails with red and white lines. Press a small bow charm onto one nail with a dot of clear coat. Sprinkle red glitter over wet polish on the accent nail and let it set. Brush a clear layer over the set and cure under light until it feels firm.
9. Mini Tree And Snowflake French
Pale pink bases carry red French tips, with a tiny tree on one nail. White snowflakes spread across a red tip, so the set mixes crisp lines with color. Candy cane stripes wrap one nail, while a gift bow ties another in red lines. Silver glitter dusts the swirls, which adds shine without a third strong color. Glossy shine covers the set, and every nail shows red and white.
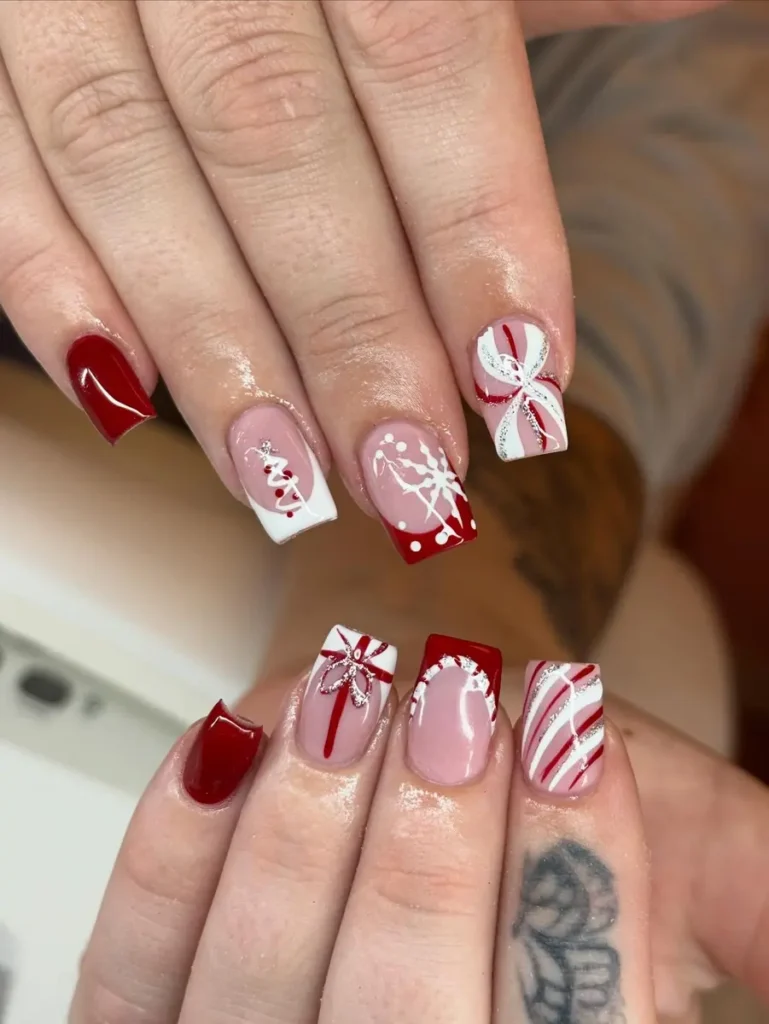
Draw a tiny tree with a thin brush, using white lines and red dots. Paint red tips on each nail, then let the base dry fully. Add snowflakes on one tip with thin lines from the center outward. Cross red lines into a bow on one nail and dot the center with glitter. Finish with a clear layer and cure under light for a firm hold.
10. Plaid Lines With Peppermint Bows
Peppermint bows spin across white tips, each one centered with a tiny gem. Red and white candy stripes wrap two nails, so the set stays bright and bold. Dotted French edges frame the pale bases, with white dots along the red curve. Silver glitter crosses one nail in straight lines, which reads as a plaid grid. Glossy shine covers the set, and the bows keep the pattern playful.
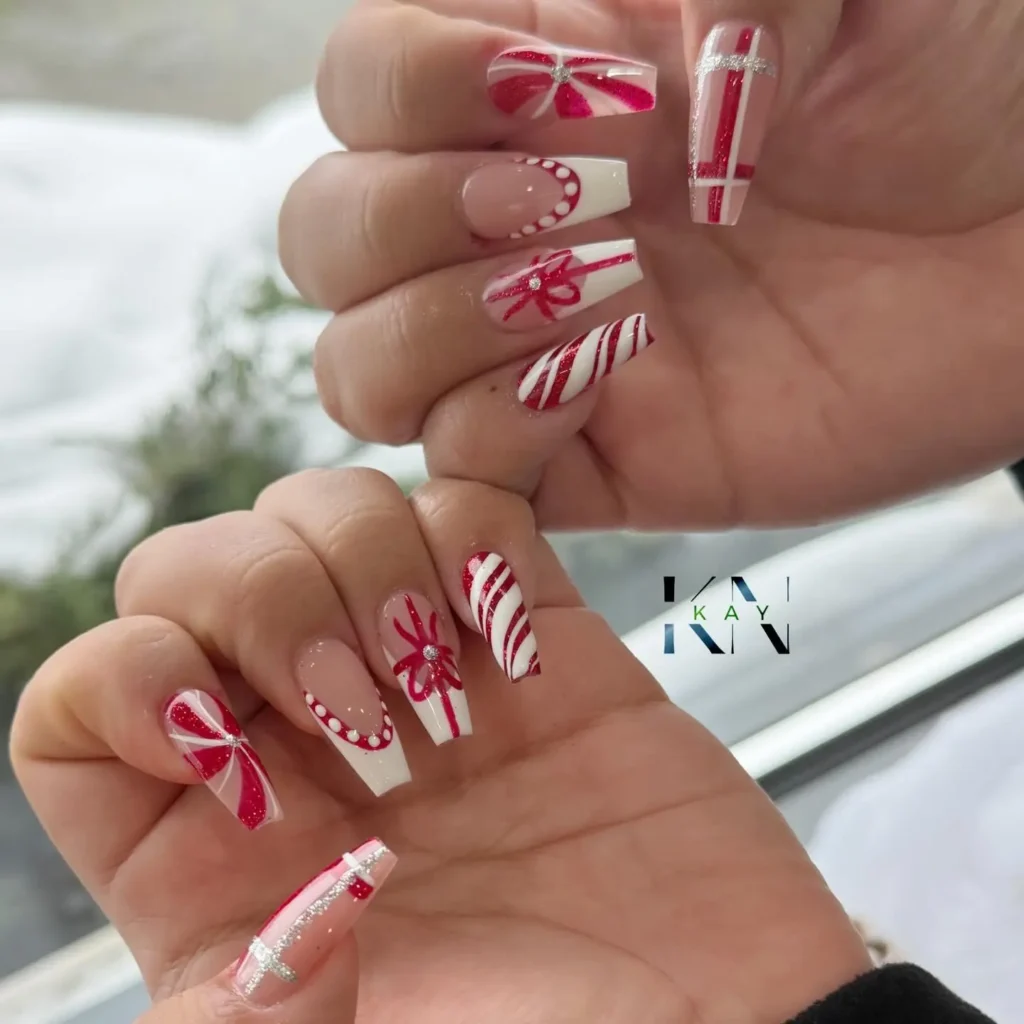
Work from a pale pink base on each nail, then let it dry fully. Paint peppermint bows with a thin brush, crossing white lines at the center. Add diagonal stripes in red and white on two nails with a striping brush. Dot white beads along the tips with a dotting tool for a neat border. Seal the set with a clear layer and let it cure under light.
11. Gold Lined French With Bow
Deep red French tips sit over pale pink bases, edged with gold glitter. Glitter bows cross the center nail, so the set gains a bright focal point. Candy swirls twist down one nail in red and white with a soft shine. Solid red fills the last nail, which balances the busy art beside it. Glossy shine covers the set, and the gold line catches light with each move.
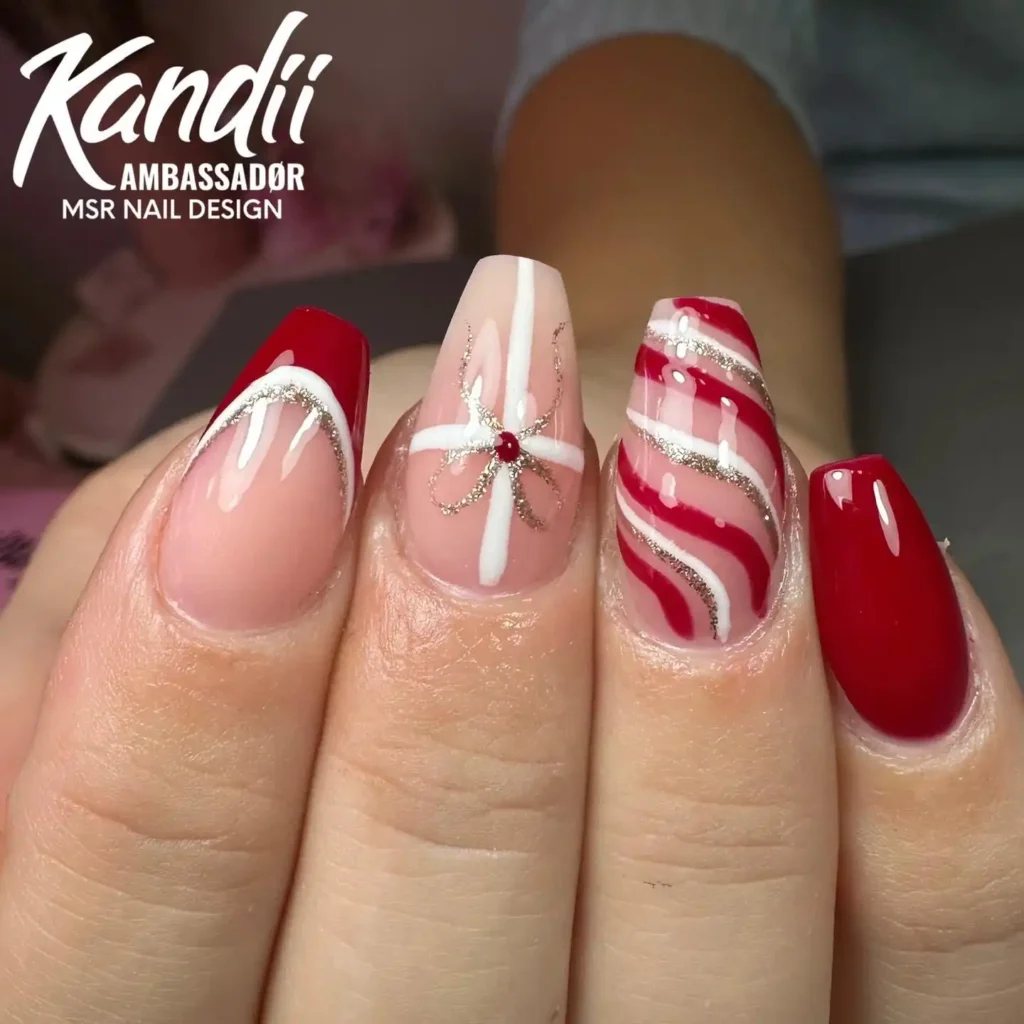
Apply two thin coats of pale pink, then let them dry. Paint red only at the ends with a flat brush for a clean French edge. Draw a gold glitter line along the tip with a thin brush. Cross white lines into a bow shape and set a red gem at the middle. Brush a top coat over it and let it harden in lamplight.
12. Striped Bows And Hearts In Red
White French tips frame pale pink bases, with red starbursts on the center nails. Candy cane bows cross two nails in striped red lines, so the set feels sweet. Striped hearts sit on one nail, drawn in red with a white center. Small red starbursts mark the outer nails, adding a bright repeat. Glossy shine covers the set, and the white tips keep the pattern light.

Sketch the bow shape first with a thin brush, using red and white crossing lines. Paint white tips on each nail, then let the base dry fully. Draw striped hearts on two nails with a striping brush and slow steady strokes. Add small starbursts with thin red lines from a center dot. Finish with a clear layer and let it cure under light.
13. Santa Hat Tips With Snowflakes
Santa hats cap the nails in red, edged in white with a small dot. White flakes dust the red bases, so the set mixes crisp art with soft color. Candy stripes twist across two nails with silver sparkle in the gaps. Clear bases keep the pattern light, which lets the red and white stand out. Glossy shine covers the set, and the hats read clearly from every angle.
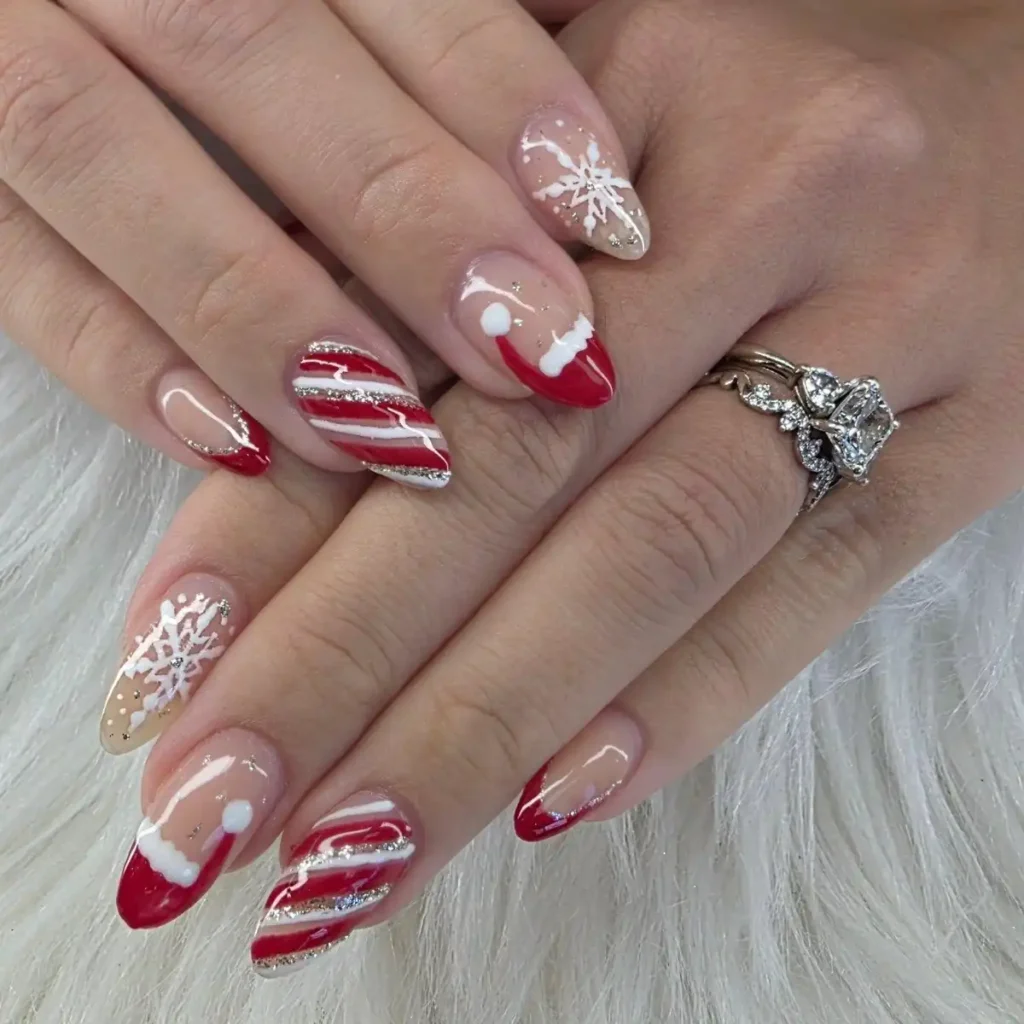
Add red tips first with a flat brush, then let the base dry. Paint a white edge line and a dot at the tip for the hat shape. Draw snowflakes on the red nails with thin white lines from the middle. Paint candy stripes on two nails with silver sparkle in the gaps. Coat the set with a top coat and let it harden under lamplight.
14. Dotted Borders With Red Bows
Dotted red edges trace each nail, forming a neat border on a pale base. White nails carry red patterns, with tiny stars and dots scattered across them. Thin red lines form a bow on one nail, with a soft curve. Bright red fills one nail, while white swirls cross another in a loose loop. Gloved fingers hold the hand steady, so the nails stay still for the photo.

Dot red beads along the rim with a dotting tool, keeping the spacing even. Paint the base pale, then draw thin red lines into a bow. Add tiny stars and dots on the white set with a fine brush. Fill one nail solid red and sweep white swirls over a bare nail. Coat the set with a top coat and let it set in lamplight.
15. Solid Red With Ribbon Bows
Solid red fills most nails in a smooth glossy coat, with no art on them. White nails carry red ribbon bows, drawn in thin lines with a small knot. Candy stripes run down two nails in diagonal red and white bands. Pale pink sits under the bows, so the white reads clean against the red. Glossy shine covers the set, and the mix stays simple with only three designs.
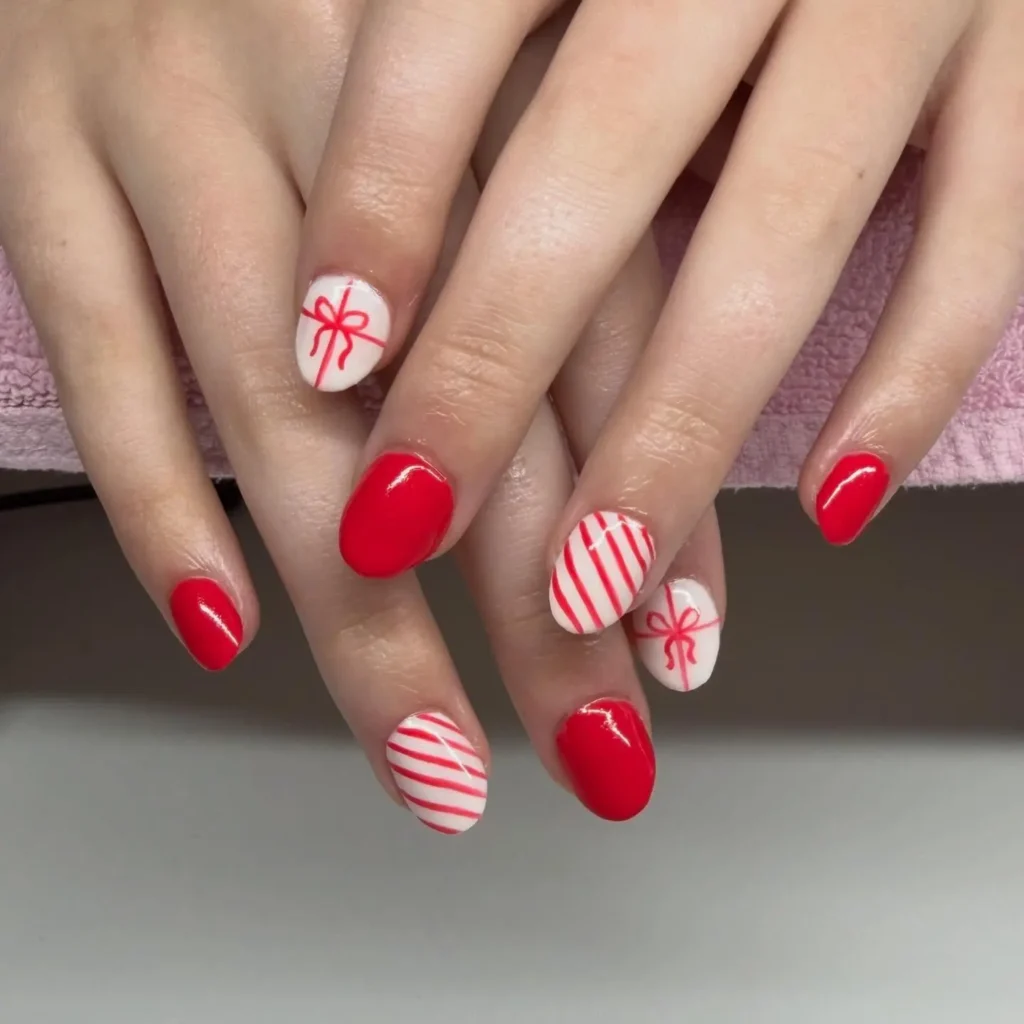
Alternate solid red and bright white, then let the base dry fully. Paint diagonal stripes on two nails using a thin striping brush. Draw ribbon bows on white nails using thin red lines and a knot. Keep the bows small, so they fit neatly without crowding the edges. Add a top coat over the nails and let it harden in lamplight.
16. Starburst French With Candy Stripes
French tips in red sit over pale pink bases, with white tips on the outer nails. Red starbursts burst from the center of two nails, drawn in thin sharp lines. Candy stripes wrap two nails in diagonal red and white bands. White tips frame the pink bases, so the set keeps a clean rhythm. Glossy shine covers the set, and the starbursts add a bright focal point.
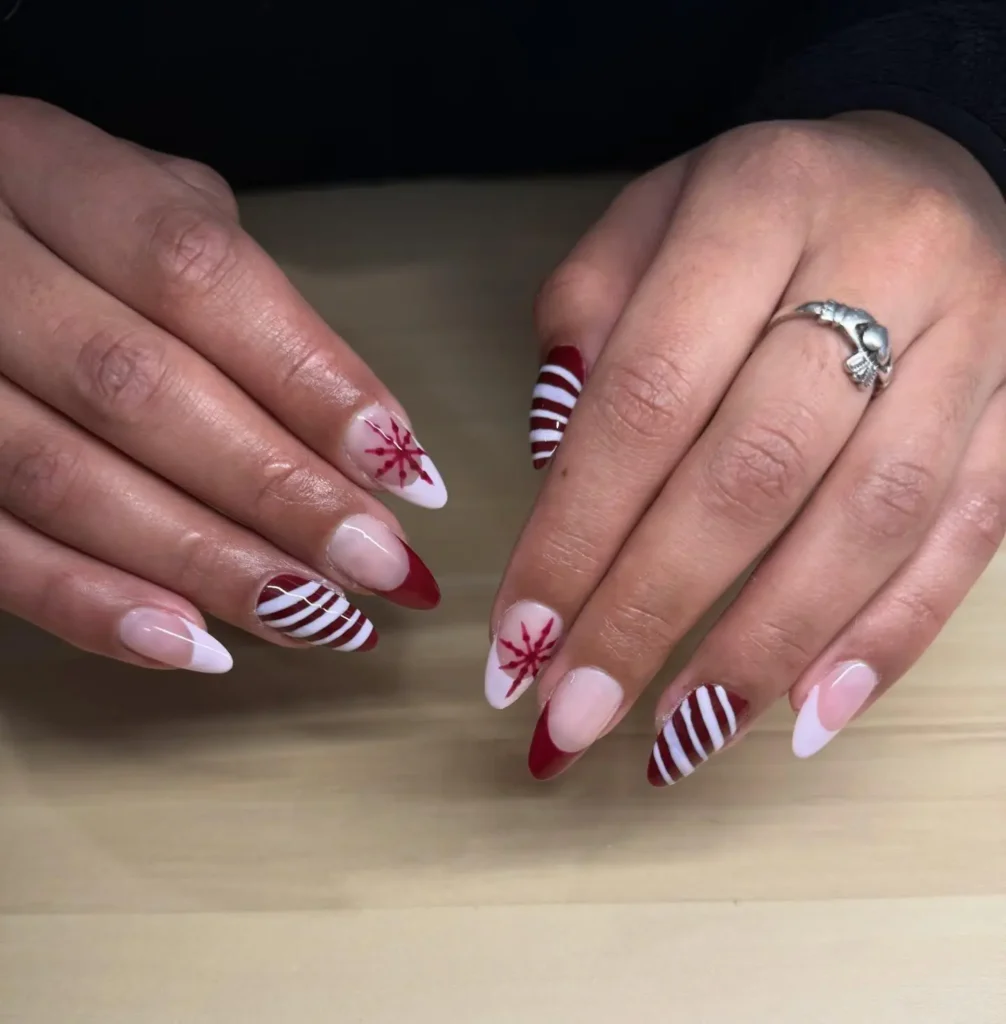
Outline the tips in red with a flat brush, then let the base dry. Draw starbursts from a center dot, using thin lines in every direction. Paint candy stripes on two nails with a striping brush and steady strokes. Leave one tip white on each hand for a calm break in the pattern. Coat the set with a clear layer and let it cure under light.
17. Solid Red With White Stripes
Solid red fills most nails in a smooth glossy coat, with white glitter on two. Diagonal stripes cross two nails in red and white, so the set gains a candy feel. White glitter dusts one nail, which adds sparkle without a new color. Hands rest over snow, which keeps the background pale and the red vivid. Glossy shine covers the set, and the stripes repeat on both hands.
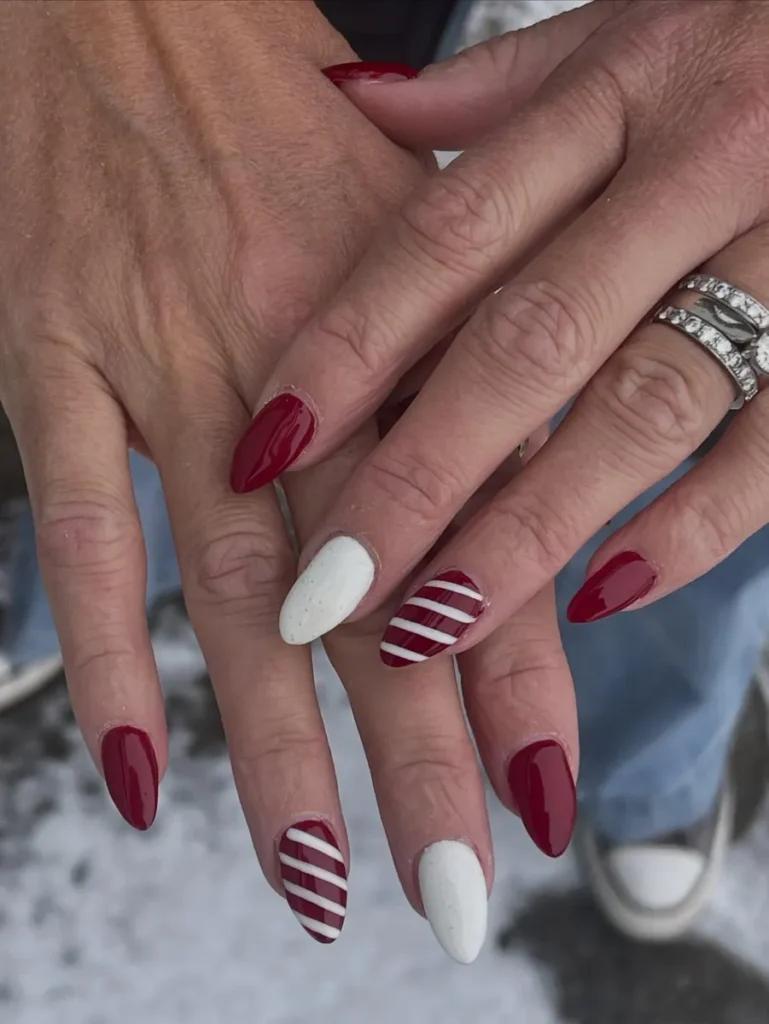
Layer two thin coats of red on each nail, then let them dry. Paint diagonal white stripes on two nails with a striping brush. Dust white glitter over one nail while the polish still feels tacky and wet. Keep the other nails plain red, so the stripes stand out more. Finish with a clear layer and cure it under light until it feels firm.
18. Nude Base With Candy Tips
Nude polish covers each nail, with candy cane stripes at the tips only. Red and white dots curve into arcs on two nails, so the set gains a playful mark. White tips frame the nude bases, which keeps the pattern light and neat. Glossy shine covers the set, and the arcs repeat on both hands. Pale skin tones sit behind the nails, and the red reads warm against them.
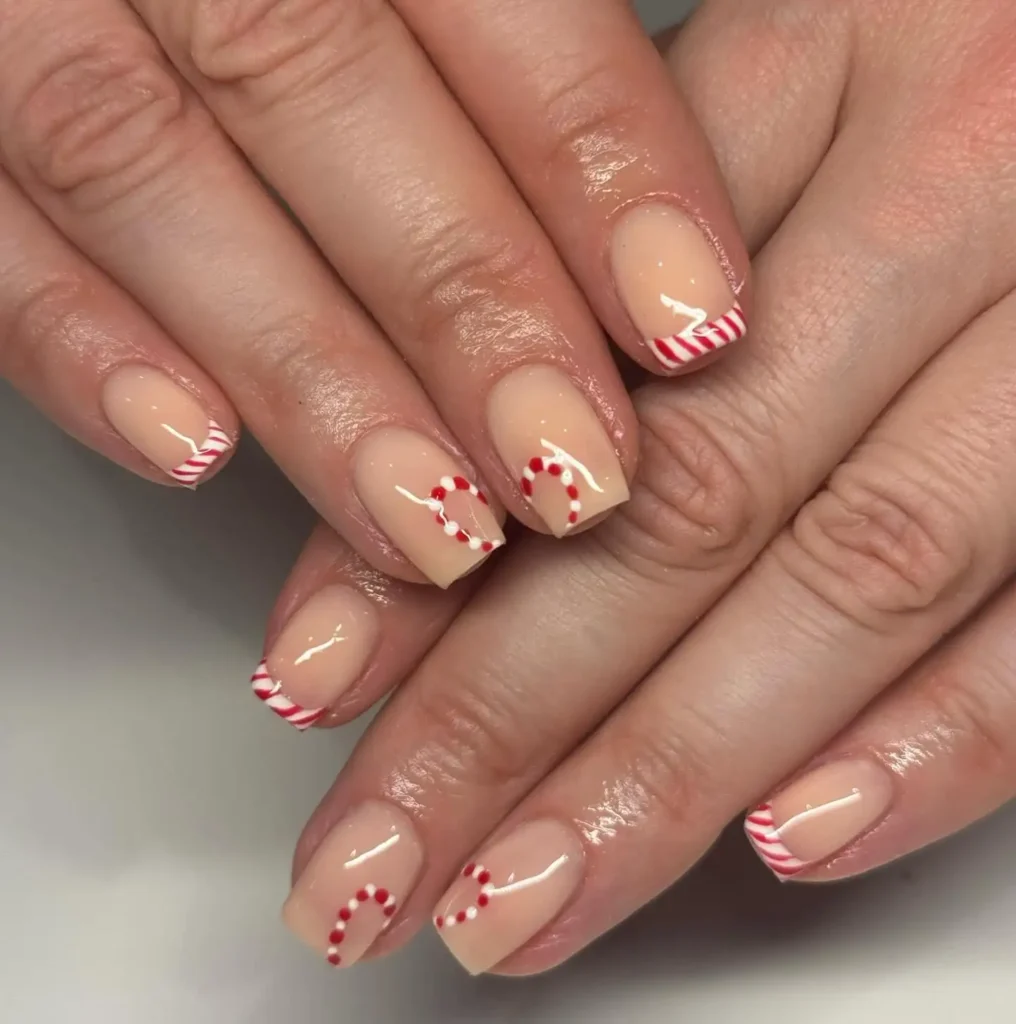
Leave the base nude, then let it dry fully before art. Paint candy cane stripes at the ends with a thin striping brush. Dot red and white beads in arcs on two nails with a dotting tool. Keep the arcs small, so they sit near the center without crowding. Add a top coat over the set and let it harden in lamplight.
19. Glitter White With Candy Stripes
Bright red fills most nails in a smooth glossy coat, with silver glitter on two. White nails carry silver glitter, which fades from the cuticle toward the tip. Candy stripes wrap two nails in red and white, with a thin silver line. Glitter catches light on the white nails, so the set shifts with each move. Glossy shine covers the set, and the red stays vivid against the white.
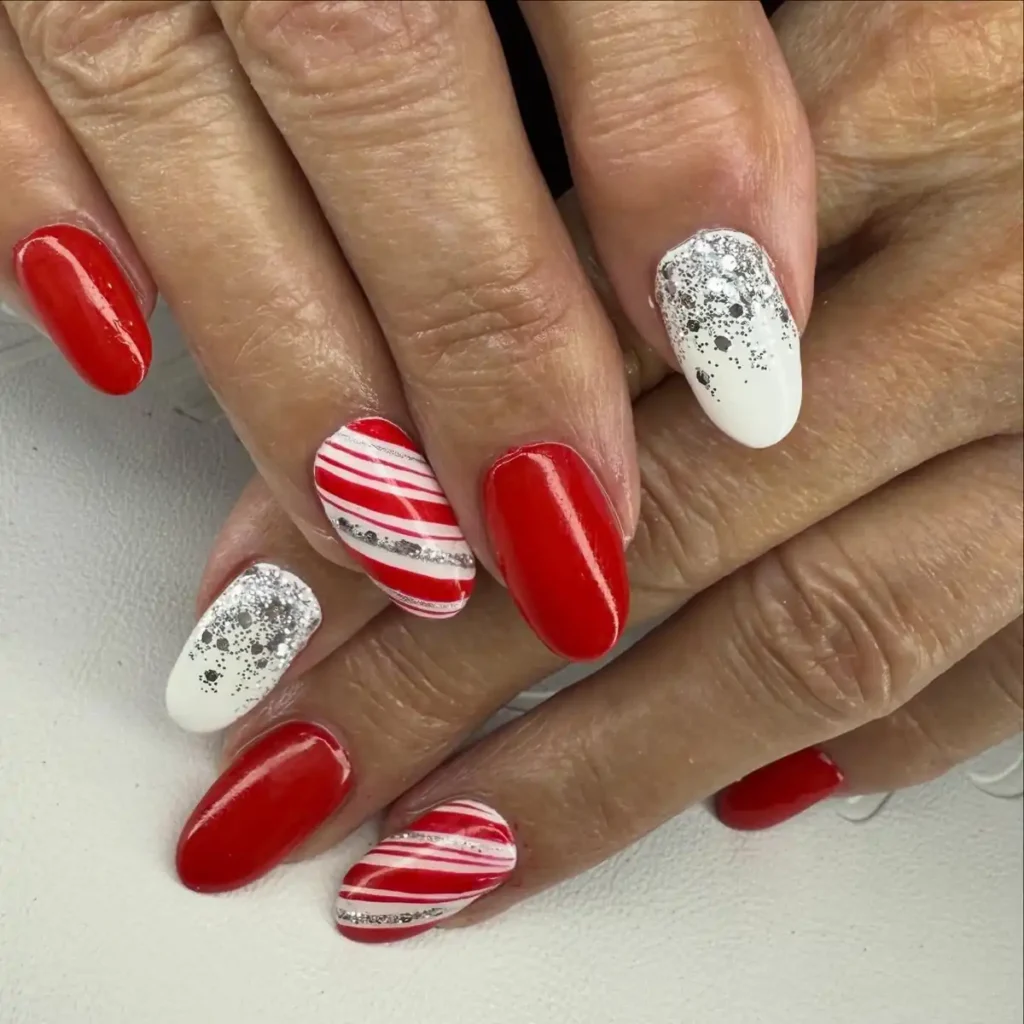
Mix silver glitter into white polish, then brush it onto two nails. Paint the other nails solid red with two thin coats and let them dry. Draw candy stripes on two nails with a striping brush and thin lines. Add a silver line down the center of each striped nail for contrast. Let the set cure under light before a clear layer goes on top.
20. Cable Knit With Peppermint Swirl
Knitted white texture covers several nails, raised in lines like a sweater knit. Peppermint swirls spin across two nails in red and white with a glitter shine. Red crystal tips frame the pale pink bases, so the set mixes texture with sparkle. Pale pink fills the gaps, which keeps the bold swirls from feeling heavy. Glossy shine covers the set, and the knit nails read soft beside the glitter.
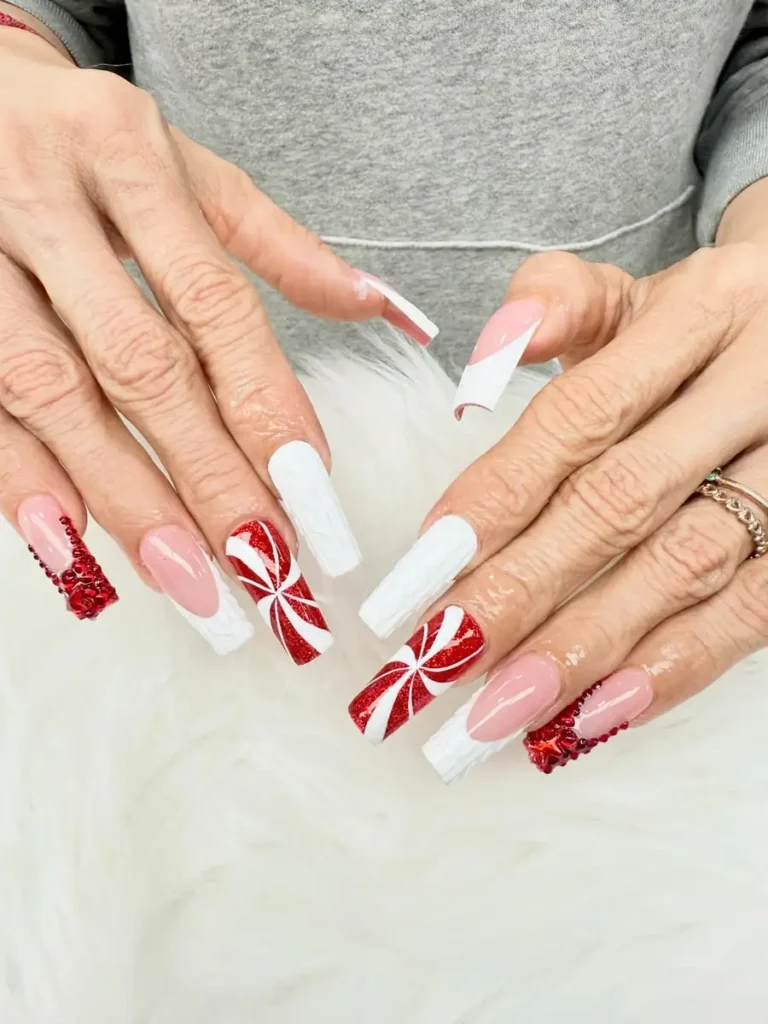
Press white gel into raised lines with a thin brush for the knit effect. Paint peppermint swirls on two nails with red and white paint. Set red crystals along the tips with a dot of clear coat. Keep the knit lines thin, so the texture stays light and neat. Coat the set with a clear layer and cure it under light for a firm hold.
21. Icing Drip On Red Polish
Glossy red fills each nail, with white icing dripping down from the cuticle. Candy stripes wrap two nails in diagonal white bands over the red. White drips vary in size, so no two nails match exactly. Sharp tips point the pattern outward, which keeps the design bold and clean. Glossy shine covers the set, and the white reads bright against the red.
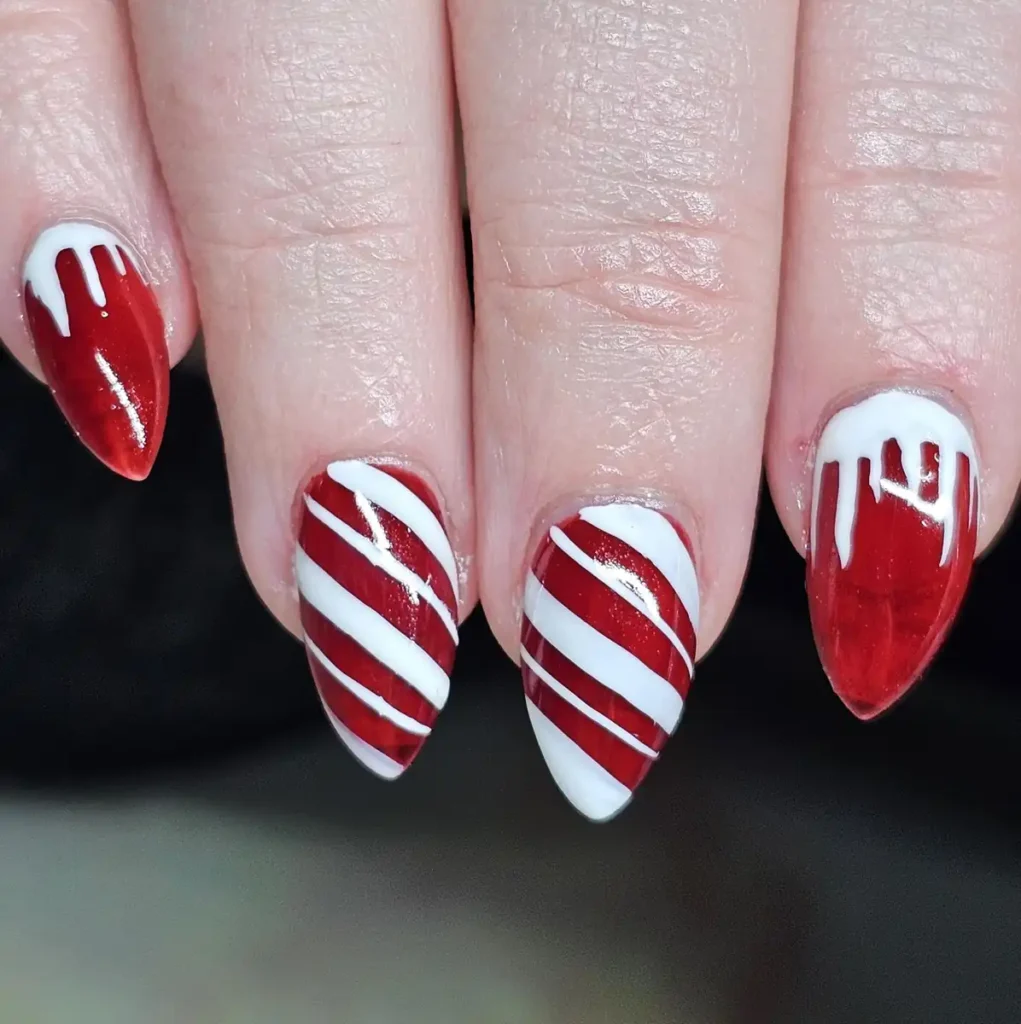
Dab white polish at the cuticle, then drag it down in uneven drips. Paint candy stripes on two nails with a striping brush and slow strokes. Keep the drips uneven, so the icing looks natural and soft. Let the drips dry fully before adding a clear layer over them. Seal the set with a clear layer and cure it under light until it feels firm.
22. Jeweled Swirl With Red Gems
Swirling peppermint lines spin across the nails in red and white with a glitter edge. Red gems ring the white tips, so the set gains a bright jeweled accent. Candy stripes run down two nails, while starbursts mark the pale ones. Pink neon light glows behind the hands, which adds a bold backdrop to the set. Glossy shine covers the set, and the swirls read clearly from every angle.

Place red gems along the white ends with a dot of top coat. Paint peppermint swirls on two nails with a striping brush. Draw starbursts on the pale set with thin white lines from the middle. Add candy stripes on two nails with red and white paint. Wipe the surface clean, then seal the set with a top coat and cure.
23. Striped Nails With Dots And Red
Bright red fills two nails in a smooth glossy coat, with no art on them. Candy stripes run down the white nails in thin red lines. White nails carry pale pink dots, so the set gains a soft accent. Hands rest on a pink surface, which keeps the background calm and bright. Glossy shine covers the set, and the small size keeps the art neat.
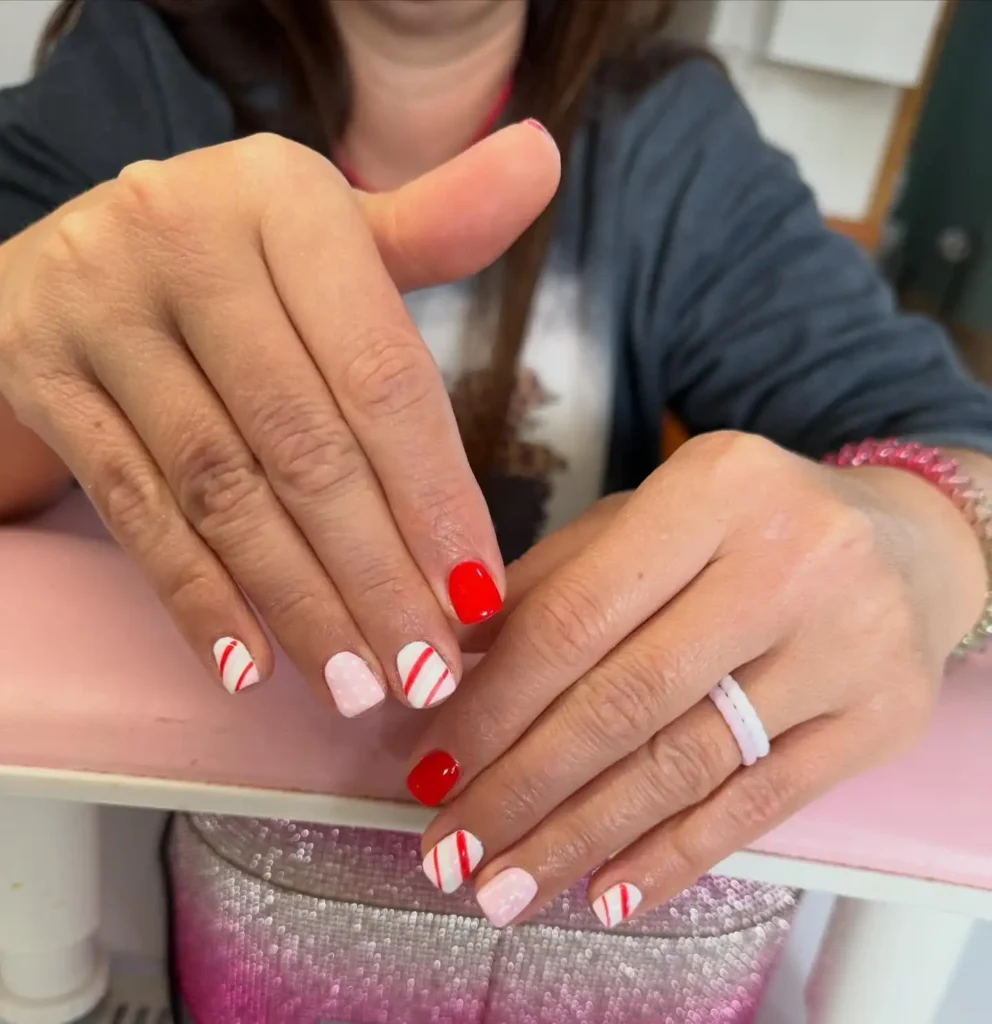
Switch between solid red, white, and striped nails on both hands. Paint thin red lines on the white nails with a striping brush. Dot pale pink beads on two nails with a dotting tool for a light mark. Keep the stripes narrow, so the look stays neat on small nails. Coat the set with a top coat and let it dry in lamplight.
24. Holly Leaves With Red French
Green holly leaves run down two nails, with red berries set between them. Red French tips carry white snowflakes, so the set mixes leaves with winter marks. White French tips frame the pale bases, which keeps the pattern crisp. Small red berries dot the holly, adding a bright repeat to the set. Glossy shine covers the set, and the green reads deep against the red.
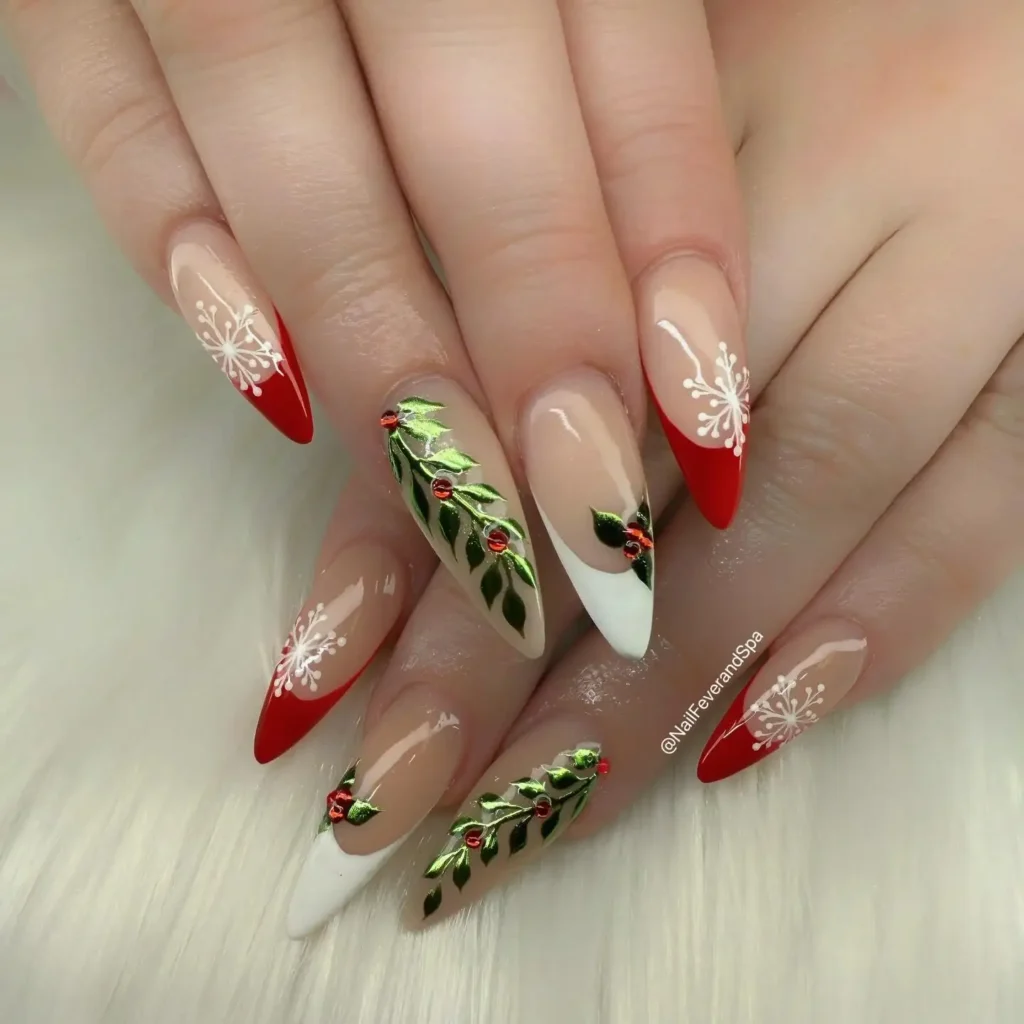
Trace green leaves down two nails with a thin brush, curving each stem. Set red berries between the leaves with a dotting tool and small dots. Paint red only at the tips, then let the base dry fully. Draw white snowflakes on the red tips with thin lines from the center. Add a clear layer over the set and cure under light until it feels firm.
25. Ho Ho Lettering With Gift Bows
Lettering spells a holiday greeting on one white nail in bold red script. Red gift bows cross the white nails, so the set reads as wrapped presents. Tiny trees wind up one red nail in white lines with small gems. Snowflakes dust the red and white nails, adding a bright winter mark. Glossy shine covers the set, and the bows repeat on both hands.

Finish the lettering first with a thin brush, using red on white. Draw gift bows on the white nails with red lines and a center gem. Paint a tiny tree with white lines and small gems on one red nail. Add snowflakes on the red nails with thin lines from the center. Buff the edges smooth, then seal with a clear layer and cure.
Closing
Steady hands matter more than a large kit for Red and White Christmas Nails. Two colors and one clear pattern carry the whole look, so extra shades only crowd it. Thin coats dry faster and keep lines crisp under a glossy top layer. Store glitter and gems away from heat, then wipe tools clean after each use. Choose the design that fits the week ahead. Keep one bottle of red and one of white close by for quick fixes.