


The tip line does the talking across these festive French manicures, and every design adds a twist to the classic curve. Glossy red meets glitter, plaid, knit texture and tiny snowflakes, while silver, gold, teal and white tips shift the mood from playful to polished. Sheer pink and nude bases keep the free edge in focus, and small touches like pearl clusters, gem stars and thin gold outlines add light to a holiday French manicure without stealing attention. Some sets split red and green between hands, others reverse the tips so Christmas French tip nails never feel repeated. Match the tip shade to skin tone, think about the outfit, and pick the finish that suits the week ahead.
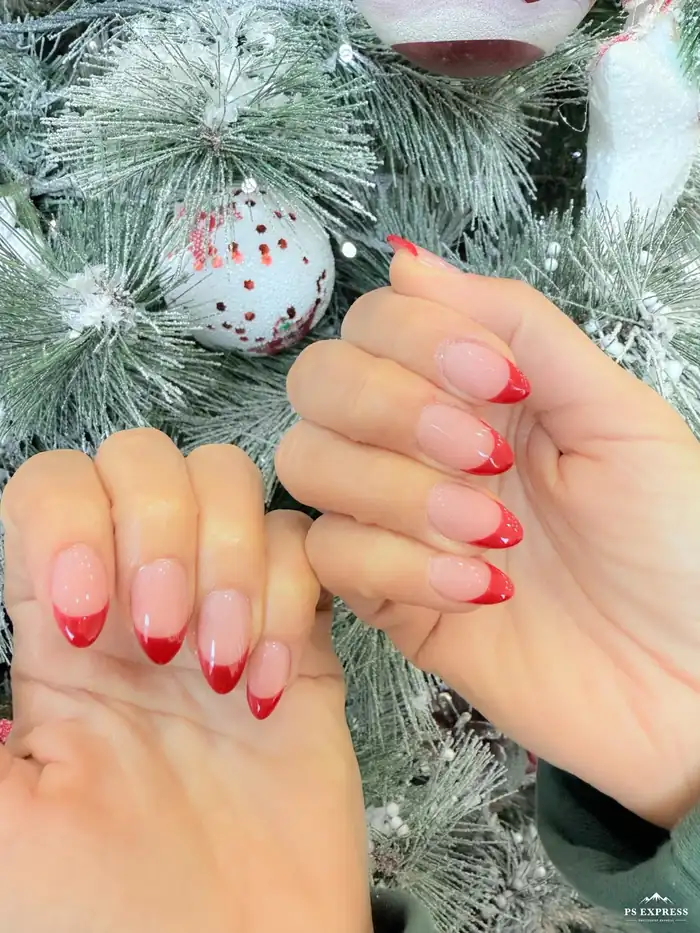
1. Bright Red Tips by the Tree
Glossy red covers each tip in a clean curved band. Pale pink fills the rest of each nail with a soft sheer wash. Light catches the high shine across all ten nails at once. Each smile line sits neat and even from thumb to pinky. Frosted branches and red ornaments frame both hands in the photo. Red stays the only colour on the nails. Crisp edges also keep the look neat and simple.
Paint two thin coats of sheer pink first and let each coat dry fully. Draw each tip with a steady hand and a flat brush. Keep the smile line level and match the curve on each nail. Seal the free edge with top coat so chips start later. Skip thick coats because thick polish pools near the cuticle. Wear gloves for washing up and the red keeps its shine for days.
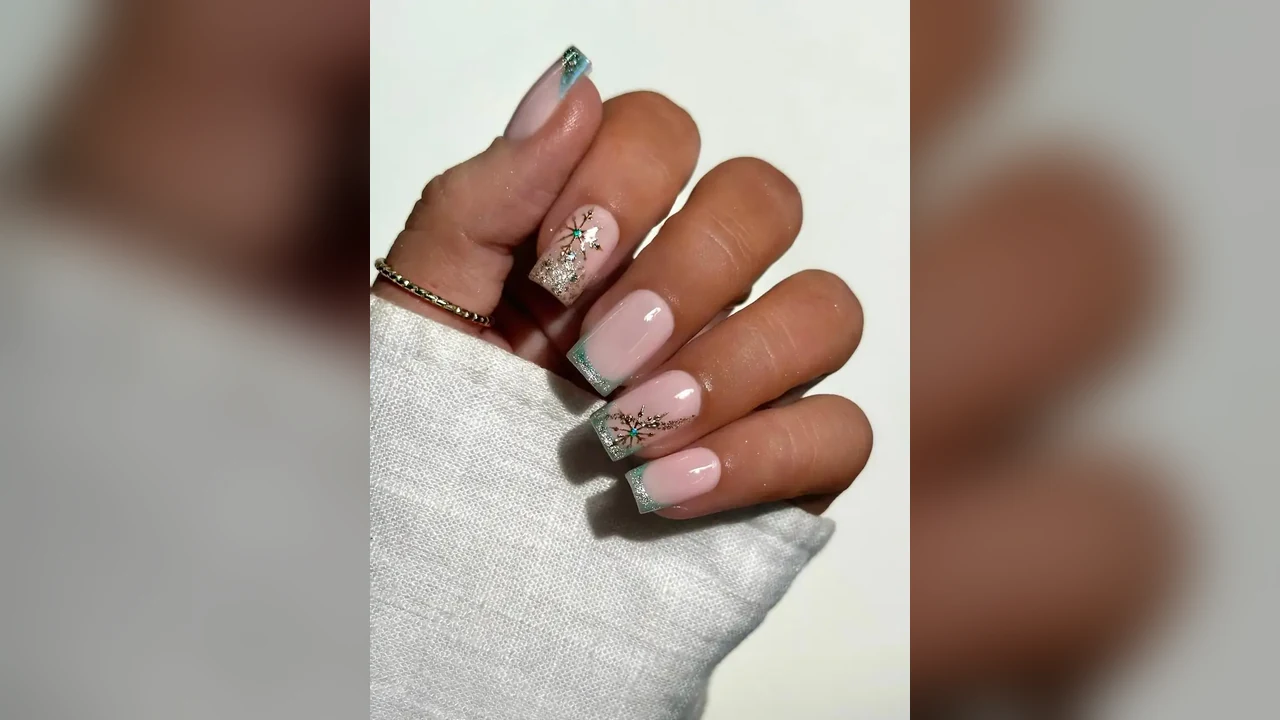
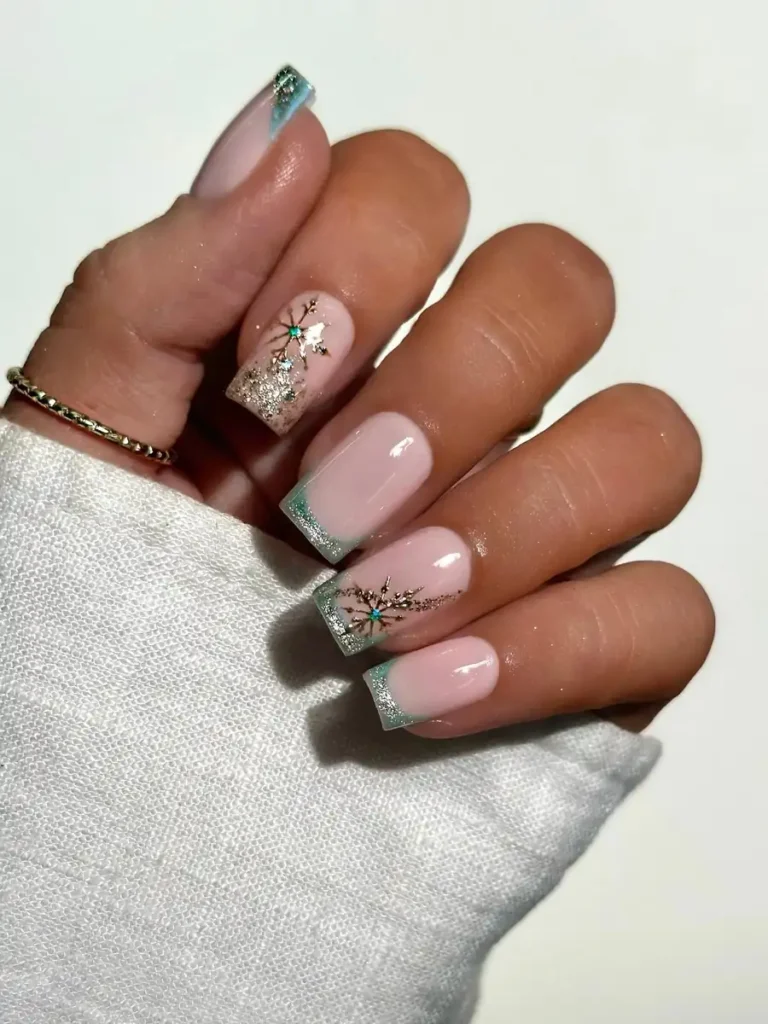
2. Icy Blue Tips with Silver Sparkle
Cool blue coats each tip in a pale icy wash. Silver glitter rims the edge of every tip with fine sparkle. Pale pink fills the base with a soft milky tone. Gold starbursts sit on two nails with small teal centres. Light plays across the glitter and lifts the cool blue. Each tip also keeps a neat curved shape against the pink. Blue and silver share the spotlight in this cool set.
Brush two thin coats of pale pink first and cure each coat fully. Paint the blue tip with a flat brush and keep the rim neat. Add silver glitter along the rim while the blue stays tacky. Place each gold starburst with a dotting tool and a steady hand. Seal the tips with top coat so the glitter stays locked in place. Swap the teal centre for red if a warmer accent suits the set.
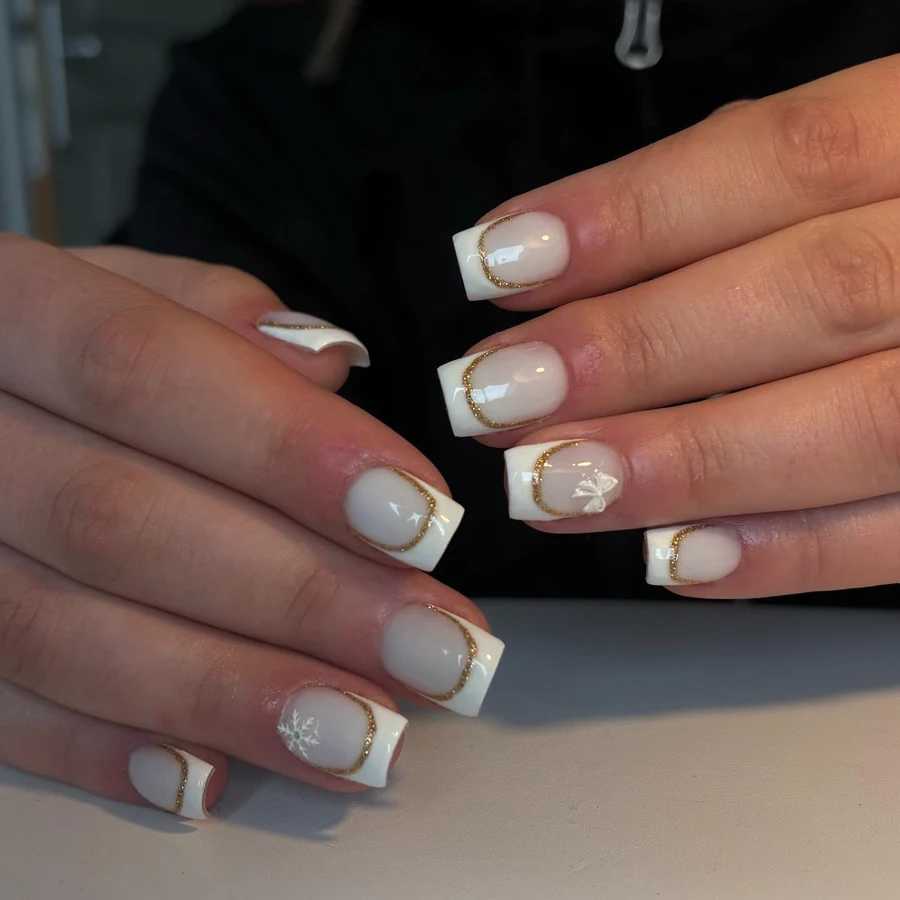
3. Gold Outlined White Tips with Bow
Wide white covers each tip in a clean solid band. Thin gold glitter traces the smile line on every nail. Milky white washes over the base with a soft calm glow. One tiny white bow sits on the ring finger near the tip. Small white snowflake marks the pinky with fine crisp lines. Light moves across the gloss and wakes the gold. White and gold also carry the whole design.
Outline the smile line first with a thin brush and gold glitter. Fill the tip with white polish and keep the edge crisp. Set the tiny bow on the ring finger before the polish dries. Add the snowflake last with a striping brush and gentle strokes. Seal everything with top coat so the bow stays fixed in place. Swap the bow for a pearl if a softer accent suits the hand.
4. Deep Red Glitter Tips with Charms
Deep red glitter covers each tip with a rich sparkling coat. Sheer pink washes over the base with a smooth glossy glow. Gold snowflake charms rest on two nails near the tips. Light hits the glitter and throws tiny sparks across the nails. Each smile line curves cleanly from one side to the other. Red stays bold but pink keeps the base calm. Glitter gives this set its festive glow.
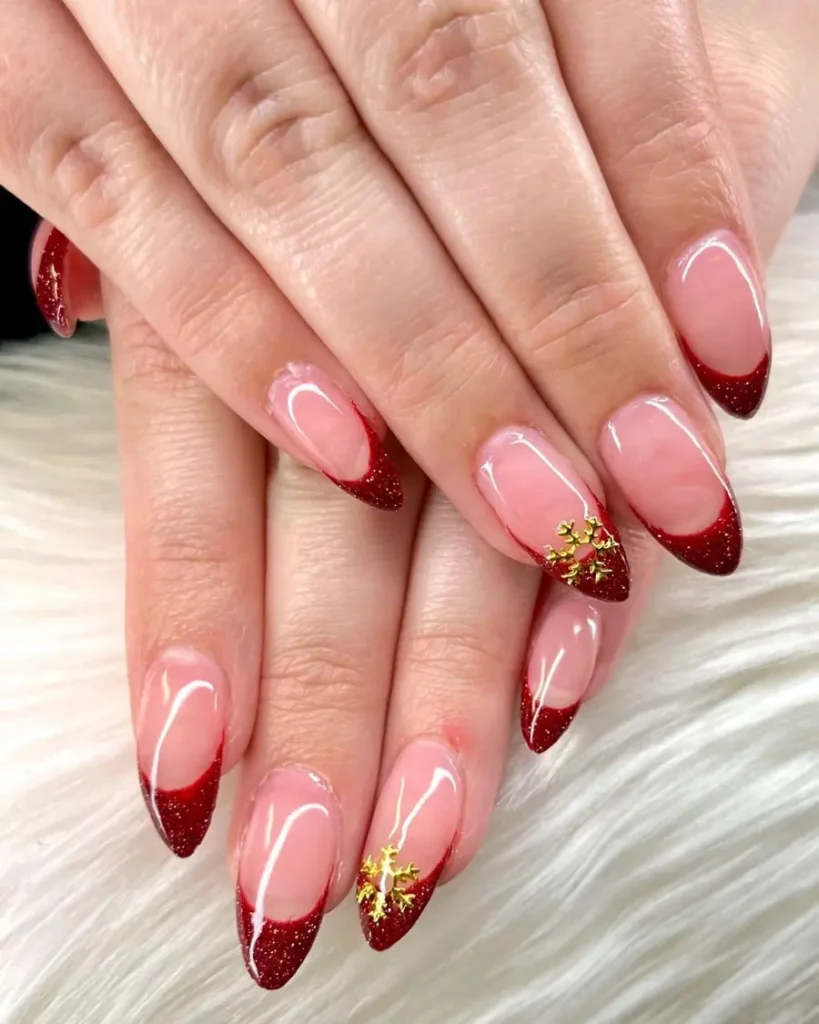
Layer two thin coats of pale pink first and cure each coat fully. Paint the tips with red glitter polish and two coats for depth. Place one gold charm on each ring finger with nail glue. Press the charm flat so it sits level on the tip. Seal the whole nail with top coat and cap the free edge. Swap the charms for plain glitter if the set needs a calmer finish.
5. Green Glitter Tips with Red Bows
Bright green glitter covers the tips with a fresh sparkling coat. Sheer pink tints the base with a smooth glossy glow. One accent nail carries a metallic red bow with red and green dots. Tiny dots frame the bow in green, red and gold. Light catches the glitter and wakes the whole hand. Green leads the set but red plays a small part. Each tip keeps a neat curved edge.
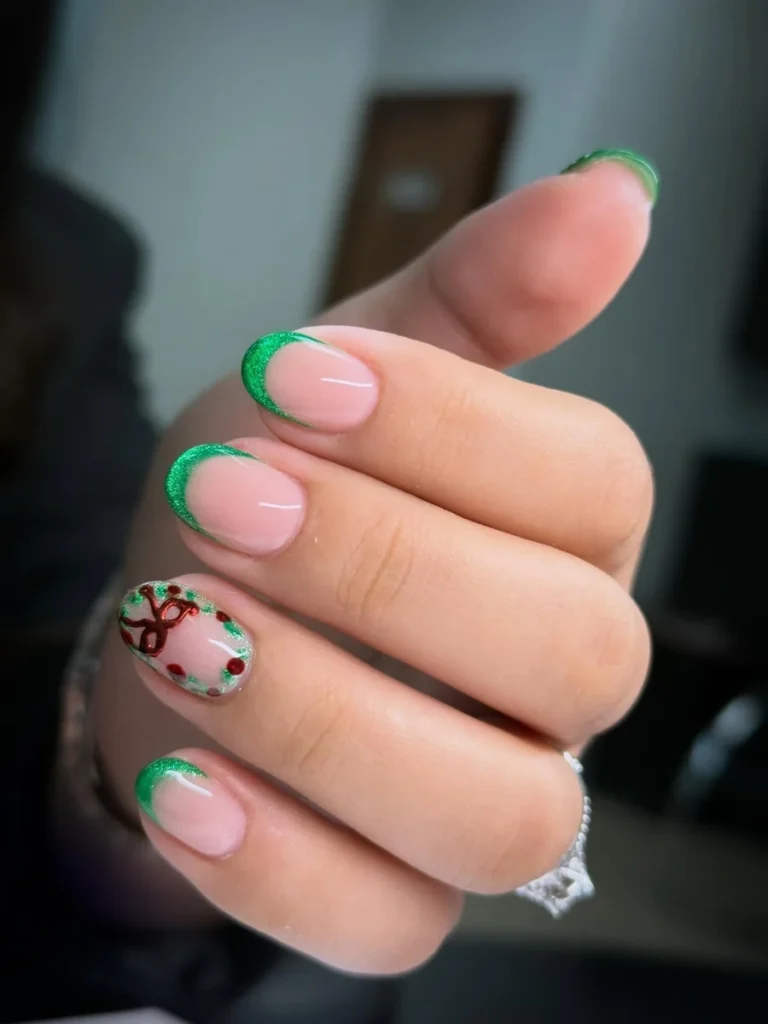
Brush two thin coats of pale pink first and let coats dry fully. Paint the tips with green glitter polish in two even coats. Draw the red bow on the accent nail with a thin brush. Add dots around the bow with a dotting tool. Seal the set with a clear top coat so the glitter stays put. Swap the bow for a gold star if a simpler accent suits the set.
6. Gold Chrome Tips over Sheer Nude
Metallic gold covers each tip with a bright mirror shine. Sheer nude washes over the base with a soft clear glow. Silver glitter dusts the cuticle area with fine bright sparkle all over. Light slides across the chrome and warms the gold. Tips curve cleanly against the sheer nude base in gold. Gold leads the look but silver adds a cool touch. Chrome gives the set a rich festive glow in the light.
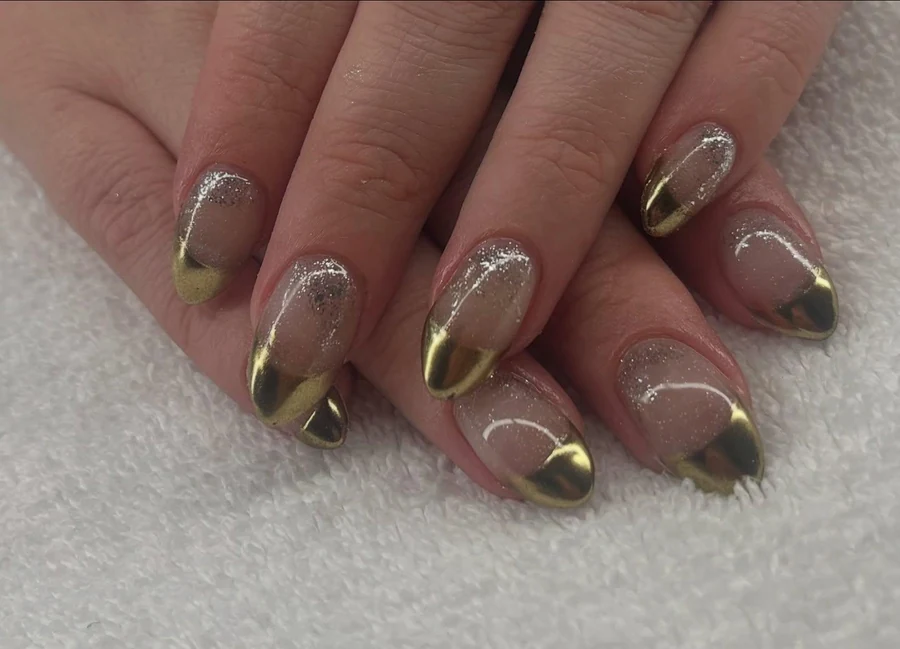
Apply two thin coats of sheer nude first and let coats dry fully. Buff chrome powder onto the tips using a soft applicator. Wipe away loose powder before sealing the surface. Add silver glitter near the cuticle with a small brush. Seal the tips with a clear top coat so the chrome keeps its shine. Swap the silver glitter for gold if a warmer finish suits the set.
7. Knit Red and White Tips
Knit texture covers the tips in raised red and white bands. Red and white swap from nail to nail across both hands. Small holly sprigs also sit near the cuticle on two nails. Soft nude warms the base with a calm smooth glow. Light catches the raised knit lines and wakes the set. Each tip keeps a neat shape against the nude base. Red and white share the set in equal measure.
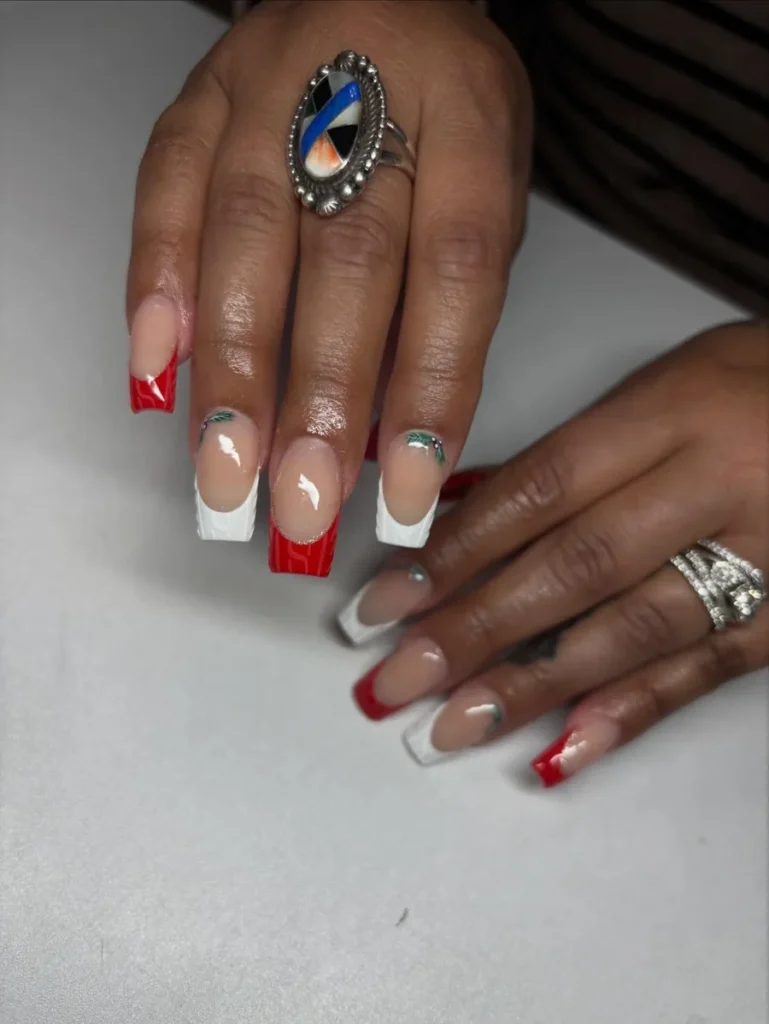
Build the nude base first with two thin coats and let coats dry. Paint each tip red or white and keep edges level. Press knit lines into the wet polish with a thin brush. Add the holly sprigs last with a fine brush and green polish. Seal the set with top coat so the texture stays crisp. Swap white tips for cream if a softer contrast suits the hand.
8. Melted Silver Chrome Tips
Liquid silver covers each tip with a bright mirror shine all over. Soft pink tints the whole base with a clear gentle glow. Wavy edges melt across the smile line on every nail. Light slides over the chrome and cools the silver. Each tip looks like poured metal against the pink. Silver leads the look but pink stays soft and calm. Chrome gives the set a bold icy glow in daylight.
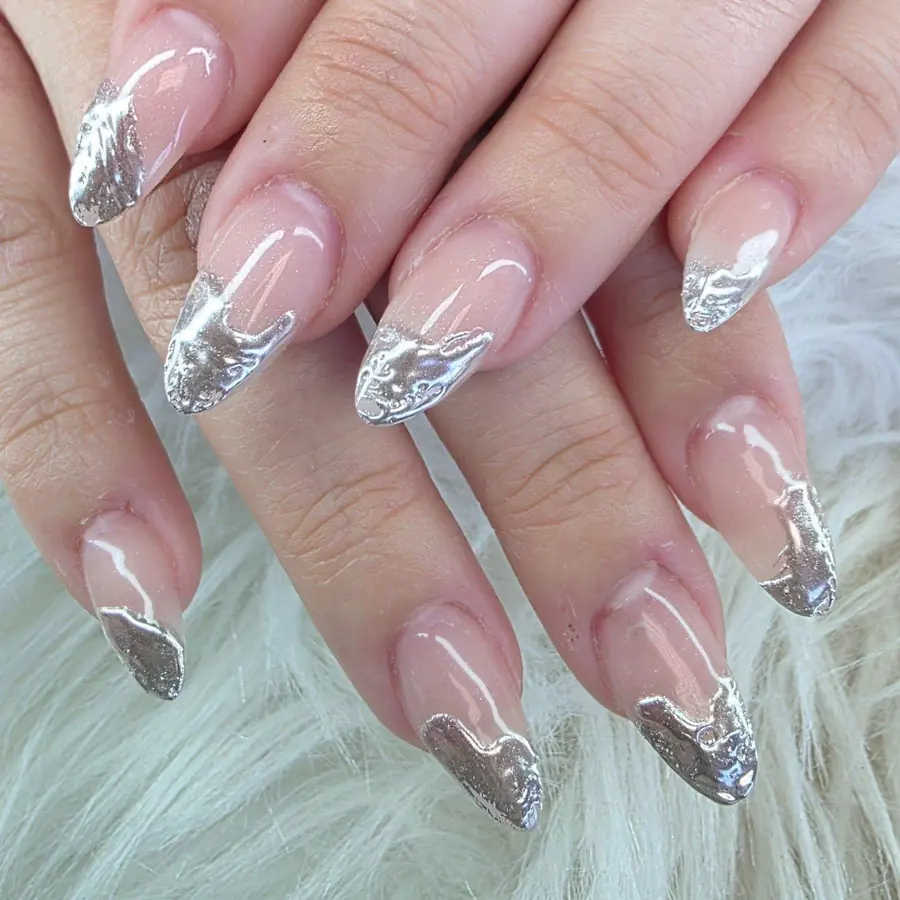
Work the sheer pink base first with two thin coats. Buff chrome powder onto each tip with a soft applicator. Shape the wavy edge with a thin brush before the powder sets. Brush away loose powder and smooth the surface. Seal the tips with top coat so the silver keeps its shine. Swap silver chrome for gold if a warmer finish suits the set.
9. Tartan Accents on White Tips
Crisp white covers most tips in a clean solid band. Red and green plaid fills the accent tips with fine lines. One thumb curves in red with a thin gold line. Sheer pink washes over the base with a soft smooth glow. Light glides over the gloss and wakes the tartan lines. White leads the set but plaid adds a tartan twist. Each tip keeps a neat shape against the pink base.
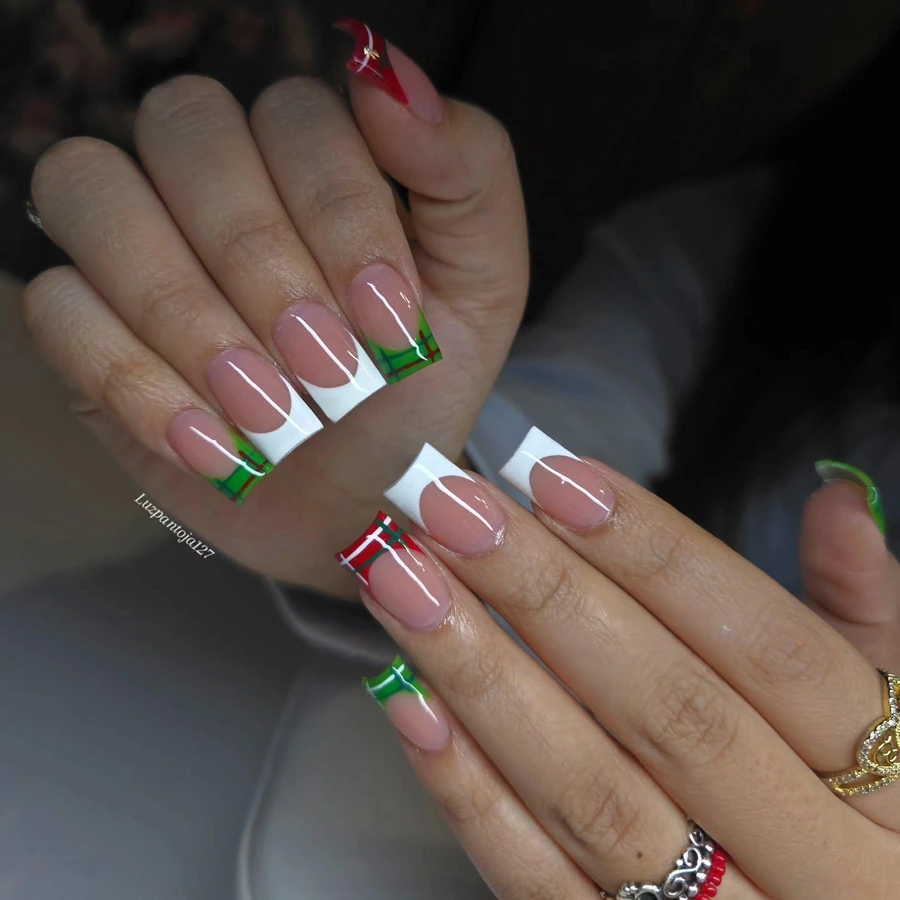
Map the white tips first using a flat brush and two thin coats. Paint the plaid accents with red, green and white lines next. Draw plaid patterns with a striping brush and a steady hand. Add the gold line on the thumb with a thin brush. Seal the set with top coat and the plaid stays neat. Swap green plaid for blue if a cooler accent suits the hand.
10. Raised White Flowers on Red Tips
Raised white flowers sit on the ring fingers with clear rhinestone centres. Glossy red covers the other tips in a bold curved band. Sheer pink washes over the base with a soft sheer glow. Light catches the raised petals and wakes the bright red. Each flower stands proud with soft white layered petals in bloom. Red leads the set but white adds a soft bloom. Flowers give the set a sweet festive lift.
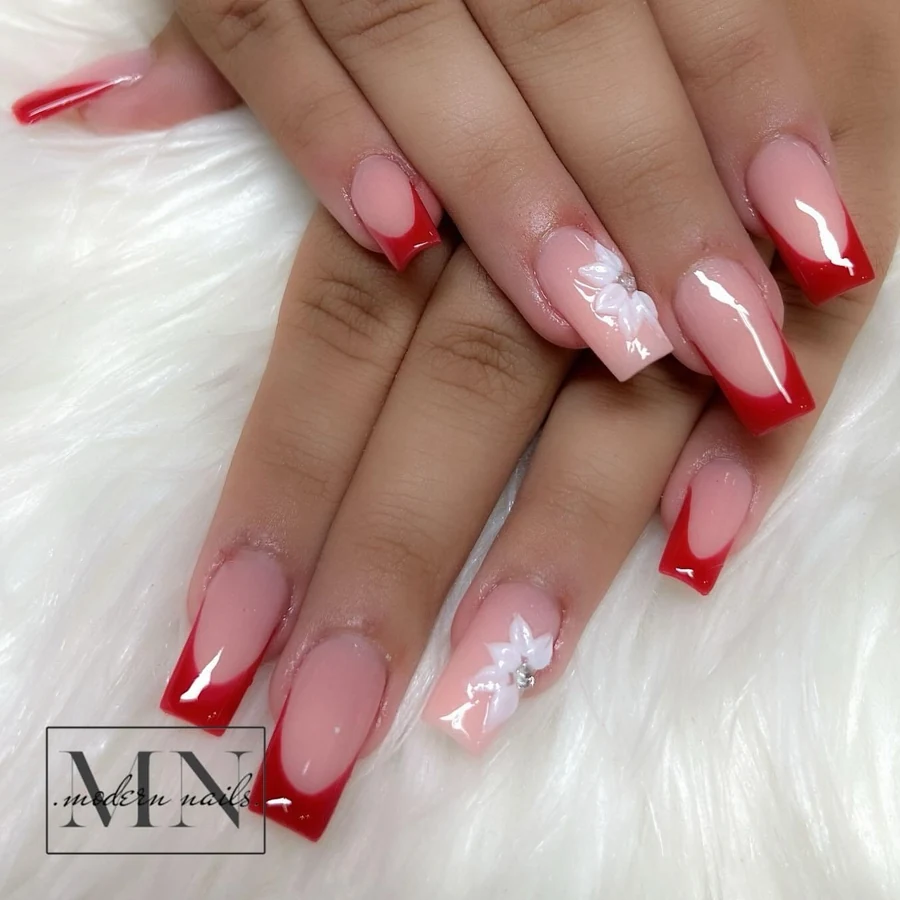
Place the red tips first with two thin coats and a flat brush. Build each flower with white acrylic and a small brush. Set one rhinestone in the centre while the flower stays soft. Press each petal gently so the shape holds its curve. Seal the set with top coat and smooth the free edge. Swap the flowers for white dots if a simpler accent suits the hand.
11. Teal Chrome Tips and Gold Moons
Teal chrome covers each tip with a bright mirror shine. Warm nude warms the base with a soft smooth glow. Small gold half moons sit at the cuticle on every single nail. Light slides across the teal and warms the bright gold. Tips curve cleanly against the warm nude base in teal. Teal leads the look but gold adds a warm touch. Chrome gives the set a rich cool glow in daylight.
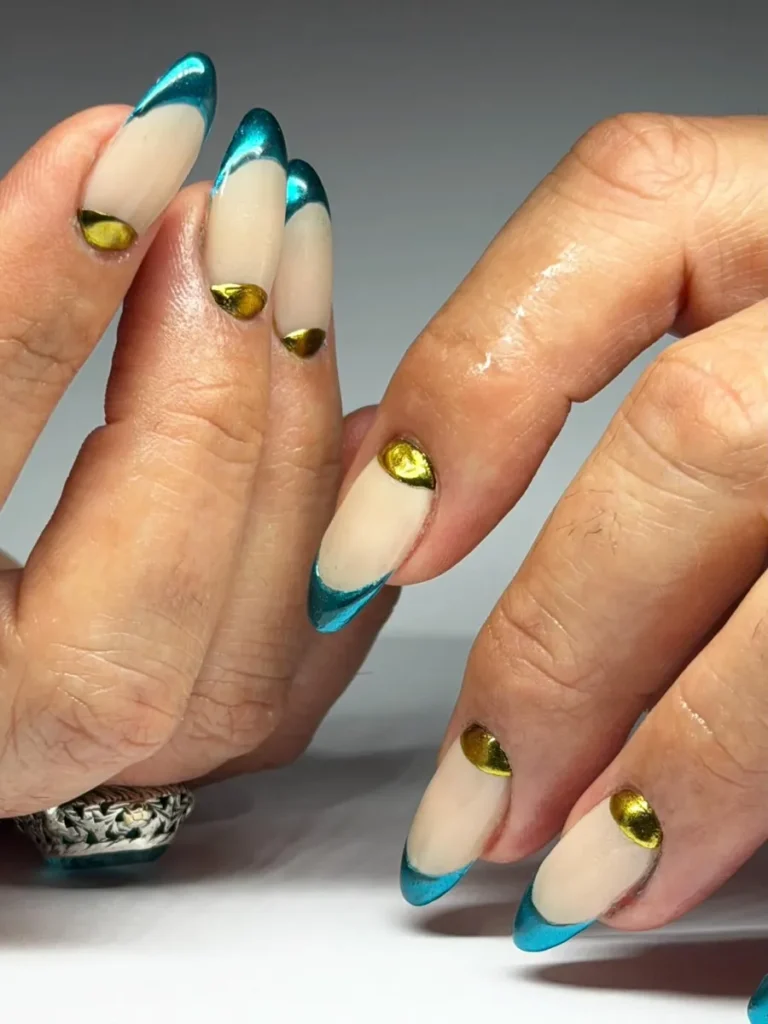
Apply two thin coats of nude first and let coats dry fully. Buff teal chrome powder onto each tip with a soft applicator. Paint each gold half moon near the skin with a small brush. Dust away loose powder before sealing the surface. Seal the tips with top coat so the teal keeps its shine. Swap teal chrome for blue if a cooler finish suits the set.
12. Gold Glitter Tips with Snowflakes
Golden glitter covers each tip with a rich sparkling coat. Sheer pink tints the base with a soft smooth glow. One white snowflake spreads across the ring finger tip in fine lines. Light catches the glitter and wakes the bright gold. Each tip keeps a neat curved edge against the pink. Gold leads the set but white adds a crisp note. Glitter gives this set a warm festive glow in daylight.
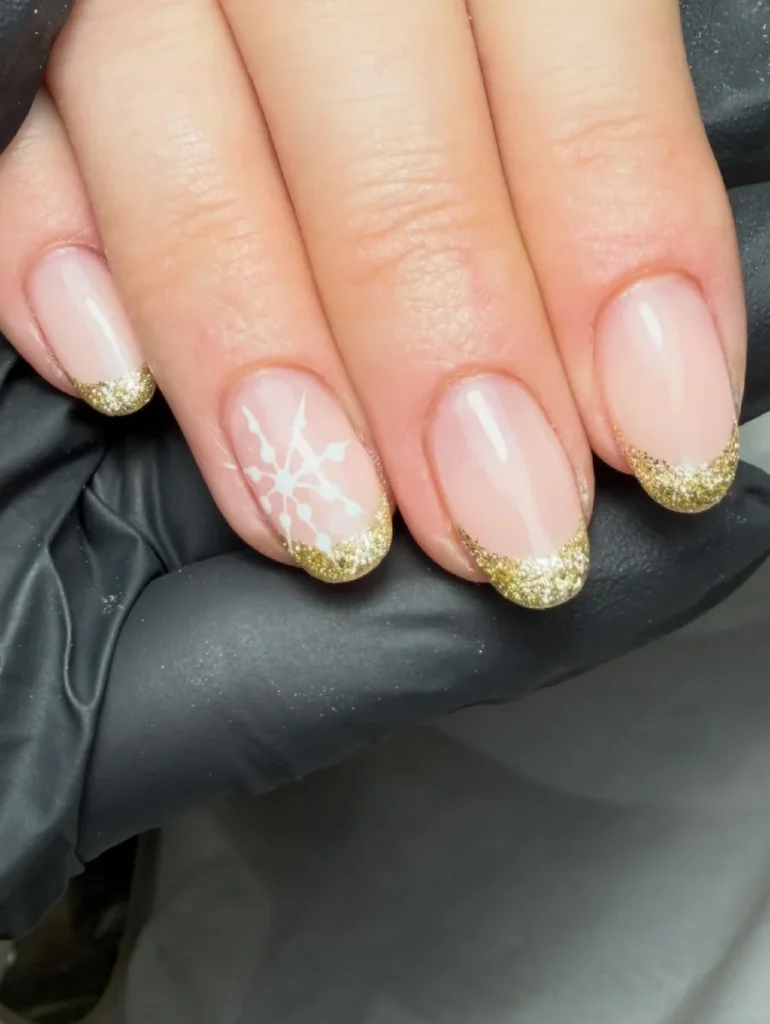
Dust the tips with gold glitter polish in two thin coats. Paint the snowflake with white polish and a fine brush. Keep the snowflake arms even and the middle neat. Seal the set with top coat and the glitter stays fixed. Cap the free edge twice so chips start later. Swap the snowflake for a star if a simpler accent suits the hand.
13. Polka Dot Tips in Red and Green
Two hands split the set neatly between green and red tips. Dark green covers one hand with white polka dots. Bright red covers the other hand with white polka dots. Soft nude washes over the base with a calm smooth glow. Light catches the white dots and wakes both bright colours. Each tip also keeps a neat curved edge on every nail. Red and green share the set in equal parts.
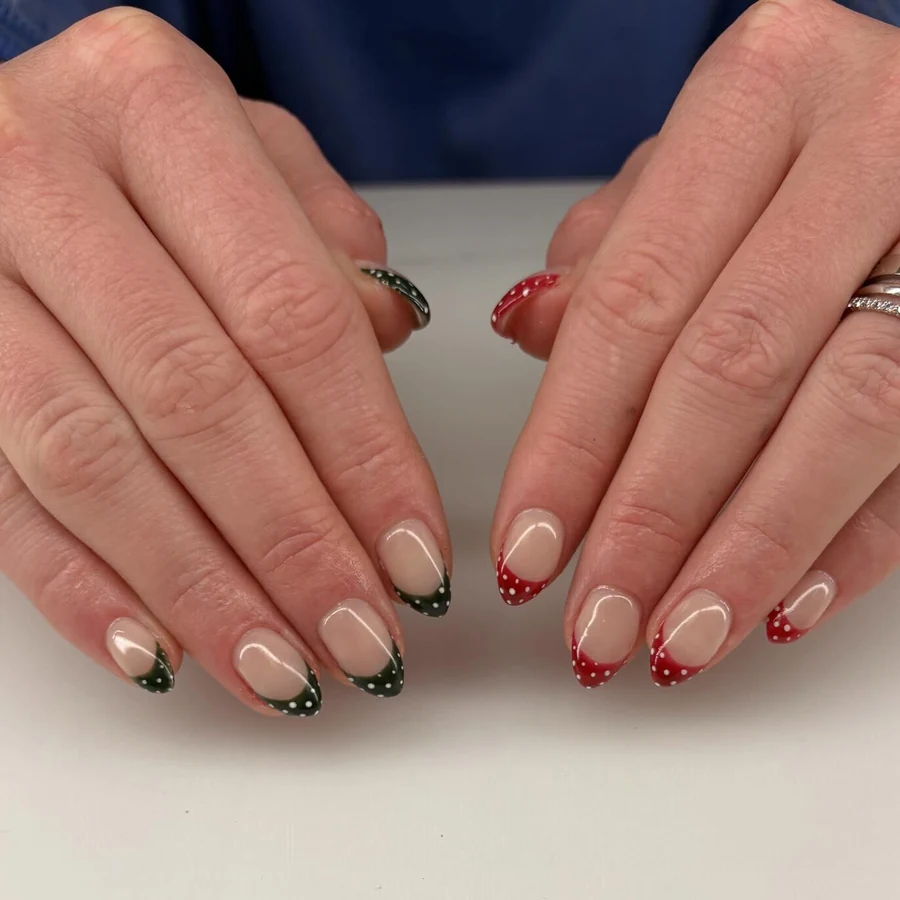
Alternate the colours by hand and paint green tips first. Paint red tips on the second hand with the same brush. Add white dots with a dotting tool once the tips dry. Keep each dot small and space them evenly along the edge. Seal the set with top coat so the dots stay neat. Swap red for burgundy if a deeper tone suits the hand.
14. Pearl Clusters on White Tips
Pearl clusters gather near the cuticle on accent nails in neat rows. White tips stretch in a thin clean line on every nail. Sheer pink warms the base with a soft glossy glow. Silver rhinestones sit among the pearls with fine sparkle. Light moves across the gloss and wakes the pearls. White leads the set but pearls add a soft glow. Each tip keeps a neat pointed shape against the pink.
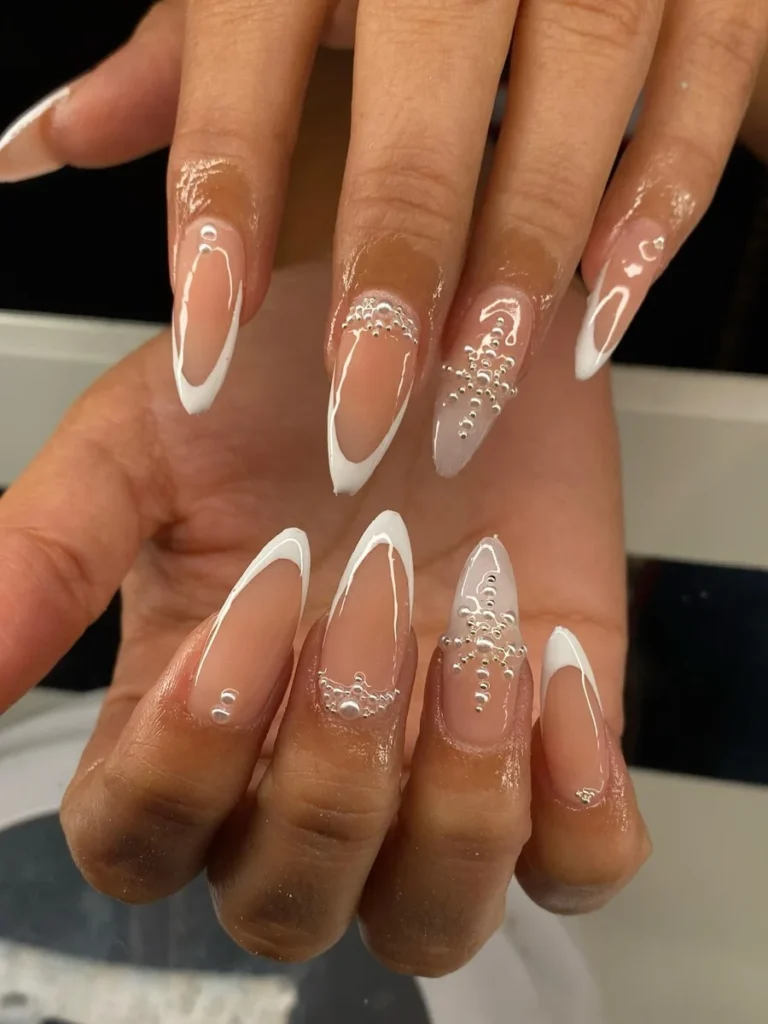
Set the white tips first using a thin brush and two even coats. Place the clusters at the skin using nail glue. Add silver rhinestones between the pearls using tweezers. Press pieces flat so they sit level on the nail. Seal the set with top coat and guard the free edge. Swap pearls for gold beads if a warmer accent suits the hand.
15. Two Hands in Red and Green
One hand wears red tips with a thin gold line. Second hand wears metallic green tips with a thin gold line. Warm nude tints the base with a soft smooth glow. Light moves across the gloss and wakes both colours. Red and green also share the set in equal parts. Each tip keeps a neat curved edge against the warm nude. Gold lines trace the smile line on every nail.
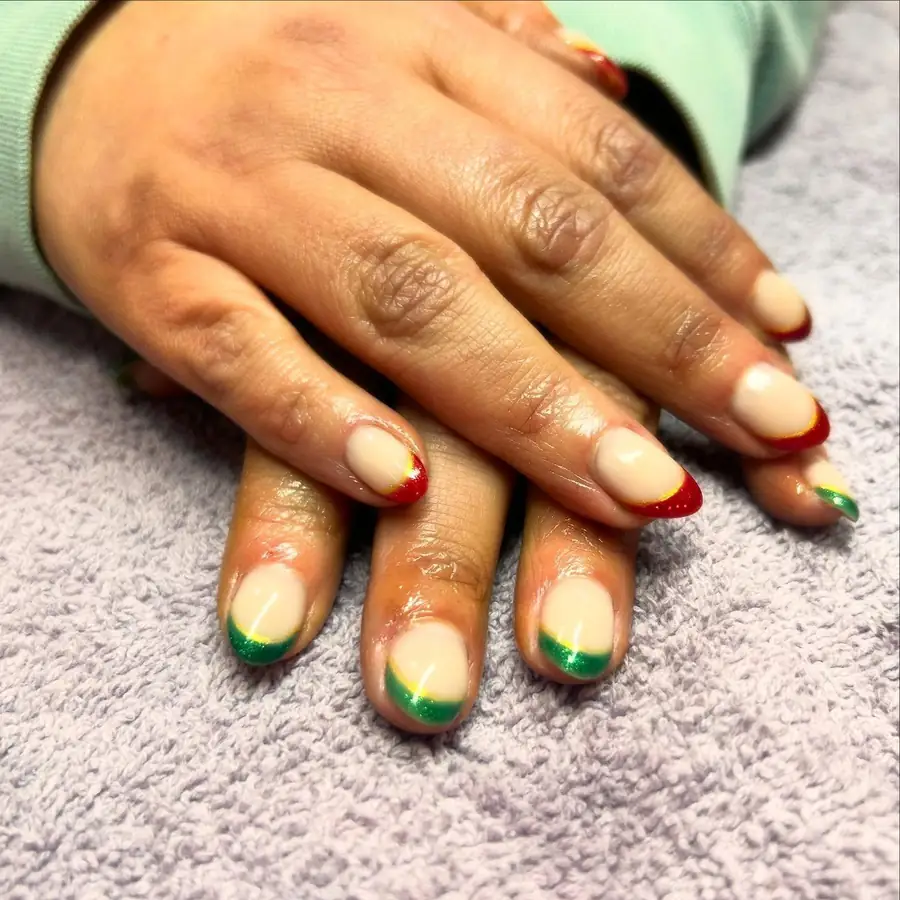
Divide the set by hand and paint the red tips first. Paint green tips on the second hand with the same brush. Add a thin gold line along each smile line. Keep the gold line level and the curve even. Seal the set with top coat so the lines stay bright. Swap green for teal when a cooler accent suits the hand.
16. Rose Gold Glitter Tips with Snowflakes
Rosy gold glitter covers each tip with a soft sparkling coat. Sheer nude washes over the base with a smooth glossy glow. Small white snowflakes sit on two nails near the tips. Light catches the glitter and warms the rose gold. Rose gold tips keep a neat curved edge against the nude. White adds a crisp note but rose gold leads the set. Glitter lights this set with a warm festive glow.

Blend rose gold glitter polish over the tips in two coats. Paint the snowflakes with white polish and a fine brush. Keep the arms of the snowflake even and the centre neat. Seal the set with top coat so the glitter stays put. Cap the free edge twice for a longer wear. Swap rose gold for yellow gold if a brighter finish suits the set.
17. Deep Green Tips with Rhinestone Outlines
Forest green covers most tips in a deep glossy coat. Two red tips carry a curved line of tiny bright rhinestones. Sheer pink warms the base with a soft smooth gentle glow. Light catches the rhinestones and wakes the green. Tips keep a neat shape against the soft pink in green. Green leads the set but red adds a bold note. Rhinestones give the set a bright festive sparkle in daylight.
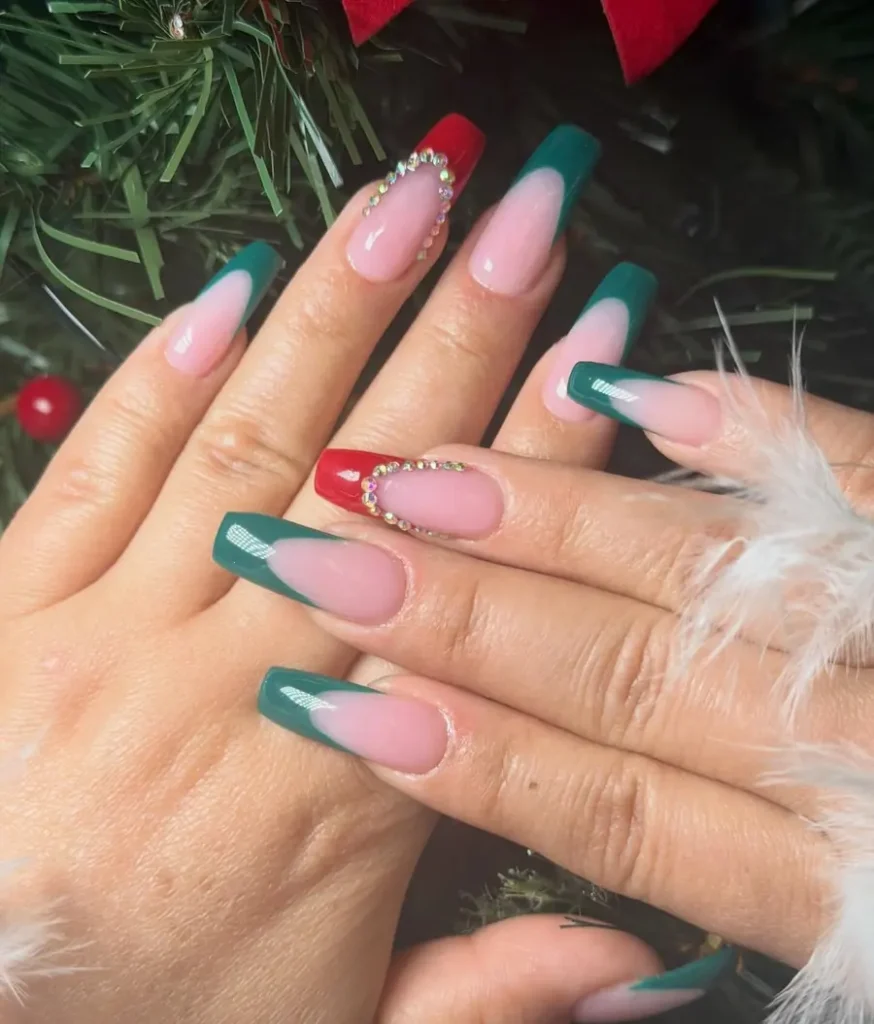
Line the tips first with deep green polish and two coats. Paint the red tips next and keep the curve even. Place rhinestones along the smile line with nail glue. Press the stone flat so it sits level on the nail. Seal the set with top coat and shield the free edge. Swap the rhinestones for gold dots if a softer accent suits the hand.
18. Silver Glitter Chevron Tips
Sharp silver glitter forms a neat pointed V on each tip. Milky white fills the base with a soft pearl glow. Light catches the silver glitter and lifts the whole set. Each chevron points cleanly toward the cuticle on every single nail. Silver leads the look but white stays calm and soft. Glitter gives the set a bright icy glow in daylight. V shapes keep the design crisp and modern here too.
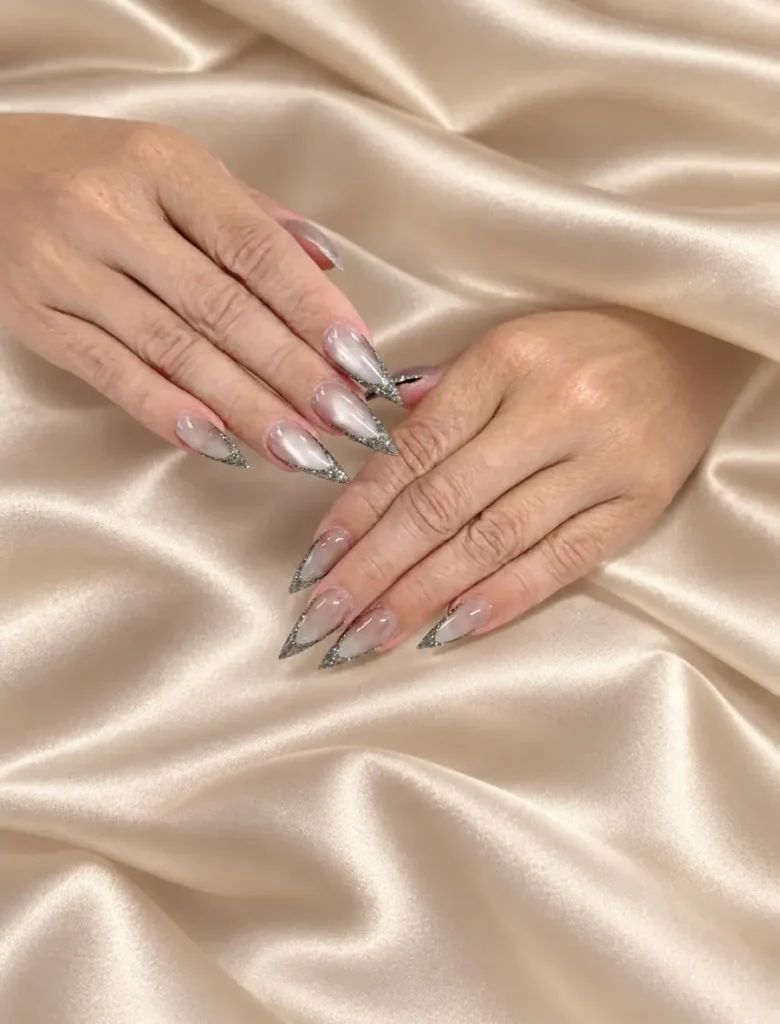
Angle the brush and paint each tip in a sharp V. Fill the V with silver glitter polish in two coats. Keep both arms of the V even and the point neat. Let the glitter dry fully before sealing the surface. Seal the tips with top coat so the glitter stays locked. Swap silver glitter for gold if a warmer finish suits the set.
19. Mixed Plaid over White Tips
Mixed plaid fills the accent tips in red, green and teal. Crisp white covers the other tips in a clean solid bright band. Sheer pink coats the base with a soft smooth glow. Light slides over the shine and wakes the checked lines. White leads the set but plaid adds a checked twist. Tips keep a neat shape against the soft pink in white. Plaid gives the set a bold festive pattern.

Stripe the plaid tips first with red, green and white lines. Paint the white tips next with two thin coats. Draw the plaid lines with a striping brush and a steady hand. Keep the lines straight and the bands even. Seal the set with a clear top coat so the plaid stays crisp. Swap teal plaid for olive if a softer accent suits the hand.
20. Reverse French in Red and White
Reversed French flips the usual look with bright red bases. Glossy red fills each nail from cuticle to mid nail. White tips curve neatly along the free edge of each nail. Light catches the gloss and wakes the bright glossy red. Each nail keeps a neat shape with a clean smile line. Red leads the set but white adds a crisp edge. Reversed tips give the set a fresh festive twist.
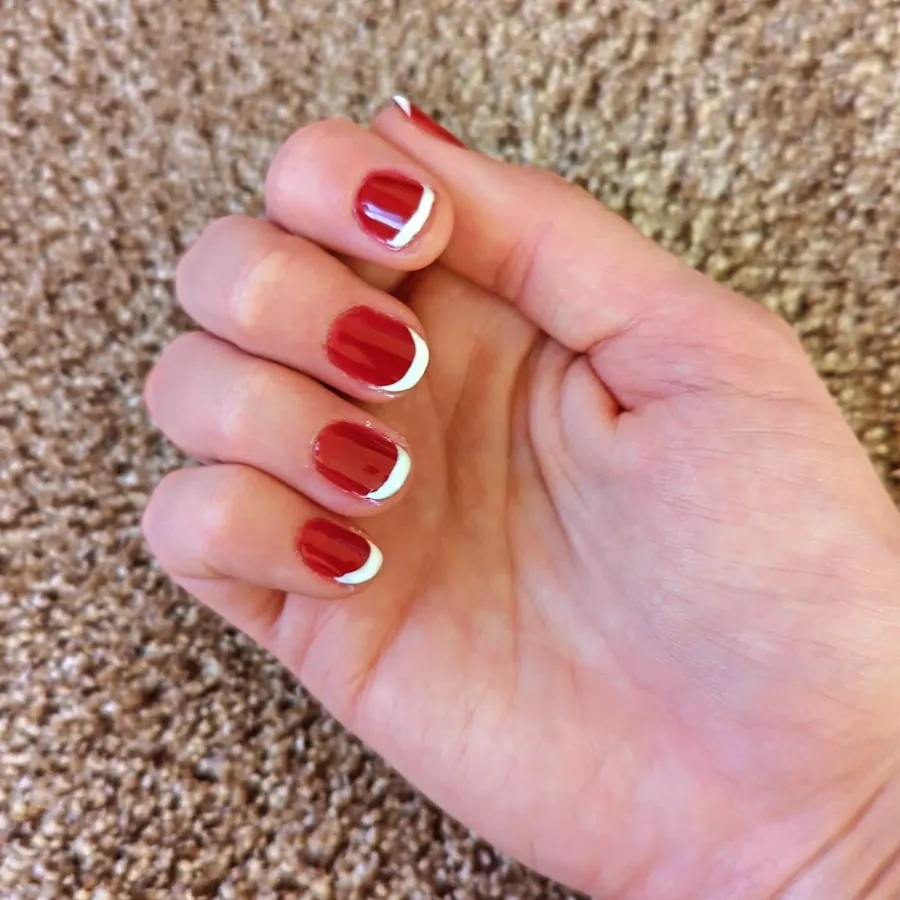
Flip the order and paint the red base first. Let the red dry fully before adding the white tips. Draw the white tip with a flat brush and a steady hand. Keep the smile line level and the curves even. Seal the set with top coat so the red keeps its shine. Swap the white tips for cream if a softer contrast suits the hand.
21. Silver Glitter Tips with a Nutcracker
Sparkling silver glitter covers the tips with a fine bright coat. Calm nude tints the base with a soft smooth glow. One nutcracker stands on the ring finger in red and gold. Small white snowflake spreads across the middle finger tip. Light catches the glitter and wakes the bright silver. Each tip keeps a neat shape outlined in crisp white. Silver leads the set but red adds a bold festive note.
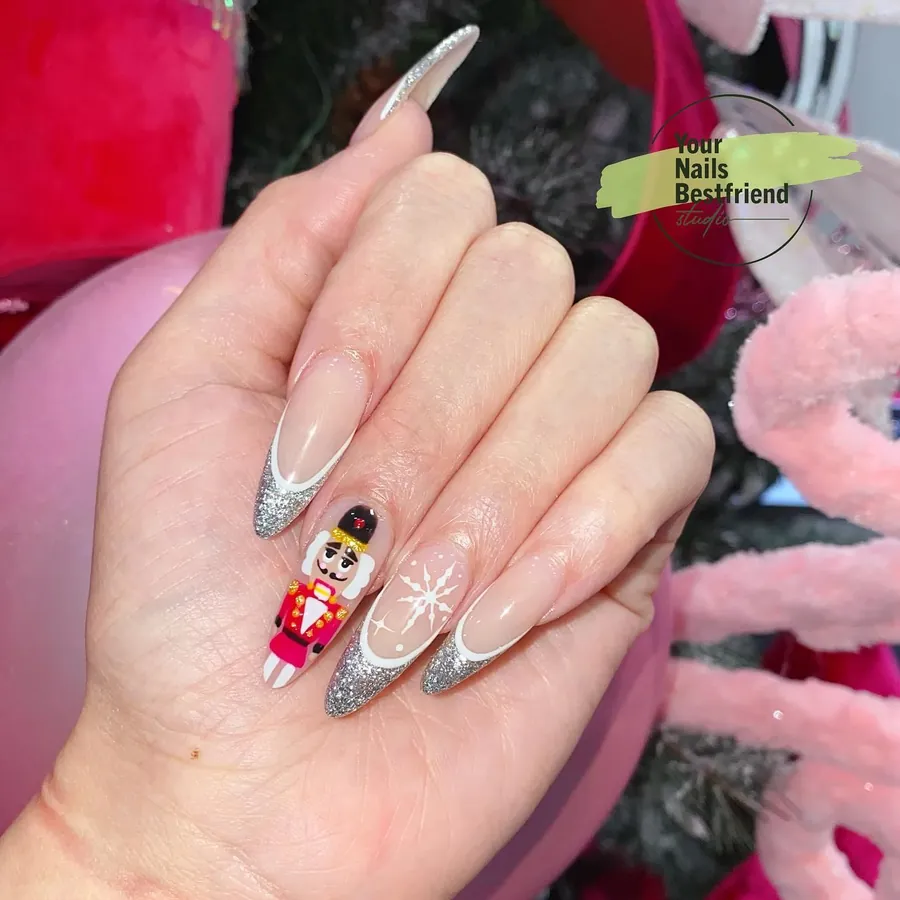
Anchor the set with silver glitter tips in two coats. Paint the nutcracker with red, gold and white polish. Keep the face small and the hat neat. Add the snowflake last with a fine brush and gentle strokes. Clear top coat seals the glitter so it stays in place. Swap the nutcracker for a star if a simpler accent suits the hand.
22. Dotted White Tips in Red
Dainty red dots line the edge of each white tip. Sheer pink tints the base with a soft glossy glow. White covers the tips in a clean solid bright band. Light moves across the gloss and wakes the bright red. Each dot sits neat and even along the long smile line. Red dots give the set a sweet playful festive lift. White leads the set but red adds a small spark.
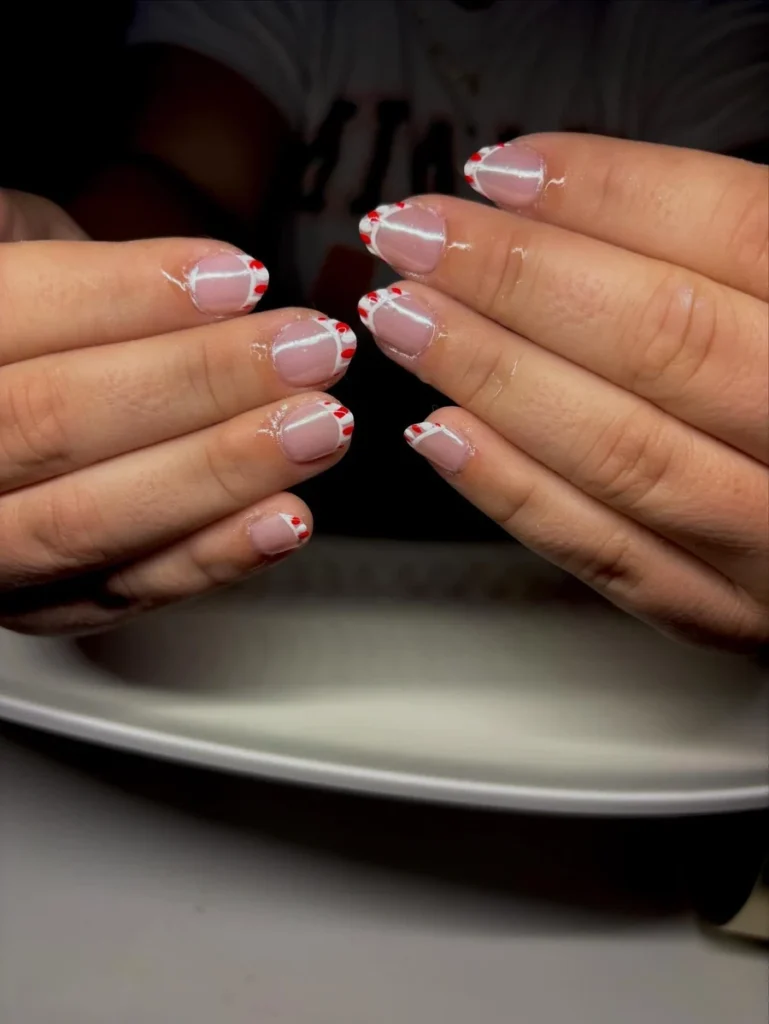
Dot the red dots last with a dotting tool and red polish. Paint the white tips first with two thin coats. Space the dots evenly and keep them small along the edge. Let the dots dry fully before sealing the surface. Seal the set with a clear top coat so the dots stay crisp. Swap red dots for green if a cooler accent suits the hand.
23. Black Tips over Metallic Shimmer
Inky black covers each tip in a bold glossy coat. Shimmery metallic fills the base with a soft grey glow. Light slides across the shimmer and wakes the deep black. Each tip keeps a neat curved edge against the base. Black leads the set but shimmer adds a soft light. Metallic grey gives the set a cool modern lift in daylight. Black and silver share the spotlight in this dark set.
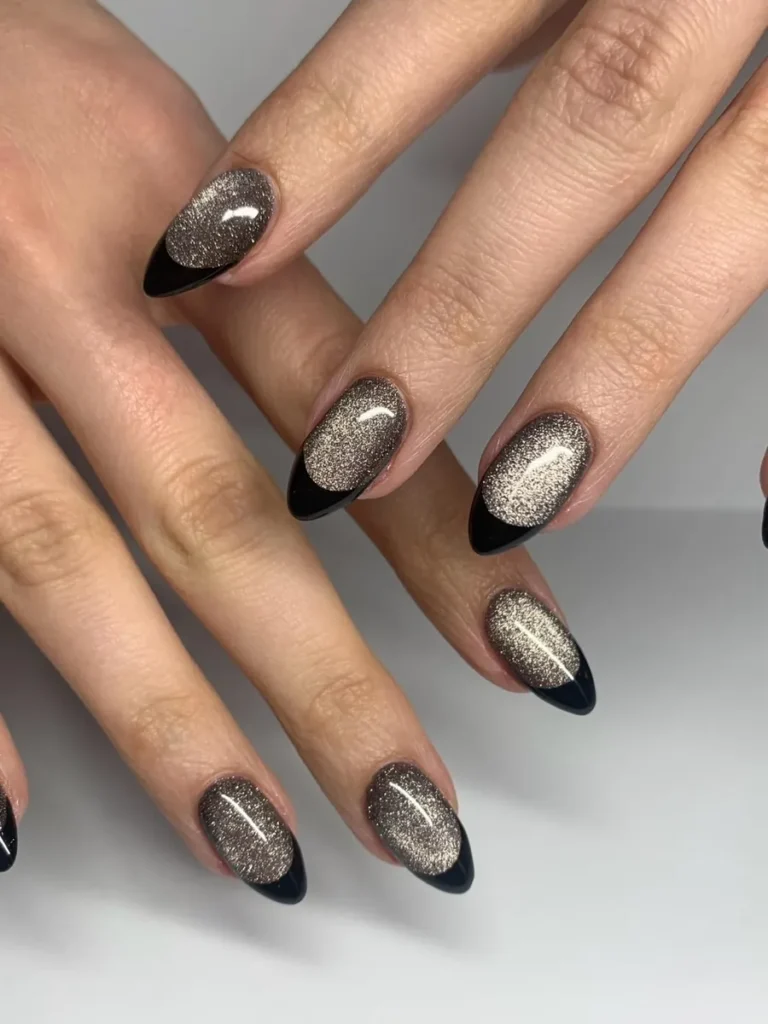
Guard the base first with two thin coats of shimmery polish. Paint each black tip with a flat brush and a steady hand. Keep the smile line level and the edges even. Let the black dry fully before sealing the surface. Seal the set with top coat so the shine stays deep. Swap black for navy if a softer dark tone suits the hand.
24. Starred Tips in Red and Green
Festive stars shine white on bright red and green tips. Deep red covers some tips in a bright glossy coat. Dark green covers the other tips in a rich smooth coat. Tiny rhinestones also sit near the smile line on two nails. Soft nude tints the base with a calm smooth glow. Light catches the stars and wakes both bright colours. Each tip keeps a neat shape against the soft nude.

Scatter white stars across each tip with a fine brush. Paint red tips first and green tips next in turn. Place tiny rhinestones at the tip edge with nail glue. Press the stone flat and it sits level on the nail. Seal the set with top coat and the stars stay bright. Swap the stars for dots if a simpler accent suits the hand.
25. Diagonal Striped Tips in Three Colours
Slanted stripes cross each tip in bright red, white and green. Calm nude washes over the base with a soft smooth glow. Red bands lead the stripes with a bright glossy coat. Thin green lines run beside the bright red on every nail. Light catches the stripes and wakes the colours. Each tip also keeps a neat diagonal edge on every nail. Stripes give the set a bold playful pattern here.
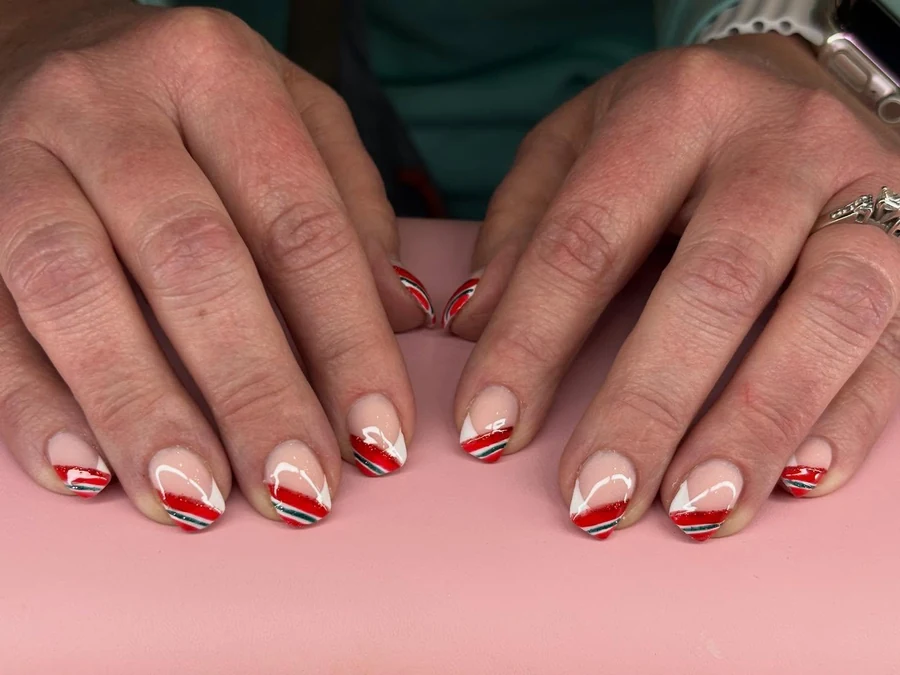
Tape the stripes first and paint red bands with a flat brush. Add white and green lines with a fine striping brush. Keep the stripes slanted and the bands even on each nail. Remove the tape while the polish stays slightly wet. Seal the set with a clear top coat so the lines stay crisp. Swap green for teal if a cooler tone suits the hand.
Conclusion
Tips look best when a lone detail leads and the rest stays calm. Thin coats dry evenly and keep glitter smooth beneath the top coat. Capping the free edge each time helps Christmas French tip nails resist chips, and a small file nearby smooths rough spots before they snag. Test the tip shade against skin tone in daylight before committing to a full set. Pick the design that fits the week ahead and wear this festive French manicure with care.

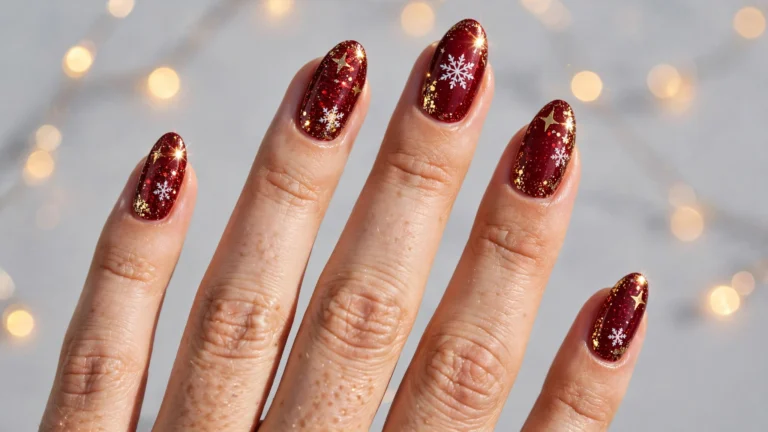
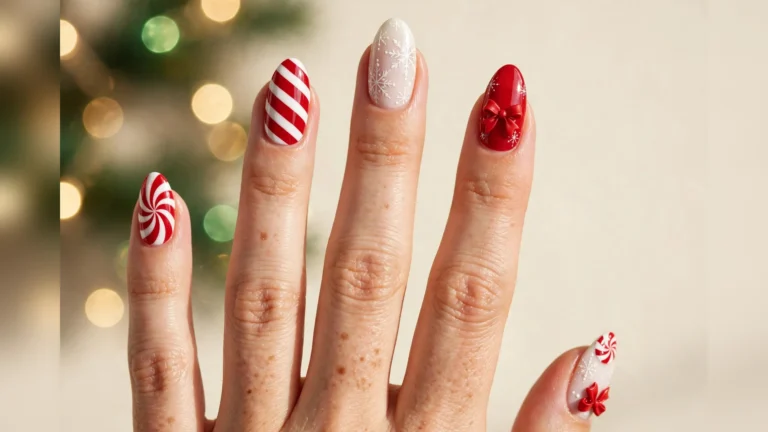

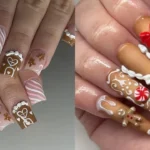

[…] color sits only at the nail ends in the French style, with white snowflakes above it. Candy swirls twist across two nails in red and white. Hands hold a […]
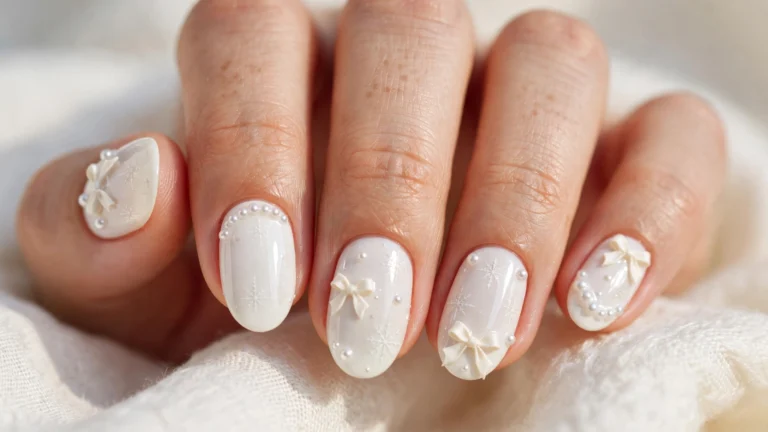
[…] White French tips cap each nail over a sheer nude-pink base. Small pearl beads line the edge of the tip on several nails in neat rows. White three-dimensional bows sit on two nails, and thin snowflake lines mark a third. Tips stay crisp and white, but the base keeps the set soft. Hands rest on white fur, which echoes the pale tones of the design…. […]
[…] pink glitter fills most nails, and white lines cut diagonal stripes. Pink glitter French tips curve over nude bases, with white snowflakes near each tip. White snowflakes sit low on some nails, […]