

Holiday parties, school concerts, and long shifts all land on the same hands, so a manicure has to look good without demanding constant attention. Most people love the idea of Christmas nail art but worry that busy patterns will chip, clash with outfits, or take an hour to paint. That is where simple christmas nails make sense: soft bases, a single small motif, and polish that stays tidy for days. This collection covers red, green, nude, and pink palettes, with tiny snowflakes, holly, bows, and gold details. Each idea works as an easy holiday nail design you can recreate at home with a few basic tools.
1. Peachy Nude with Gold Stars
Warm peachy nude washes each nail in a soft, sheer glow. Shimmer shifts across the surface as light moves, giving the base a quiet glow. One small gold star sits on every nail, flat against the polish and catching light. Gold stays bright against the nude. Stars rest near the middle of each nail, spaced evenly from cuticle to tip. Gloss seals the shimmer, so the nude stays bright and the stars stay sharp.
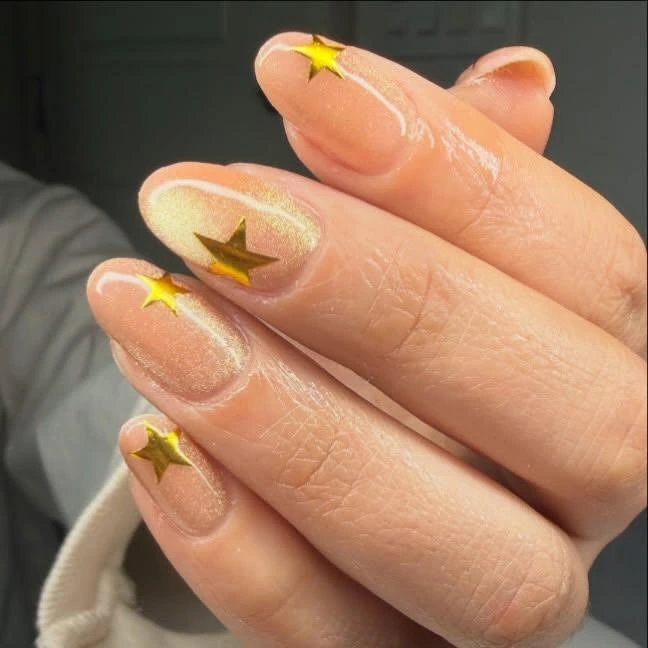
Press a thin sheer coat over clean nails, then cure or dry it fully. Place one star decal near the middle of each nail with tweezers. Smooth the edges flat, because lifted corners catch on fabric. Seal the decals with a glossy top coat in one smooth pass. Swap the star to a dot when the set needs a calmer accent. Refresh the top coat when shine fades, since wear shows first at the tips.
2. Emerald Green with Gold Glitter Accent
Jewel emerald green coats four nails in a rich, glossy shade. Gold glitter fills the ring finger over the same dark base, dense and sparkling. Green reads almost black in low light, while glitter catches every lamp. Cream knit cuff rests at the wrist, softening the dark colour. Window light falls across the hand, so the green keeps a cool, jewel tone.
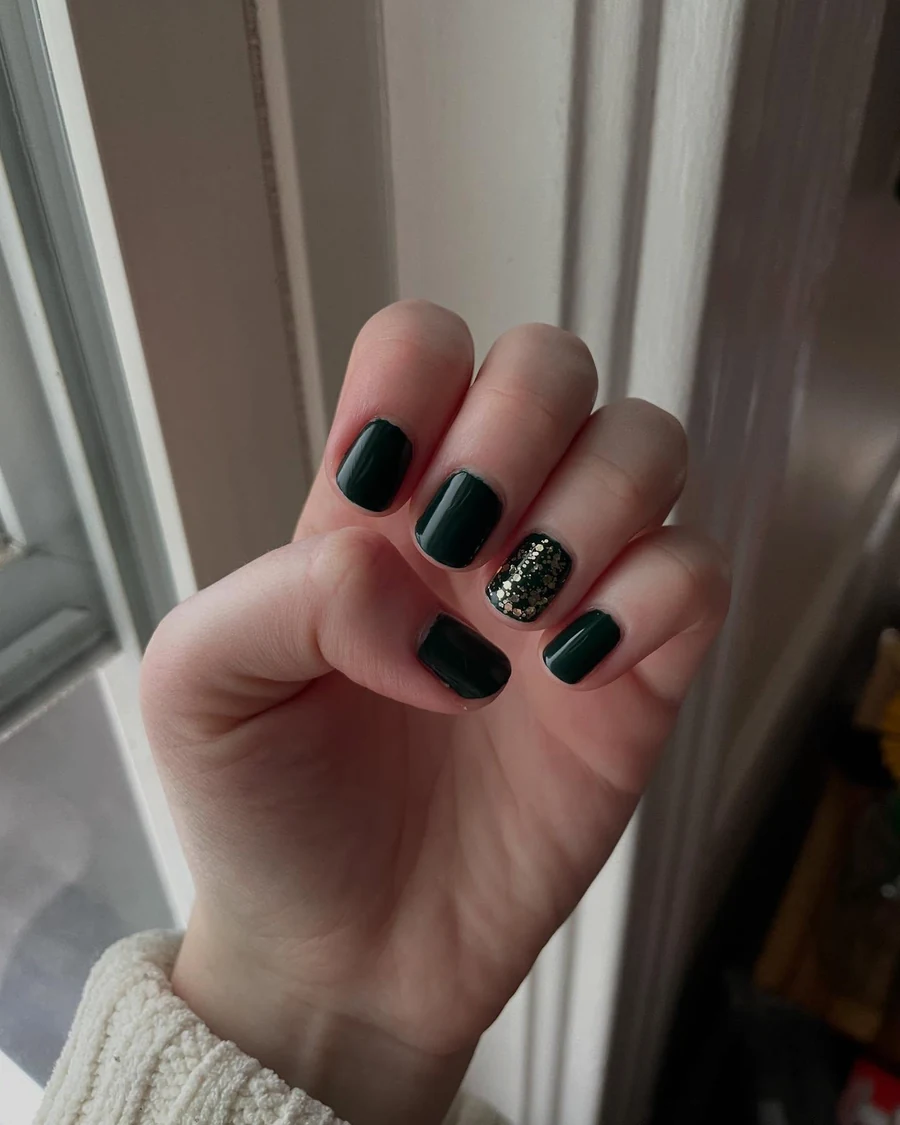
Lay down two thin coats of the dark shade, then let each dry fully. Pack gold glitter onto the accent nail with a flat brush while the coat stays tacky. Press the glitter flat, because loose grains lift under top coat. Clean the cuticle line with a small brush, so edges stay neat. Seal twice for a smooth finish, since glitter texture can feel rough. Touch up the tips promptly, as dark shades show wear fast.
3. Creamy White with Red Dots and Bow
Creamy white gloss covers most nails in a smooth, even coat. Small red dots scatter across the index finger in neat rows. Red bow line art sits on the ring finger, drawn in thin, looping strokes. White and red sit in sharp contrast, so the two accents stand out at once. Gloss keeps the white bright, while the dark car interior frames the hand behind it.
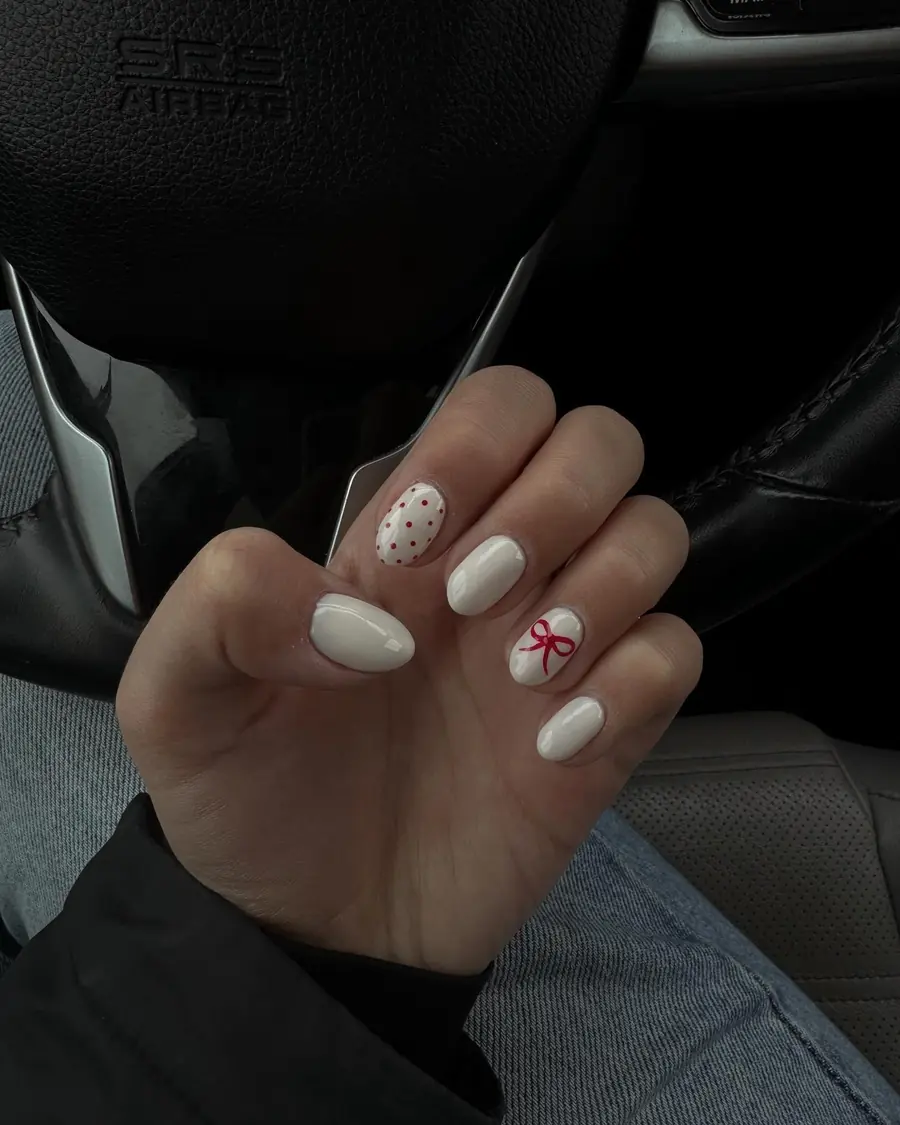
Brush the white base on in two thin coats, then let each dry fully. Dot the red spots with a dotting tool, spacing them evenly across the nail. Draw the bow with a thin brush, starting from the centre knot outward. Keep the loops small, because wide loops crowd the nail. Clean stray marks with a small brush dipped in remover before sealing. Seal with a glossy top coat, since white shows every ridge.
4. Sheer Pink with Four Tiny Motifs
Sheer nude pink washes each nail in a soft, pale glow. One tiny motif sits near the tip of every nail. Red striped bauble, green tree, and red and white candy cane each take one nail. White pudding with holly takes the last nail. Pale dots scatter around the motifs like falling snow. Gloss keeps the nude bright, so the small pictures read clearly from a distance.
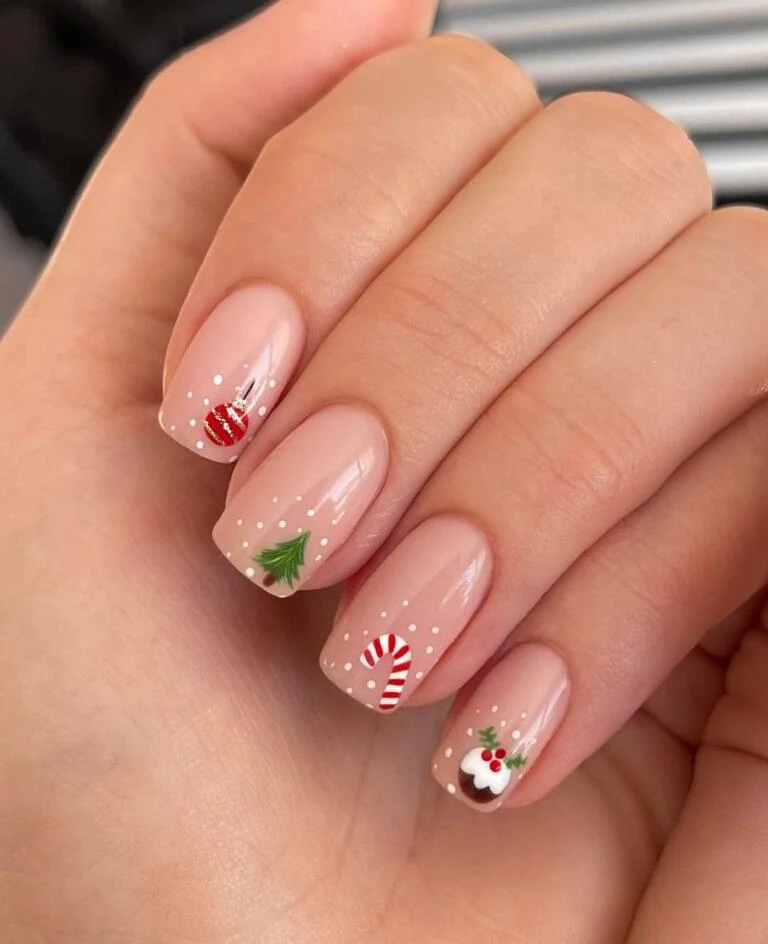
Start with a sheer nude base in two thin coats, then let each dry fully. Sketch each motif near the tip with a thin brush, keeping it small. Paint the tree first, because the bauble needs a dry base beside it. Dot the snow with a dotting tool, spacing dots unevenly. Seal with two coats of top coat, since tiny details wear fast without cover. Swap any motif for one dot when the set needs less detail.
5. Red Glitter with One White Snowflake
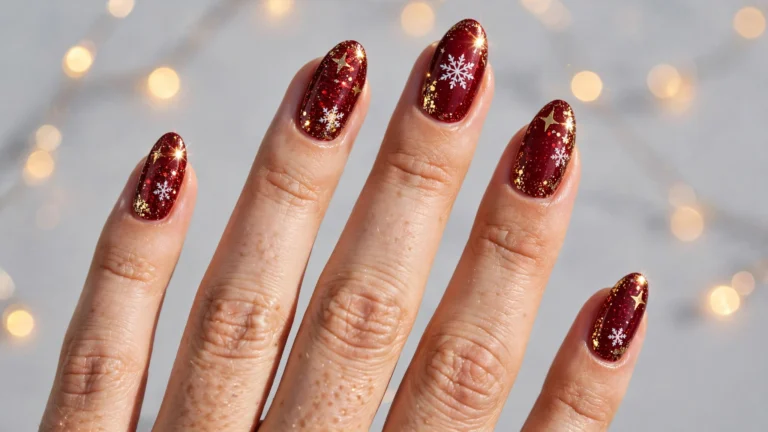
Bright red glitter covers every nail in a dense, sparkling coat. One large white snowflake rests on the ring finger, crisp against the red. Glitter flecks of varied size catch light across each nail and fingertip. Red runs rich and dark, so the white flake reads bold and bright. Gloss seals the sparkle, and the flake stays sharp from every angle.
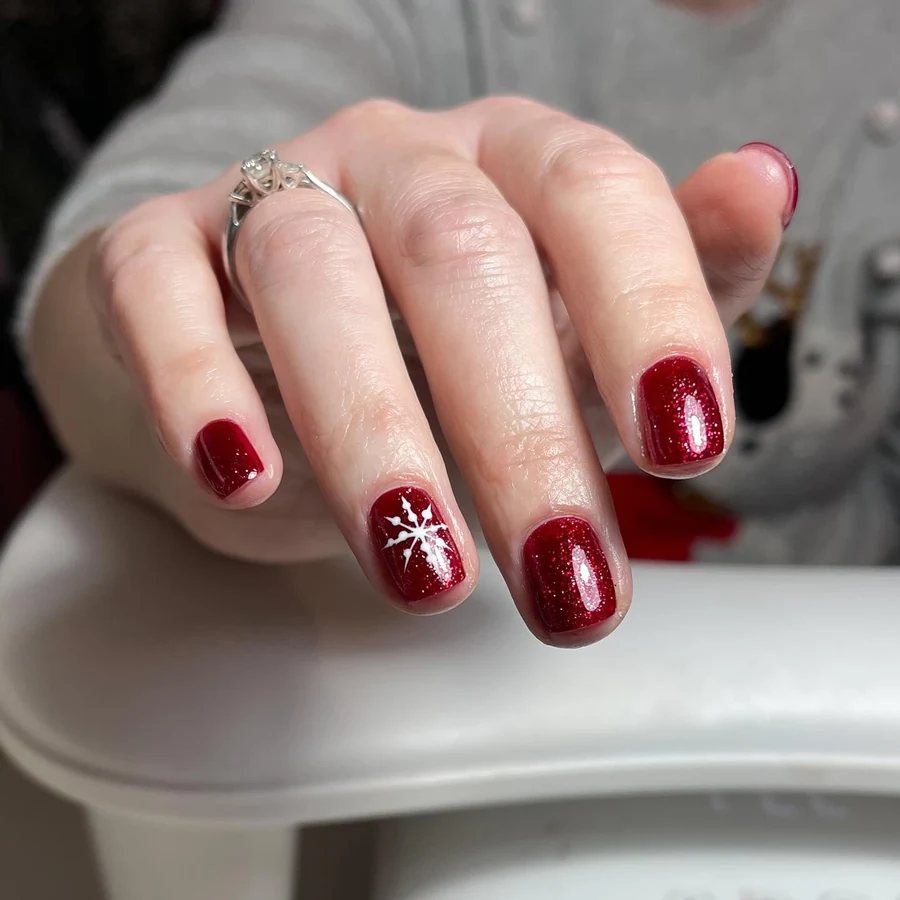
Work glitter polish in thin coats, then let each coat dry before the next. Draw the flake with a fine brush, keeping the arms even and centred. Press the glitter flat with a wrapped fingertip, because grains can stand up. Wipe the cuticle line with a small brush, so edges stay neat. Seal with two layers of top coat, since glitter needs a smooth cover. Swap the flake to another finger when the set needs balance.
6. Pale Pink with White Starbursts
Pale pink gloss coats every nail in a soft, even shade. Two accent nails carry white starbursts, drawn with fine lines from a bright centre. White dots scatter beside the stars, spaced unevenly across the nail. Thin curved white line sweeps across one accent, linking the stars and dots. Gloss keeps the pink bright, so the white detail reads crisp and clean. Script watermark sits on skin at the edge, clear of the nails.
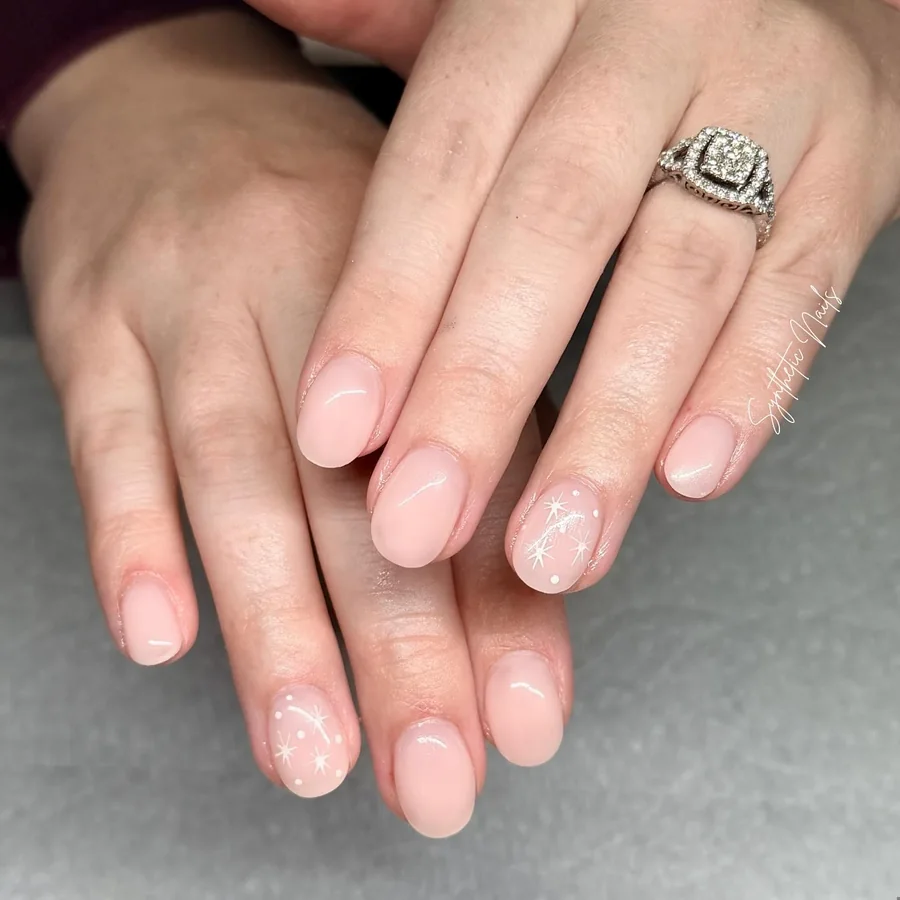
Begin with the pale base in two thin coats, then let each dry fully. Draw each starburst outward with a fine brush, keeping the arms level. Place the small spots with a dotting tool, spacing them at random. Add the curved line last, sweeping it over the accent in one smooth stroke. Seal with two coats of top coat, since fine white lines wear fast. Hold a spare brush ready, because white shows every stray mark.
7. Green Nails with Gold Foil Trees
Vibrant green covers most nails, some matte and some glossy. Gold glitter fills two accent nails in a dense, sparkling coat. Foil trees sit on green, each shape built from uneven flakes and bright lines. White flecks mark snow on the trees, small and sparse. Green reads bold and bright, so gold stands out sharply against it. Magazine lettering shows at the right edge, partly cropped and out of focus.
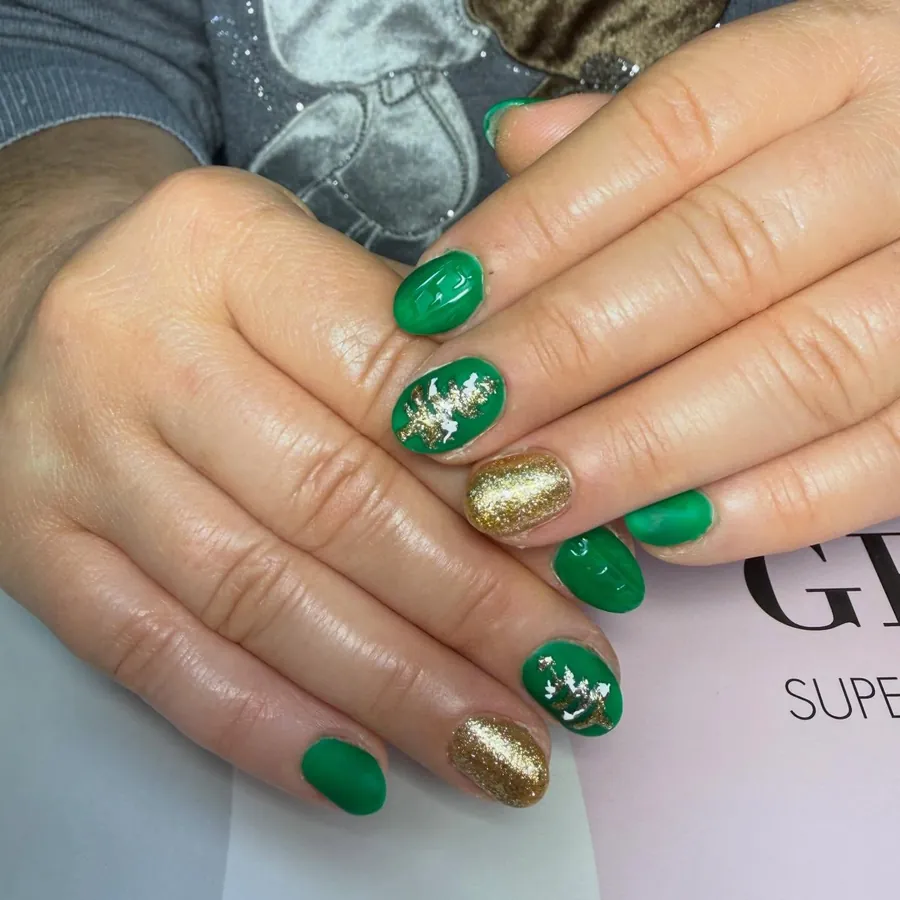
Lay the green base in two thin coats, then let each dry fully. Press gold sparkle onto the accent nails while the coat stays tacky. Lay the foil flakes in tree shapes with a fine brush, pressing each piece flat. Add the pale flecks last with a dotting tool, keeping them sparse. Seal with two coats of top coat, since foil edges lift without cover. Wipe the cuticle line clean before sealing, because green stains skin fast.
8. Pink Nails with Red Glitter French
Light pink gloss covers each nail in a smooth, even coat. Red glitter tips cap the nails in a bold French edge. Two red bows sit on pale pink, drawn in thin line art with glitter centres. Glitter sparkles across the tips, catching light at every angle. Pink stays soft beside the red, so the set feels calm despite the sparkle. Pale pink background frames the hand, keeping the focus on the tips and bows.
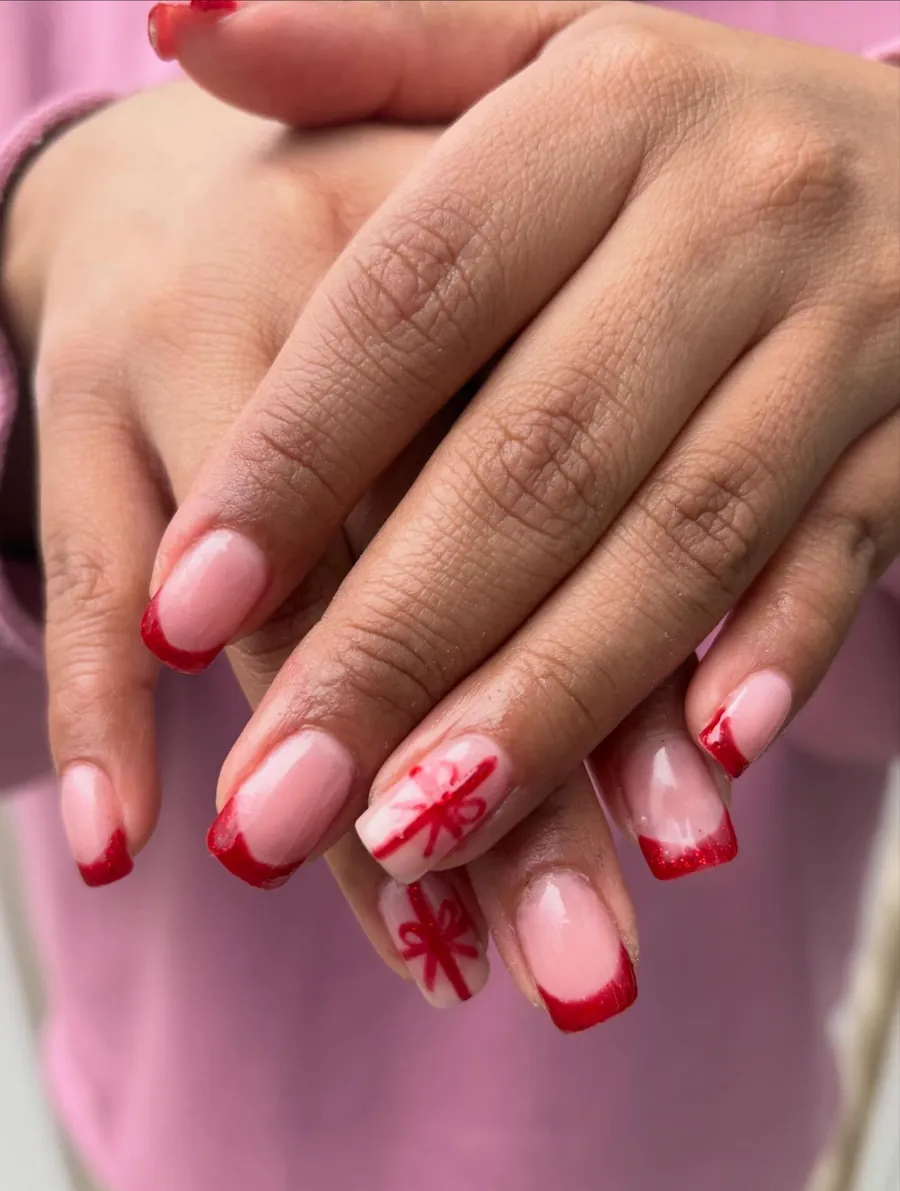
Brush the pink base on in two thin coats, then let each dry fully. Draw the French edge with a thin brush, keeping the curve level. Pack red glitter onto the tips while the polish stays tacky. Sketch each bow from the centre knot outward, keeping the loops small. Seal with two coats of top coat, since glitter needs a level cover. Wipe stray marks with a spare brush, because red stains skin fast.
9. Pale Pink with Gold Leaf Vines
Sheer nude pink washes each nail in a pale, warm glow. Gold foil vines curl near the tips, each strand thin and branching. Small gold leaves sit along the vines, shaped like pointed ovals. White dots scatter between the vines, small and sparse like berries. Foil catches lamplight, so the vines glow against the nude. Dark background frames the hand, keeping the focus on the gold detail.
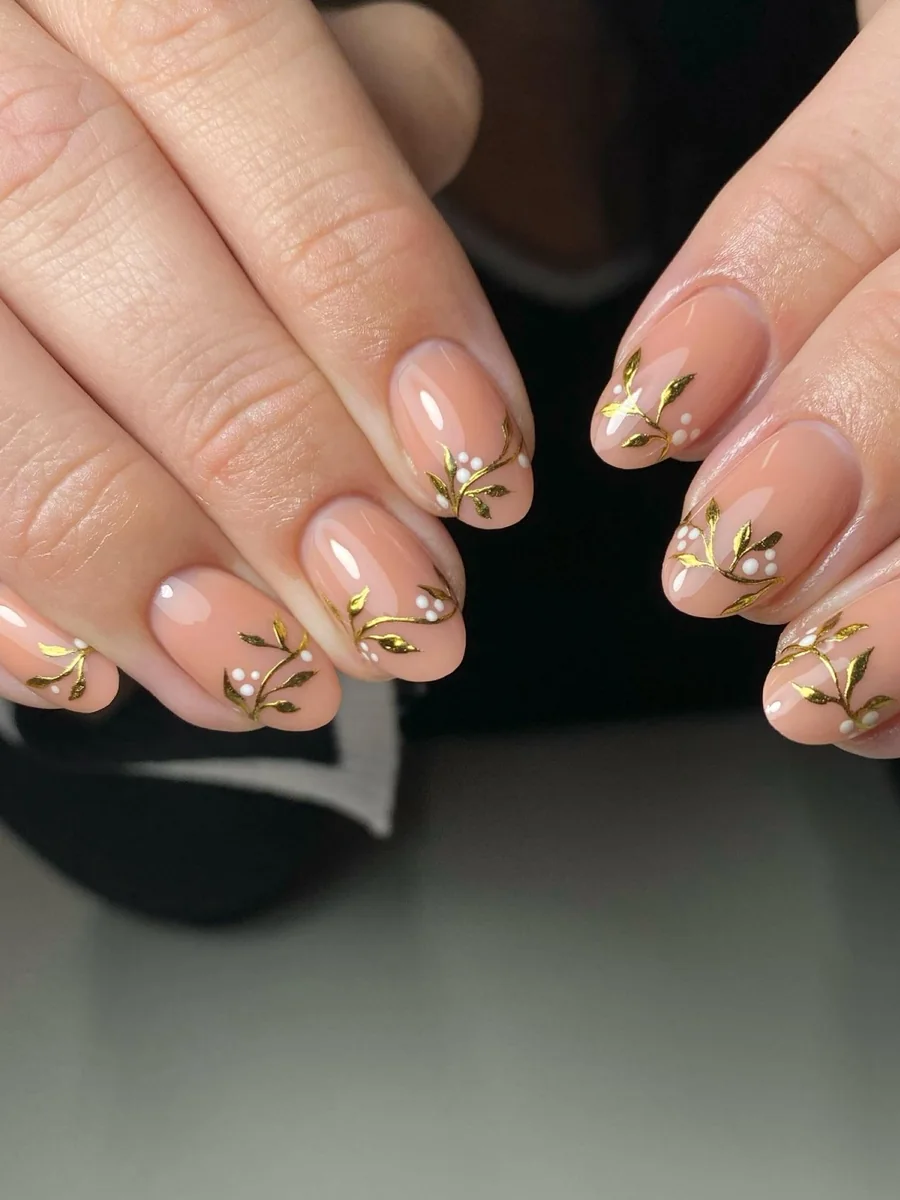
Begin with the sheer base in two thin coats, then let each dry fully. Lay the foil vines with a fine brush, curling each line toward the tip. Press the foil flat while the coat stays tacky, because loose foil lifts. Set the leaves near the vines, spacing them unevenly. Dot the white berries last with a dotting tool, keeping them sparse. Seal with two layers of top coat, since foil edges lift without cover.
10. Deep Red with White and Gold Dots
Deep red gloss covers every nail in a rich, even coat. White dots scatter across the red, varied in size and spacing. Gold dots sit between the white, smaller and sparser. Gloss runs from cuticle to tip, so light catches the dots and the red alike. Gold rings rest on the fingers, warming the deep colour. Watermark text sits on skin between the fingers, clear of the nails.
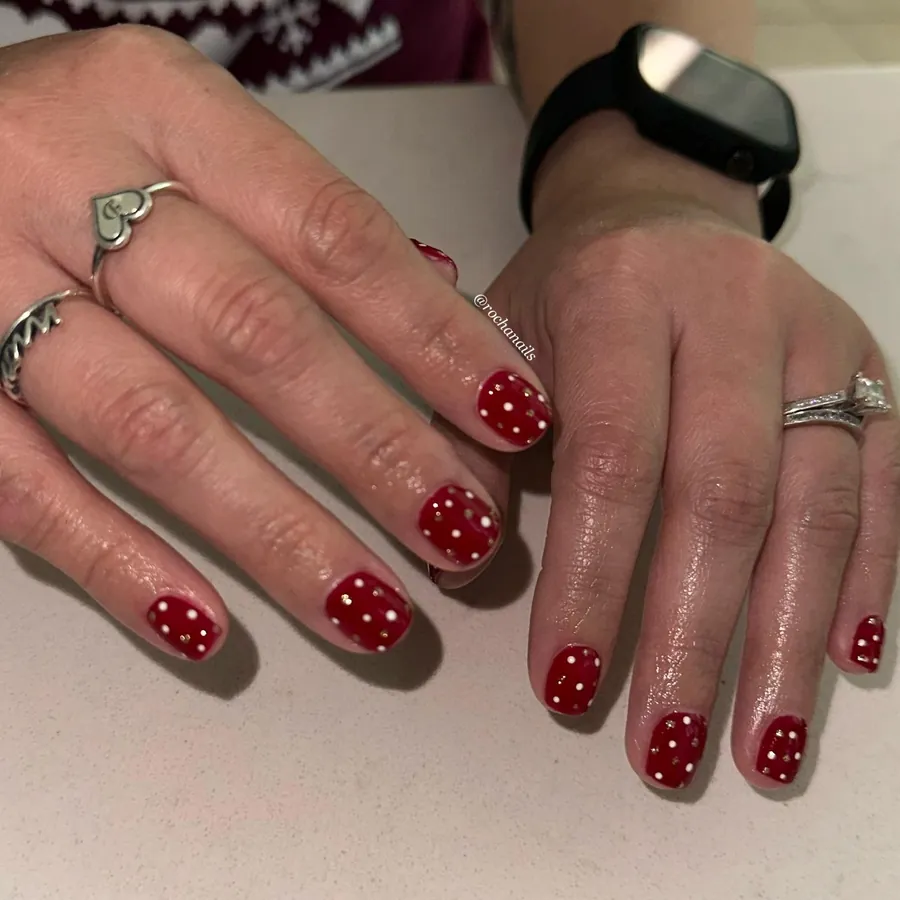
Start with the red base in two thin coats, then let each dry fully. Dot the white spots with a dotting tool, spacing them unevenly. Add the gold spots last, keeping them smaller and sparser. Vary the spacing, because even rows look formal. Seal with two layers of top coat, since dots wear fast without cover. Clean the cuticle line with a small brush, as red stains skin fast.
11. Peach Chrome with Gold Foil Edges
Iridescent peach pink shifts across nails, glowing pink in one light and peach in another. Gold foil edges trace the tips and sides in thin, uneven lines. Foil flecks sit along the edges, catching lamplight as the hands move. Two hands frame a white tree, with colourful baubles behind the nails. Chrome stays soft and sheer, so the gold reads delicate against it. Rings rest on two fingers, adding warm metal beside the foil.
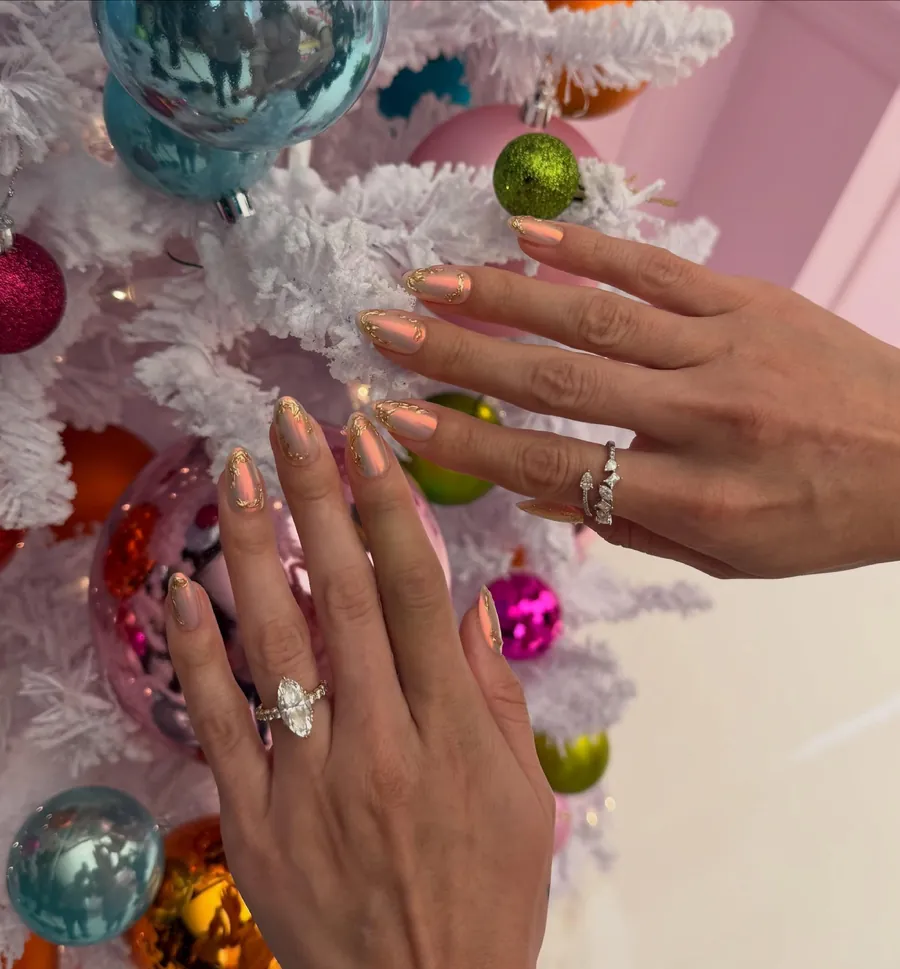
Coat the nails with pale pink in two thin layers, then let each dry fully. Rub the powder over the base with a soft applicator while it stays tacky. Wipe away excess powder, because loose grains dull the shine. Lay gold foil along the edges with a fine brush, pressing each piece flat. Seal with two coats of top coat, since the shine needs a smooth cover. Keep the foil light at the sides, as thick foil lifts.
12. Sheer Pink with Red French Outline
Light pink washes each nail in a pale, glossy glow. Thin red line traces the French edge, outlining each tip in bright red. One red snowflake sits on the ring finger, small and crisp. Red line stays fine and even, so the pink base reads calm and clean. Gloss runs from cuticle to tip, keeping the pink bright. Hand rests on a pale surface, with the design clear on every nail.
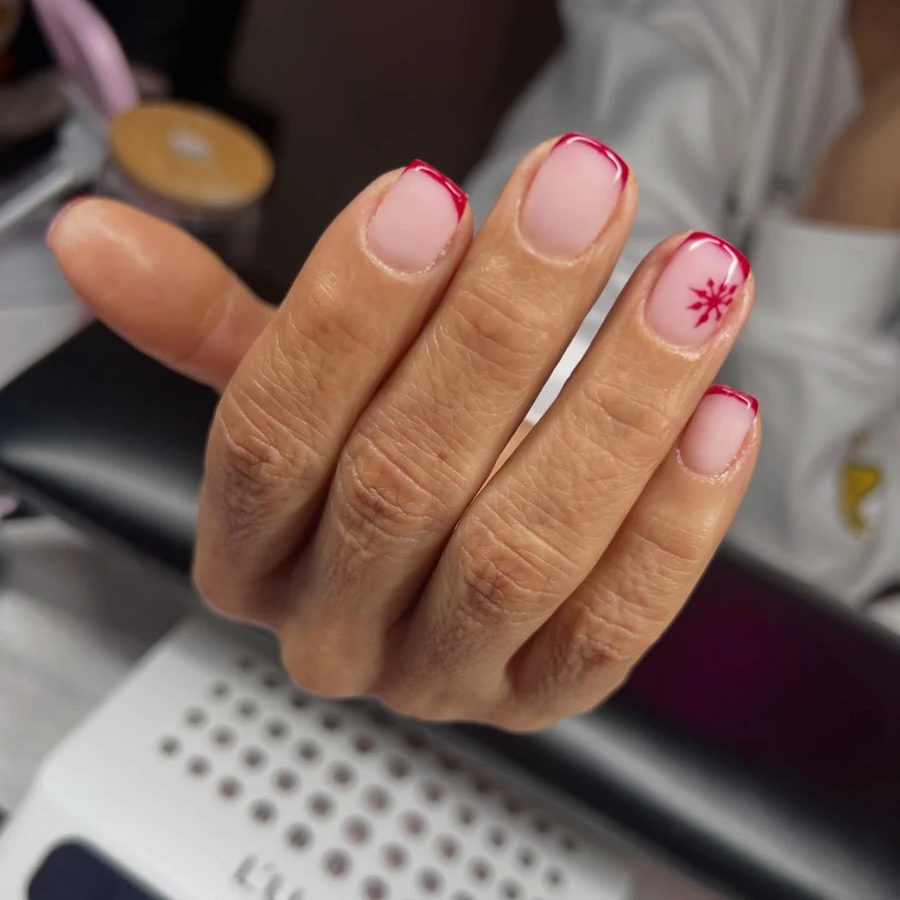
Work the pale base in two thin coats, then let each dry fully. Draw the curved edge with a fine brush, keeping the line thin. Add the flake last, starting from the centre and adding each arm. Keep the flake small, because a large flake crowds the tip. Seal with two coats of top coat, since thin lines wear fast without cover. Clean stray marks with a small brush, as red stains skin fast.
13. Red and Green Metallic with Gold Stars
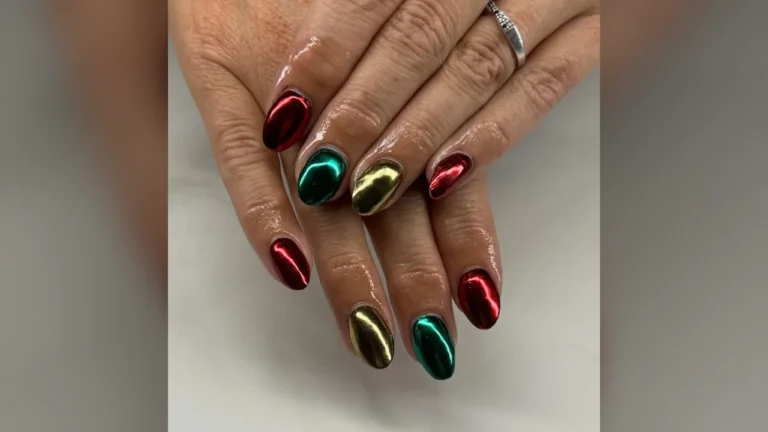
Metallic red and shimmery green alternate across the nails in bold, glossy bands. One red nail carries a gold starburst with a clear gem at its centre. Another red nail shows a gold zigzag tree, crowned with a small gold star. Green nails shimmer between the red, deep and cool. Gold accents catch lamplight, so the set reads festive without extra detail. Gloss seals the metal shine, keeping each colour bright.
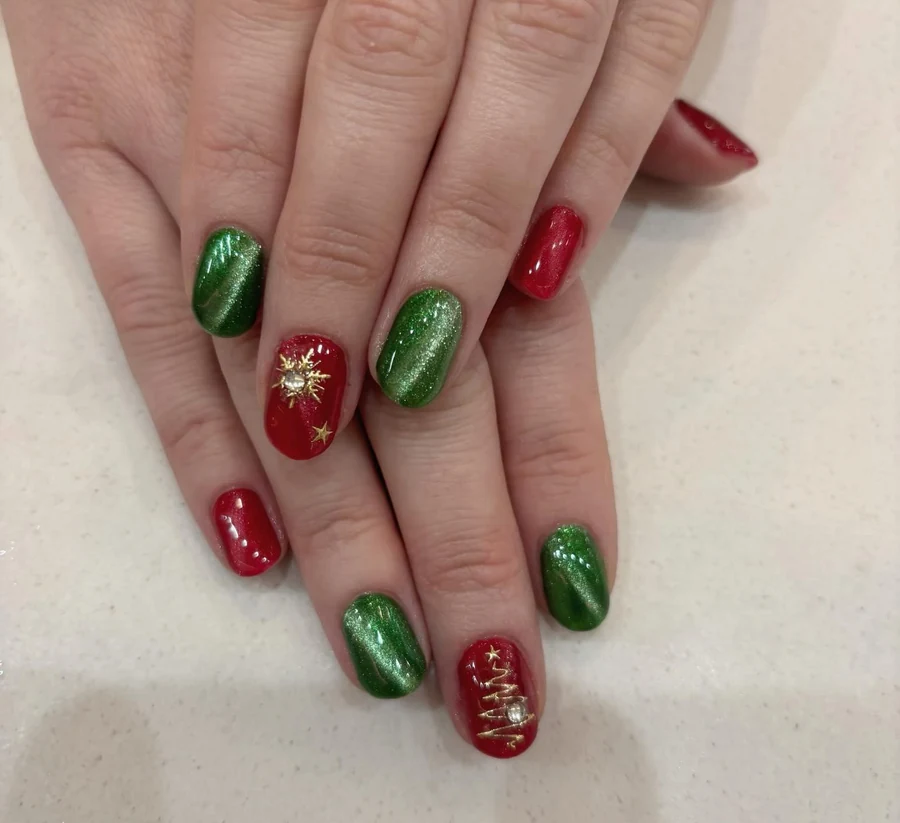
Cover the red and green nails in two thin coats, then let each dry fully. Place the gem first with a dot of sticky base, pressing it flat. Draw the zigzag tree with a fine brush, keeping each turn even. Add the starburst last, starting from the middle and adding each ray. Seal with two coats of top coat, since gems need a firm cover. Keep the gems small, because large gems catch on fabric.
14. Soft Pink with White French and Bow
Nude pink gloss covers each nail in a soft, warm coat. White French tips cap the thumb and pinky in a clean, pale edge. Thin bow line art sits on the middle finger, drawn in looping strokes. Star line art rests on the ring finger, fine and delicate. Pale pink stays calm beside the white, so the set reads quiet and neat. Gloss runs from cuticle to tip, keeping the nude bright.
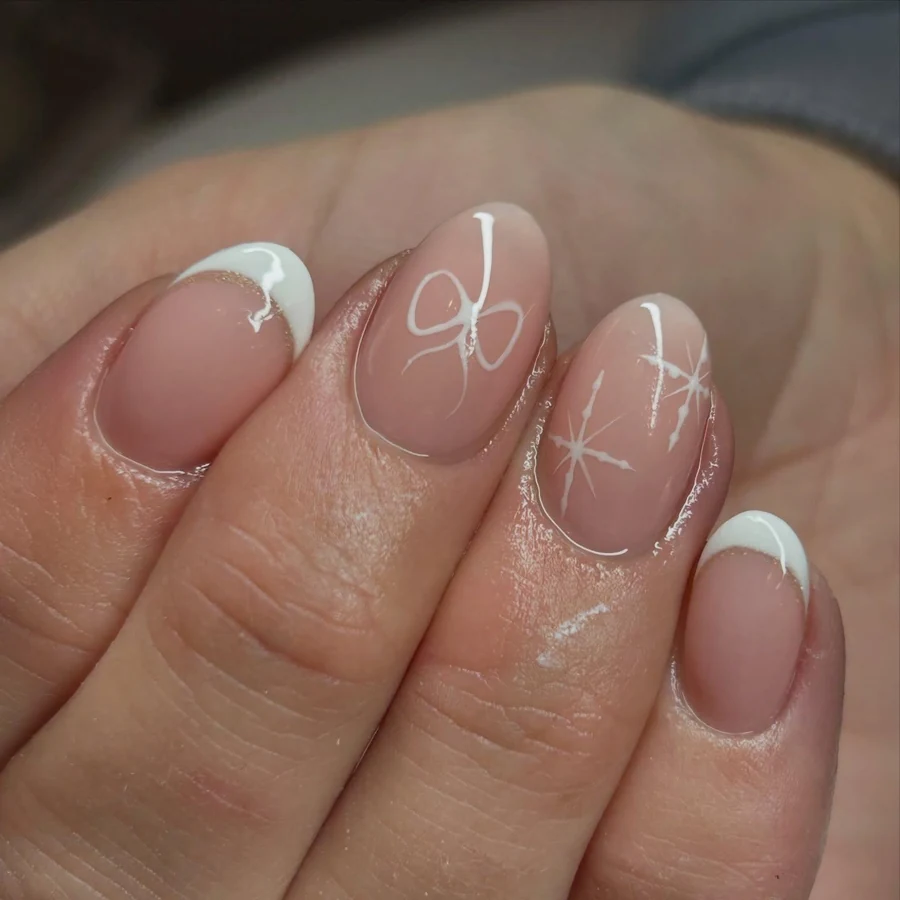
Cover the pink base in two thin coats, then let each dry fully. Draw the curved edge with a thin brush, keeping the curve level. Sketch the bow from the knot outward, keeping the loops small. Add the star last, starting from the middle and adding each point. Seal with two coats of top coat, since fine lines wear fast without cover. Clean stray marks with a spare brush, as pale polish shows every slip.
15. Burgundy with Gold Trees and Stars
Rich burgundy gloss covers every nail in a dark, even coat. Gold starbursts scatter across the set, each shape built from fine lines. Zigzag trees rise on several nails, crowned with small gold stars. Tiny gold dots sit between the trees, adding quiet sparkle. Burgundy runs dark and warm, so gold reads bright against it. Red sweater frames the hand, keeping the focus on the gold detail.
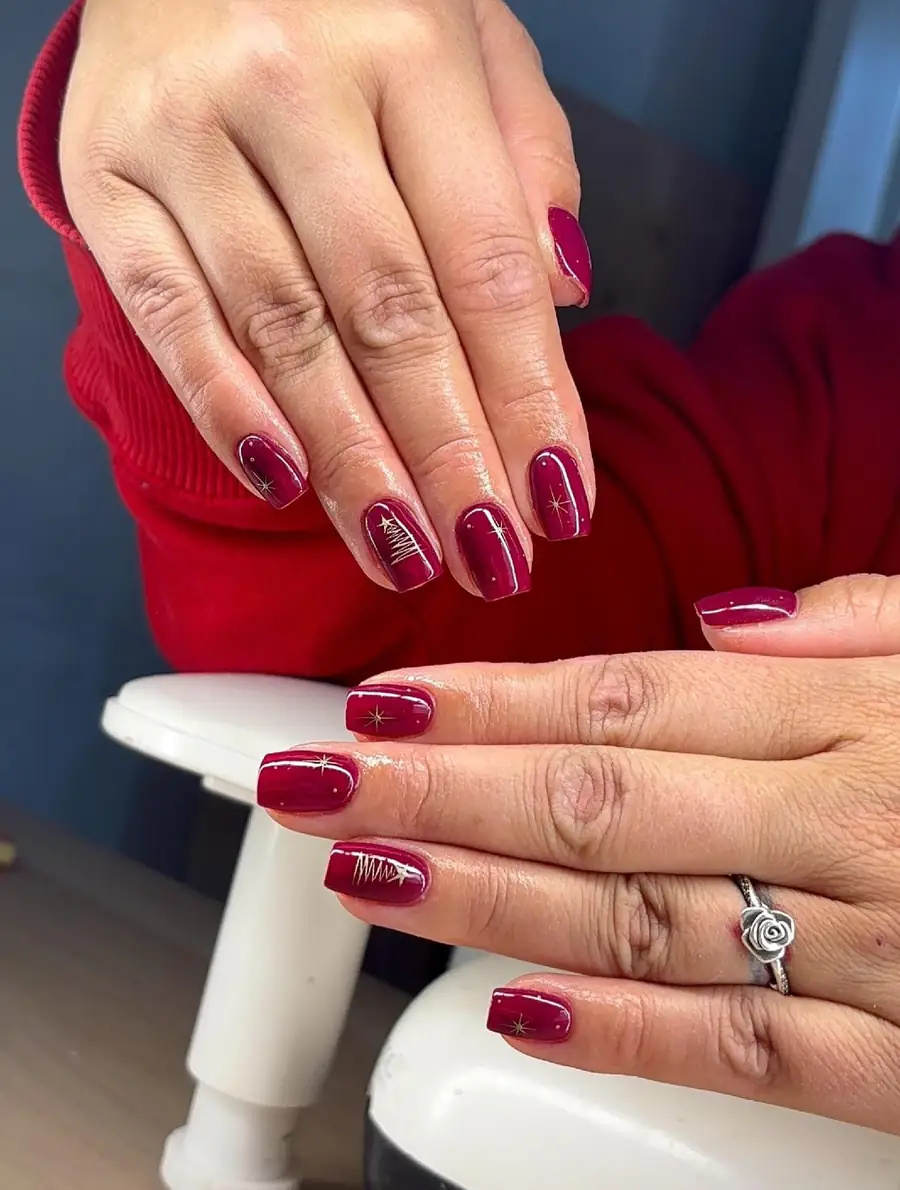
Apply the deep base in two thin coats, then let each dry fully. Draw each tree with a fine brush, keeping each turn even. Add the starburst last, starting from the middle and adding each arm. Dot the tiny gold spots with a dotting tool, spacing them unevenly. Seal with two coats of top coat, since the lines wear fast without cover. Clean stray marks with a spare brush, as dark shades stain skin fast.
16. Pink Nails with Confetti Dots
Soft nude pink washes each nail in a pale, glossy glow. Dots in red, green, white, and metallic gold scatter across the set in varied sizes. Gold dots catch light beside matte red and green, adding quiet sparkle. White dots sit between the colours, small and sparse. One thumb angles oddly, showing its underside, while the other nine nails stay clear. Gloss runs from cuticle to tip, so the dots read crisp and bright.
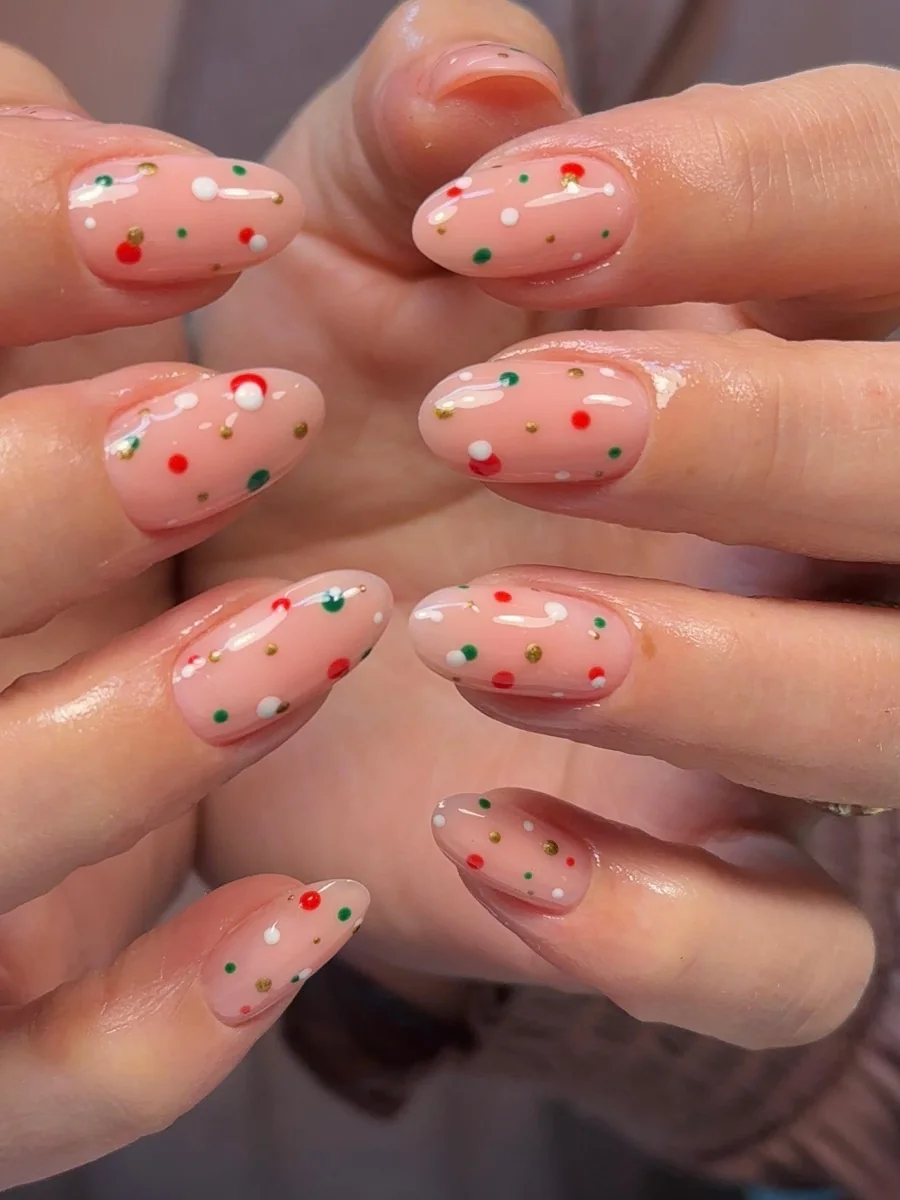
Apply the sheer base in two thin coats, then let each dry fully. Dot the red and green spots first with a dotting tool, spacing them unevenly. Add the white spots next, keeping them smaller. Place the gold spots last, pressing the glitter flat. Seal with two coats of top coat, since dots wear fast without a cover. Vary the spacing, because even rows look formal.
17. Crimson Glitter with Striped Wave Nails
Metallic red glitter covers several nails in a dense, sparkling coat. Nude nails carry diagonal wavy stripes in dark green and white. Other nude nails show dot trees in red, green, and white, topped with a gold star. Red glitter nails alternate with striped and tree nails, keeping the set lively. Watermark text sits on skin at the right edge, clear of the nails. Gloss seals the glitter, so the waves and trees read crisp.
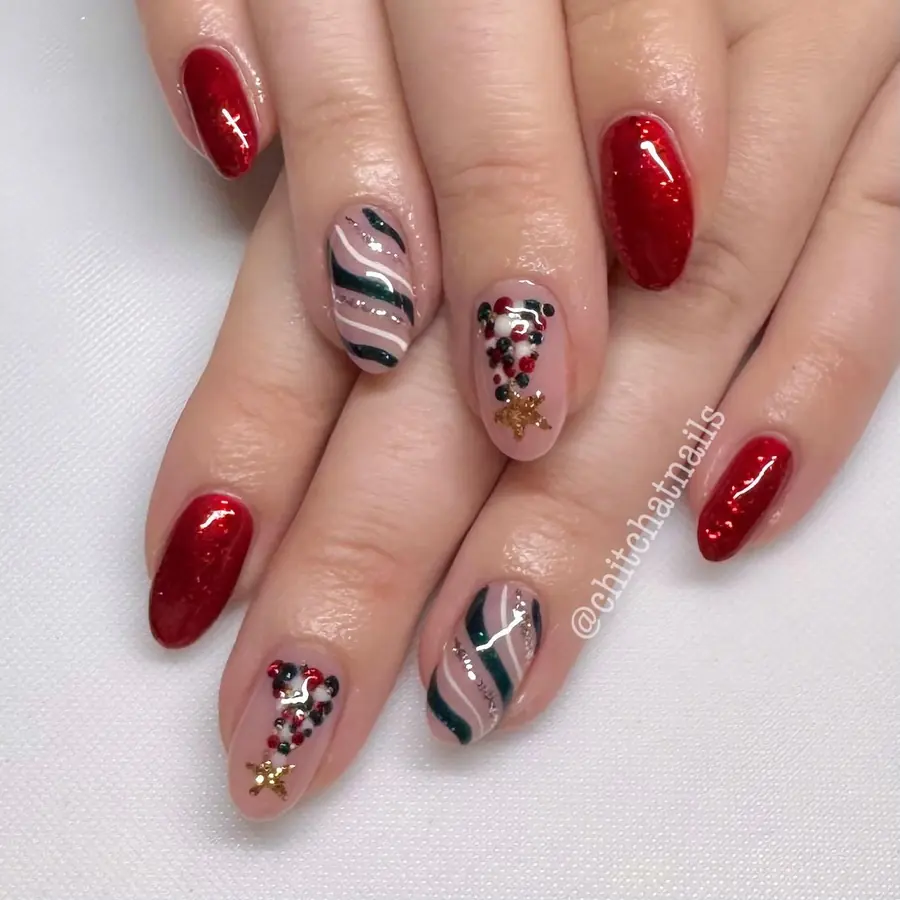
Coat the sparkle nails in thin coats, then let each coat dry fully. Brush the pale base over the rest in two thin coats. Draw the waves with a fine brush, keeping each wave even. Dot the shapes with a dotting tool, building each tree from small spots. Add the star last, placing it at the top of each tree. Seal with two coats of top coat, since glitter needs a smooth cover.
18. Nude Pink with Red and Green Crossed Lines
Milky nude pink washes each nail in a pale, sheer gloss. Two nails carry thin crossed lines in red and green, forming a simple X. Red runs diagonally from cuticle toward the tip, while green cuts across it in a level stroke. Other nails stay plain, so the two marked nails read clearly against the calm base. Gloss keeps the pink bright, and the lines stay crisp from every angle.
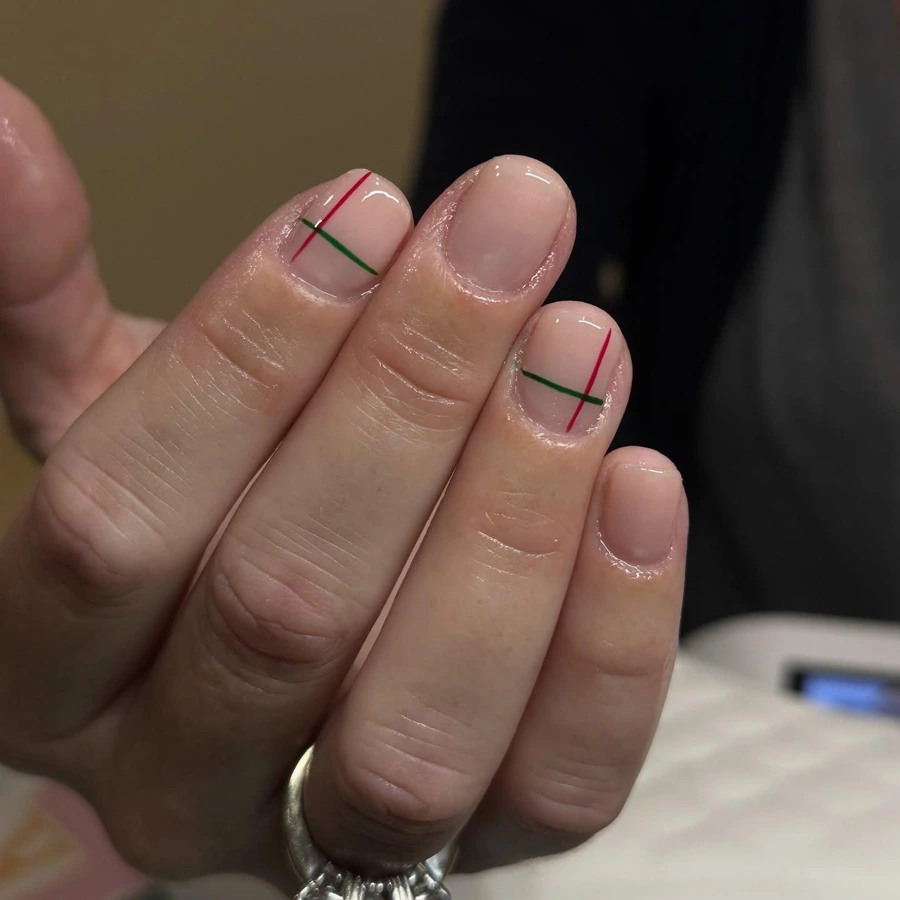
Draw the crossed lines with a striping brush after the base dries fully. Load the brush lightly, because thick paint makes the lines bleed. Paint the red line first, then add the green line across it. Keep both lines thin, and the X stays light against the pink. Seal with a glossy top coat, smoothing the brush from cuticle to tip. Swap green for white when the set needs a softer contrast.
19. Burgundy and Pink with Gold Bows
Dark burgundy and pale pink alternate across the nails in a rich, two-tone split. Gold bow line art sits on the burgundy nails, drawn in thin, looping strokes. Dots and starbursts scatter across the pink nails, small and sparse. Pink nails also carry burgundy French tips, adding a third pattern to the set. Burgundy keeps dark and warm, so gold reads bright against it. Gloss runs from cuticle to tip, keeping each colour bright.
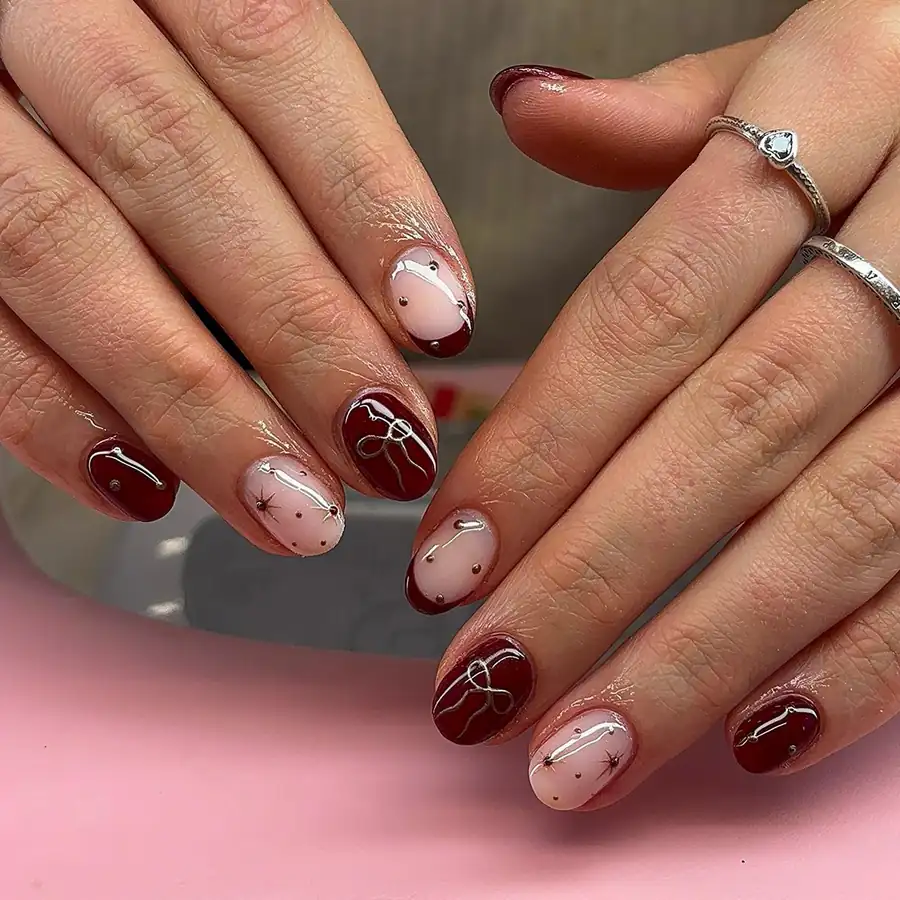
Use burgundy first, painting two thin coats, then let each coat dry fully. Brush pale pink over the rest in two thin coats. Sketch each bow from the knot outward, keeping the loops small. Dot the gold spots with a dotting tool, spacing them unevenly. Draw the burgundy tips with a thin brush, keeping the curve level. Seal with two coats of top coat, since thin lines wear fast without cover.
20. Blush Pink with Red Ribbon Lines
Pale nude pink washes each nail in a soft, glossy glow. Thin red glitter lines wave across the nails like ribbons, curving from cuticle to tip. Red glitter bow sits on the ring finger, bold against the nude. Glitter flecks catch light along the ribbons, adding quiet sparkle. Christmas tree stands behind the hand, with pink knit at the edge. Ribbon lines stay fine and even, so the set reads calm and neat.
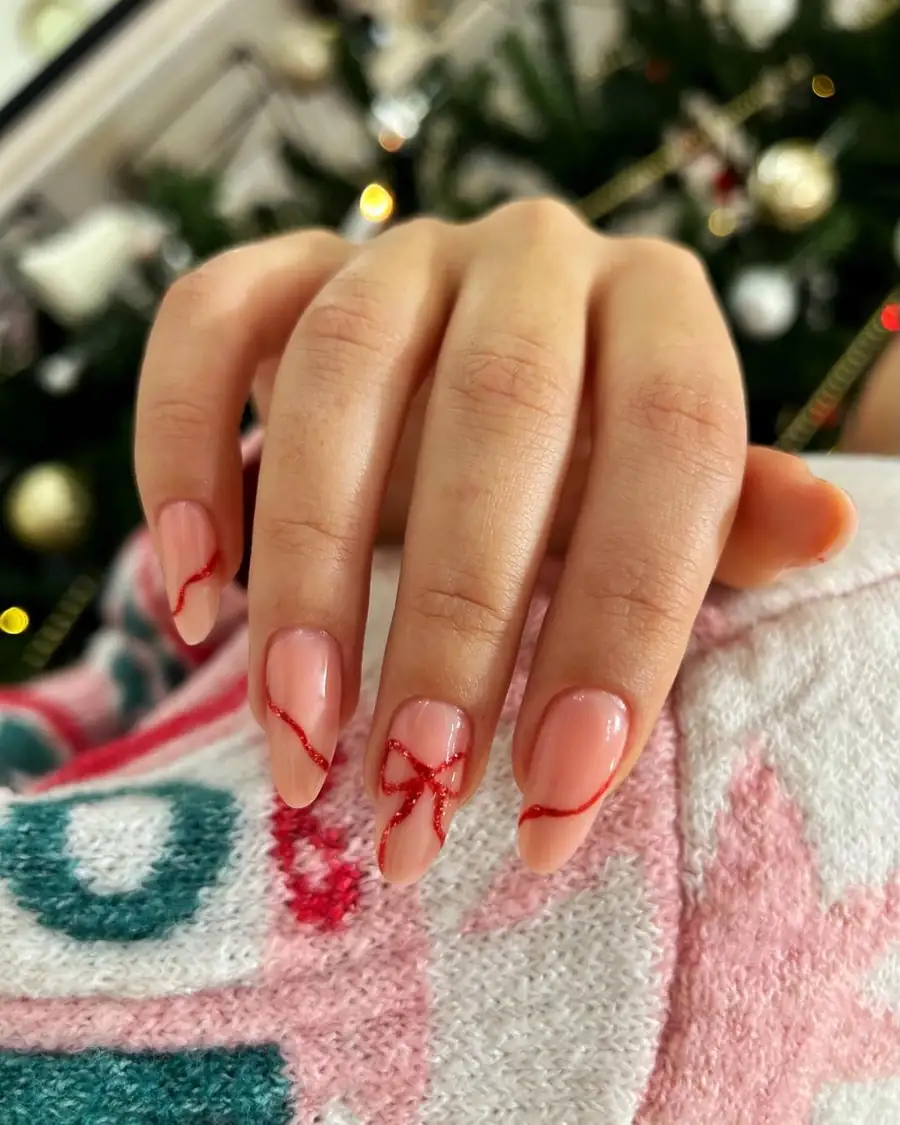
Set the sheer base in two thin coats, then let each dry fully. Draw the wavy lines with a thin brush, keeping each curve even. Pack red glitter onto the lines while the polish stays tacky. Sketch the bow from the knot outward, keeping each loop small. Seal with two coats of top coat, since glitter needs a firm cover. Clean stray marks with a spare brush, because red stains skin fast.
21. Split Red and White Polka Dots
One hand wears deep red gloss, dotted with small white spots. Other hand wears crisp white gloss, dotted with small red spots. Dots sit in neat rows across every nail, even and small. Both hands face the camera, showing ten nails at once. Red and white swap places, so the two hands mirror each other. Gloss keeps both colours bright, and the dots read crisp from a distance.
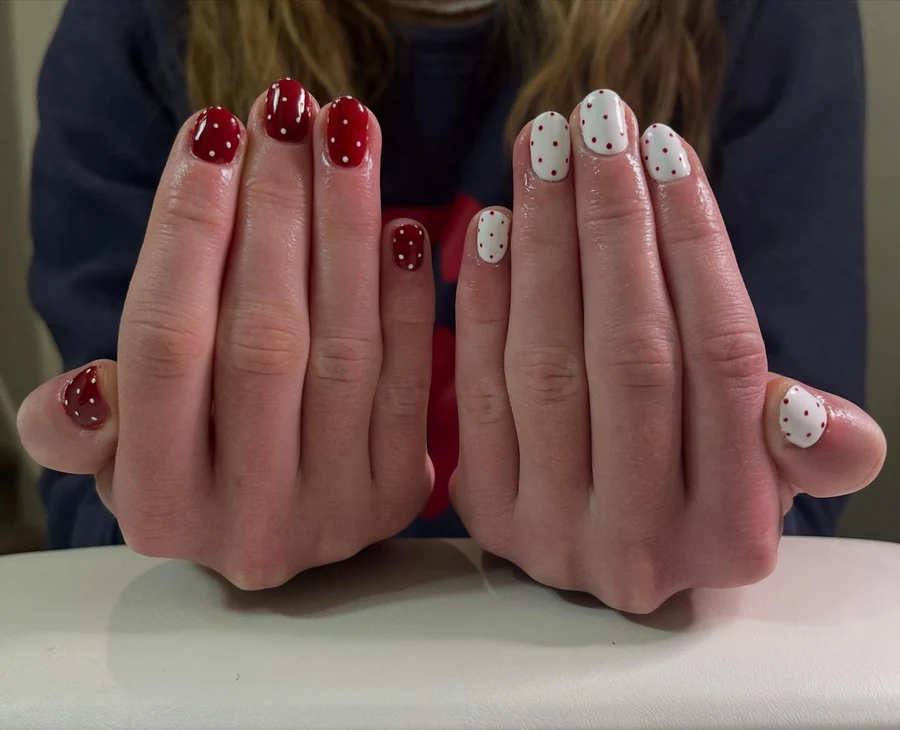
First, paint the red hand in two thin coats, then let each coat dry fully. Work the white hand next in two thin coats. Dot the white spots with a dotting tool, spacing them evenly. Add the red spots last, keeping them the same size. Seal with two layers of top coat, since dots wear fast without a cover. Keep the dotting tool clean between colours, because red marks white fast.
22. Chrome Red with Holly and Snow
Bold red chrome coats several nails in a bright, mirror shine. Nude nails carry white snow dots, scattered in varied sizes. Green holly leaves sit on the nude nails, with small red berries beside them. Candy canes stand behind the hand, red and white. Chrome reflects lamplight, so the red reads bright and sharp. Gloss seals the chrome, keeping the mirror finish smooth.
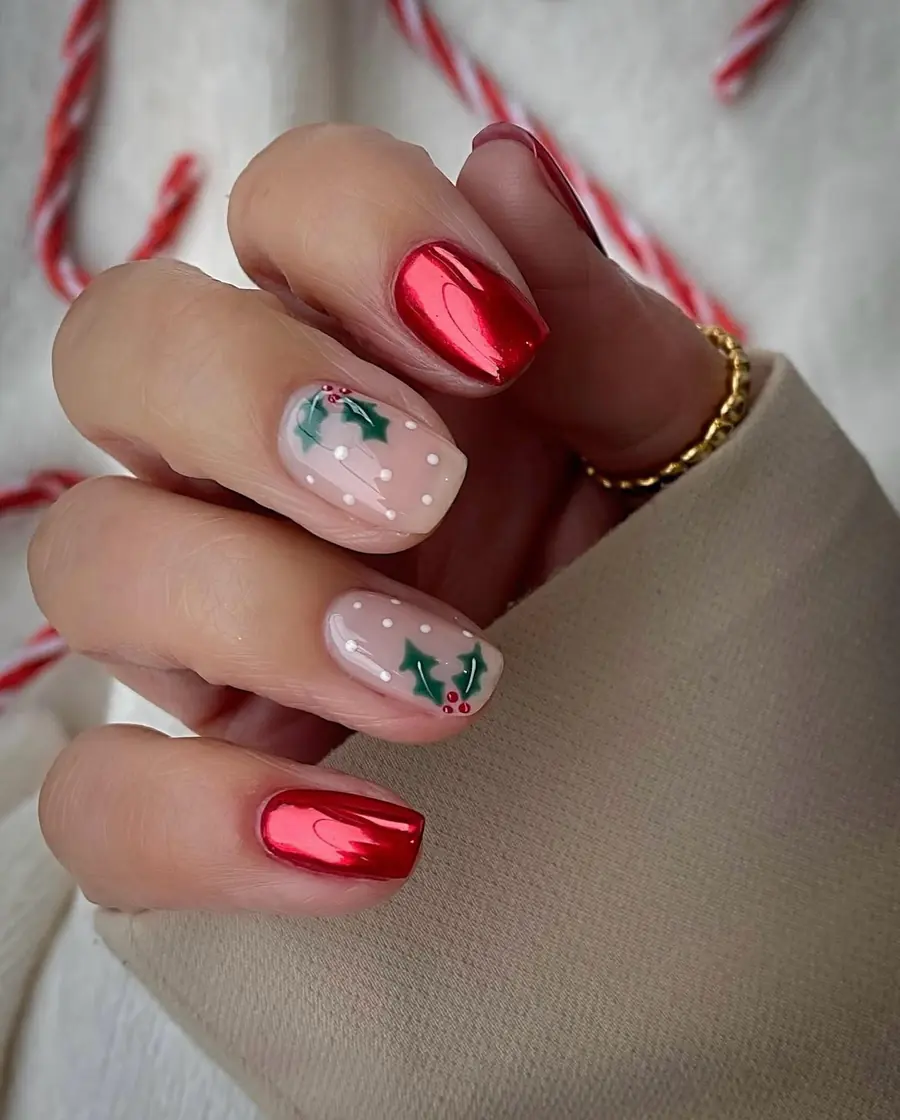
Paint the chrome nails in two thin coats, then let each coat dry fully. Rub chrome powder over the base with a soft applicator while it stays tacky. Brush the pale base over the other nails in two thin coats. Dot the snow with a dotting tool, spacing the spots unevenly. Paint the leaves last with a fine brush, adding the berries beside them. Seal with two coats of top coat, since chrome needs a smooth cover.
23. Dark Green with Single Red Gems
Forest green gloss covers every nail in a rich, even coat. One small red gem sits on every nail, placed just below the centre. Gems catch light with a bright red sparkle, small enough to read as a single dot. Green reads deep and cool, so the red gems stand out sharply against it. Gloss runs from base to edge, keeping the green bright and the gems secure.
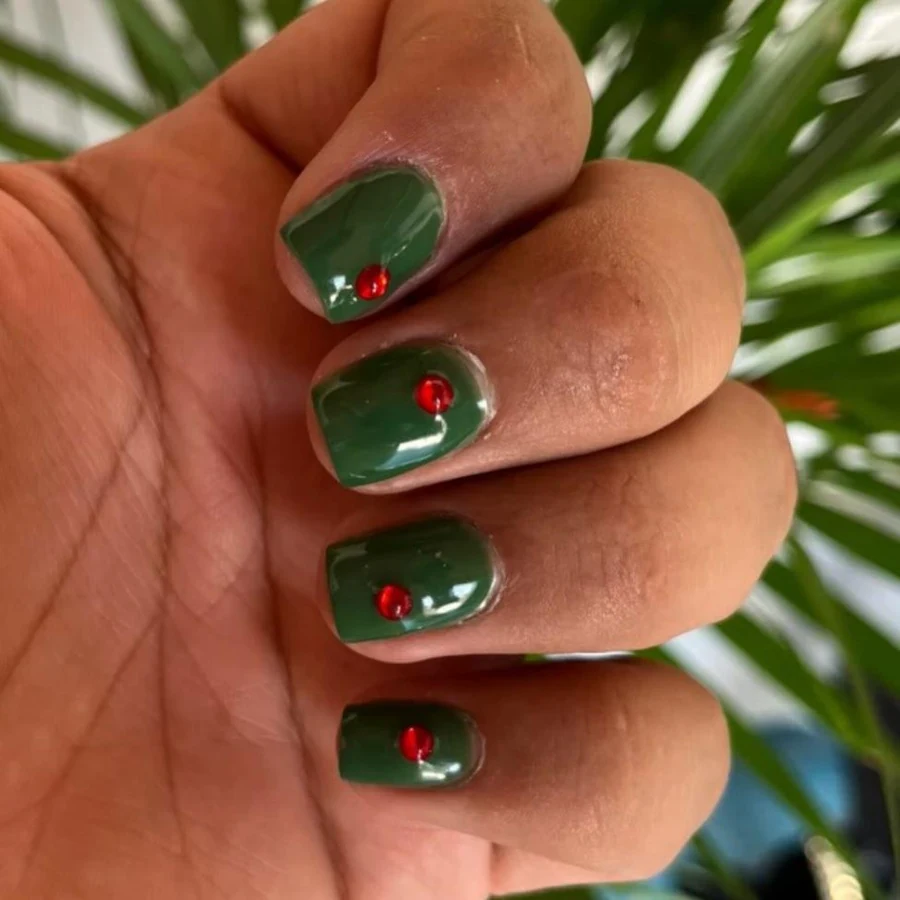
Place the gems while the final coat stays tacky, then press each one flat. Set one gem on each nail with tweezers, keeping the spacing even. Seal with two layers of top coat, because gems lift without cover. Swap red gems for gold ones when the set needs a warmer accent. Wipe the cuticle line clean before sealing, since green stains skin fast. Refresh the top coat when shine fades, as gems show wear first at the edges.
24. Bright Red with White Tree and Snowflake
Vivid red gloss covers three nails in a bright, even coat. White line art winds across the ring finger in a loose spiral tree shape. Small star crowns the top of the spiral, with tiny white dots scattered around it. Large white snowflake fills the middle finger, its arms reaching toward each edge. Small white dots also ring the flake like falling snow.
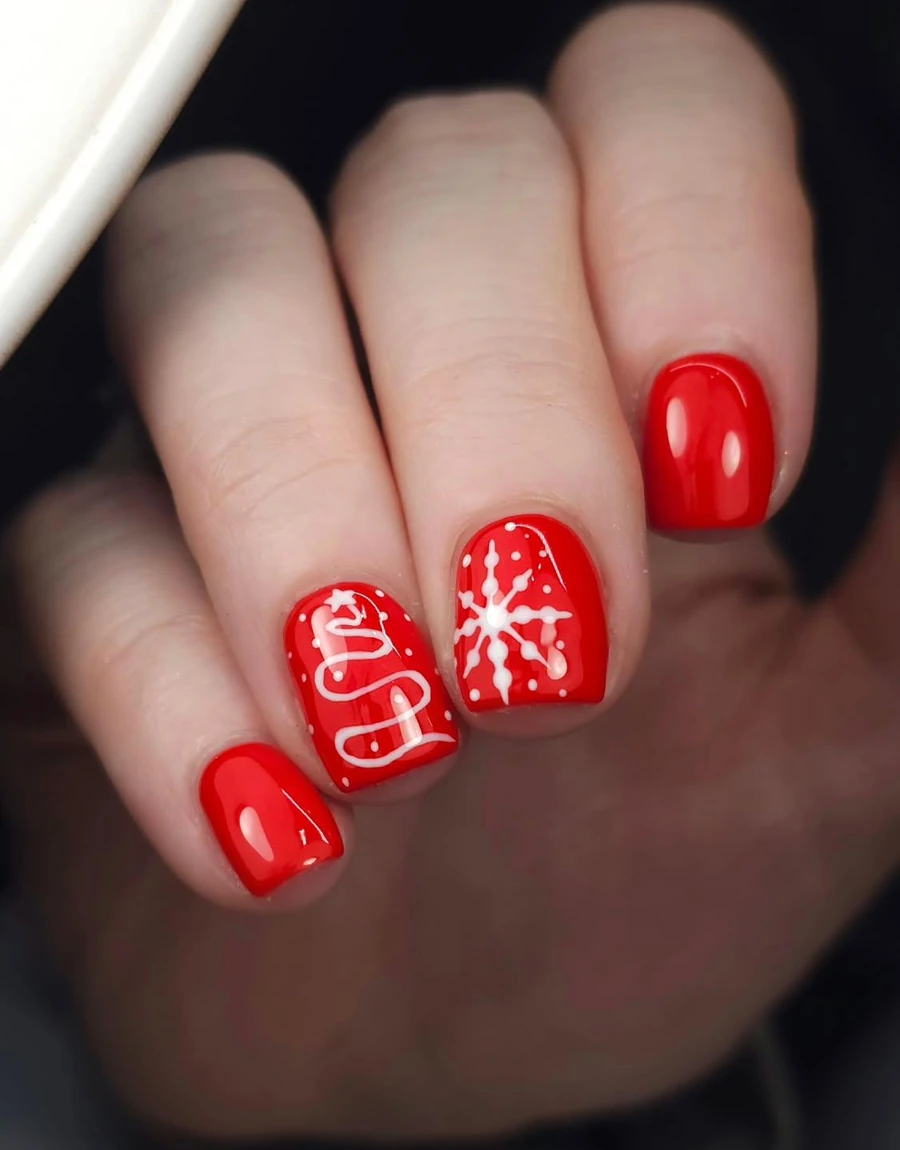
Build the red base in two thin coats, then let each dry fully. Sketch the spiral with a thin brush, winding downward from the top. Keep the line loose, because a stiff spiral looks flat. Draw the flake next, building each arm from the centre outward. Add the falling dots last with a dotting tool, spacing them unevenly. Seal with two coats of top coat, since white lines wear fast without cover.
25. Pale Pink with Holly Berry Sprigs
Delicate pale pink gloss washes four nails in a soft, even coat. Diagonal sprig runs across each nail, built from red berries and green leaves. Red dots sit in small clusters along the sprig, with white dots between them. Green leaves point outward in varied sizes, keeping the sprig lively. Tiny gold flecks also sparkle beside the berries, adding shine. White knit frames the hand, softening the pink and red.
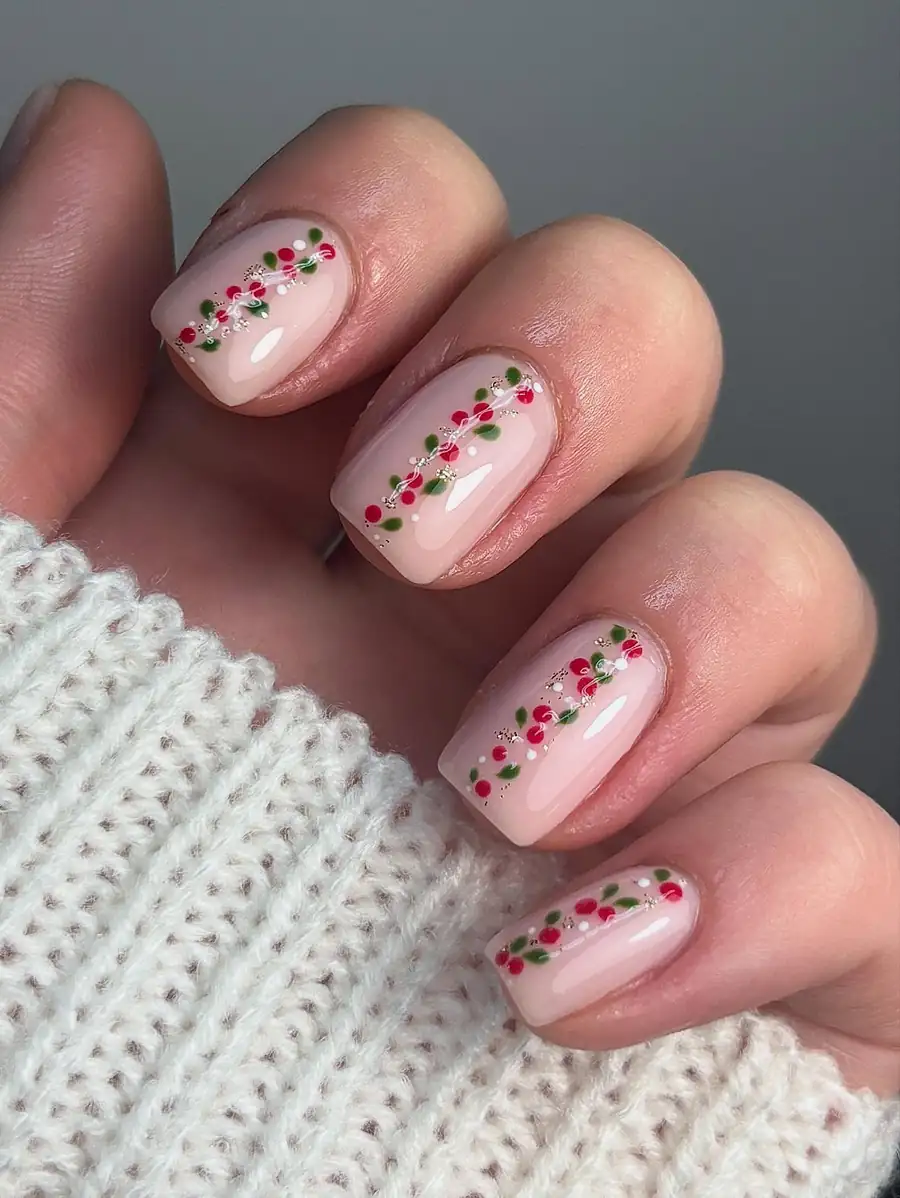
Sweep the sheer base on in two thin layers, then let it dry fully. Dot the red spots with a dotting tool, spacing them in loose groups. Form the leaf shapes next with a fine brush, keeping the size tiny. Set the pale spots last, amid the red and green. Sprinkle metallic dust sparingly, because too much of it crowds the sprig. Seal with two coats of top coat, since dots wear fast without cover.
Conclusion
Pick the palette that already matches your coat, sweater, or party dress, then let a small detail do the talking. Calm bases make red and green look brighter, and thin coats keep the finish smooth from the first day to the last. When you choose simple christmas nails, you spend less time fixing smudges and more time enjoying the season. A clean christmas manicure also grows out gracefully, so a missed touch-up never shows. Keep a bottle of top coat in your bag, refresh the shine when it dulls, and wear your favourite design all month.