

Short nails leave very little room for mistakes, so every colour and line has to earn its place. That is why short Christmas nails look best with a deep base, one clear accent, and a glossy finish. This collection mixes burgundy, forest green, and red with snowflakes, candy stripes, plaid grids, and tiny bows. A few chrome and glitter sets add sparkle, while pale pink and nude options keep things soft for work days. Each idea suits a compact nail shape and stays tidy through wrapping, cooking, and party prep. You will also find thin-coat steps and sealing tips for a simple holiday manicure that stays neat.
1. Candy-Cane Borders with Gingerbread and Holly
Sheer nude polish forms a clear base across every nail in the set. Red and white candy-cane borders frame two nails with crisp diagonal bands. One nail carries a gingerbread man with dark buttons and a smiling face. Green holly leaves with red berries sit beside a small green tree. White snowflakes rest on the tips, so the pale base stays bright and festive.
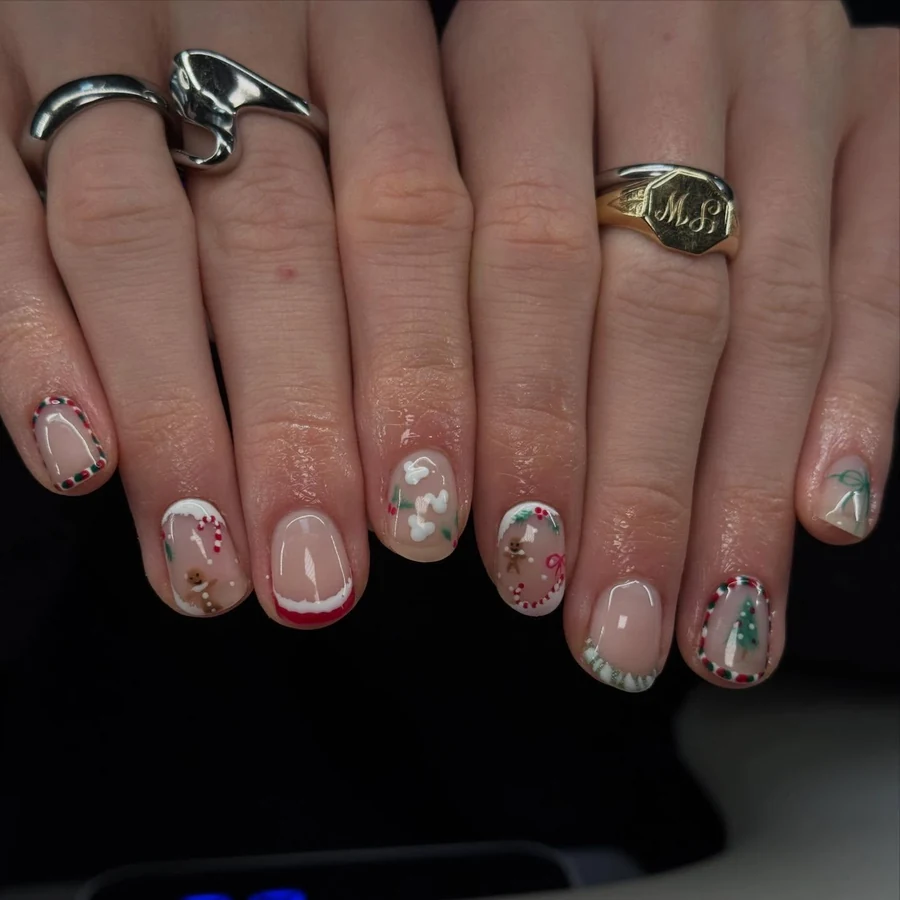
Lay down two thin coats of the sheer shade, then let each dry fully. Paint the borders with a fine brush, keeping the diagonal lines even and neat. Sketch the little man with dark dots for buttons and a curved smile. Paint the leaf sprigs and small fruit in deep pine tones for contrast. Seal the art with clear top coat, because flakes and paint can lift at the edges.
2. Pale Pink Nude with One Snowflake
Soft pink polish covers each nail in a pale, even wash of colour. One ring finger carries a single large white snowflake with fine arms. Tiny dots sit around the flake like scattered frost on glass. Gloss runs from cuticle to tip, giving the pale shade a wet shine. Pink and white share the set, so the single flake holds the eye.
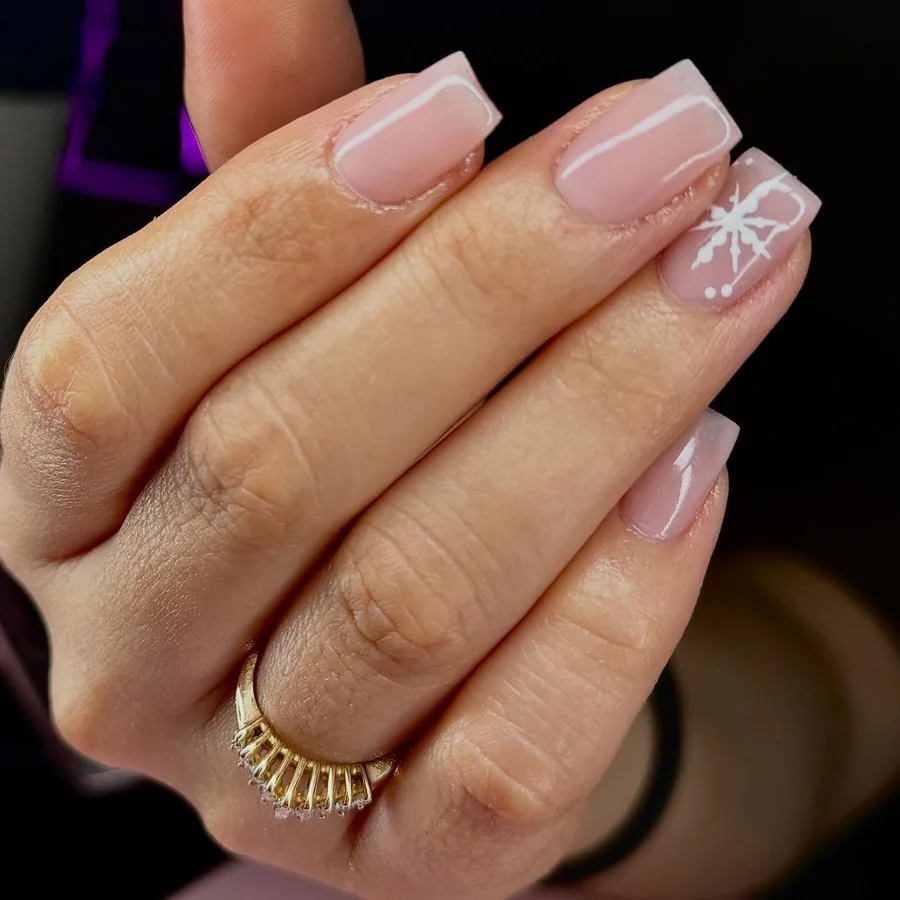
Start with two thin coats of the pale shade, letting each dry fully. Draw the flake with a fine brush, working outward from the centre in even strokes. Add the dots with a dotting tool, keeping them small and spaced apart. Seal the set with a clear top coat, because gloss can dull without cover. Touch up chips at the free edge promptly, since pale shades show wear fast.
3. White Winter Knit with Rhinestone Arc
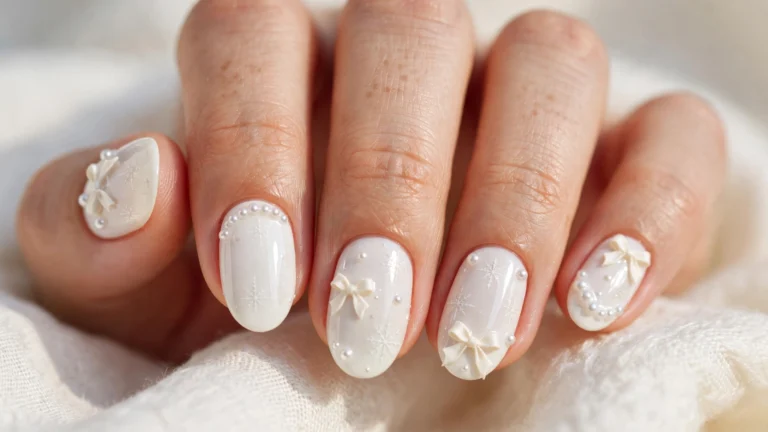
Nude polish forms a calm base for white winter art on every nail. Diagonal white stripes cross two nails in crisp, even bands. Snowflakes sit on pale nails with small dots between each arm. One accent nail wears a cable-knit pattern, raised twists like a woollen jumper. Tiny rhinestones arc along the cuticle, so the set catches light at every angle.

Begin with two thin coats of the nude shade, then let each dry fully. Paint the stripes with a striping brush, keeping the bands straight and parallel. Draw the flakes with white polish, starting from the centre of each nail. Build the knit texture with quick strokes, layering twists until the surface feels raised. Set the stones near the skin edge with tweezers, pressing each one into wet top coat.
4. Red Glitter with Snowflake French Tips
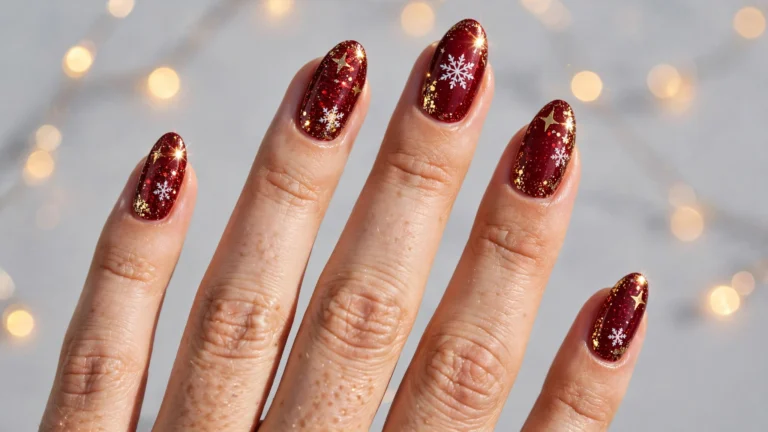
Crimson glitter covers two nails in a dense, sparkling coat of colour. Nude nails wear red glitter tips shaped like a curved smile line. One white snowflake rests on a glitter nail, crisp against the red. Gloss seals the sparkle, so the set reads bold under indoor light. Gloved fingers show the set, keeping the focus on the nails alone.
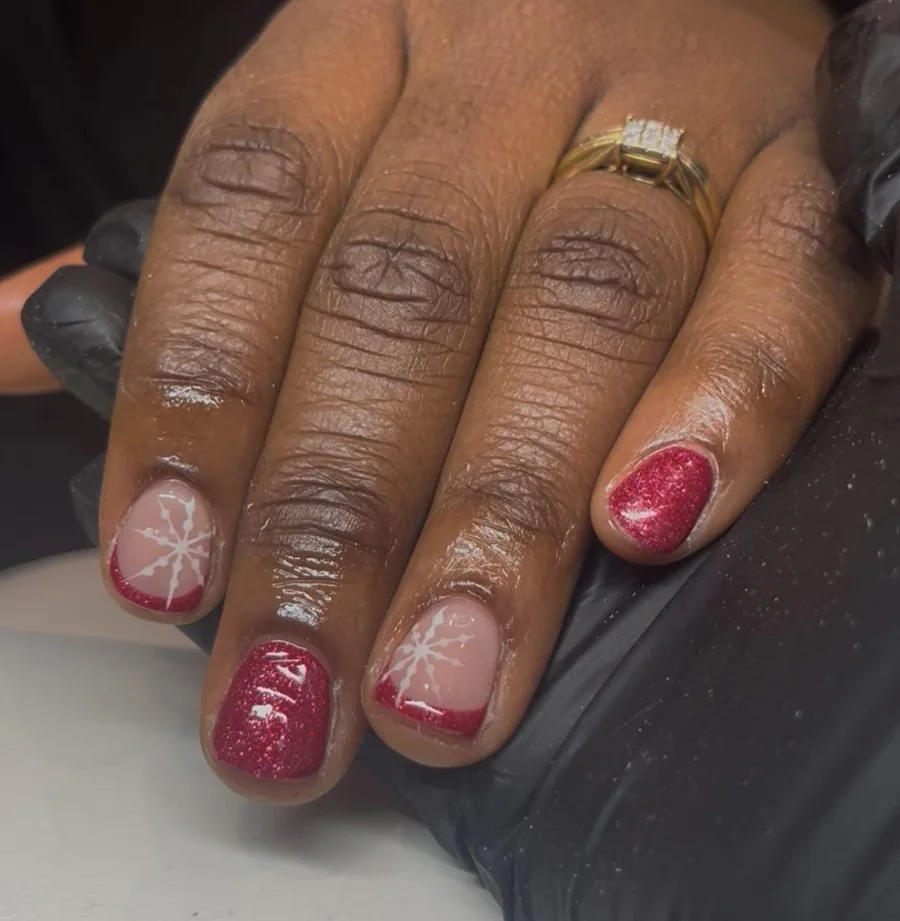
Work glitter polish in thin coats, then let each coat dry before the next. Shape the tips with tape or a guide, painting the red ends in even layers. Draw the flake with white polish, keeping the arms even and centred. Press the grains flat with a wrapped fingertip, because loose sparkle can lift. Seal with two coats of clear top coat, and cap the free edge for wear.
5. Emerald Glitter with White Snowflakes
Deep emerald glitter coats the nails in a rich, dark green sparkle. White snowflakes spread across the green in varied sizes and angles. Small dots sit between the flakes like scattered stars on velvet. Gloss keeps the dark base bright, so the flakes read clearly at a glance. Each flake stays crisp against the green, with no bare patches anywhere.
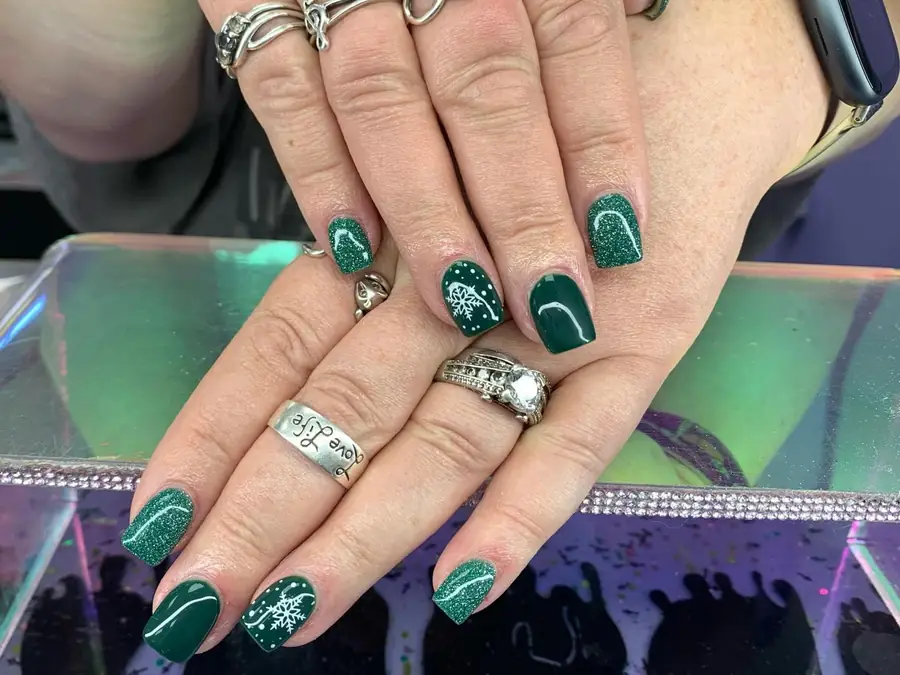
Spread two thin coats of the emerald shade, then let each dry fully. Pack glitter onto the nails with a flat brush while the coat stays tacky. Draw the flakes with white polish, keeping the arms even and centred. Add the dots with a dotting tool, spacing them so no two sit too close. Seal everything with a clear top coat, because glitter edges can catch and lift.
6. Red Glitter Ombre with Raised Snowflakes
Bright red glitter fades to pale pink at the centre of each nail. Ombre shading, a slow fade from one colour into another, softens the change. Large white snowflakes rise from the surface with a raised, textured feel. Glitter packs the outer edges, so the pink centre glows by contrast. Every nail carries the same bold flake, crisp against the sparkling red.
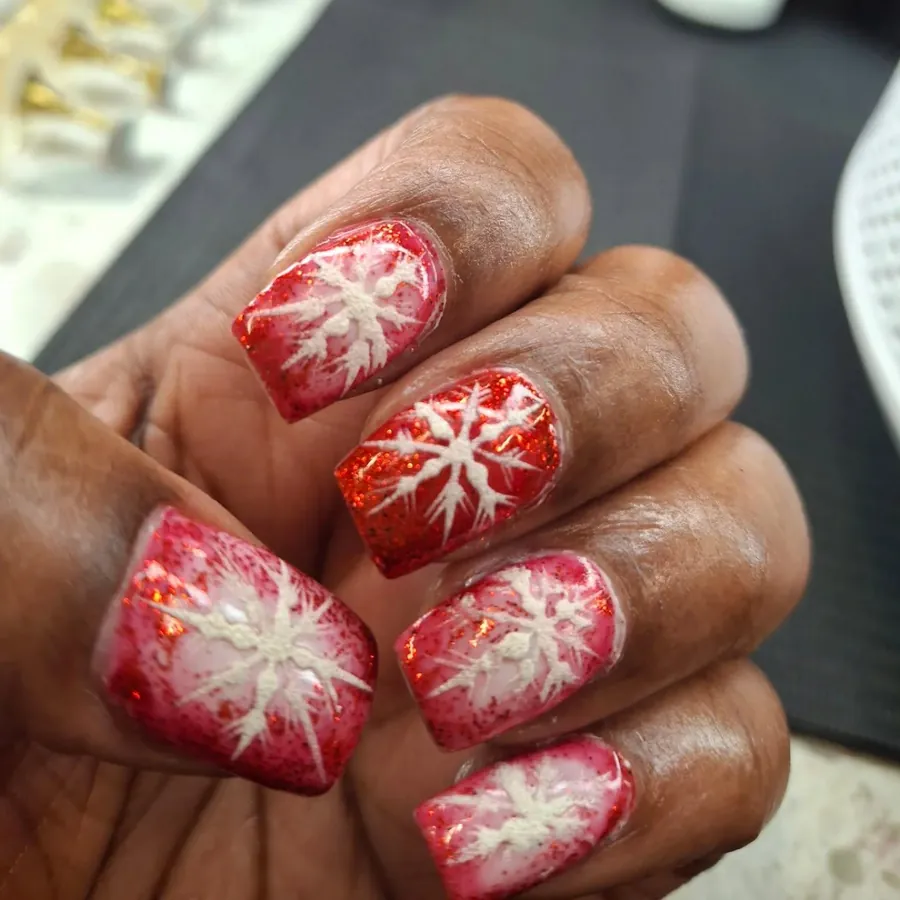
Paint the red shade first in two thin coats, then let each dry fully. Blend a pale pink into the middle with a sponge, fading the edge gently. Build the flakes with thick white polish, layering dots until they stand proud. Press each flake flat at the base, because raised art can snag on fabric. Seal the set twice with clear top coat, and cap the free edge for wear.
7. Milky Pink with Bright Red Tips
Soft pink polish forms a pale, milky base across every single nail. Bright red tips cap each nail with a clean, curved edge. White snowflakes sit on two accent nails, crisp against the pink. Gloss runs from cuticle to tip, giving the set a wet, polished look. Pink and red share the set, so the tips stand out at once.
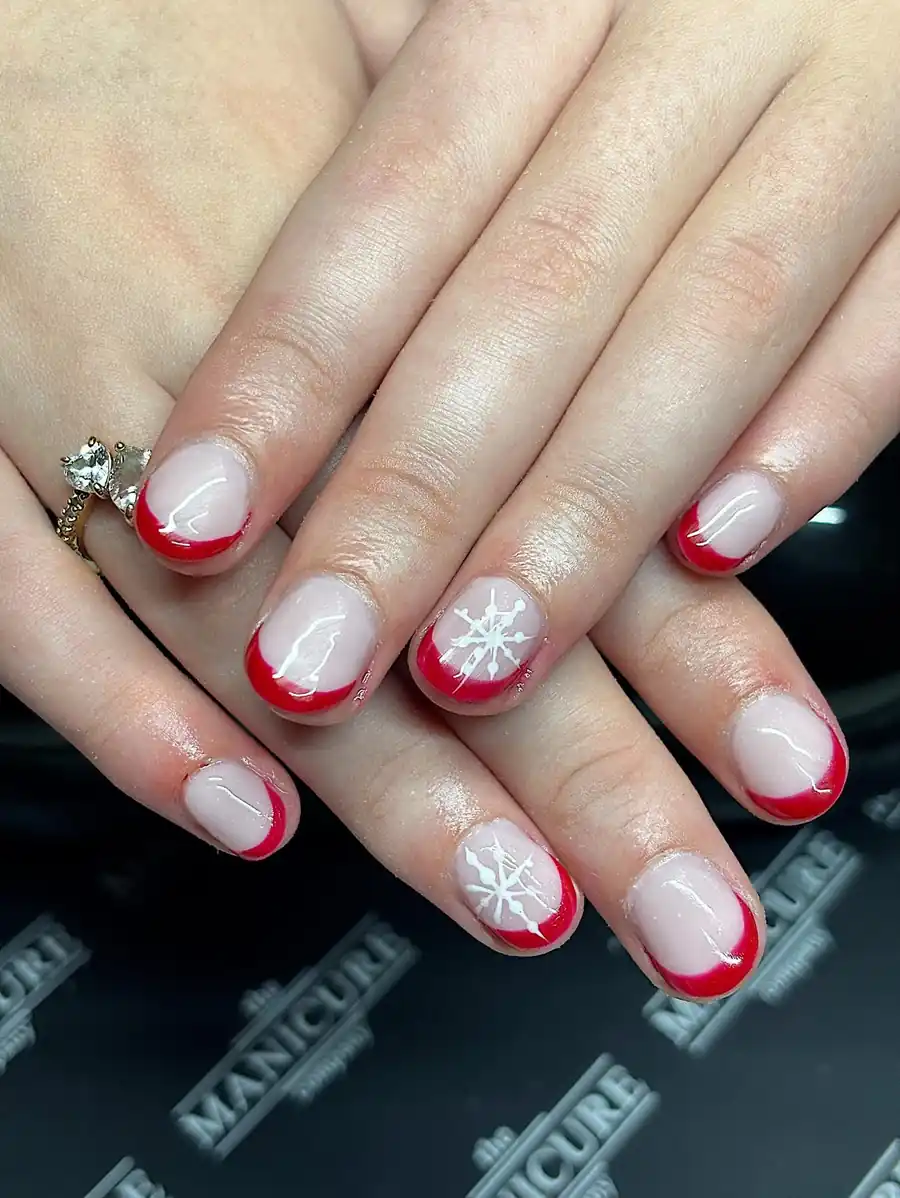
Coat the pale shade first in two thin layers, then let each dry fully. Shape the red ends with a striping brush, following the natural curve of each nail. Paint the flakes with white polish, keeping the arms even and centred. Clean stray marks with a small brush dipped in remover before sealing. Seal with a glossy top coat, because shine makes the contrast sharper.
8. Festive Mix of Red Green White
Solid red nails sit beside deep green nails in a bold festive mix. White snowflakes scatter across the green, crisp against the dark shade. One white nail carries a candy cane, a small tree, and tiny stars. Red, green, and white share the set, so no single colour takes over. Gloss seals the art, giving each nail a bright, polished finish.
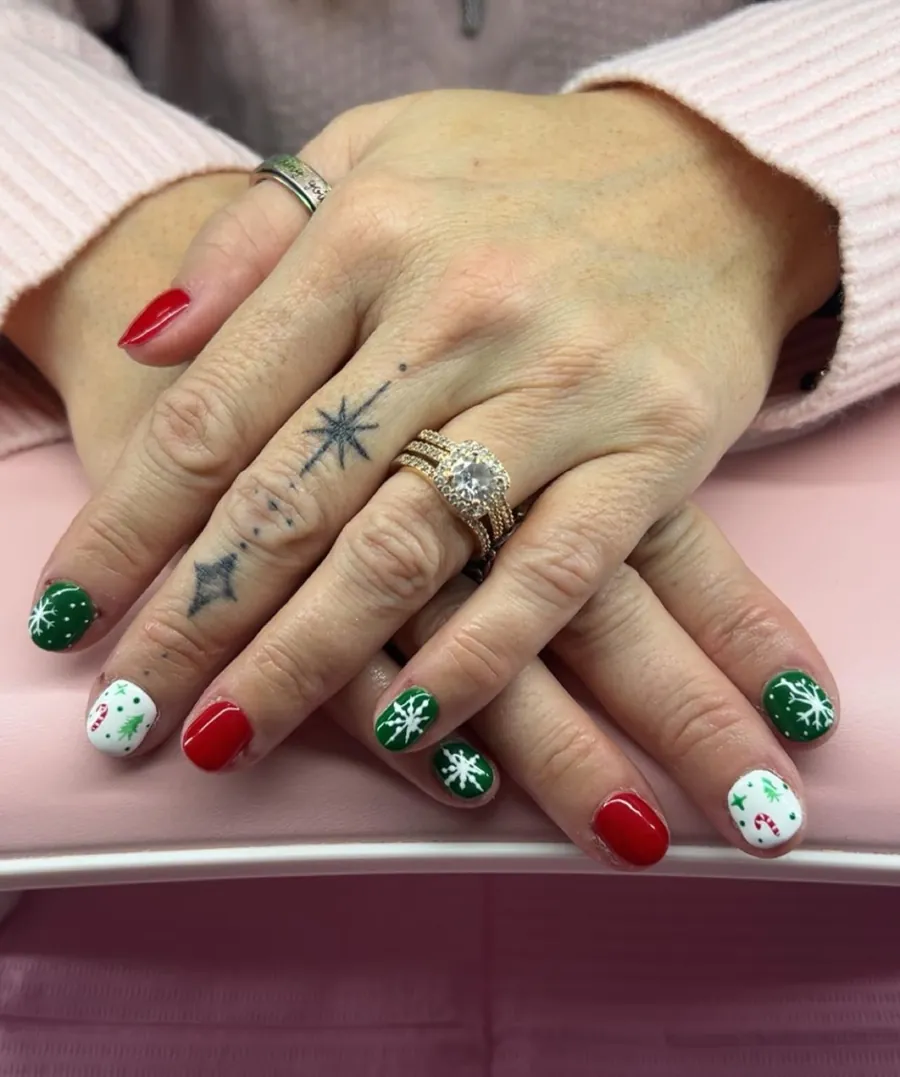
Work one colour at a time, then let each coat dry before the next. Paint the solids first with two thin coats, keeping the edges neat and clean. Draw the flakes and the tree with a fine brush, spacing the art evenly. Add the cane stripes in red and white, plus small stars for sparkle. Seal the set with clear top coat, because mixed art chips first.
9. Sheer Nude Pink with Zigzag Trees
Pale nude-pink polish washes the nails in a soft, sheer glow. White snowflakes sit on several nails, bold against the sheer base. Zigzag trees climb the nails in thin white lines with tiny dots. One small star rests near a tip, so the set feels light and airy. Dots and lines share the space, keeping the pale art calm and clear.
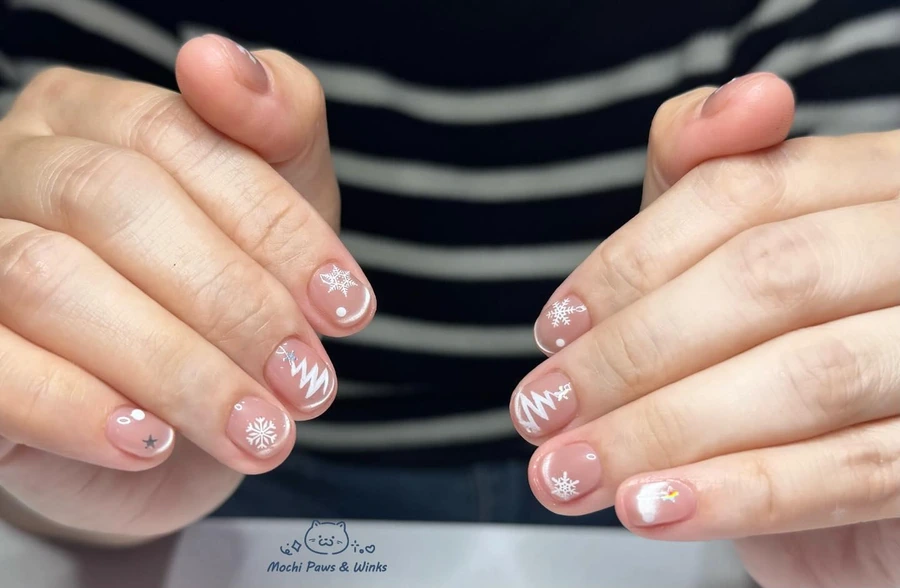
Dust glitter over a sheer base in thin layers, then let each layer dry. Draw the flakes with a striping brush, starting from the centre of each nail. Keep the zigzag lines freehand and loose, so they read as soft ripples. Add extra glitter at the tips, because the gradient needs density there. Seal with a glossy top coat, since sheer bases show every ridge.
10. Deep Red with Candy-Cane Stripes
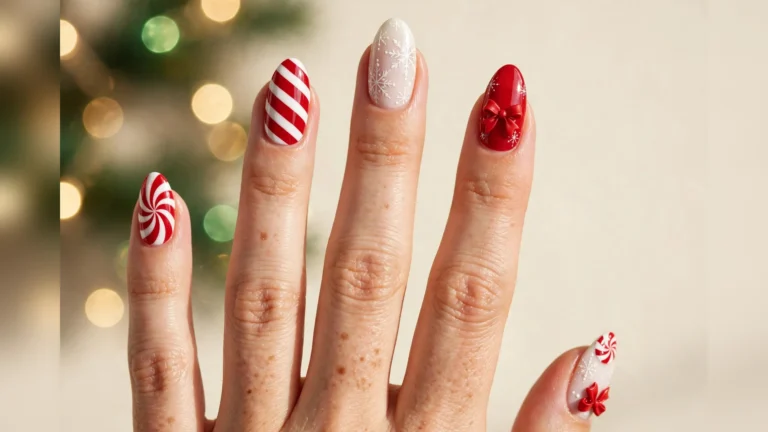
Rich red covers most nails in a glossy, bold festive coat of colour. Red glitter fills two accent nails with a dense, sparkling festive shine. Diagonal candy-cane stripes twist across pale nails in red and white. White snowflakes sit on the red, crisp against the dark shade. Gloss runs from cuticle to tip, so the set reads rich and bright.
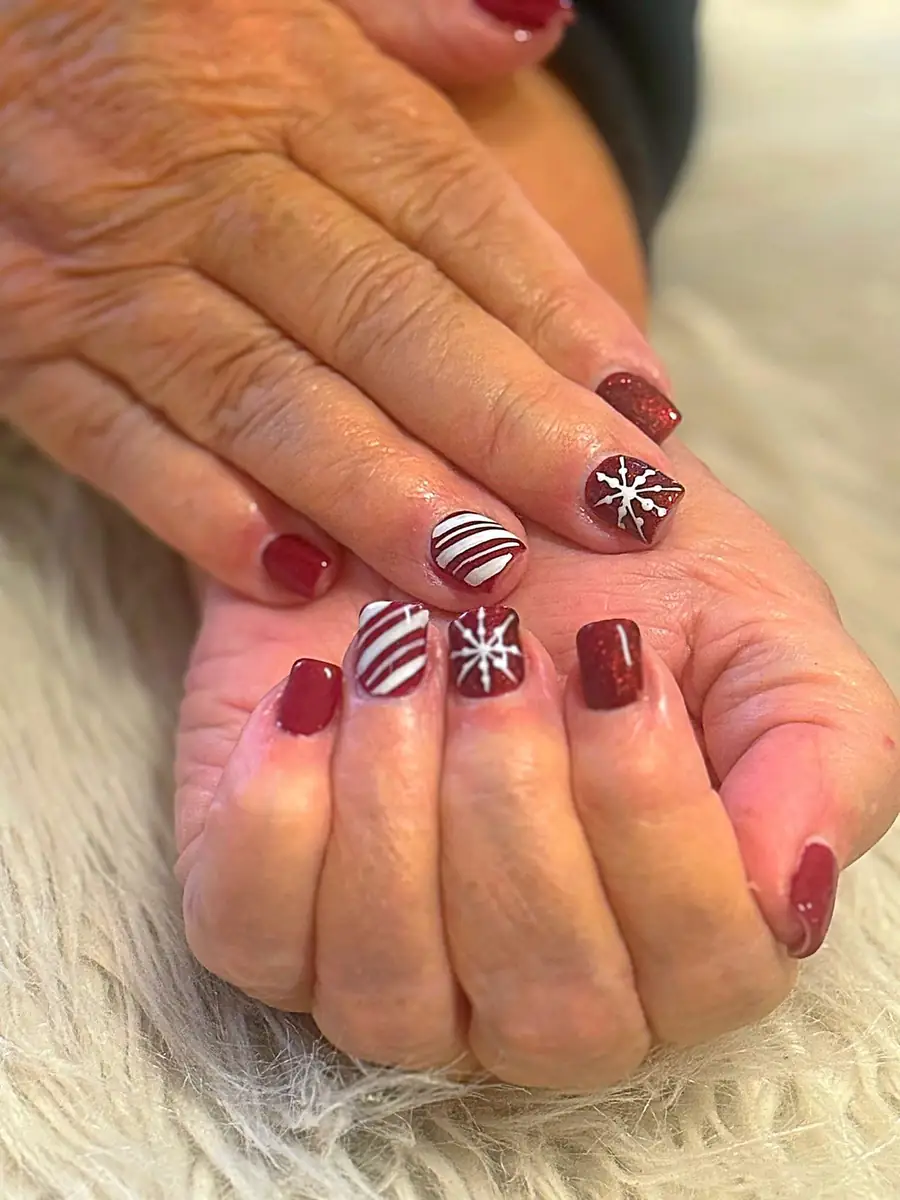
Begin with two thin coats of the deep shade, then let each dry fully. Paint the stripes with a striping brush, alternating red and white bands. Pack glitter onto the accent nails with a flat brush while the coat stays tacky. Draw the flakes with pale polish, keeping the arms even and centred. Seal the set twice with clear top coat, because glitter texture can feel rough.
11. Near-Black Burgundy with Green Tree
Wine-dark burgundy coats the nails in a deep, glossy shade. One white nail holds a green Christmas tree with tiny gold dots. Another dark nail carries a gold snowflake, fine and sharply drawn. Gold and white break the dark set, so the tree stands out at once. Gloss gives the burgundy a wet shine, keeping the edges neat and smooth.

Spread two even coats of the wine shade, then let each dry fully. Paint the tree with a fine brush, starting with the trunk and adding branches. Add the gold dots with a dotting tool, spacing them evenly across the green. Draw the flake in gold polish, keeping the arms thin and centred. Seal the set with a glossy top coat, because dark shades show chips fast.
12. Candy Mix in Red Silver White
Solid red nails sit beside silver glitter nails in a bright candy mix. One white nail holds a red snowflake with fine, crisp arms. Red and white candy-cane stripes twist diagonally across one pale accent nail. Silver sparkle catches the light, so the red reads warmer and brighter. Each nail holds a different pattern, keeping the set lively and varied.
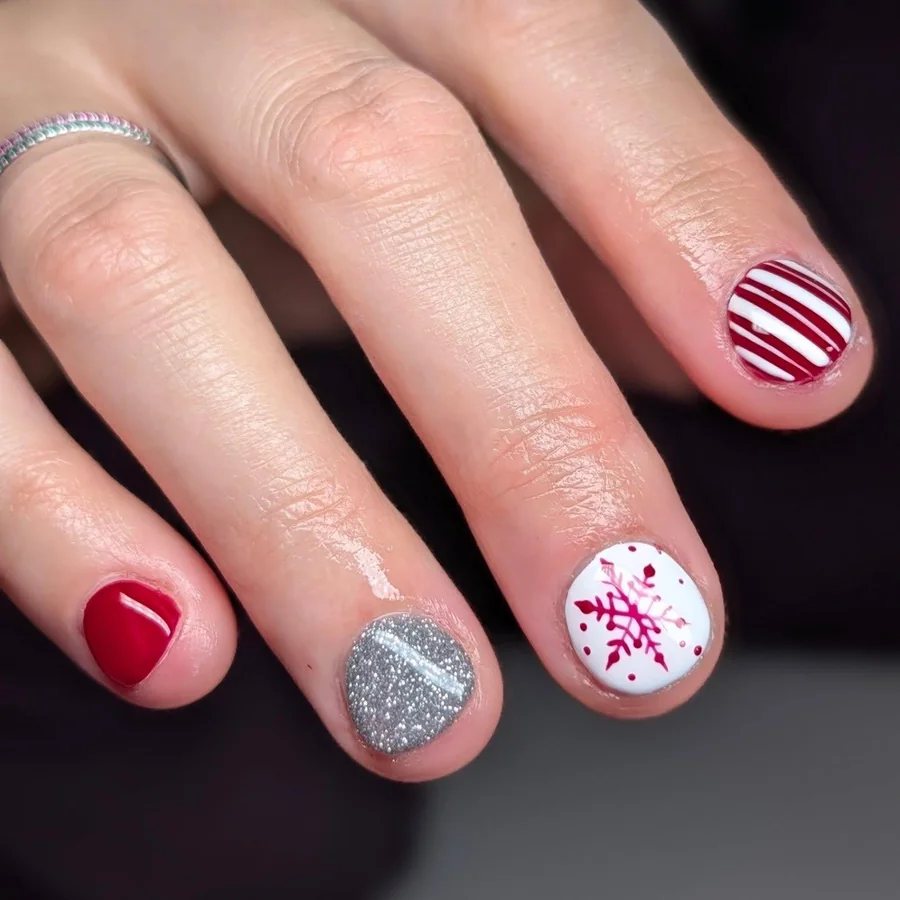
Take one shade at a time, then let each coat dry before the next. Paint the red solids first with two thin coats, keeping the edges neat and clean. Pack glitter onto the silver nails with a flat brush while the coat stays tacky. Draw the flake with red polish, keeping the arms even and centred. Add the stripes with a striping brush, alternating the two shades in even bands.
13. Burgundy French Tips with Holly
Wine-dark tips cap nude nails with a deep, curved edge. White snowflakes and starbursts scatter across the pale nude base. One nail carries a red and white candy cane with green holly leaves. Tiny ornament hangs near the cuticle, gold with a red bow and white dots. Nude and burgundy share the set, so the tips stand out at once.

Coat the nude shade first in two thin layers, then let each dry fully. Shape the wine-dark ends with a striping brush, following the natural curve. Draw the flakes and the cane with a fine brush, spacing the art evenly. Add holly leaves in green beside the cane, plus tiny red berries for colour. Set the ornament with tweezers, pressing it gently into wet top coat.
14. Gingerbread Men with Plaid and Peppermint
Little men in Santa hats smile from glitter nails with rosy cheeks. Red and green plaid crosses silver glitter in a bold checked grid. One candy cane curls down a dark green glitter nail with white stripes. Red glitter snowflakes sparkle beside a peppermint swirl in red and white. Each nail tells a different festive story, so the set feels rich and playful.
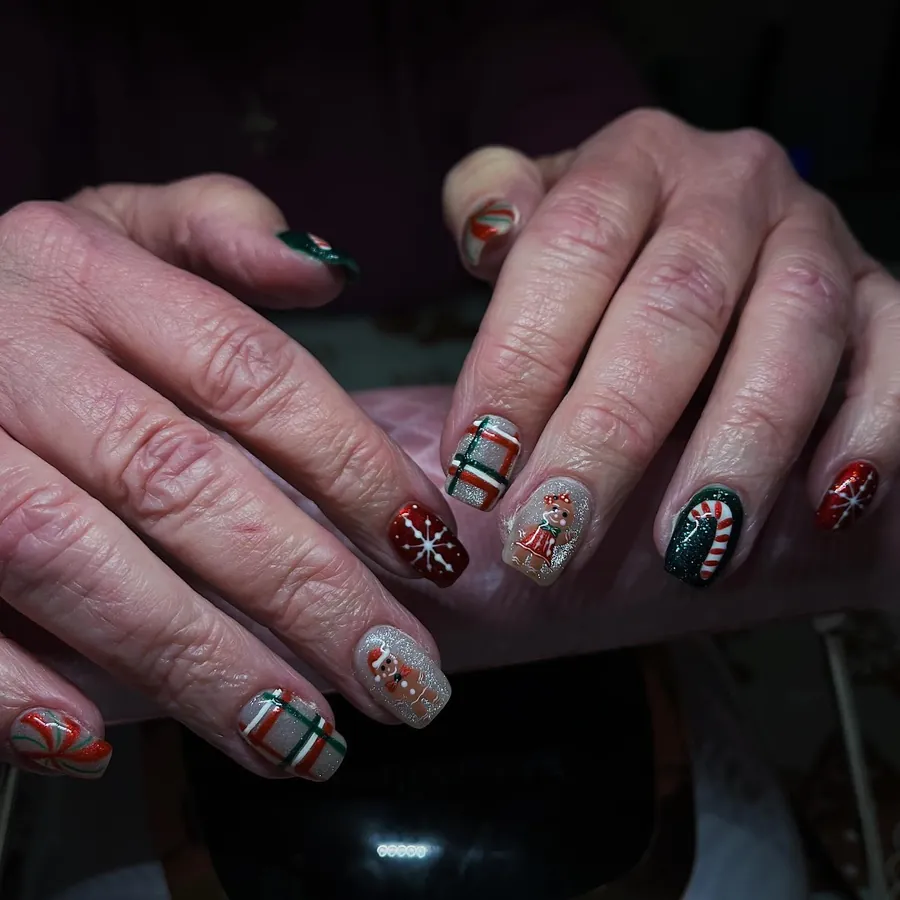
Sketch the little men first in pencil-thin lines, then fill the shapes with colour. Paint the plaid with thin lines, crossing green over white in even gaps. Draw the cane in red and white, curling it down the nail with care. Add the hats and cheeks with small dots, keeping the faces sweet and simple. Seal the set with a clear top coat, because tiny details wear fast without cover.
15. Green Plaid with Candy-Cane Stripes
Checked plaid covers half the nails in a crisp, green grid of lines. Red and white lines cross the green in even, tidy, well-spaced bands. Candy-cane stripes twist down red nails in bold diagonal bands. White stripes cut through the red, so the pattern reads clearly at a glance. Green and red share the set with no extra decoration anywhere.
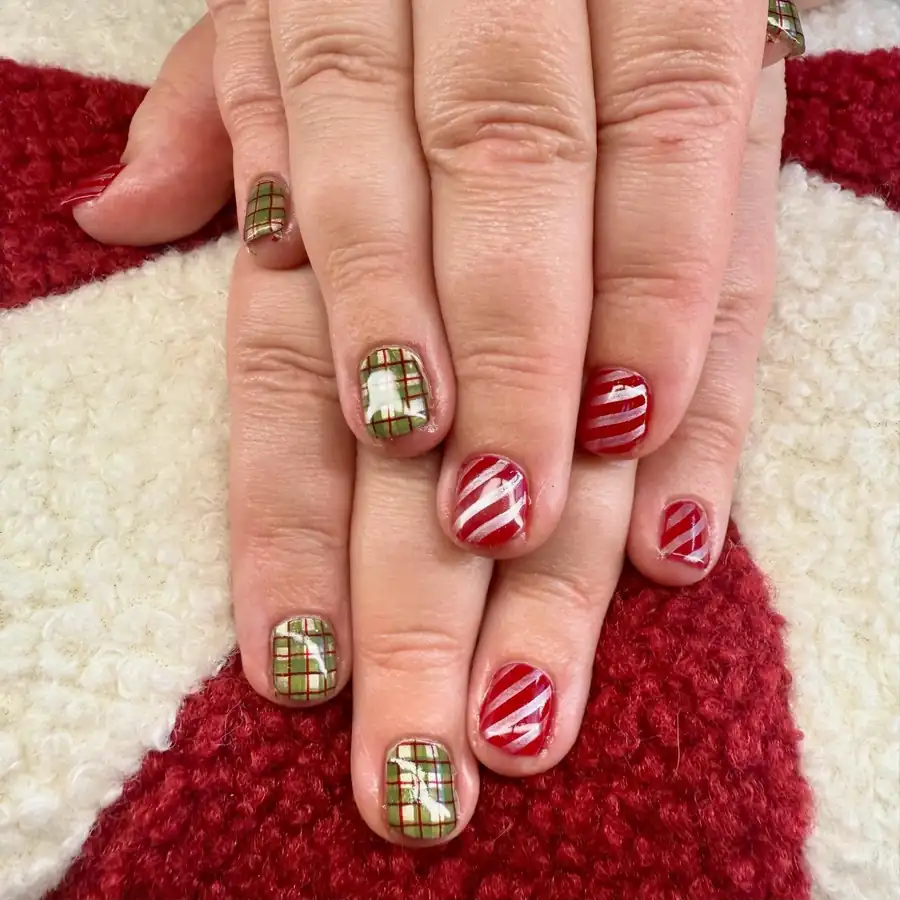
Map the plaid first with thin lines, then fill the green base around them. Cross white lines over green ones, keeping the gaps even across the nail. Paint the stripes with a striping brush, alternating the two shades in even bands. Clean the edges with a small brush, so the lines stay sharp and straight. Seal the plaid nail last, because straight lines chip first at the edges.
16. Sage Plaid with Sequin Stripes
Muted sage plaid covers pale nails with small red bows at each crossing. Red and green candy-cane stripes twist down nails in diagonal bands. Silver sequin stripes run beside the plaid, catching light at every angle. Champagne shimmer fills two accent nails with a soft, golden glow. Plaid, stripes, and shimmer share the set, so the look feels calm and wintry.
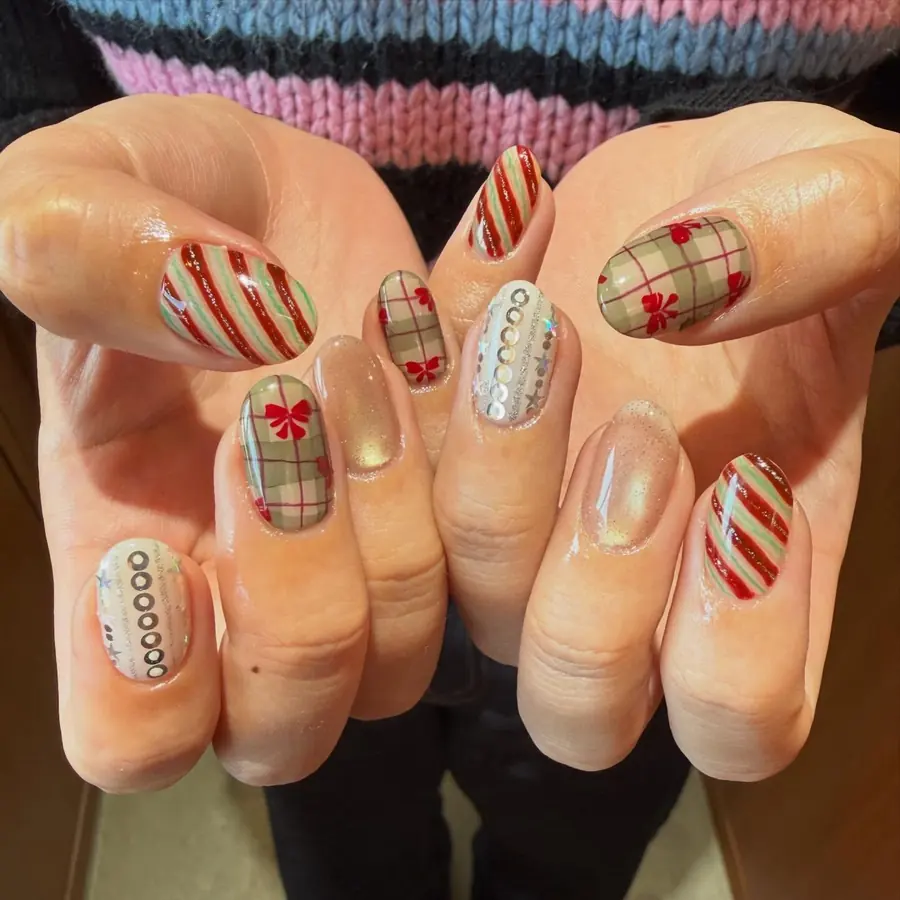
Tape off the grid lines first, then fill each cell with metallic polish. Alternate the plaid bands, keeping the wider bands on the outer edges. Paint the bows with a thin brush, and place each one at a crossing. Add the sequin stripes last, pressing them gently into wet top coat. Seal with a clear top coat, since tape edges can lift without cover.
17. Pale Pink with Gold Bows
Blush pink polish forms a soft, sheer base on every nail. One nail wears a gold bow outline, drawn in thin metallic lines. Dotted tree climbs another nail with pink, white, and gold dots. Gold starbursts scatter across the pale pink, catching light at every angle. Small gold bows rest near the cuticles, so the set feels light and airy.
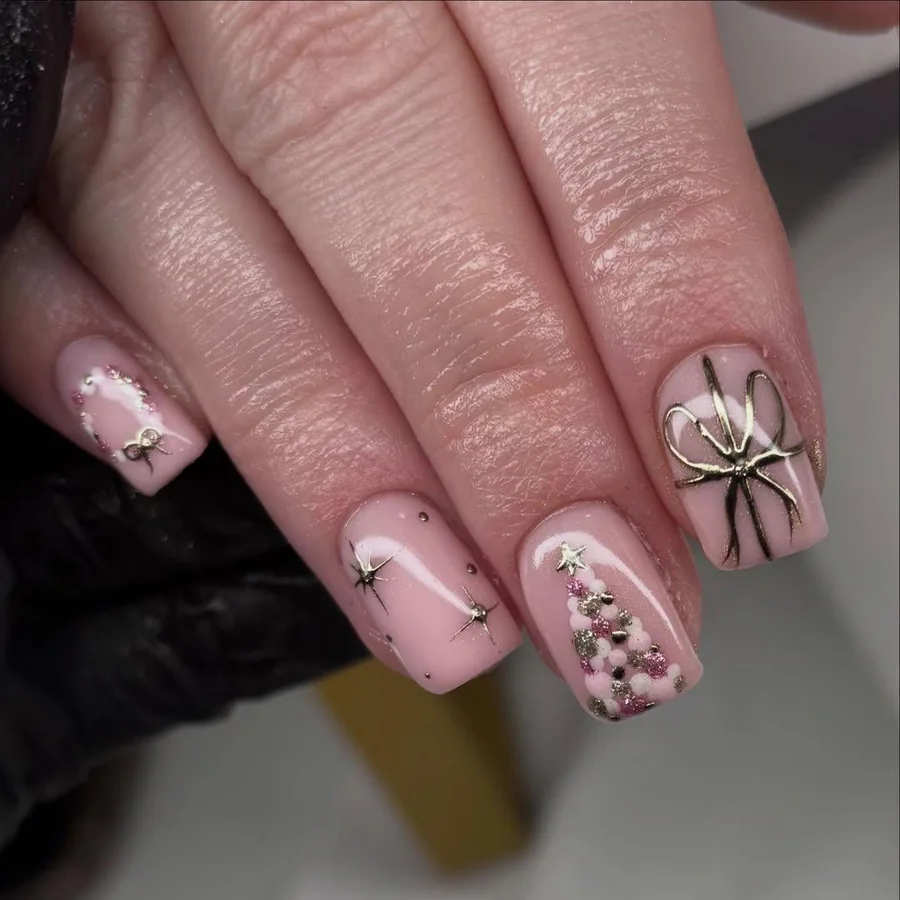
Start with two thin coats of the blush shade, then let each dry fully. Draw the bow outline with a fine brush, keeping the loops even and neat. Build the tree from dots, layering blush, ivory, and gilded specks in rows. Add starbursts with a dotting tool, spacing them so no two sit close. Seal the set with clear top coat, because gold lines can lift.
18. Bows with Pink Plaid Trees
Crimson nails wear white bows with a pink dot at each centre. Pink plaid crosses white nails in red and black lines. Tiny pink trees stand on pale nails with dark dots between them. Candy canes curl down pink nails, so the set feels sweet and festive. Red, pink, and white share the set, keeping the look bright and lively.

Cover the crimson shade first in two thin layers, then let each dry fully. Map the plaid with thin lines, crossing crimson over ivory in even gaps. Draw the bows with a fine brush, adding a blush dot at each centre. Add the trees with small strokes, spacing dark specks between the branches. Seal the set with a clear top coat, because plaid lines can lift at the edges.
19. Green Chrome Stripe Edged in Gold
Chrome stripes run down nude nails in a bright green mirror shine. Green shifts from sage to bright lime as the light moves across. Thin gold lines edge each stripe, framing the green in warm metal. Nude polish shows between the stripes, so the set stays calm and clean. Light slides over the chrome, changing the green from soft to vivid.
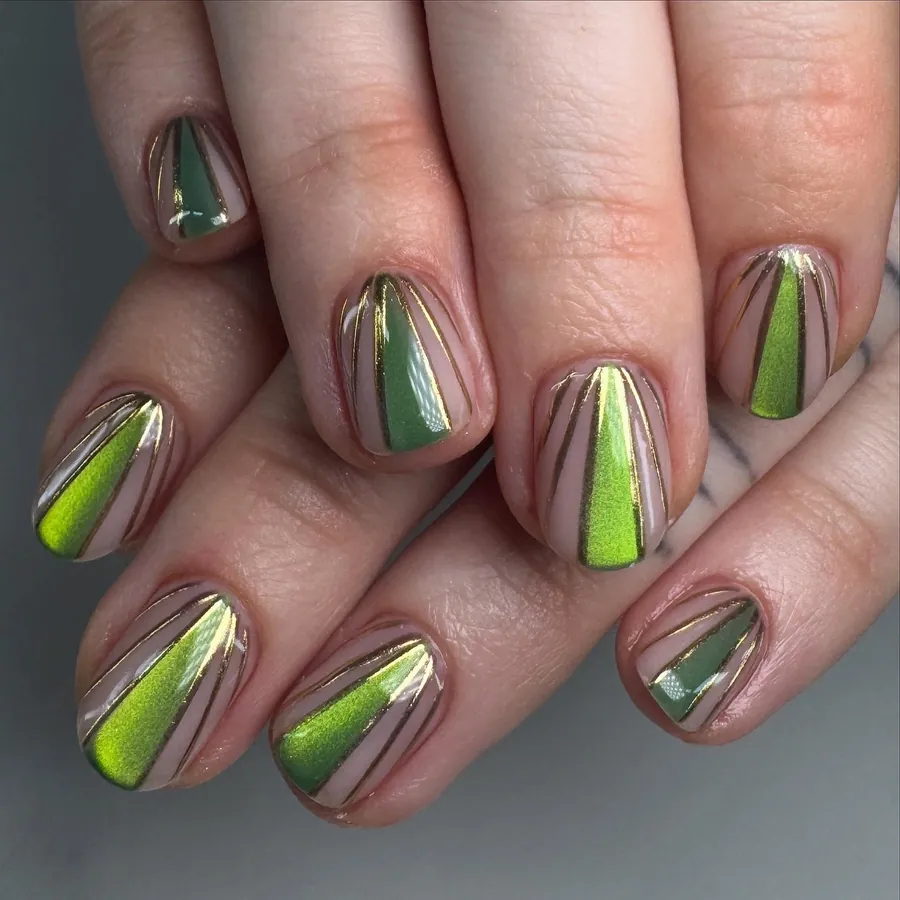
Rub mirror powder onto a dry base with a soft applicator, then seal it fast. Buff the powder in one direction only, so the finish stays even without streaks. Draw the gold edges with a fine brush, keeping the lines thin and straight. Keep the base pale, because deep bases turn the shine grey. Top with a glossy coat, and skip matte here since matte dulls mirror powder.
20. Gold Chrome with Green Glitter Pieces
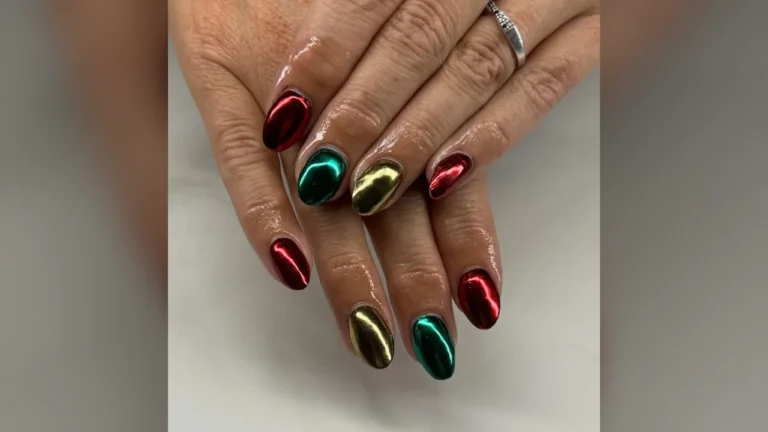
Metallic gold chrome covers several nails with a warm, bright mirror shine. Green glitter pieces scatter across sheer nails, shifting from lime to deep emerald. Holographic shine, a rainbow glow that shifts with light, fills the accents. Sheer polish shows between the gold, so the set stays light and airy. Gold and green share the set, giving it warmth, shine, and contrast.
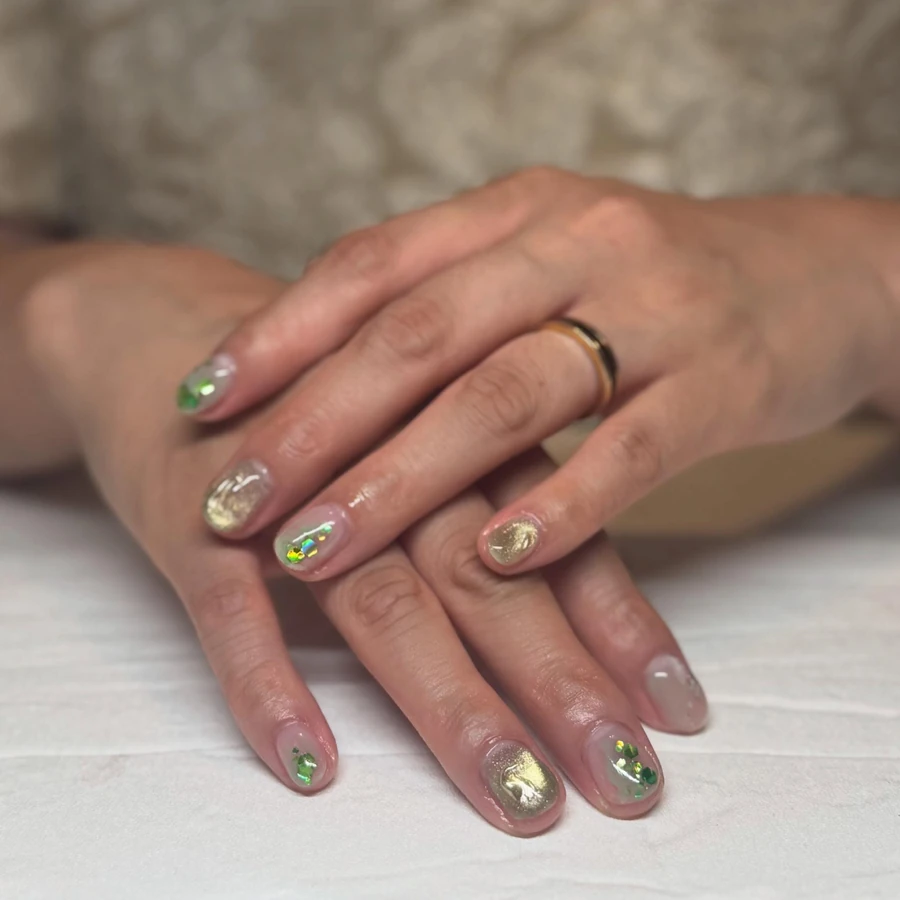
Buff mirror powder over a tacky coat with a sponge, then seal it fast. Pack green sparkle onto sheer nails with a flat brush while the coat stays tacky. Sprinkle the pieces over wet polish, spacing them so no two sit close. Keep the base clear, because dark bases turn the mirror finish grey. Finish with two coats of clear top coat, and cap the free edge for wear.
21. Matte Burgundy with Glossy Tips
Flat burgundy covers every single nail with a velvety, light-absorbing surface. Glossy tips cap each nail with a deep, wine-dark shine. Burgundy stays deep and even across the whole set, with no glossy patches anywhere. Matte finish dulls the shine, so the glossy tips stand out more. Wine tones warm the whole set, giving it a rich, cosy festive feel.
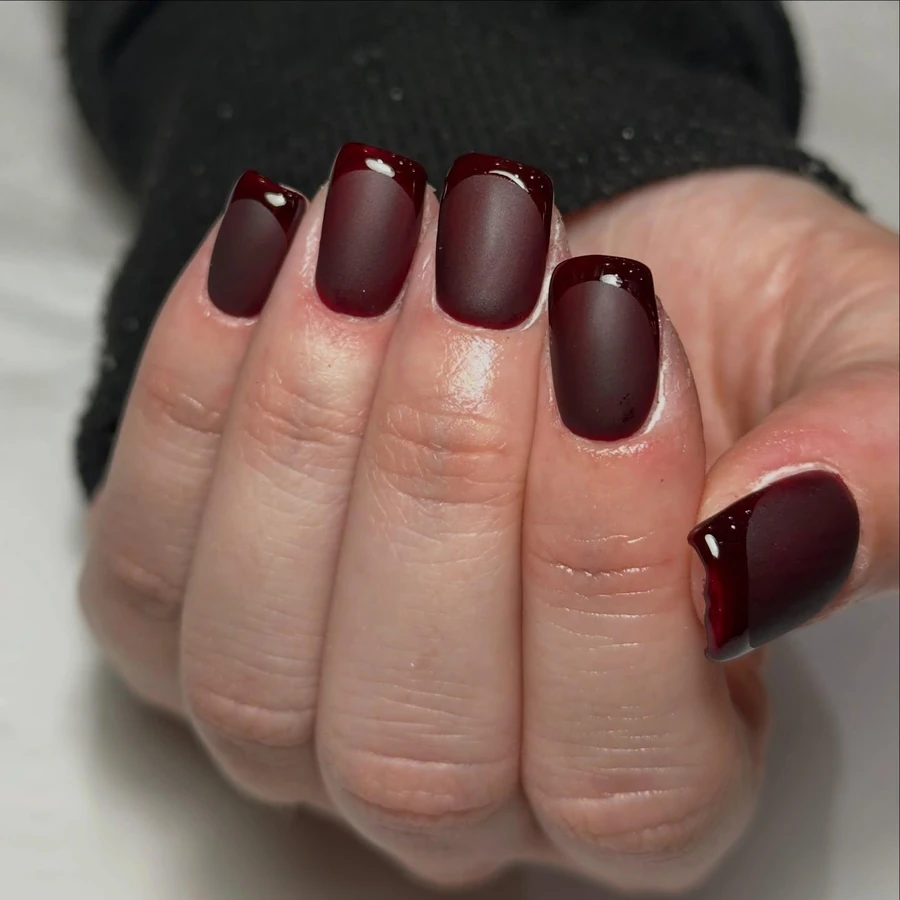
Cover the wine shade first in two thin layers, then let each dry fully. Shape the glossy ends with a striping brush, following the natural curve of each nail. Use a flat top coat last, because gloss would undo the velvety look. Skip oils near the tips, so the shine stays fixed in place. Fix chips at the free edge at once, since dark shades show wear fast.
22. Burgundy and Stormy Green Confetti
Stormy green covers two nails in a dark, muted shade of green. Deep burgundy fills the rest with a rich, glossy wine-dark festive coat. One accent nail wears full confetti glitter in red, green, and gold. Burgundy nails carry green, gold, and pink glitter flecks near the tips. Muted tones keep the set calm, so the confetti adds the sparkle.
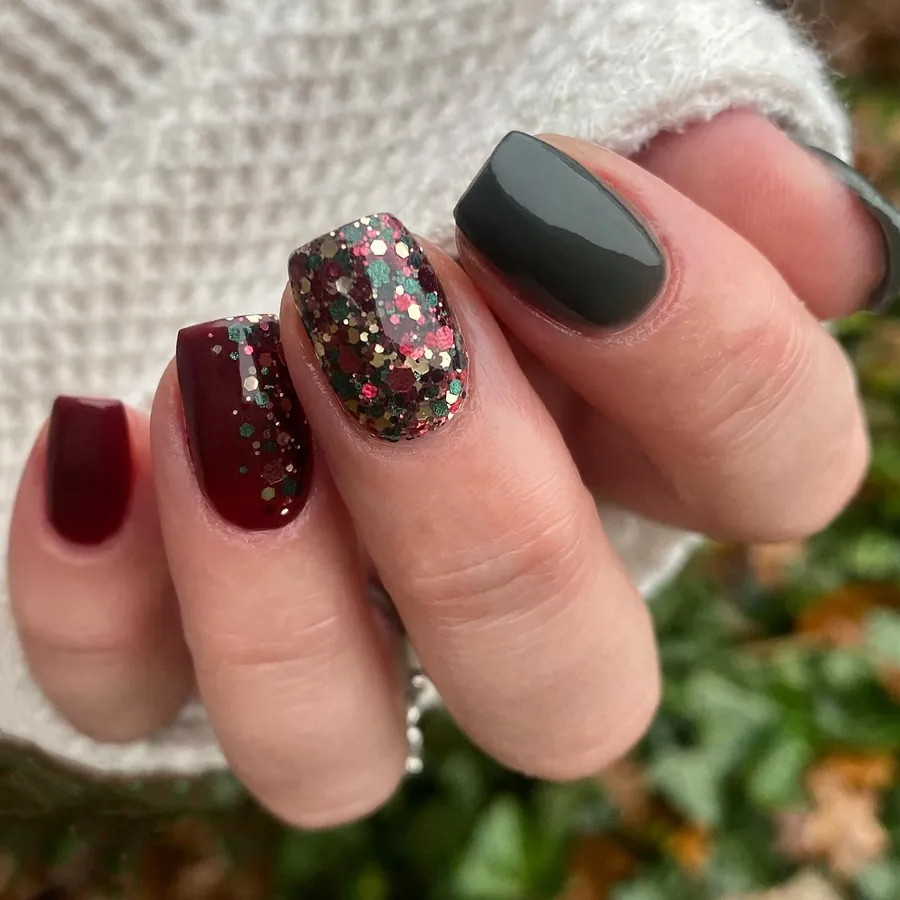
Layer two thin coats of the wine shade, then let each dry fully. Paint the stormy nails next, keeping the shade even across each nail. Dust the confetti glitter over wet polish, spacing the pieces evenly. Add the flecks with a dotting tool, pressing them gently into the coat. Seal the set with a clear top coat, because glitter edges can catch and lift.
23. Red Plaid Hearts with Snowflake
Deep red polish covers thumb and pinky in a glossy coat. Pale pink fills three middle nails with a sheer glow. White snowflake arms spread across the middle nail. Red and white lines cross the ring finger in a neat plaid grid. Small red heart sits at the centre of the grid. Tiny white heart rests near the pinky tip. Red, green, and white dots edge the index nail, so the pale pink stays bright.
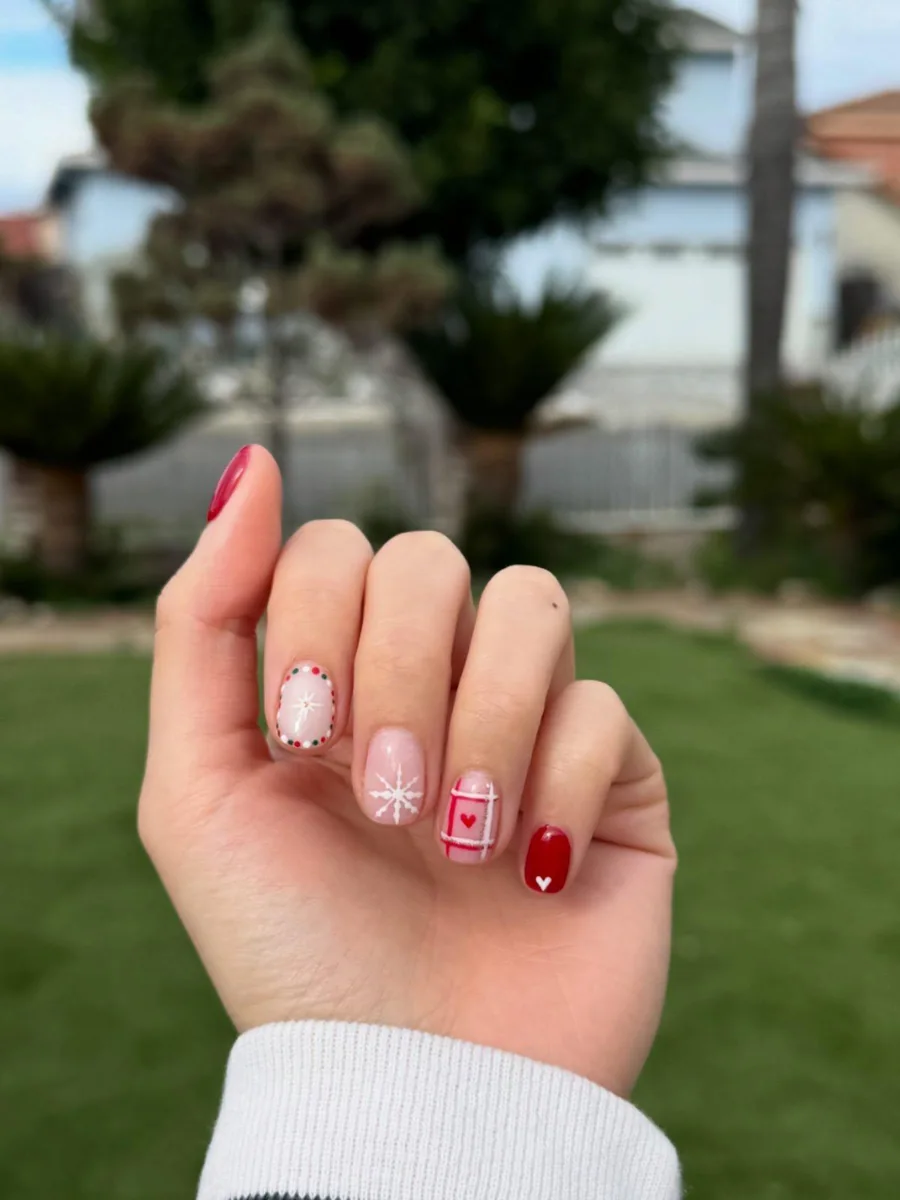
Brush the red shade on first in two thin layers, then let each dry fully. Sweep the pale base on after the red dries, keeping the edges tidy and clean. Draw the flake with a fine brush, working outward from the centre. Map the grid with a striping brush, crossing red over white lines. Add each heart with a dotting tool, pressing one dot to a point. Seal the set with clear top coat, because thin lines chip first.
24. Emerald Glitter with Tree and Bow
Dark green glitter covers the nails with a dense, sparkling shine. Silver glitter fills two accent nails with a cool, bright metallic gleam. White nails hold a green Christmas tree with a red and green bow. Green and silver share the set, so the tree stands out at once. Gloss seals the glitter, giving each nail a wet, polished finish.
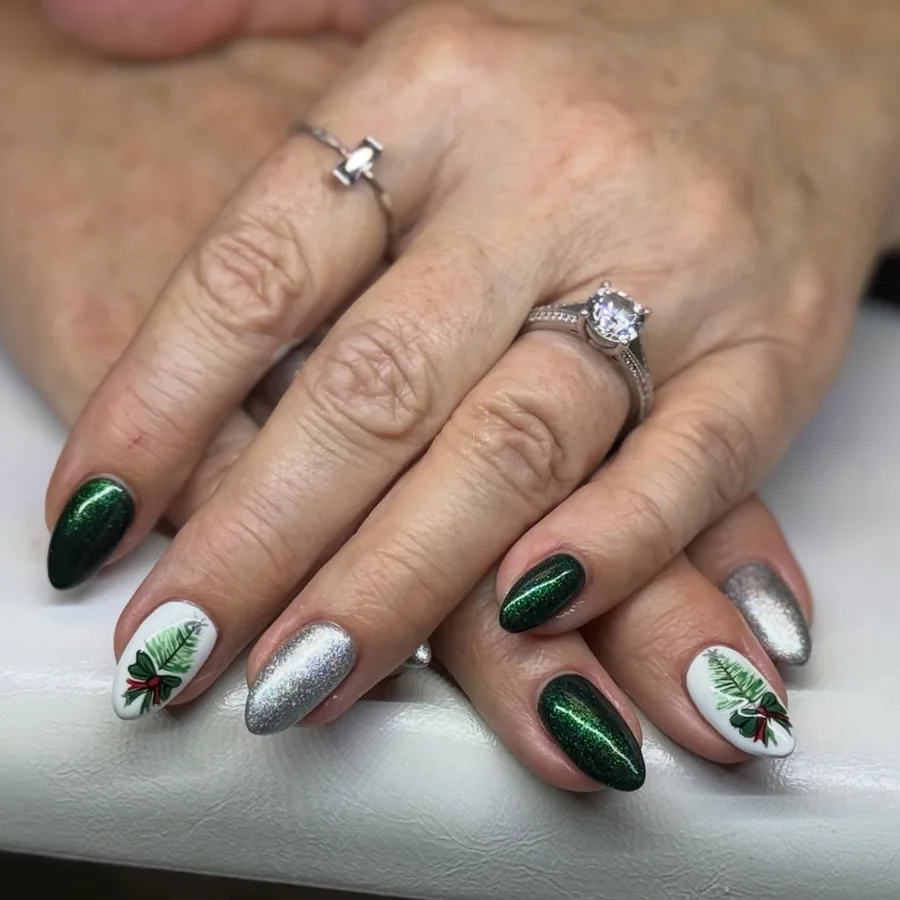
Pack glitter onto the green nails with a flat brush while the coat stays tacky. Paint the tree with a fine brush, starting at the trunk and adding branches. Add the bow in crimson and pine, plus tiny dots for berries and leaves. Dust silver sparkle over the accent nails, spacing the grains evenly. Seal the set with a glossy top coat, because glitter edges can lift and snag.
25. Burgundy Solids with Pink Polka Dots
Polka dots cover pale pink nails in burgundy, white, and black spots. Deep metallic burgundy fills the rest of the set with a rich, glossy shine. Dots vary in size and spacing, so the pink reads playful and bright. Burgundy and pink share the set, giving it warmth and contrast. Gloss seals the dots, keeping the pattern crisp and easy to read.

Lay down two thin coats of the wine shade, then let each dry fully. Paint the blush nails next, keeping the shade even across each nail. Add the dots with a dotting tool, varying the size and spacing for play. Use black, ivory, and wine dots in turn, so no two nails match exactly. Seal the set with a clear top coat, because dots can lift at the edges.
Conclusion
Choose your base shade first, then keep the detail small and well spaced. Burgundy pairs well with gold, emerald with silver, and pale pink with crisp white lines. Short Christmas nails look their best when coats are thin, the free edge is capped, and glitter or raised pieces stay on one or two fingers. Press loose sparkle flat, wipe stray marks right away, and keep a small bottle of top coat in your bag. A compact festive manicure like this grows out gracefully, so one careful session can last through the season.