


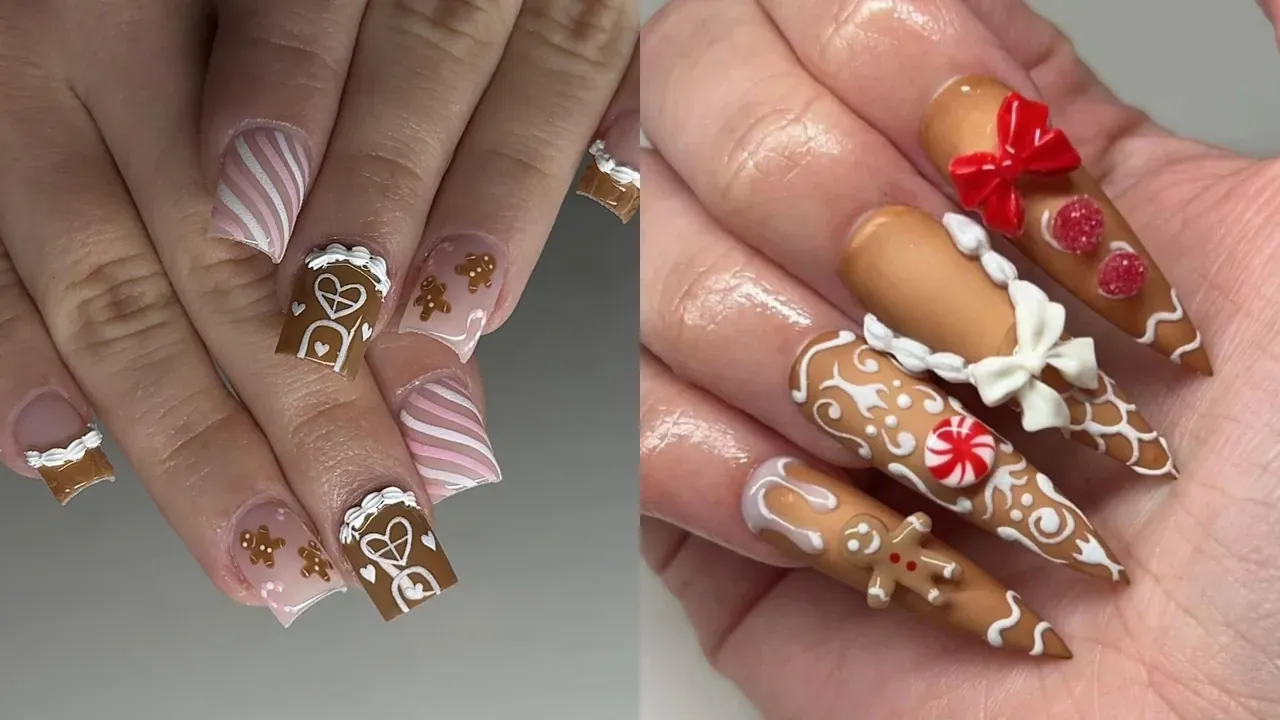
Warm spice, buttery biscuits, and a tray fresh from the oven set a mood that fingertips can borrow too. Gingerbread nails turn caramel brown, white icing lines, and candy stripes into a set that looks good enough to eat. This collection covers tiny cookie men, icing-roofed houses, peppermint swirls, and glitter bases, with sheer pink and nude options for softer days. If you enjoy gingerbread nail art but want it wearable, the notes below explain how to keep figures small, icing lines clean, and finishes smooth. Cookie-inspired nails also suit every skin tone, so you can pick a shade of brown that flatters your hands.
1. Cookie Houses with Pink Candy Stripes
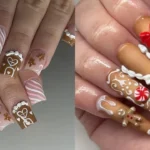
Caramel brown fills several nails with a warm cookie color. White icing roofs cap small gingerbread houses, and white hearts sit between them. Small gingerbread men stand on sheer pink nails, each one plain and simple. Pink and white candy stripes run down the remaining nails in even bands. Glossy shine keeps the caramel bright, so the white icing reads crisp against it.
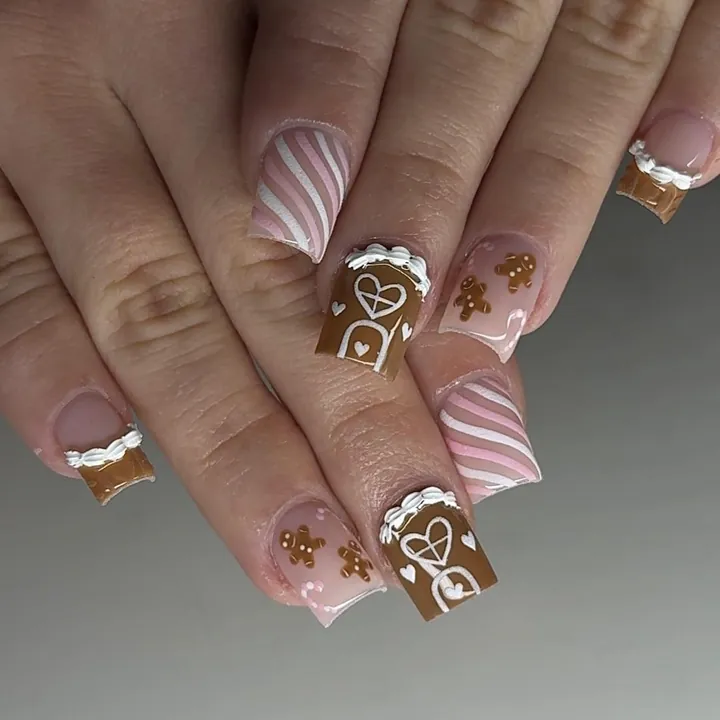
Paint the caramel base first in two thin coats, then let each coat dry fully. Draw the houses with a thin brush, starting with the roof lines before the walls. Add the gingerbread men next, keeping each figure small so the pink base shows. Stripe the candy nails with tape guides. Pull the tape while the polish stays wet. Seal everything with a glossy top coat, because icing lines can smudge without cover.
2. Raised Gingerbread Man with Peppermint Candy
Warm caramel brown coats the nails in a warm, even cookie color. White icing swirls wind across the caramel in loose, curling lines. One gingerbread man sits raised above the surface, built as a small 3D figure. Peppermint candy rests beside him, round and striped in red and white. Red and white bows sit near the tips, so red glitter dots fill the gaps between them.
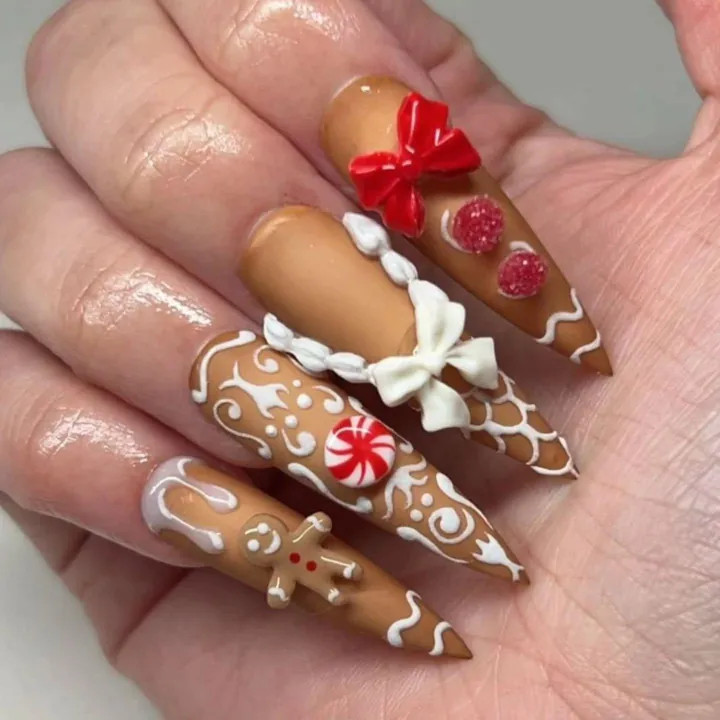
Build the raised figure after the base coats dry, because wet polish shifts under weight. Shape the gingerbread man from builder gel. Builder gel is thick, so it holds a raised form. Paint the icing swirls with a thin brush, keeping the lines loose and uneven. Set the bows and candy with tweezers, pressing each piece into wet top coat. Seal the flat nails first, then add a thicker seal around the raised pieces.
3. Sheer Pink Tips with Gingerbread Men
Sheer pink washes the nails in a soft, pale color. Caramel brown tips cap each nail, so each tip reads like a gingerbread cookie edge. White snowflakes sit on the brown tips, one flake per nail in varied sizes. Small gingerbread men stand on the pink base, each one plain brown with white icing. One pearl rests near a cuticle, small and round against the sheer pink.
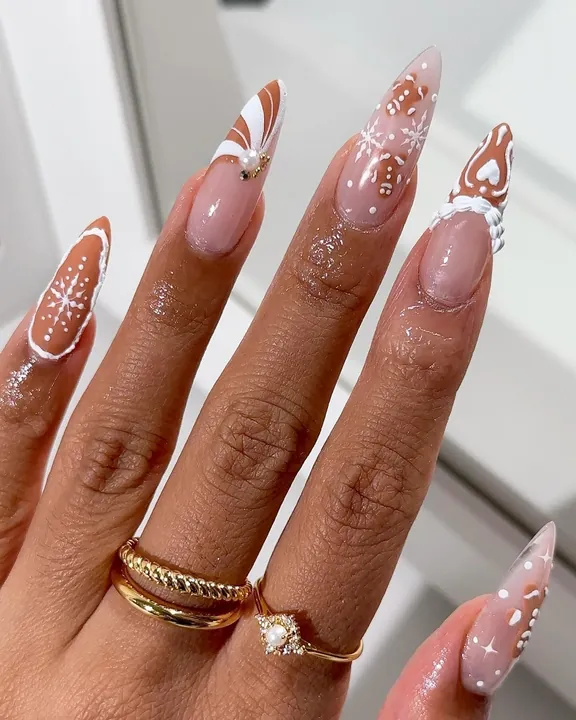
Shape the brown tips with a striping brush, following the curve of each nail. Draw the flakes after the tips dry, because wet brown smears under white lines. Keep each cookie man small, leaving rose base visible around him. Place the bead with tweezers into wet polish, then press it gently until it holds. Cap the free edge with a clear seal to slow chipping at the ends.
4. Smiling Gingerbread Men with Holly Blooms
Pale sheer pink forms a soft base across every nail. Smiling gingerbread men sit on the pink, each one brown with white icing details. Green holly leaves spread beside the figures, sharp and dark against the pink. Red poinsettias bloom on other nails, their petals wide and layered. White sparkle stars scatter across the set, so small bright points fill the gaps.
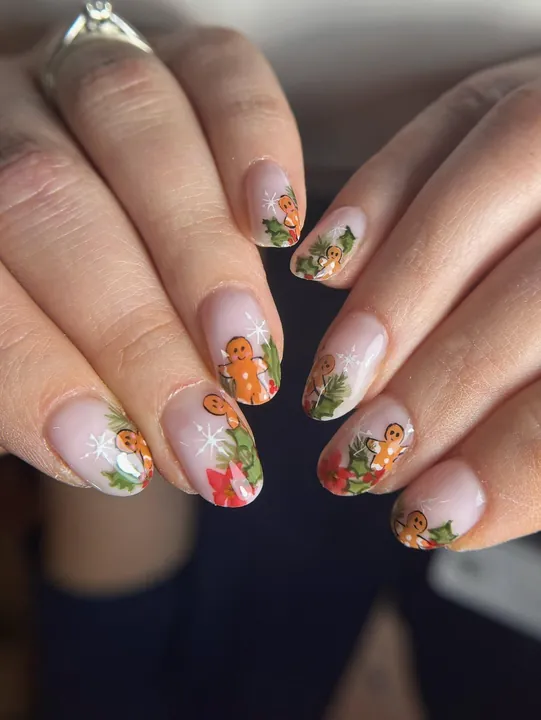
Begin with the gingerbread men, then add the white icing lines once the brown dries. Draw holly leaves with a small brush, keeping each leaf pointed at the tip. Layer the poinsettia petals one at a time, starting with the outer petals. Place the sparkle stars with a dotting tool. Space them unevenly for a natural look. Seal the set with a glossy top coat, since tiny lines wear fast without cover.
5. Icing Outlines on Cookie Brown Nails
Rich caramel brown covers the nails in a warm, even coat. White icing outlines trace the edges, forming cookie-style borders on every nail. Pink stripes run beside the white lines, thin and straight down each nail. Cream bows sit near the tips, so soft pale shapes break up the brown. Small rhinestones catch light between the bows, adding tiny bright points across the set.

Lay the caramel base in two light coats, then let each coat dry fully. Draw the icing outlines with a fine brush, keeping the lines smooth and steady. Add the pink stripes after the outlines dry. Use tape guides to keep them neat. Set the raised pieces with tweezers, pressing one into wet polish. Seal with a glossy top coat, because raised pieces loosen fast without cover.
6. Hello Kitty Gingerbread Figure with Houses
Cookie brown fills the nails with a warm color. Gingerbread houses stand on several nails, their roofs edged in white icing. One nail carries a Hello Kitty figure dressed as a gingerbread cookie. Another nail holds a small gingerbread man, plain brown with white icing lines. White icing drips run down from the tips, so red bows fill the gaps between the designs.

Sketch the houses first in thin lines, then fill the caramel around them. Paint the kitty figure after the base dries, because small faces smudge easily. Draw the pale drips with a thin brush, letting each drip end at a different point. Place the red bows with tweezers, pressing each one into wet top coat. Seal the flat nails twice to protect the detailed faces from wear.
7. Matte Brown Gingerbread House Nails
Matte brown covers the nails with a flat, soft cookie color. Each nail reads as a gingerbread house, painted edge to edge in warm brown. White icing roofs cap the houses, with crisp lines marking the roof edges. Small white windows sit in rows, and a white door centers each house. Matte finish dulls the shine, so the white icing stands out more.
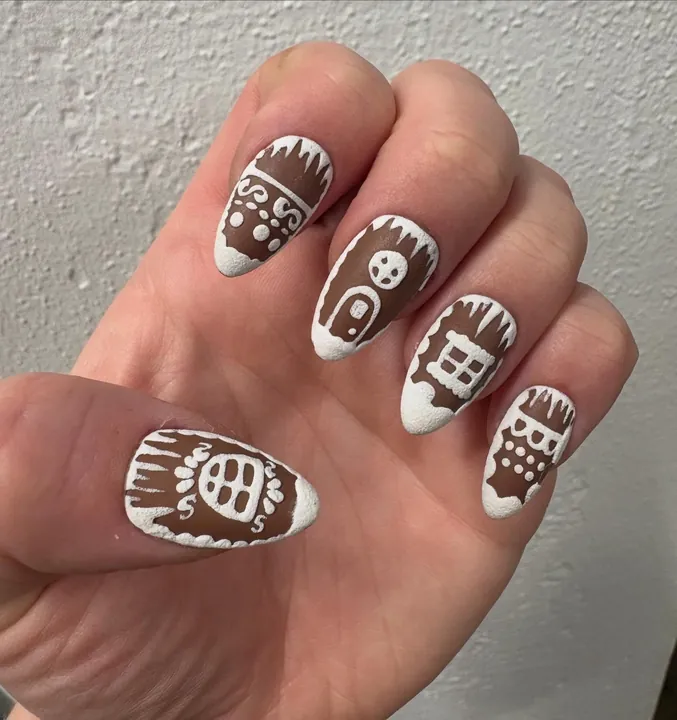
Cover the nails in brown first, then add a matte seal before the details. Draw the roof lines using a fine brush, keeping them straight and even. Add windows and doors once the paint dries, because pale lines smear on wet matte. Keep each house centered to balance the design on every nail. Seal the details with a matte top coat to keep the flat finish.
8. Gingerbread Men in Santa Hats
Deep caramel brown spreads across the nails in an even, glossy coat. Gingerbread men wear red Santa hats, so each hat shows a white trim. Houses stand beside them, their roofs edged in white icing. Candy canes lean across several nails, striped in red and white. Red and white peppermint swirls spin on the remaining nails, round and bold against the caramel.
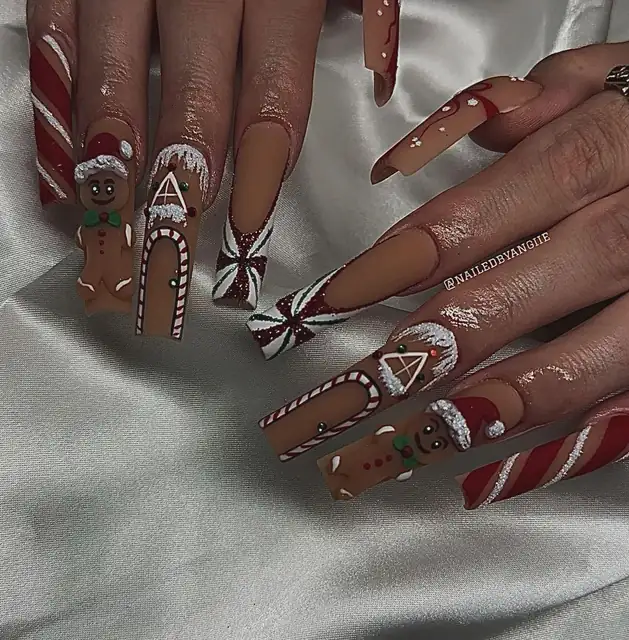
Start with the caramel base in two thin layers, letting each layer dry fully. Draw the cookie men next, adding the Santa hats after the brown dries. Paint the striped canes with a fine brush, curving each stripe at the top. Swirl the peppermint circles using a dotting tool, keeping the rings even. Seal everything under a glossy top coat, because red and white lines smudge without cover.
9. Brown Nails with Gingerbread Lettering
Brown nails carry gingerbread houses and cookie patterns in white icing. White icing lines trace roofs, windows, and swirls across the brown. Red and green sprinkles scatter over the icing, small and bright between the houses. GINGER BREAD DREAMS lettering runs across one nail in white capitals. Brown and white dominate the set, so red and green sprinkles add the color.

Work the brown base first in two thin coats, then let each coat dry. Sketch the houses with a thin brush, starting with the roof lines. Add the sprinkles with a dotting tool, spacing red and green dots apart. Letter the words last with a fine brush, keeping each capital even. Seal with a glossy top coat, because white icing lines wear fast without cover.
10. Sheer Pink with Tiny Cookie Houses
Soft sheer pink covers the nails in a light wash. Small caramel houses sit on the pink, each one tiny against the sheer base. White icing snow caps crown the roofs, thick and bright on the caramel. Snow dots scatter around the houses, small and evenly spaced. Pink and caramel share the set, so the houses read warm against the pale base.
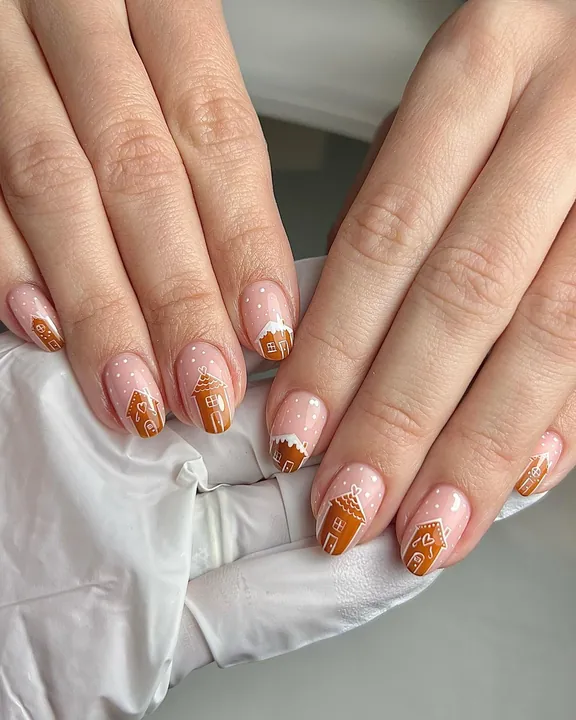
Paint the sheer pink base first, then let it dry fully before the houses. Draw the caramel houses with a thin brush, keeping each one small. Add the snow caps after the caramel dries, because white icing smears on wet brown. Dot the snow with a dotting tool. Space the dots unevenly for a natural look. Seal with a glossy top coat to smooth the icing lines and lock in the dots.
11. Caramel Swirls with Dangling Gingerbread Charm
Even caramel brown coats the nails in a warm, cookie color. White icing swirls loop across the caramel, curling in loose, open curves. Hearts sit between the swirls, small and plain against the brown. One gingerbread-man charm dangles from a nail, hanging below the tip on a small link. Glossy shine keeps the caramel bright, so the white icing reads crisp.

Begin with two thin coats of caramel, letting each coat dry fully. Draw the icing swirls with a thin brush, keeping the curves loose and open. Add the hearts after the swirls dry, because white shapes smudge on wet lines. Hook the charm through a small bead of top coat, then hold it until it sets. Seal the flat nails first, and add extra top coat around the charm base.
12. Caramel Mix with Polka Dots and Tips
Warm cookie brown fills most nails with a warm, even color. Gingerbread men stand on the caramel, each one plain with white icing lines. White icing houses sit beside them, their roofs edged in white. Cream polka-dot nails break up the brown, dotted evenly across the whole set. French tips in cream and brown finish the remaining nails, so a clean curved edge caps each one.

Color the caramel nails first, then add the cream polka-dot nails. Draw the gingerbread men after the base dries, because brown figures smudge easily. Shape the French tips with tape guides, following the curve of each nail. Dot the cream nails with a dotting tool, keeping the dots even and spaced apart. Seal everything with a glossy top coat to even out the mixed finishes.
13. Matte Orange with Gingerbread Houses
Matte orange and caramel share the nails in warm, flat autumn tones. One gingerbread man stands on an orange nail, plain brown with white icing. Gingerbread houses fill other nails, their roofs edged in white icing. White polka dots scatter across the set, small and evenly spaced. Matte finish dulls the shine, so the white icing and dots stand out more.
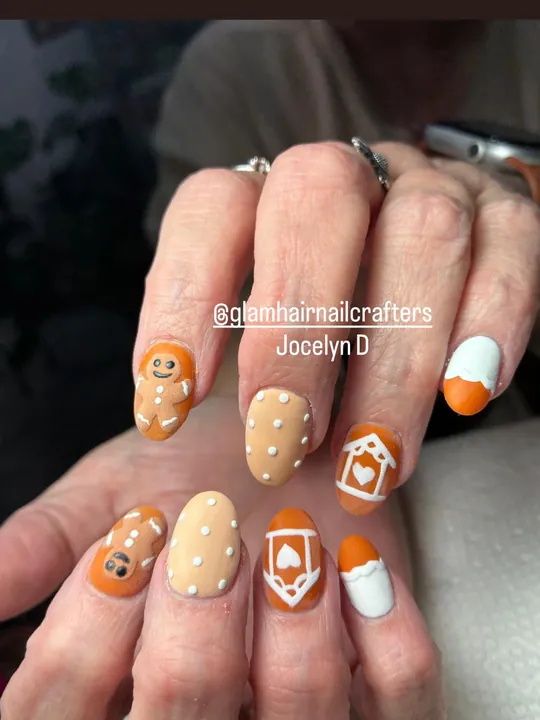
Coat the nails in orange and caramel first, then add a matte seal. Draw the cookie man after the base dries, because small figures smudge easily. Paint the houses with a fine brush, keeping each roof line straight and even. Dot the spotted nails with a dotting tool, spacing them evenly across the set. Seal the details under a matte top coat to keep the flat finish.
14. Nude Gingerbread Men with Candy Borders
Sheer nude covers the nails in a pale, clear wash. Gingerbread men stand on the nude base, brown with white icing lines. Candy-cane borders edge the nails in red and white stripes. Red and green rhinestones sit between the figures, small and bright. Silver bow rests near one tip, its loops smooth and metallic. Nude base keeps the set soft, so bold red and green accents pop.

Brush the sheer nude base on in two thin coats. Draw the cookie men after the base dries, keeping each figure small. Edge the nails with striped borders, using a fine brush for clean lines. Set the stones with tweezers, pressing one into wet polish. Place the silver bow last, because heavy pieces slide on wet polish. Seal the flat nails first, then add extra top coat around the bow.
15. Short Brown Nails with Cookie Thumbs
Chocolate brown coats the nails in a rich, even color. Gingerbread houses stand on two nails, their roofs edged in white icing. Pink bows sit beside the houses, soft and pale against the brown. White snowflakes scatter across other nails, each flake small and neat. Thumbs show close-up gingerbread cookies, brown with white icing details. Brown and pink share the set, so snowflakes read bright between them.
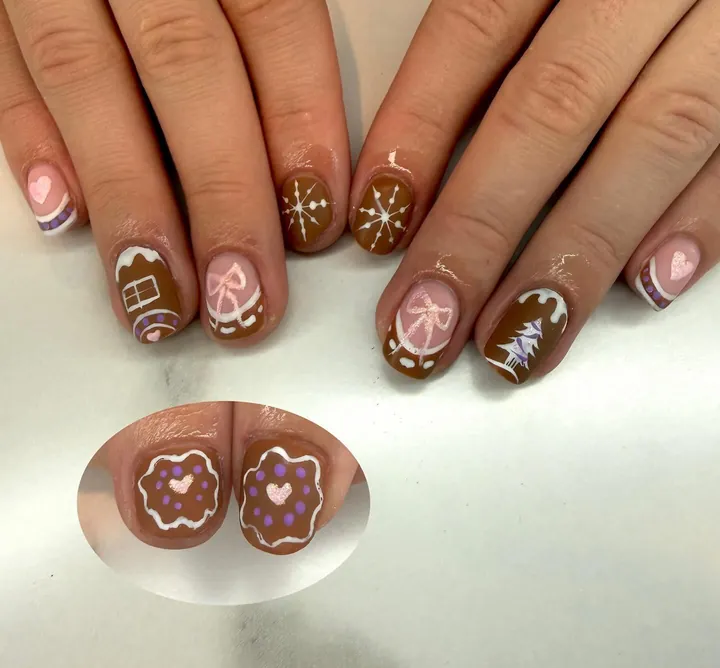
Shape the brown base first, keeping coats thin for even coverage. Draw the houses with a fine brush, starting with the roof lines. Add the rose bows after the houses dry, because soft colors smear on wet brown. Dot the flakes with a dotting tool, keeping each flake small. Finish the cookie thumbs last, since tiny art needs a steady hand. Seal everything with a glossy top coat for lasting shine.
16. Golden Cookie Figures with Gold Foil
Clear sheer polish leaves the nails pale and see-through. Golden gingerbread figures sit on the sheer base, each one a different cookie shape. Man, angel, rocking horse, bell, reindeer, star, and heart all appear across the set. Gold foil flakes catch light between the figures, warm and bright. Brown outlines edge each cookie, so the golden shapes read clear against the sheer base.

Coat the nails with sheer polish first, letting it dry fully before the figures. Sketch each cookie figure with a thin brush, keeping the shapes small and simple. Fill the figures with gold after the outlines dry, because gold smears over wet lines. Press gold foil flakes onto tacky top coat, spacing them between the figures. Seal with a glossy top coat, then check the foil edges for lifting.
17. Icing French Tips with Red Glitter
Gingerbread men stand on two nails, brown with white icing drips. Red and green dots line the drips, small and bright against the brown. Brown icing French tips cap other nails, their curved edges edged in white. Solid red glitter fills some nails, bold and sparkling beside the brown. Green nails also round out the set, deep and flat next to the glitter.
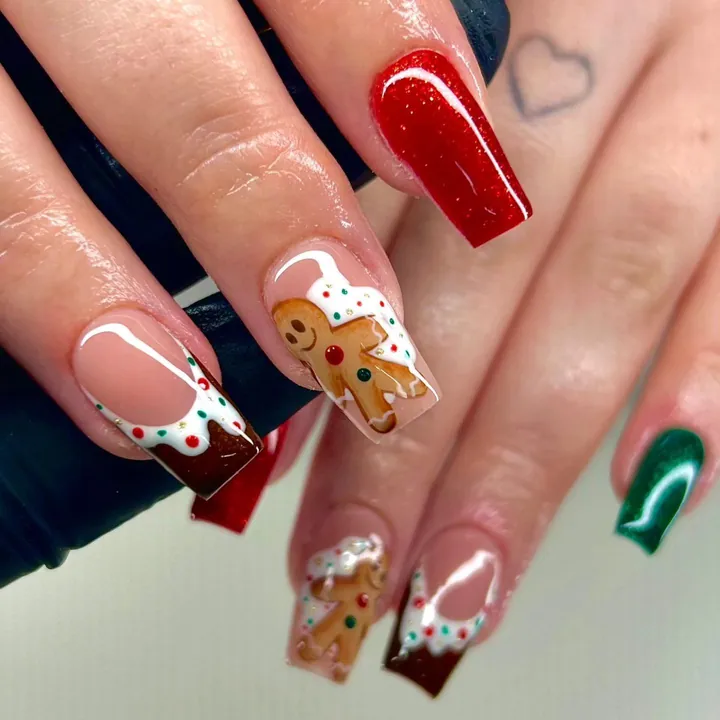
Start with the gingerbread men, then add the icing drips once the brown dries. Dot red and green along the drips with a dotting tool, spacing the colors apart. Tape the brown French tips with guides, following the curve of each nail. Brush the red glitter on in two thin coats, because glitter shows streaks when thick. Top the glitter nails twice to smooth rough glitter that catches on fabric.
18. Cookie Shapes on Sheer Pink
Pale pink sheer covers the nails in a light, clear wash. Gingerbread men stand on the pink, brown with white icing details. Snowman, bells, stocking, reindeer, tree, and mitten shapes fill the other nails. Each cookie shape stays brown with white icing, small against the sheer pink. White icing edges every shape, so the brown cookies read clear on pink.
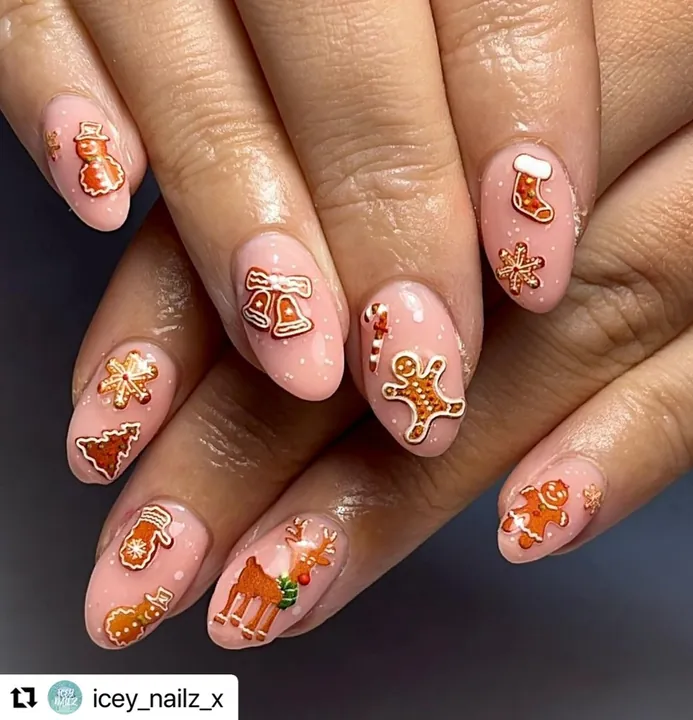
Lay the sheer pink base first, letting it dry fully before the cookies. Sketch each cookie shape small, leaving rose base visible around every figure. Outline the shapes in brown first, then add the piped lines once the brown dries. Keep the pine and gift shapes simple, because tiny marks blur on little tips. Finish with a glossy top coat to smooth the icing lines and lock in the shapes.
19. Glitter Gingerbread Houses with White Man
Glitter catches light across brown nails in a warm, sparkling coat. Each glitter nail reads as a gingerbread house, its roof edged in white icing. White icing drips run down the houses, so each drip ends at a different point. Red and green dots scatter across the houses, tiny points of color on brown glitter. One nail shows a white gingerbread man, plain against the brown glitter.
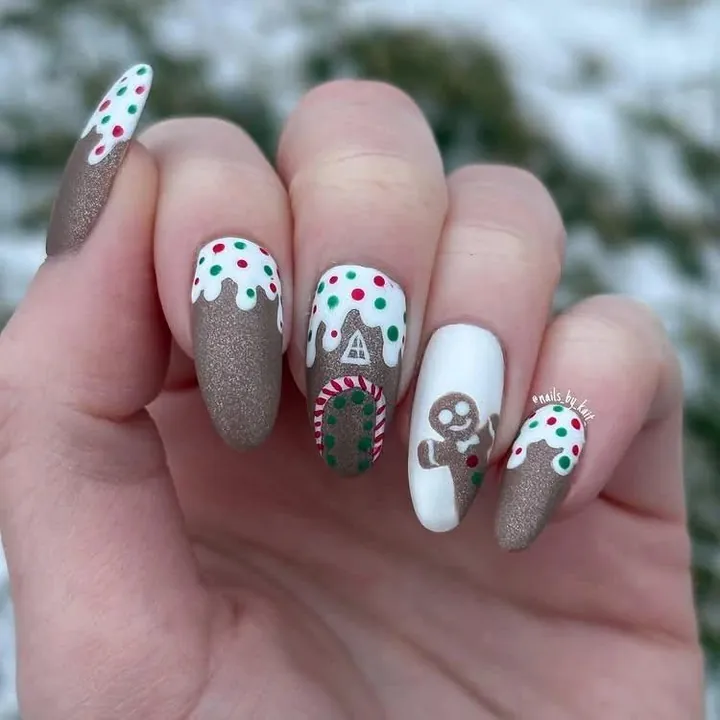
Spread the dark sparkle shade in two thin coats, letting each coat dry fully. Line the house roofs with a fine brush, keeping the icing lines straight. Add the icing drips after the roofs dry, because white lines smear on wet glitter. Place bright dots with a dotting tool, spacing the colors across the houses. Save the pale figure for last. Pale marks every slip on the dark shade.
20. Pink and Caramel Houses with Bows
Pink and caramel share the nails, warm brown beside soft pale pink. Pale pink nails sit beside the caramel, light between the brown. Gingerbread houses stand on the caramel, their roofs traced in white icing. Striped bows rest near the tips, candy-cane red and white. Candy stripes in pink and white run down the remaining nails in even bands. Glossy top coat adds shine, so the icing lines stay bright on the caramel.

Color the caramel nails first, then add the rose nails beside them. Outline the houses with a fine brush, starting with the roof lines. Tie the striped bows after the houses dry, because stripes smear on wet polish. Stripe the candy nails with tape guides, pulling the tape while the polish stays wet. Lock the set with a clear top coat to guard the icing lines against smudging.
21. Gold Glitter with Star Cookie
Gold glitter covers the nails in a warm, sparkling shine. Gingerbread man stands on one nail, brown with white icing details. House sits beside him, its roof edged in white icing. Star cookie rests on another nail, golden brown with white icing points. White and gold candy stripes run across the remaining nails in even bands. Gold glitter glows under the brown figures, so each cookie reads warm and bright.
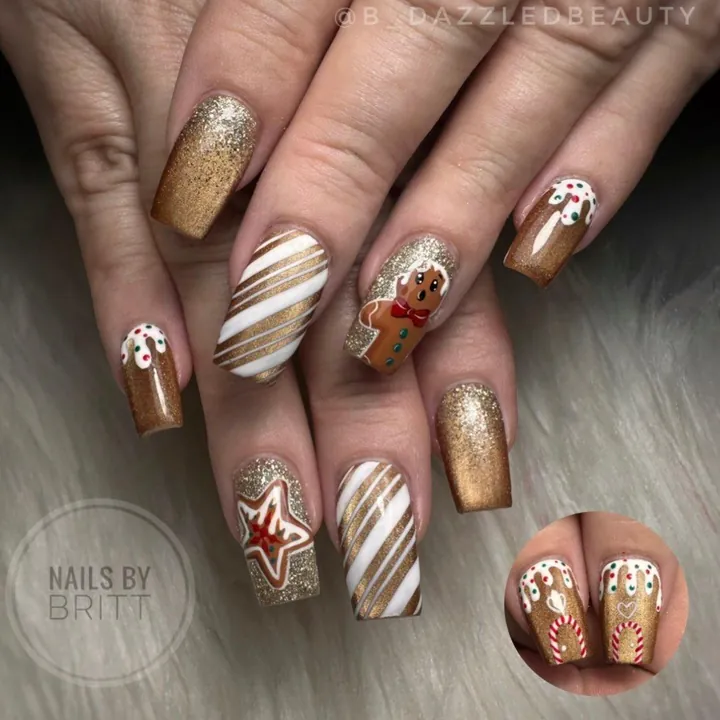
Spread the gold glitter in two thin coats, letting each coat dry fully. Work the gingerbread man in after the glitter dries, keeping the figure small. Edge the house roof with a thin brush, then add the white icing lines. Tape the candy stripes with guides, pulling the tape while the polish stays wet. Top the set with a glossy coat, since glitter feels rough without a smooth seal.
22. Pink Gingerbread Girl with White Bows
Soft pink coats the nails in a pale, sweet color. Gingerbread girl stands on one nail, brown with white icing and a pink dress. Pink gingerbread house sits beside her, its roof edged in white icing. White bows rest near the tips, smooth and pale against the pink. Rhinestones also catch light between the bows, small and bright on the pink. Glitter candy stripes run across the remaining nails, pink and silver in even bands.

Cover the nails with a pale rose shade first. Use two thin layers, letting each layer dry fully. Build the small cookie girl after the base dries, keeping the figure small. Fill the rose house next, adding the pale roof trim once the shade dries. Set the pale bows and bright stones with tweezers, pressing each piece into wet top coat. Stripe the sparkle candy nails with tape guides, then seal with a glossy top coat.
23. Gold Glitter with Icing Drips
Golden glitter fills the nails with a bright, sparkling glow. White icing drips fall from the tips, each drip ending at a different point. Red and green dots sit along the drips, small and bright on the gold. White heart outline rests on one nail, its lines thin and clean. Glitter shines through the icing, so the white drips read crisp against the gold.
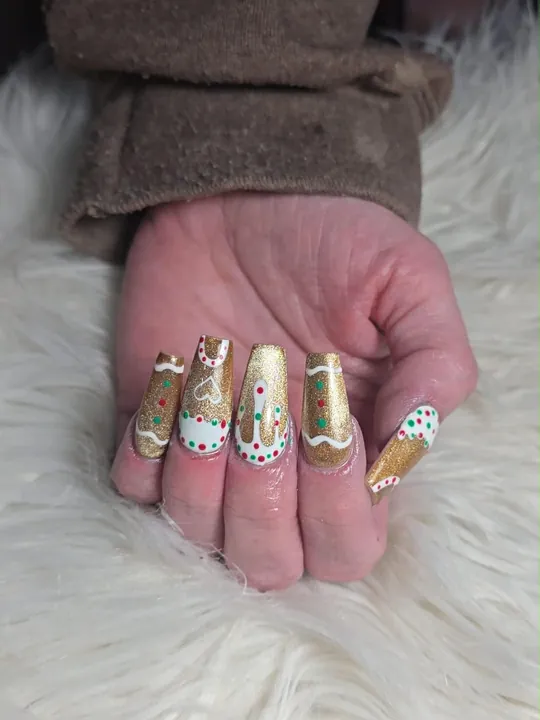
Dust the nails with a gold sparkle shade. Use two thin coats, letting each coat dry fully. Line the pale drips with a fine brush, letting each drip end at a different point. Sprinkle bright dots along the drips with a dotting tool, spacing the colors apart. Trace the pale shape last, keeping the edges neat. Lock the sparkle down with a glossy top coat, because loose sparkle snags on fabric.
24. Golden Caramel Houses with Candy Stripes
Golden caramel coats the nails in a warm, rich cookie color. Houses stand on the caramel, roofs and windows traced in white icing. Gingerbread men stand beside the houses, brown with white icing lines. Bows with candy-cane stripes sit near the tips, red and white against the caramel. Candy stripes in pink and white cross the last nails, even and straight. Golden caramel glows beneath the white icing, so each house reads warm and clear.

Wash the nails with golden caramel first, letting each coat dry fully. Trace the houses with a fine brush, starting with the roof lines. Draw the cookie men after the houses dry, because brown figures smudge on wet lines. Tie the striped bows after the men dry, keeping each bow small. Tape the sweet stripes with guides, pulling the tape while the polish stays wet. Finish the set with a glossy top coat to guard the icing lines from wear.
Conclusion
Start with the brown that makes your hands glow, then build the story around it. Gingerbread nails stay charming when figures are small, icing lines are thin, and the free edge gets a clear seal. Sheer pink and nude bases soften the theme for work, while glitter and gold foil lift it for parties. Tiny art chips less than large art at the tips, so keep one spare bottle from the set for quick repairs. Whichever cookie-themed manicure you choose, keep the details sweet and uncluttered.

[…] gloss covers most nails, with blush accents carrying painted faces. Gingerbread faces wear red Santa hats, with white trim and small smiles. Snowflakes dust the blush base, while candy […]
[…] Warm gingerbread brown covers most nails in a smooth glossy coat. White icing lines draw snowflakes, small trees, and dots on the brown base. Two nails stay pale pink with a brown icing border and a white heart. Each brown nail holds one white motif, so the set reads calm and neat. Tiny white dots fill the gaps between the larger shapes. […]