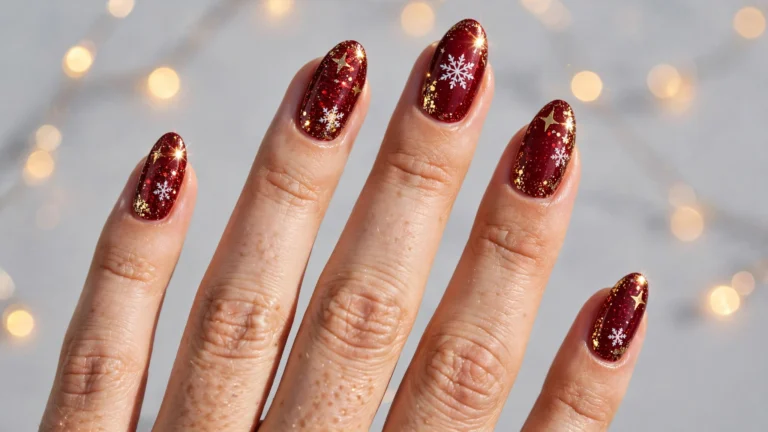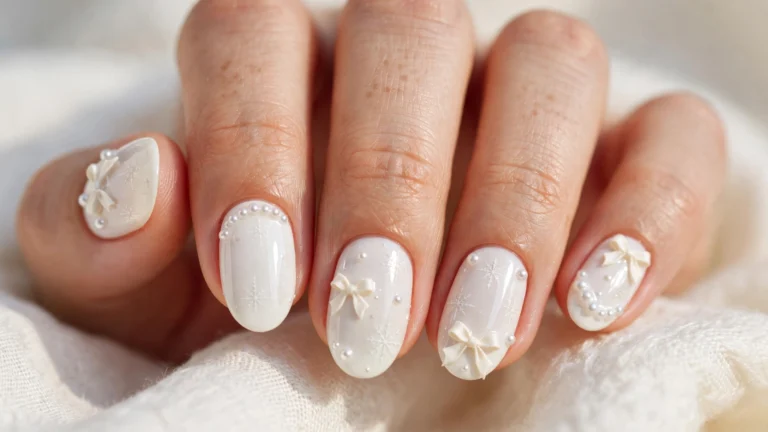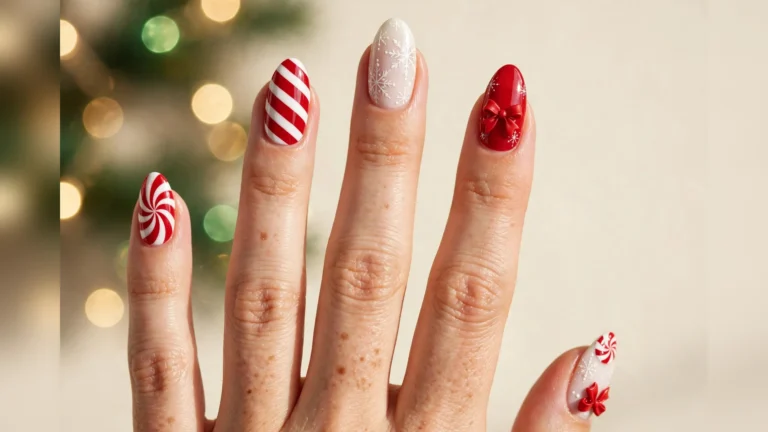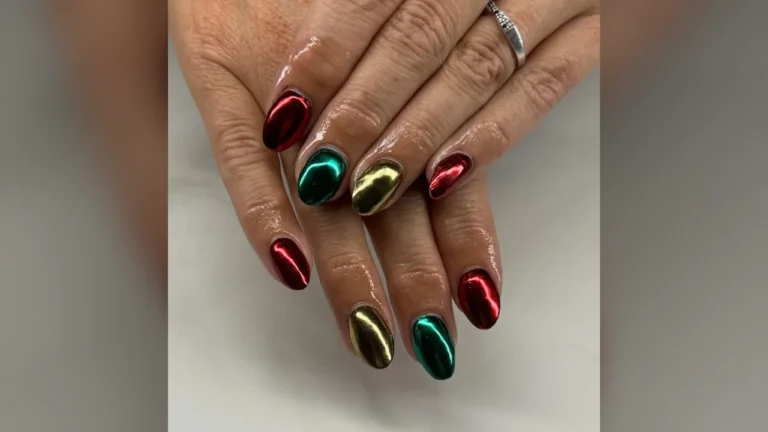


Red glitter sits beside a deep green shimmer in this Xmas Nails set. Gold, pink, blue, and white weave through the mix. Painted faces, knit textures, plaid checks, and chrome shine give each hand a different feel. Some nails carry tiny bows, berries, and snowflakes, while others stay plain with one bold finish. Soft nude confetti contrasts with rich jewel tones, so each design reads clearly. Together, these twenty-five looks offer plenty of choice for the holiday season.
1. Jewelled Crimson and Emerald Christmas Nails
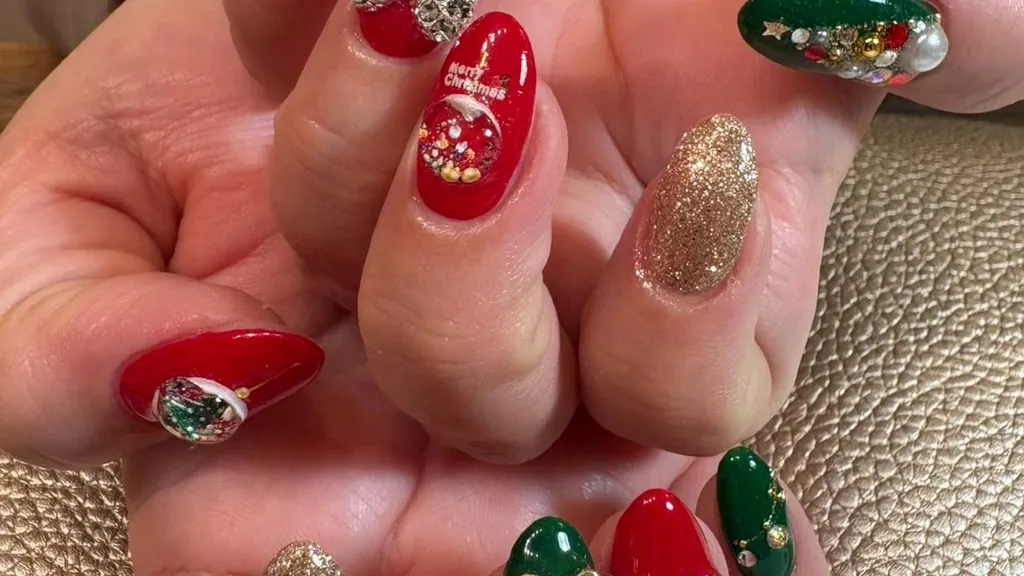
Crimson glitter covers most nails, with emerald and golden sparkle woven between. Crystal bows sit on two nails, catching light with each small facet. Pearl beads form a wreath with a golden bow on one accent nail. White script spells out a holiday greeting beside a painted bauble. Gold stars scatter across the set, so the whole look feels rich and festive.

Start with a crimson base on most nails, then add emerald and golden glitter in turn. Paint the wreath with tiny dots of white, and shape the bow with a thin brush. Press each crystal charm into wet polish so it sets firmly. Keep coats thin, because thick layers dry slowly and trap bubbles. Seal the whole manicure with clear top coat, and cap the free edge to slow chips.
2. Fairy Lights on Red Green and Gold
Scarlet glitter alternates with emerald and golden sparkle across the hands. Ivory accent nails carry black wire lines with tiny coloured bulbs. Each bulb glows in a different soft hue, like bulbs strung along a branch. Gold glitter fills the gaps, so the set stays warm and bright. Red glitter anchors the rich look, while green adds depth beside it.

Paint a red base first, then add green glitter and gilded shimmer on alternate nails. Draw thin black lines over the white nails with a striping brush. Dot tiny bulbs down every line, using a dotting tool for even size. Swap the bulb hues for one colour if the mix feels too busy. Finish with clear top coat, because the lines smudge without a seal.
3. Glitter Trio in Red Gold and Green
Ruby glitter, champagne sparkle, and dark emerald glitter take turns across the set. Each shade sits alone on its own nail, with no pattern or accent. Light catches the fine grains, so the surface shifts as hands move. Warm gold sits between cool green and deep red, balancing the trio. Glossy top coat gives every nail a smooth, wet shine.

Lay down one shade per nail, starting with red, green, and gold in turn. Use thin coats, because thick glitter clumps and dries unevenly. Press loose sparkle into wet polish if the coverage looks patchy. Swap the order of shades for a fresh look, and repeat the pattern on both hands. Seal with clear top coat, and cap the free edge to slow chips.
4. Merry Christmas Tree on White and Green
Emerald glitter, ruby gloss, and golden sparkle share the set in turn. Ivory accent nails show a black pine tree with white script beneath. Tiny baubles dot the branches, while small gold stars crown the top. Dark green gloss anchors the look, so the pale nails stand out. Each nail stays glossy, with light sliding across the smooth clean finish.

Start with green glitter on most nails, then add red and gold in turn. Paint the tree on white nails with a thin brush, working from the top down. Add the greeting last, because wet script smears if touched too soon. Keep the tree lines slim, or the design crowds the small nail. Finish with clear top coat, and cap the free edge to stop early wear.
5. Teal and Ruby Glitter with Gold Charms
Teal glitter covers one hand, while ruby glitter covers the other. Golden bows rest on the teal nails, with one tiny snowflake beside them. Ruby nails carry a golden snowflake and a small bow near the cuticle. Light plays across the glitter, so the two hands still feel joined. Each charm sits flat, with gold tones tying both hands together.

Paint teal glitter on one hand and red glitter on the other. Add gold charms while the polish stays wet, then press them flat. Use a thin brush for the bow loops, because thick lines blur the shape. Swap the charm sides if one hand looks heavier than the other. Seal the charms with two thin passes of clear top coat.
6. Scarlet Silver and Bright Green Glitter
Scarlet glitter, pewter sparkle, and bright emerald glitter rotate across the set. Each shade stands alone, with no art or accent to break the rhythm. Fine grains catch soft light, so the surface glows from every angle. Cool silver sits between warm red and vivid green, keeping the trio fresh. Glossy seal gives each nail a smooth, clean, wet look.

Lay down red, silver, and green glitter, one shade per nail. Keep each coat thin, because thick glitter clumps and dries slowly. Brush the sparkle on in even strokes, then let it set before the next pass. Swap the shade order on the other hand for a mirrored effect. Finish with clear top coat, and cap the free edge to slow chips.
7. Ruby Gold and Pine Shimmer Mix
Ruby glitter, champagne sheen, and deep pine shimmer rotate across the set. No pattern crowds the set, so each shade speaks on its own. Light slides over the fine grains, giving the surface a soft glow. Warm gold links cool green and rich red, holding the trio together. Glossy seal leaves every nail smooth, with shine from base to tip.

Begin with red, gold, and green shimmer, one shade per nail. Use thin coats, because thick shimmer streaks and dries unevenly. Let each coat set fully, then add the next shade with a clean brush. Change the shade order on the other hand for a mirrored effect. Top the set with clear coat, and cap the free edge to slow chips.
8. Confetti Dots on Sheer Nude Nails
Sheer blush covers each nail, with tiny dots scattered across the surface. Crimson, emerald, ivory, and golden dots mix in no fixed order. Two nails carry a golden glitter base, so the dots sit on sparkle there. Small white dots float near the cuticle, while red dots gather at the tips. Light moves through the sheer base, giving the whole set a soft glow.

Prime each nail with a sheer pink base, then let it dry before any dots. Dot the surface with a dotting tool, spacing the spots by eye. Use red, green, white, and gold polish for the spots, one hue at a time. Keep the spots small, because large dots crowd the sheer base. Finish with clear coat, and cap the free edge to slow chips.
9. Cherry Gold and Bright Green Shine
Cherry gloss, golden glitter, and bright emerald gloss rotate across the set. No art crowds the nails, so each shade holds its own space. Light slides over the glossy surface, giving the set a wet shine. Gold glitter warms the space between green and red, tying the trio. Smooth seal leaves every nail even, with shine from base to tip.
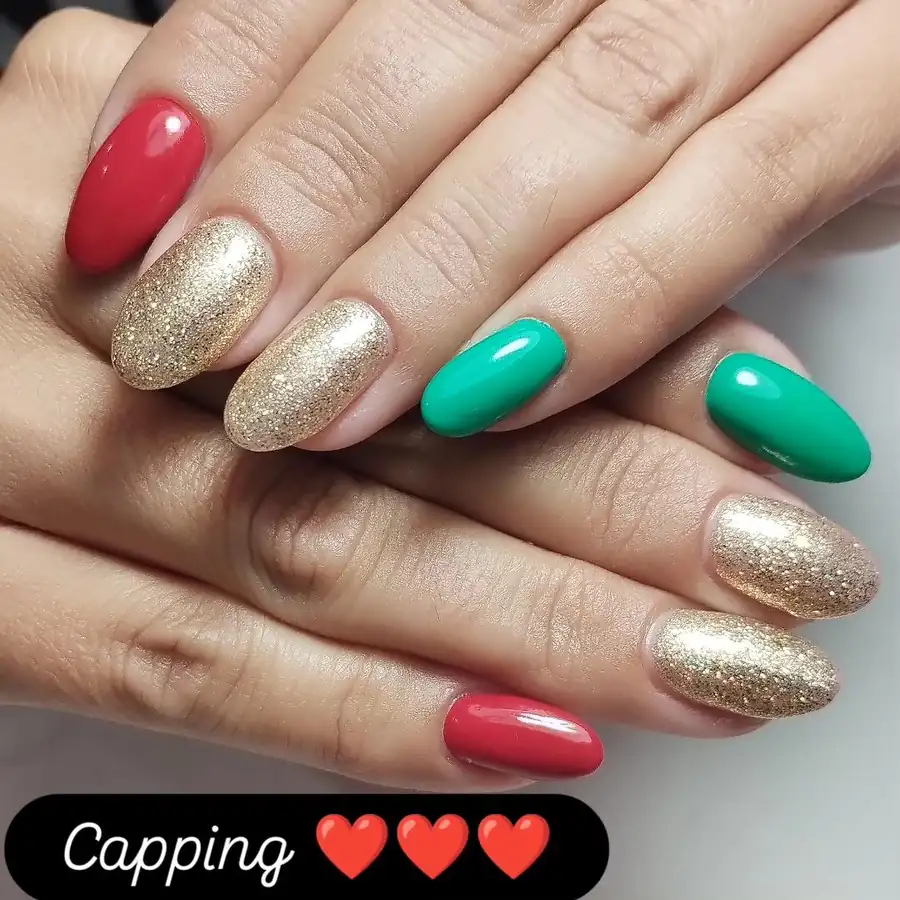
Spread red, gold, and green across the nails, one shade per nail. Use thin coats, because dark polish shows streaks more than pale shades. Let each coat dry fully, then brush on the next shade with care. Mirror the shade order on the other hand for a balanced effect. Finish the set with clear coat, and cap the free edge to slow chips.
10. Gingerbread Faces in Santa Hats
Cherry gloss covers most nails, with blush accents carrying painted faces. Gingerbread faces wear red Santa hats, with white trim and small smiles. Snowflakes dust the blush base, while candy canes lean along the edges. Tiny dots frame each face, so the art stays crisp and clear. Rich red gloss gives the set warmth, with pale pink softening the mix.

Spread red polish on the nails, then add rose sections for the faces. Draw the face with a thin brush, keeping the lines fine and neat. Add red hats last, because the pale edge needs a dry coat to sit on. Use a dotting tool for the snowflakes, so the flake stays sharp. Seal the art with a top coat, and cap the free edge to slow chips.
11. Red Knit and Plaid Holiday Mix
Crimson gloss leads the set, with ivory knit and plaid accents beside it. White cable-knit fills two nails, with raised loops running down the centre. Pale pink nails carry red and black plaid lines, crossed in a neat grid. Gold glitter dusts the edges, so the set keeps a warm holiday glow. Each texture reads clearly, from smooth gloss to soft raised knit.

Begin with a red base, then paint white knit on two nails. Draw the plaid grid with a striping brush, crossing red over black lines. Build the knit with raised lines, because flat paint misses the texture. Keep the grid lines slim, or the small nail looks crowded. Seal the texture with clear top coat, and cap the free edge to slow chips.
12. Forest Green and Burgundy Knit Texture
Deep emerald gloss covers most nails, with burgundy knit accents beside it. Raised cable loops run down the burgundy nails, catching light at each ridge. Smooth green gloss contrasts with the soft knit, so both textures stand out. Tiny gold dots hide in the knit, adding a quiet sparkle to the set. Dark tones keep the look calm, while the raised pattern gives it depth.

Brush green gloss first, then add burgundy on the accent nails. Build the knit with raised lines, using a thin brush for each loop. Keep the lines even, because uneven loops make the texture look messy. Swap burgundy for plum if the mix feels too dark. Seal the set with clear coat, and cap the free edge to slow chips.
13. White Knit Tips with Holly Berries
Ivory knit tips cover the ends of sheer blush nails, with one plain nail. Raised cable loops run along each tip, catching light at the ridges. Holly leaves and ruby berries sit near the smile line of each tip. Soft pink base keeps the set gentle, so the white tips stand out. Small green leaves add colour, with red berries giving the set warmth.
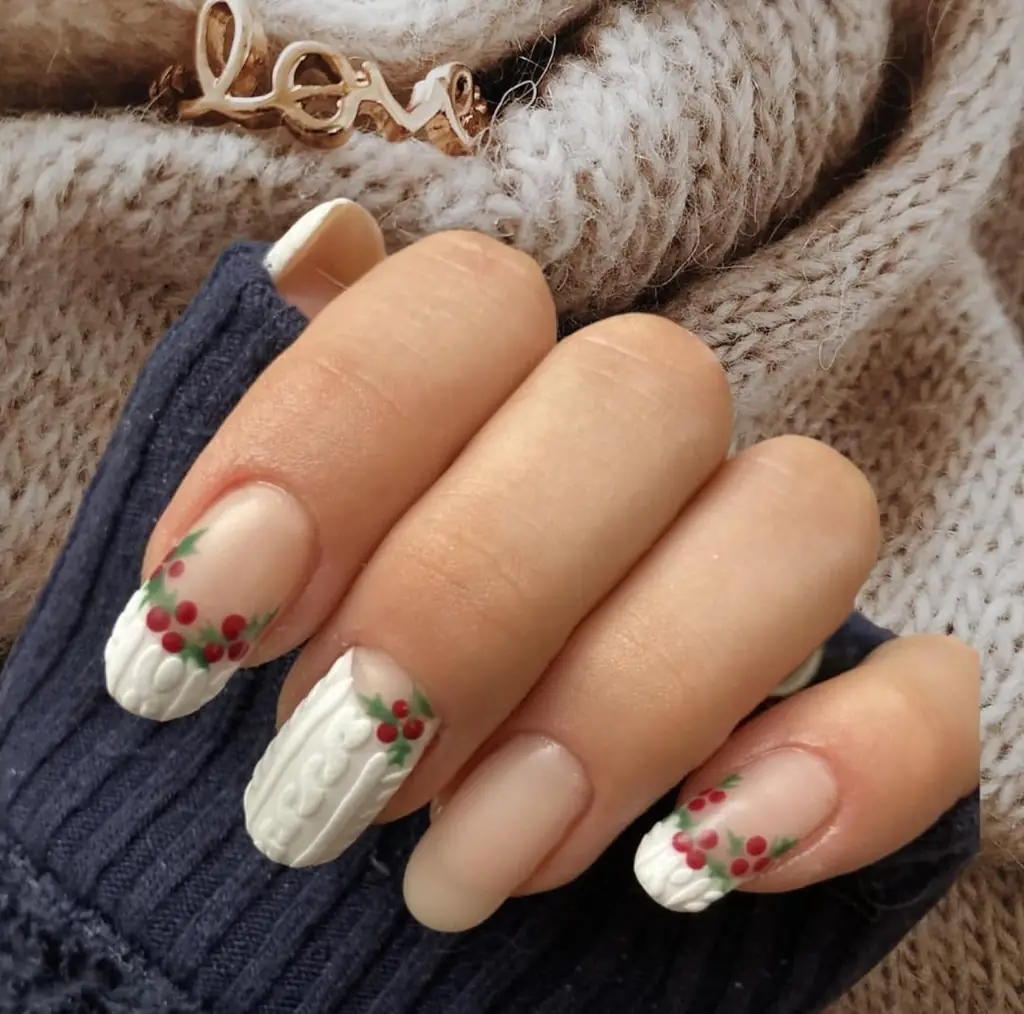
Press pink base onto each nail, then paint white tips. Shape the knit with raised lines, using a thin brush for each loop. Add leaf sprigs with a thin brush, because thick lines blur the small art. Dot red gems with a dotting tool, keeping each dot small and neat. Seal the tips with clear coat, and cap the free edge to slow chips.
14. Nutcracker and Polar Bear Shimmer Set
Warm cherry shimmer covers one hand, with emerald shimmer on the other. Nutcracker face sits on one nail, with a red hat and white trim. Polar bear wears a red scarf on the next nail, with soft white fur. Gold dots scatter across the set, so the shimmer keeps a warm glow. Light moves over the shimmer, giving each nail a soft gleam.

Brush red shimmer on one hand and green shimmer on the other. Paint the nutcracker face with a thin brush, keeping the lines small. Add the bear next, because the scarf needs a dry base to sit on. Dot gold spots across the set, then seal the art once it sets. Lock the art in with clear coat, and cap the free edge to slow chips.
15. Pink Nutcracker with Peppermint Swirls
Blush and ivory swirl together, with candy stripes curling across the set. Nutcracker face sits on one nail, with a red hat and gold trim. Red and pink stripes run down the uniform nails, with gold dots between. Soft pink fades into white, so the set keeps a gentle glow. Tiny gold dots mark the cuffs, with each stripe ending in a clean point.
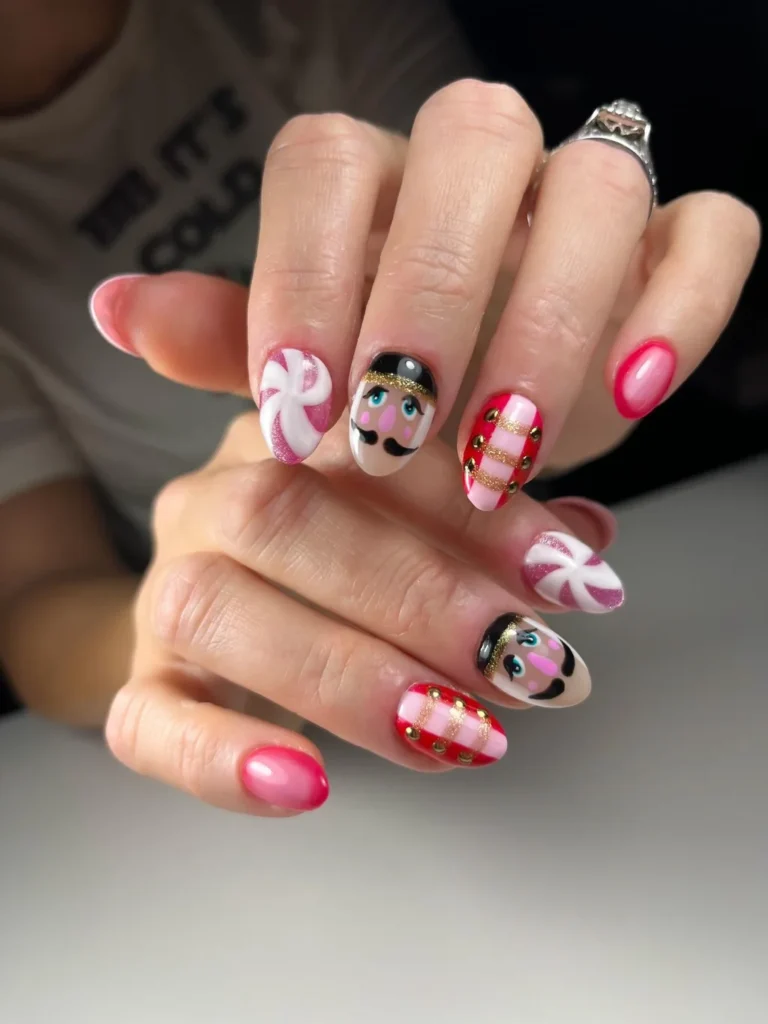
Work pink base on each nail, then swirl white through it. Draw the nutcracker face with a thin brush, keeping the lines small. Add red stripes last, because wet stripes bleed into the pink base. Dot gold spots on the cuffs, and seal the art once it sets. Protect the art with clear coat, and cap the free edge to slow chips.
16. Blue Nutcracker Ballet Story Set
Deep blue and ivory fill the set, with silver shimmer tying the scenes together. Nutcracker face sits on one nail, with a tall hat and gold trim. Mouse king, drum, and ballet slippers share the next nails, with music notes between. Silver shimmer dusts the background, so the painted scenes stay bright. Each nail tells one part of the story, with no scene repeated twice.
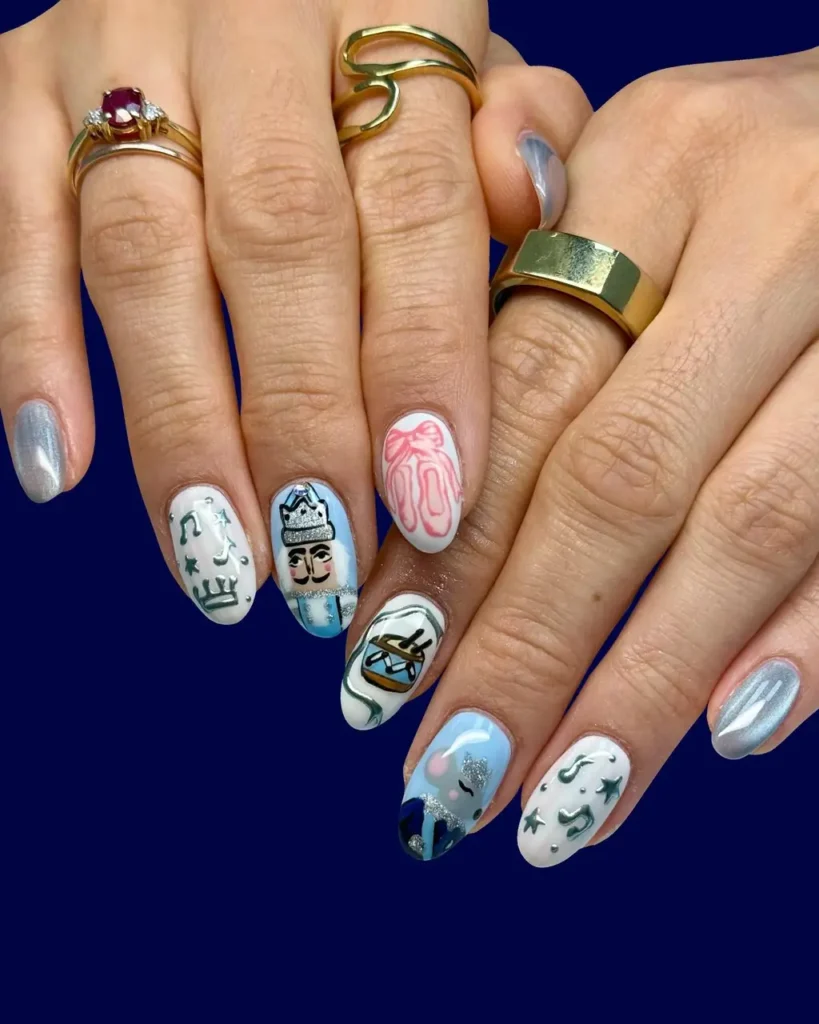
Cover each nail with blue base, then add white and silver on the story nails. Paint each scene with a thin brush, keeping the lines small and neat. Add the mouse king last, because small faces smudge if rushed. Use silver shimmer sparingly, or the scenes lose their detail. Seal the scenes with clear coat, and cap the free edge to slow chips.
17. Holly French Tips on Sheer Pink
Sheer blush covers each nail, with ivory French tips at the ends. Holly leaves and ruby berries line the smile line of each tip. White tips curve in a soft arc, while green leaves frame the red fruit. Small gold dots hide near the leaves, so the set keeps a warm gleam. Light moves over the glossy surface, giving the set a clean shine.

Work a sheer pink base first, then paint white tips with a clean brush. Draw the holly leaves with a thin brush, keeping the leaves small. Add red berries with a dotting tool, because the dots need a steady hand. Keep the smile line smooth, or the tips look uneven. Protect the tips with clear coat, and cap the free edge to slow chips.
18. Holly and Red Gems on Pink French
Blush French tips sit on pink nails, with ivory edges at the ends. Holly sprigs rest at the centre of each tip, with ruby gems as berries. White tips curve in a soft arc, while green leaves frame the gems. Small gold beads hide near the leaves, so the set keeps a warm gleam. Light slides over the glossy surface, giving the set a clean shine.

Coat each nail with pink base, then paint white tips. Draw the holly sprigs with a thin brush, keeping each sprig small. Press red gems into wet polish, because dry polish will not hold them. Keep the gems centred on each tip, or the tips look lopsided. Seal the gems with clear coat, and cap the free edge to slow chips.
19. Pale Green Holly Wreath and Plaid
Pale emerald shimmer covers most nails, with ivory swirls curling across the set. Three-dimensional holly leaves and ruby berries rise from one nail. Wreath with a red bow wraps around the next nail, with gold beads. Green plaid lines cross two nails, while white swirls soften the mix. Small gold dots mark the edges, so the set keeps a warm gleam.

Apply pale green shimmer first, then add white swirls with a thin brush. Draw the plaid grid with a striping brush, crossing green over white lines. Shape the wreath with a thin brush, because thick lines blur the small art. Press the berries in while the polish stays wet, or they slip off. Seal the raised art with clear top coat, and cap the free edge to slow chips.
20. Crimson Stripes over Silver Shimmer
Warm crimson stripes run over a pewter shimmer base, crossing each nail in turn. Silver sheen shifts under the stripes, catching light as hands move. Thin red lines sit beside wider bands, so the pattern stays lively. No other art crowds the set, with the stripes doing all the work. Glossy seal leaves the stripes smooth, with shine from base to tip.

Set a silver shimmer base first, then stripe red lines across each nail. Use a striping brush for the lines, keeping each stroke steady and even. Vary the line widths, because one width alone looks flat. Keep the stripes straight and even, or the pattern looks wobbly. Protect the stripes with clear coat, and cap the free edge to slow chips.
21. Emerald Cat-Eye with Gold Snowflake
Emerald cat-eye shimmer, a magnetic polish that shifts with light, fills each nail. Golden snowflake rests on one accent nail, with small gold dots around it. Magnetic shimmer shifts as hands move, so the green deepens and brightens. Tiny gold dots mark the other nails, with one flake on the ring finger. Glossy seal leaves the surface smooth, with shine from base to tip.

Apply green magnetic polish first, then hold the magnet near the wet surface. Hold the magnet still for a few seconds, or the band drifts off centre. Paint the flake with a thin brush, because thick lines blur the small art. Dot gold spots with a dotting tool, keeping each dot small and neat. Seal the shimmer with clear coat, and cap the free edge to slow chips.
22. Buffalo Check with Pine and Gems
Ebony and ivory checks cover most nails, with blush accents between. Green pine sprigs rise from the blush nails, with ruby gems as berries. Gold lines trace the cuticle, while tiny stars dust the pale base. White bows wrap the checks, so the set keeps a cosy holiday feel. Glossy seal gives the set shine, with light sliding across each nail.
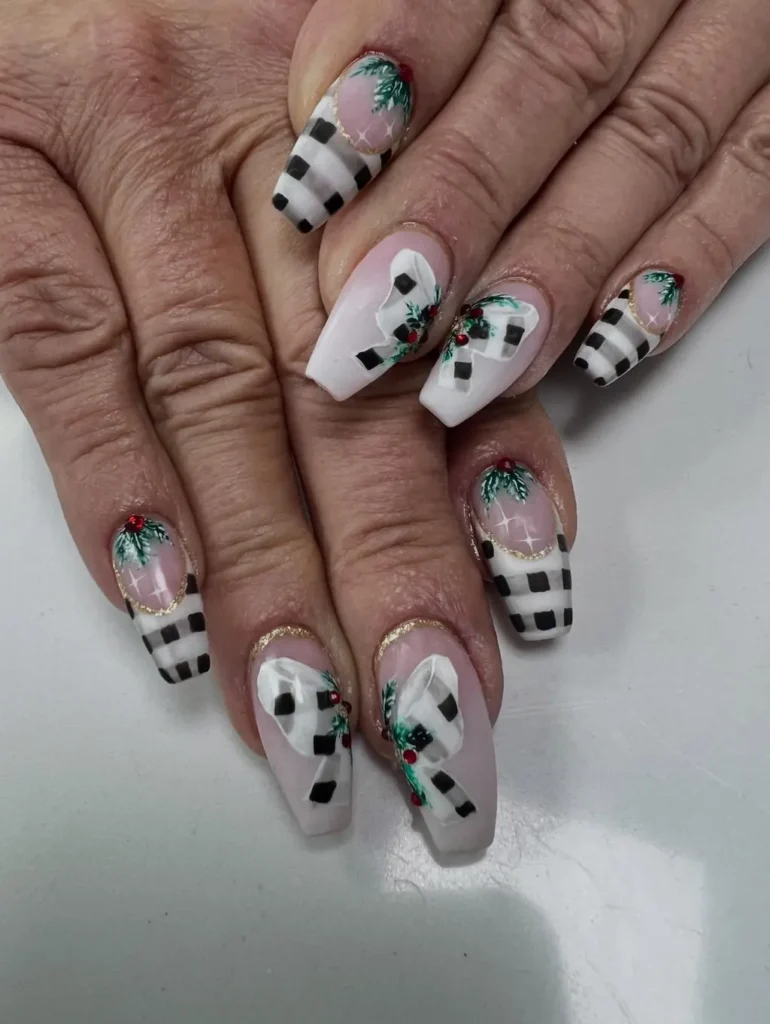
Coat each nail with white base, then paint black checks across them. Draw the grid with a striping brush, crossing black over white lines. Add pine sprigs with a thin brush, because thick lines blur the small art. Press red gems into wet polish, or they slip off the surface. Seal the checks with clear coat, and cap the free edge to slow chips.
23. Candy Stripes with Gems and Glitter
Rich red glitter, emerald cat-eye, and candy stripes share the set in turn. Red and green stripes curl over ivory, with thin green lines between. Ruby and emerald gems cluster near the cuticle, catching light with each facet. Silver shimmer dusts the dark background, so the stripes stay bright. Each nail tells a different story, with no pattern repeated twice.
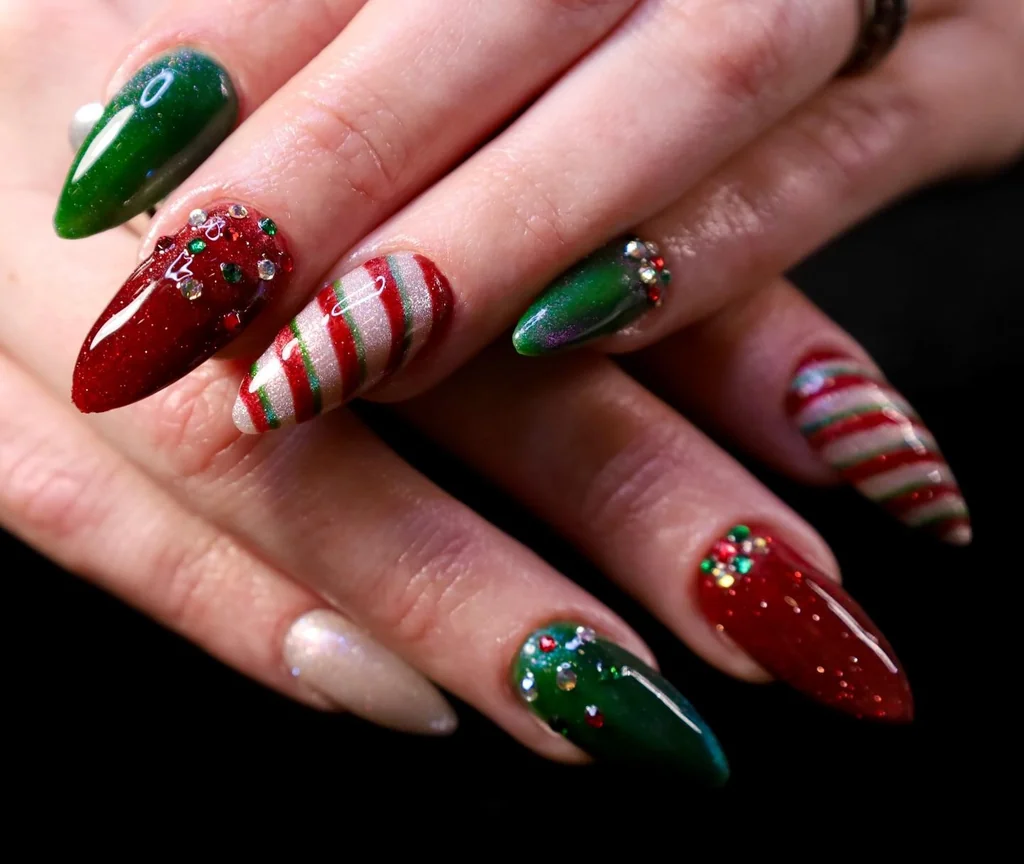
Set red glitter on some nails and green cat-eye on others. Paint the stripes with a striping brush, keeping each line slim and even. Press gems into wet polish, because dry polish will not hold them. Vary the stripe widths, or the pattern looks flat and dull. Seal the stripes with clear coat, and cap the free edge to slow chips.
24. Deep Green Cat-Eye Shimmer
Rich emerald cat-eye shimmer fills every nail, with a soft band of light. Magnetic polish shifts as hands move, so the green deepens and brightens. No art crowds the set, with the shimmer doing all the work. Light slides over the surface, giving the set a clean shine. Dark green tones keep the look calm, while the band of light adds life.
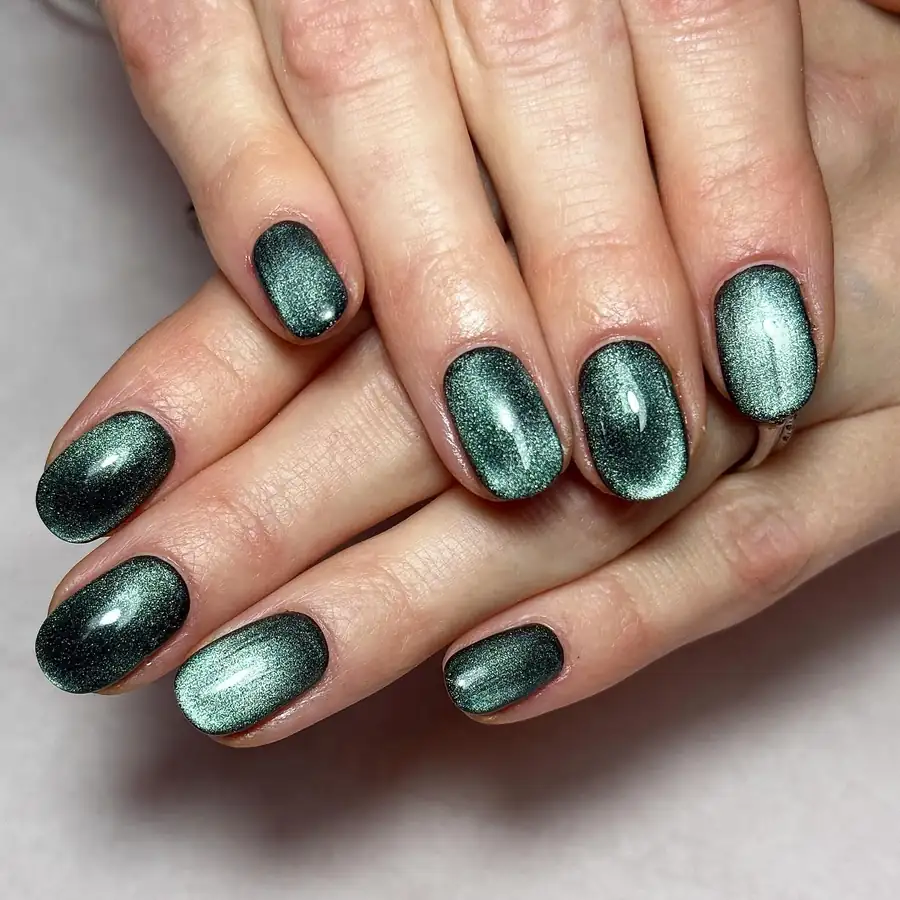
Prime each nail with green magnetic polish, then hold the magnet near the surface. Keep the magnet still for a few seconds, or the band drifts off centre. Use thin coats, because thick magnetic polish clumps and dries unevenly. Swap green for teal if the shade feels too dark. Finish the shimmer with clear coat, and cap the free edge to slow chips.
25. Gunmetal Chrome against Christmas Ornaments
Gunmetal chrome covers each nail, with a mirror shine that shifts with light. Silver and black blend in the chrome, giving the set a smoky depth. Ornaments glow behind the hand, so the plain nails still feel festive. No art crowds the set, with the metal finish doing all the work. Light slides over the chrome, giving the set a clean shine.

Rub chrome powder, a fine metallic dust, over a dark base for the mirror shine. Dust the powder on in small sections, and work fast before it sets. Buff the surface gently, then seal it before touching the nails. Skip matte top coat, because it dulls the mirror shine. Seal the chrome with clear top coat, and cap the free edge to slow chips.
Conclusion
Picking one design from this Xmas Nails set comes down to wear, not rules. Glitter hides small chips, while plain shimmer also shows every mark. Match the finish to how hard your hands work. Keep a spare polish for quick fixes, and cap the free edge each time you repaint a tip. Thin coats dry more evenly than one thick pass. Clear top coat each third day keeps shine going longer, and that small habit protects the manicure.