

Pearl polish has a way of making hands look calm even in the busiest week of the year. Christmas pearl nails lean on that quiet glow, pairing creamy white, pale pink, nude, and champagne bases with a few beads, thin bows, snowflakes, or rows of tiny rhinestones. Red polish and fine metal lines add contrast for anyone who wants more drama, while shell ridges and marbled swirls bring gentle texture. Short nails carry a single bead or a cuticle arc well, and longer shapes leave room for clusters. Whether the plan is a work lunch or a family dinner, a pearl manicure fits easily.
1. Pearly White Texture With Jewel Dots
Pearly white polish covers every nail with a soft crinkled texture. Two accent nails carry tiny gems in pink, green, red, and gold. Gems sit flat against the pearl base, so each color reads as a small bright spot. Glossy top layer smooths the texture and adds shine to the whole set. Hands rest against a plain pale background, which keeps the focus on the nails….

Lay down two thin coats of the pale shade, then let each coat dry fully. Press each gem into a dot of clear coat while the surface still feels tacky. Space the gems with a dotting tool for an even pattern. Seal the set with a glossy top coat to lock the gems in place. Skip thick coats to stop pooling around the gems….
2. Red Polish With One Large Pearl
Bright red polish coats every nail in a smooth glossy layer. One large pearl sits near the cuticle of each nail. Pale shine from each bead stands out against the red. Pearls all share the same size and the same spot, which gives the set a steady rhythm. Fingers lie flat against a plain grey backdrop, so the contrast stays sharp….
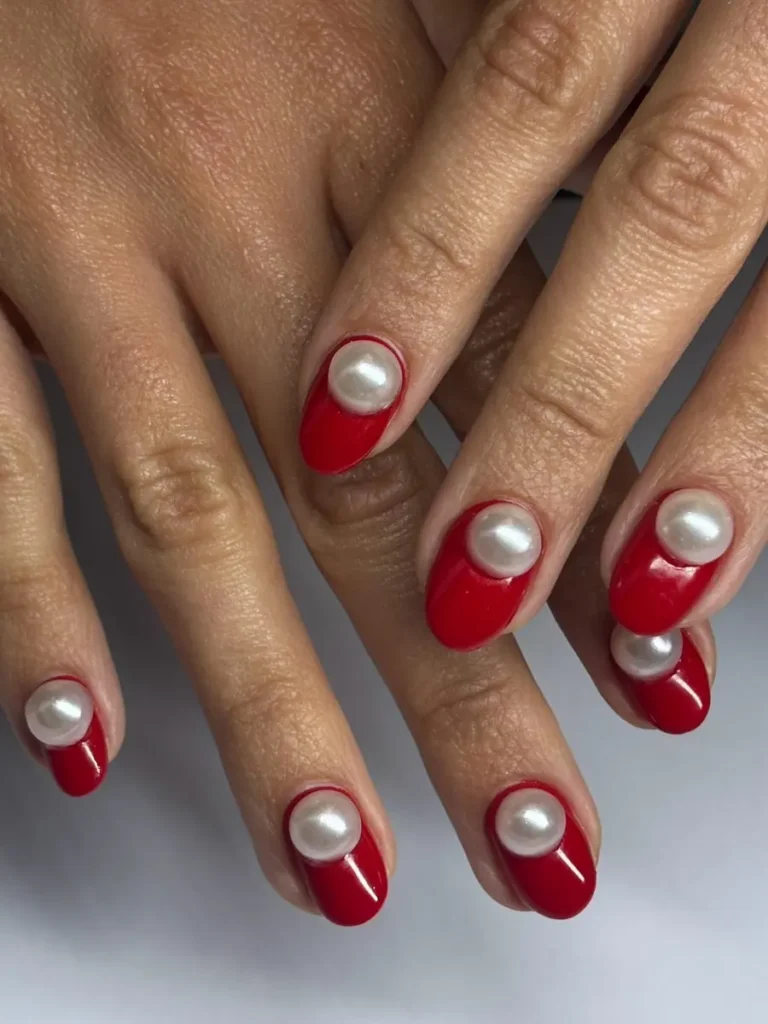
Begin with two thin coats of red and let the second coat dry fully. Set one pearl near each cuticle with a drop of clear coat. Press the bead gently with a dotting tool, then hold it still for a few seconds. Seal around the bead with a glossy top coat, and leave the bead top bare. Swap red for deep green if the set needs a quieter holiday mood….
3. Creamy Pearl With White Polka Dots
Creamy pearl polish gives every nail a soft off-white glow. Small white dots scatter across each nail in loose rows, and no two nails match exactly. Dots stay tiny and pale, so they read as a quiet pattern rather than a bold print. Glossy finish keeps the surface smooth and lets light move across the dots. Hands press together in the center, which shows all ten nails at once….

Start with two thin coats of the creamy shade and dry each coat well. Add the dots with a dotting tool, dipping it once per dot for even size. Vary the spacing a little, so the pattern looks loose and natural. Seal with a glossy top coat to smooth the dots into the surface. Wear the set with pale knits, since the soft dots suit calm winter layers….
4. Nude Pearl Shine With Pearl Clusters
Nude polish with a pearl sheen covers each nail in a warm pale tone. Large pearls, clear rhinestones, and tiny gold dots also cluster on several nails. Gold wire lines run down a few nails and link the clusters into one design. Light pools on the sheen and makes the beads look soft against the skin. Two hands cross at the center, which shows the clusters from both sides….
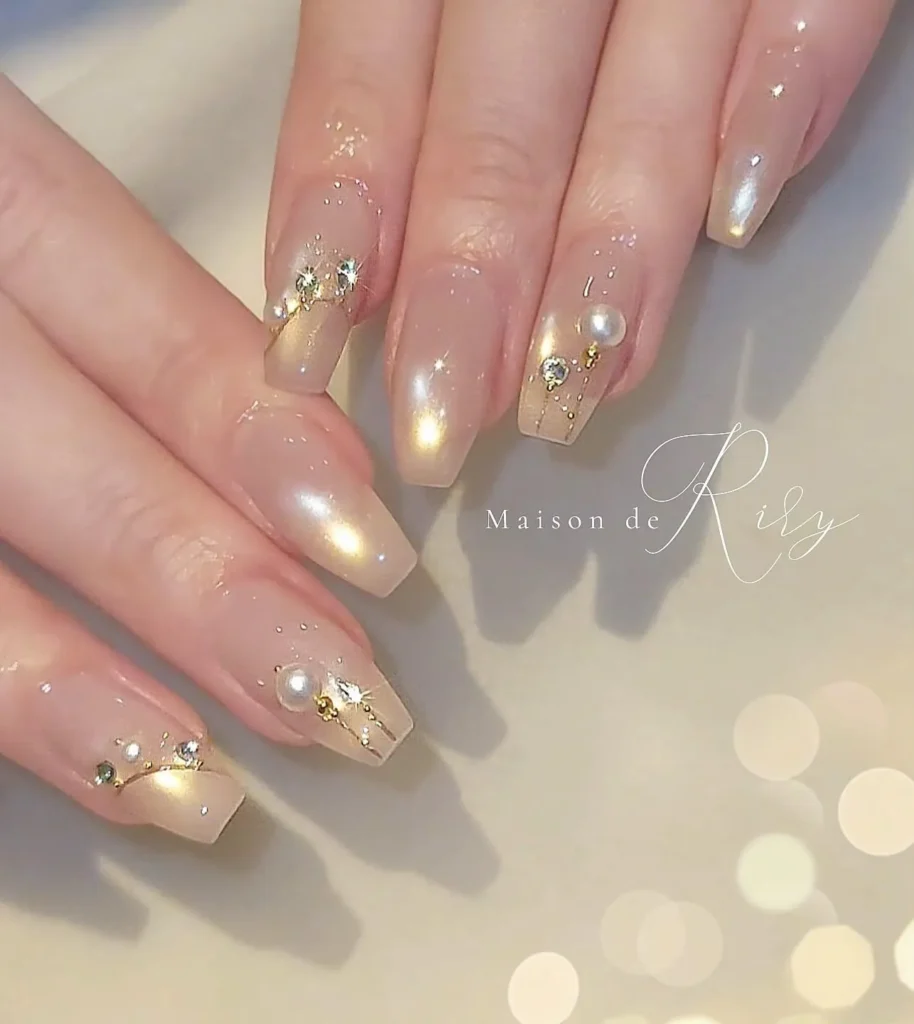
Brush two thin coats of nude onto each nail and let them dry. Place the largest pearl first, then fill around it with smaller beads. Use a dotting tool to set gold dots in the gaps between the pearls. Seal the beads with a glossy top coat, and leave their tops bare. Keep the beads away from the free edge, because they catch on fabric there….
5. Pearly White With Black Snowflakes
Bright glossy polish in pearly white coats each nail. Two black snowflake decals sit on the ring finger near the tip and base. Black lines stay thin and sharp, so the flakes read clearly against the white. Other nails stay plain, which leaves the dark pattern as the one focal point. One hand rests flat on white cloth, and a wide silver ring frames the set….
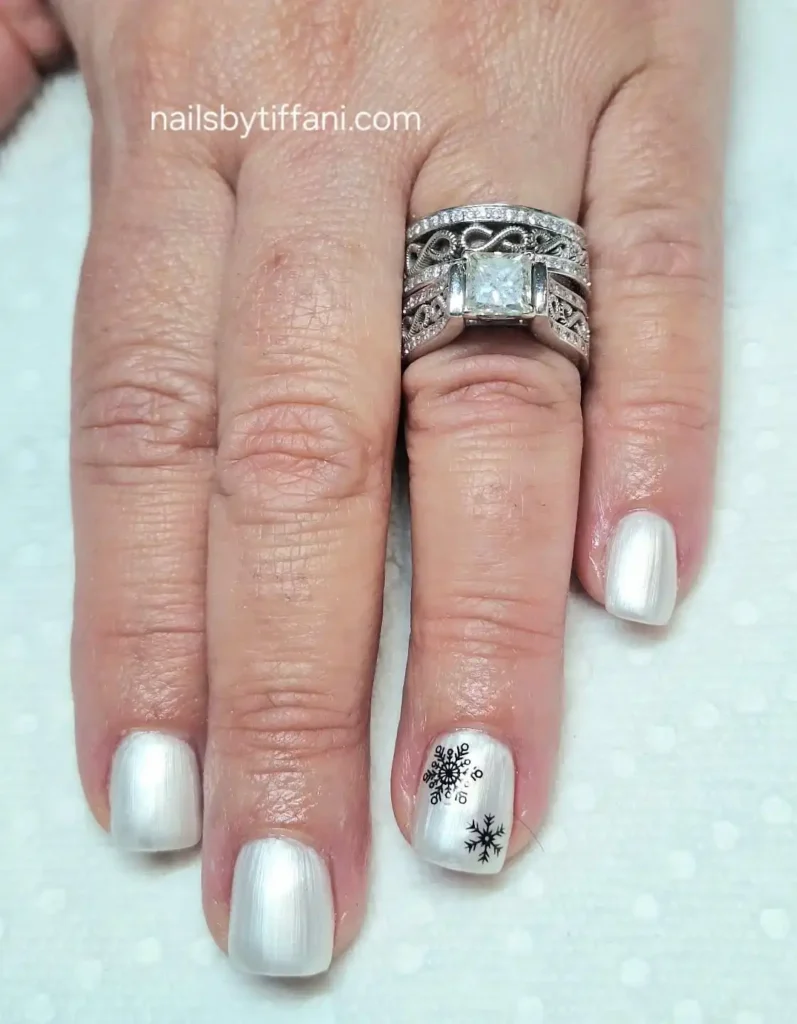
Coat each nail with two thin coats of the white shade and let them dry. Slide each decal onto the nail with water, then smooth it flat with a soft brush. Trim any decal edge that lifts past the nail with small scissors. Seal the decal under a glossy top coat to stop the edges from peeling. Swap black for deep blue if the flakes need a softer contrast….
6. Sheer Pink With Scattered Pearl Beads
Sheer pale pink polish leaves the natural nail faintly visible beneath. One to three small pearl beads sit on each nail, placed without a fixed pattern. Beads vary in size, and the largest ones sit near the center of the nail. Glossy surface keeps the pink soft and also lets the beads catch the light. Hands fold gently together, which shows the beads from a few angles at once….
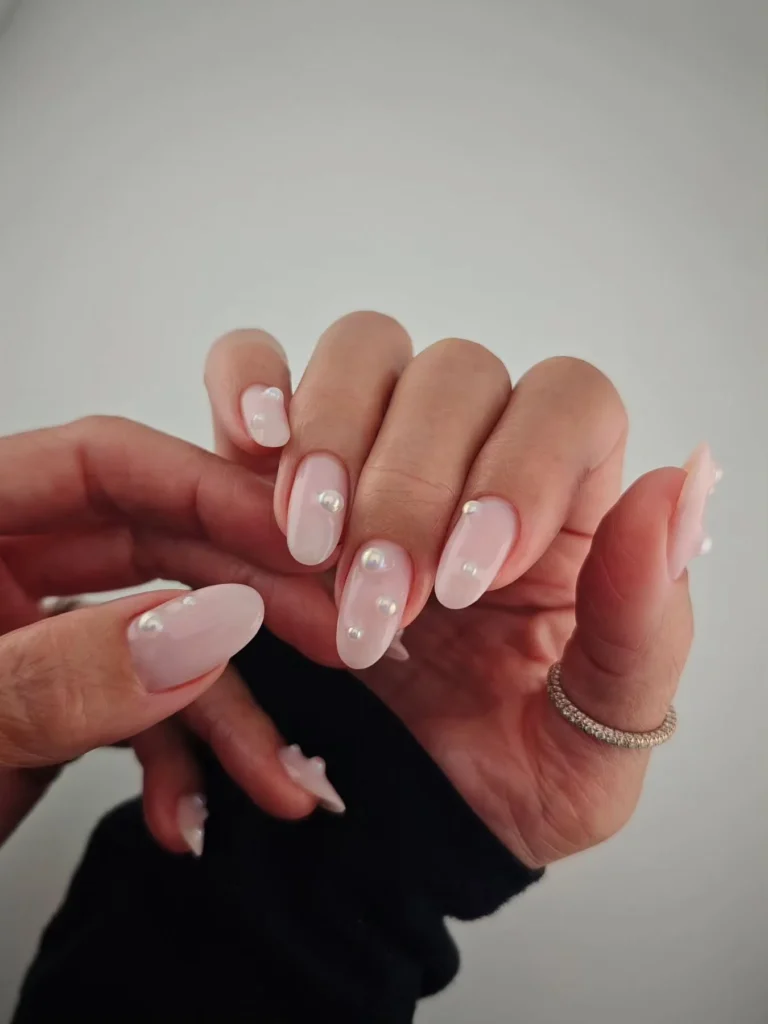
Dip the brush in sheer pink and paint two thin coats. Set the beads with a drop of clear coat, placing the largest one first. Use a dotting tool to nudge each bead into its spot before the glue sets. Seal around the beads with a glossy top coat, and skip the bead tops. Store the set away from rough knitwear, because raised beads can snag….
7. Champagne Pearl With Rhinestone Clusters
Warm champagne polish with a pearl sheen covers every nail. Rhinestone clusters and tiny pearl beads scatter across several nails in loose groups. Stones catch light in small flashes, while the pearl beads add a soft curved shape. Base stays smooth and glossy, so the clusters sit cleanly on the surface. Hands clasp together over a dark carved table, which sets off the pale tones….
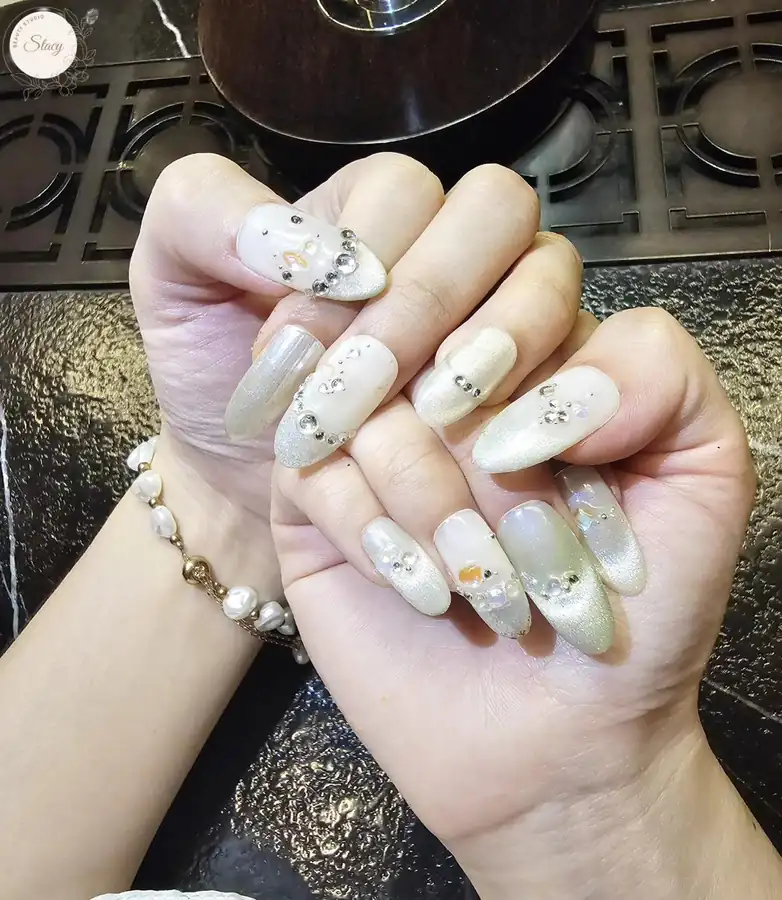
Spread two thin coats of the champagne shade over each nail. Place the largest stone first, then add smaller stones and beads around it. Use a dotting tool to keep the gaps even between the stones. Seal the clusters with a glossy top coat, and leave the stone tops bare. Vary the cluster spots from nail to nail for a less uniform look….
8. White French Tips With Pearl Rows
White French tips cap each nail over a sheer nude-pink base. Small pearl beads line the edge of the tip on several nails in neat rows. White three-dimensional bows sit on two nails, and thin snowflake lines mark a third. Tips stay crisp and white, but the base keeps the set soft. Hands rest on white fur, which echoes the pale tones of the design….

Work two thin coats of sheer base onto each nail. Draw each tip with a striping brush, then clean the smile line with a flat brush. Set the pearl beads along the tip edge with clear coat as glue. Attach each bow after the top coat, so it bonds to a smooth surface. Keep the bows small, because large ones catch on sleeves and hair….
9. Pink Pearl Shine With Tiny Beads
Pale pink polish with a pearl sheen covers each nail. Tiny pearl beads sit on several nails, some near the tip and some near the center. Beads stay small and sparse, so the pink sheen stays the main feature. Light moves across the surface and gives the pink a soft blue flash. Hands rest on white fur, which keeps the pale tones bright….
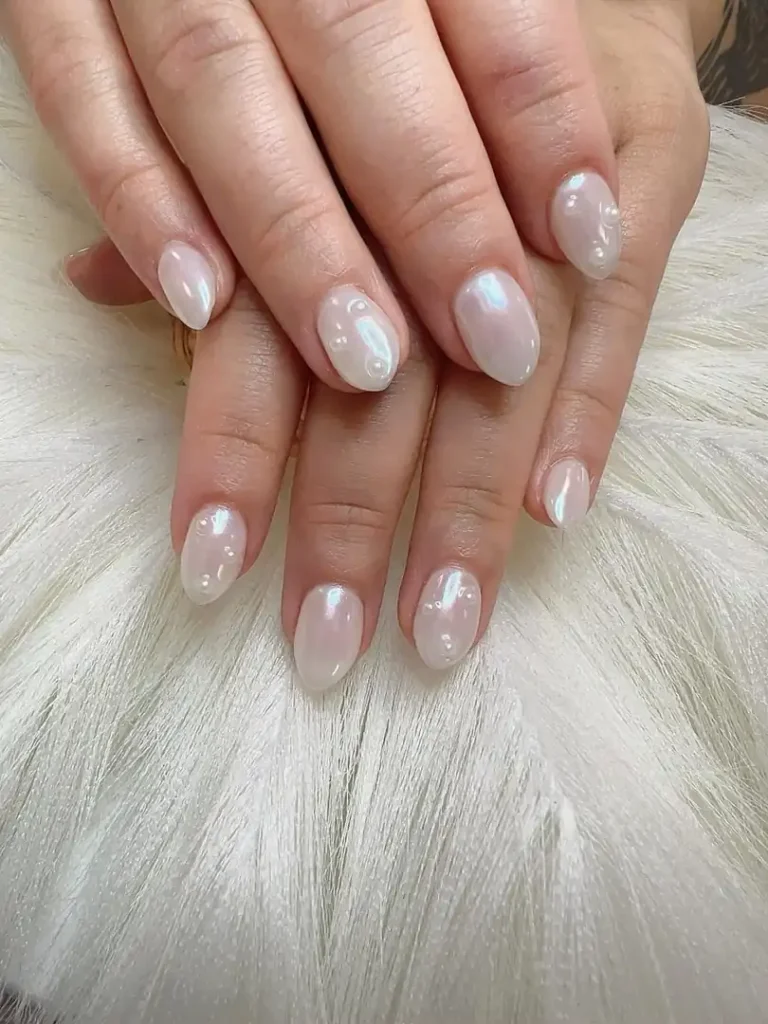
Smooth two thin coats of the pink shade over each nail. Set the beads with clear coat, starting with the largest one. Use a dotting tool to nudge each bead into place before the glue sets. Seal around the beads with a glossy top coat, and leave the bead tops bare. Wear the set with pale knits, because the soft pink suits calm winter layers…
10. White And Gold With Pearl Cluster
White polish covers three nails, while metallic gold coats one nail in glitter. One white nail also carries a cluster of pearls and small gold beads near its tip. Gold bow with a pearl center sits on another nail, crossed by a thin gold line. Diagonal gold stripes mark the last white nail in a clean slanted pattern. Large gold ring on one finger echoes the warm tones.

Cover the white nails with two thin coats and let them dry fully. Add the gold glitter nail with two thin coats for even cover. Set the pearl cluster with clear coat, placing the largest bead first. Draw the gold lines with a striping brush, then add the bow while the coat stays tacky. Coat the set in a glossy top coat, and skip the bead tops…
11. Glossy Pearl White With Faint Snowflakes
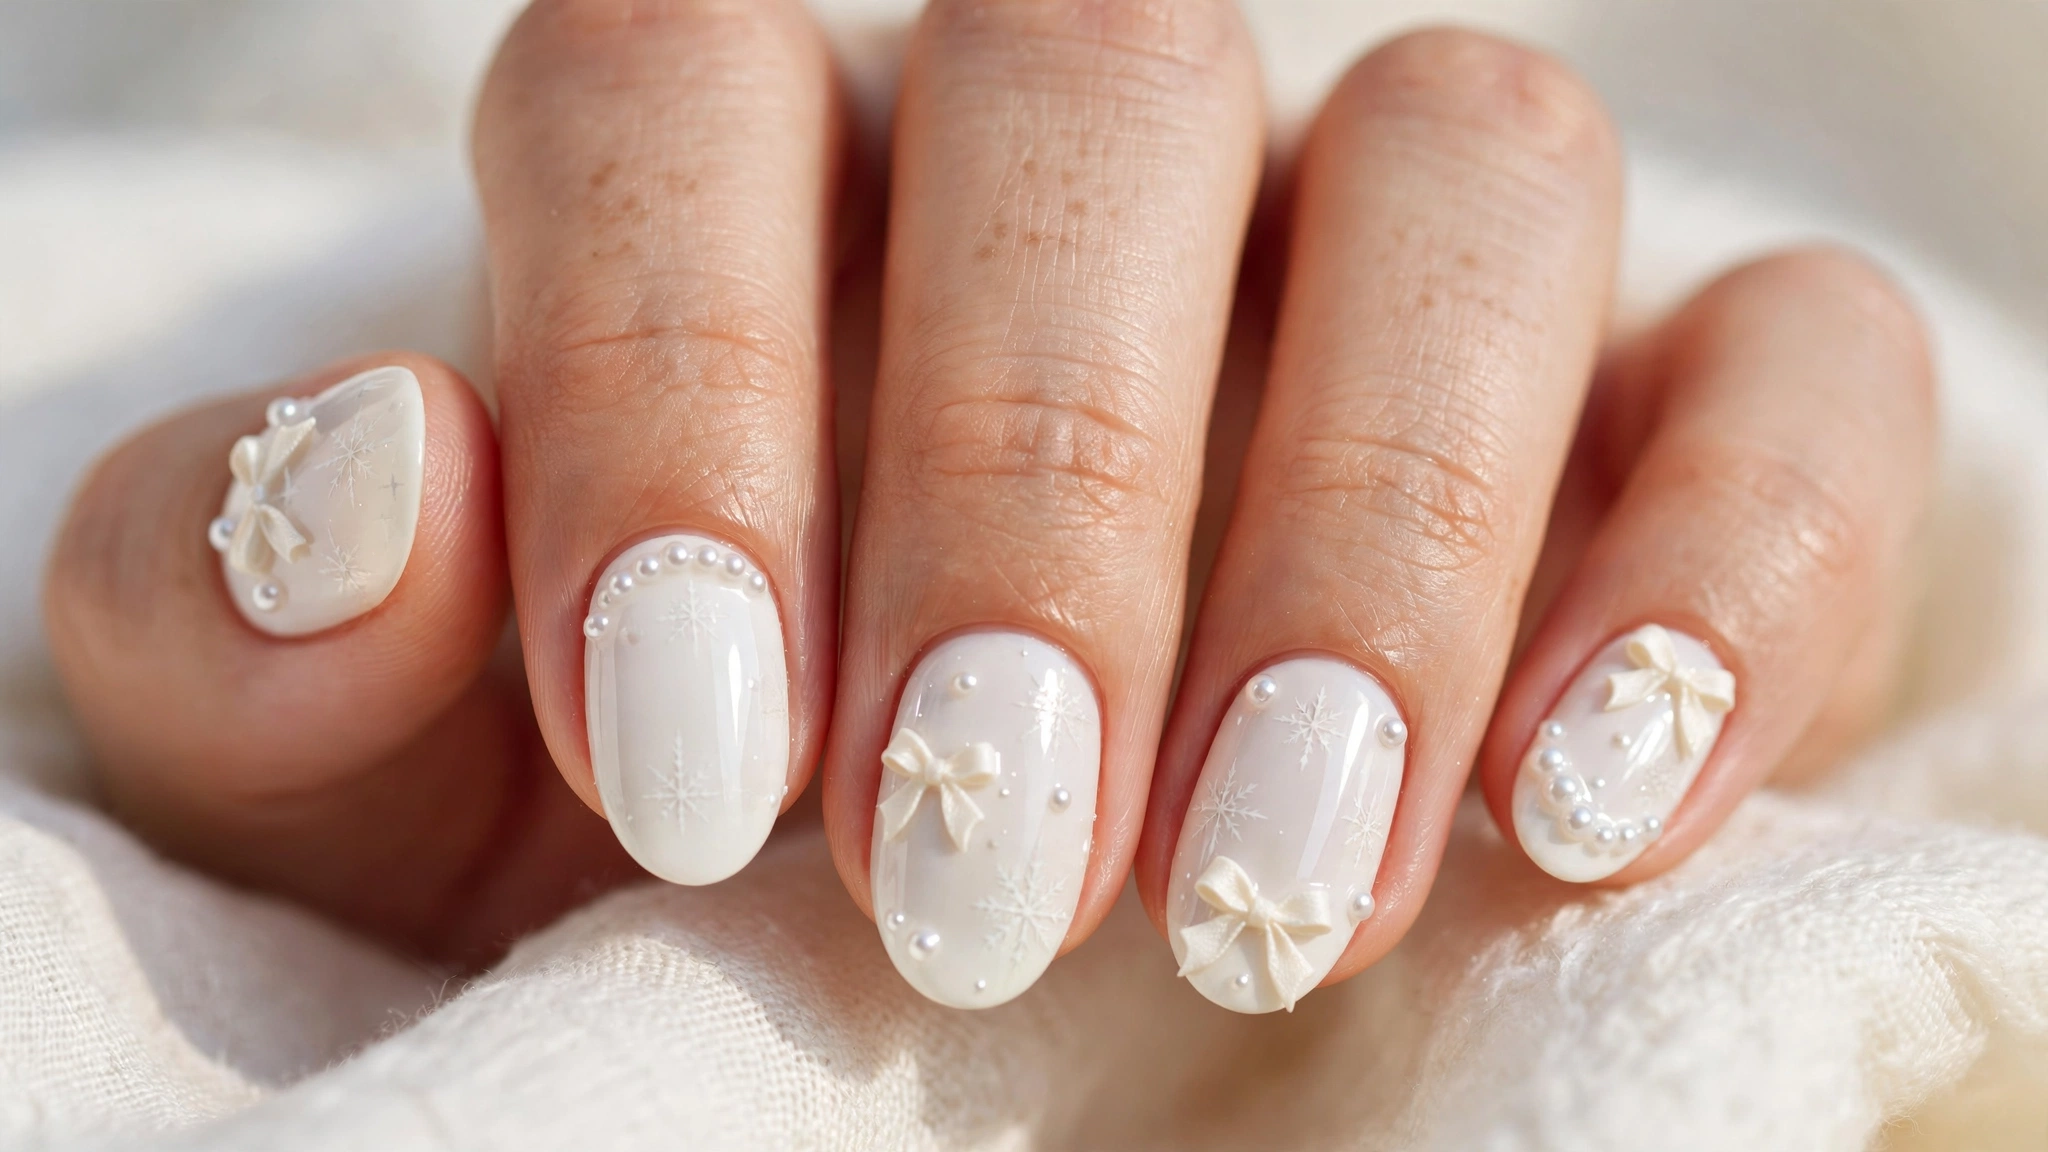
Glossy pearly polish in off-white coats every nail. Faint white snowflake sits on two nails, barely darker than the base beneath. Flakes stay subtle, so the pearl shine leads and the pattern whispers behind it. Light slides across the gloss and gives each nail a bright curved highlight. Hands rest over glitter cloth, which adds sparkle without touching the nails….
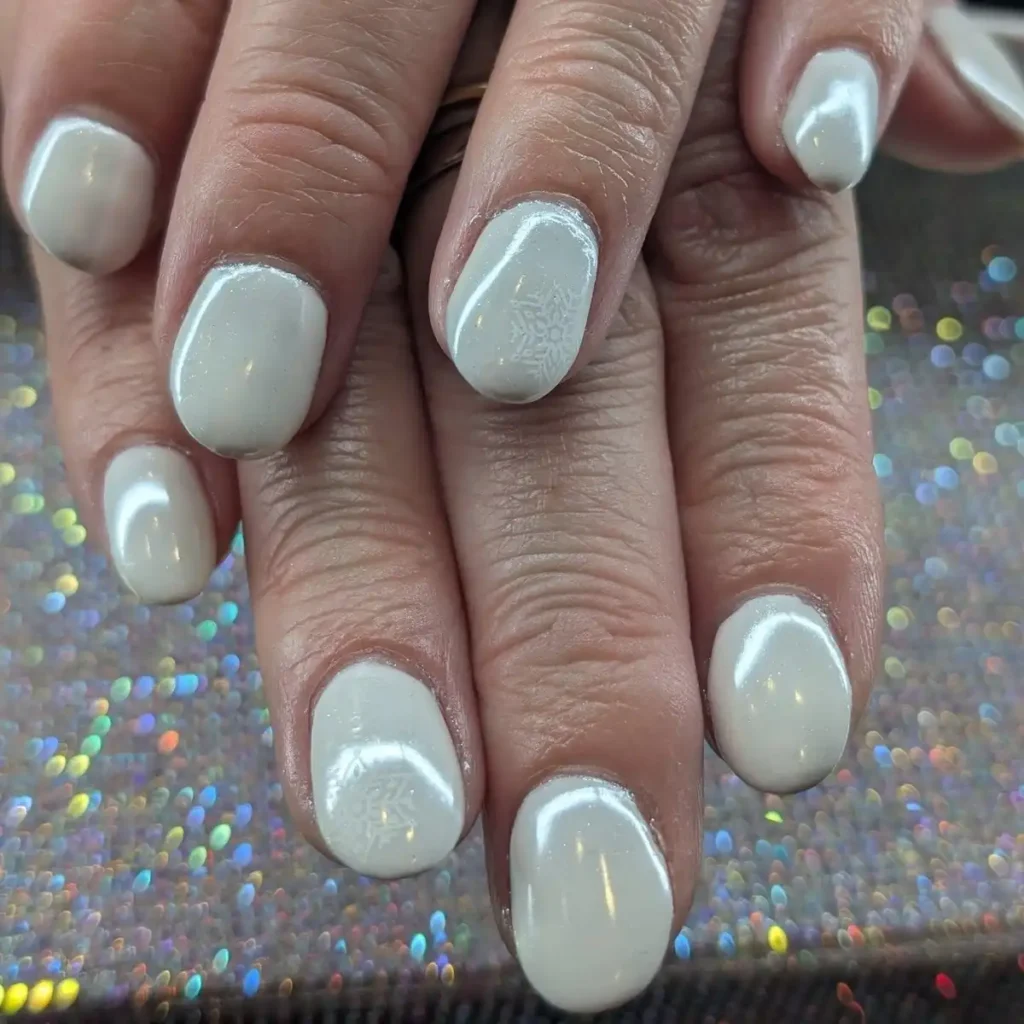
Apply two thin coats of the off-white shade to each nail. Stamp the snowflake with white polish, then wipe the plate clean between nails. Press the stamp firmly and lift it straight up for a crisp print. Seal the flakes under a glossy top coat to keep the edges smooth. Vary the flake spots from nail to nail for a less uniform look….
12. Nude Base With Dense Pearl Clusters
Nude polish forms a sheer base under dense clusters of pearl beads. Beads of mixed sizes crowd every nail, with the largest ones near the tips. Clusters catch light from many angles and give the set a raised bumpy texture. Base stays pale and calm, so the white beads read as the main event. Front fingers stay sharp in focus, while the back hand blurs softly behind….

Glide two thin coats of nude onto each nail. Set the largest bead first with a drop of clear coat, then fill around it. Use a dotting tool to place smaller beads in the gaps between the large ones. Seal around the beads with a glossy top coat, and keep the bead tops bare. Keep the beads off the free edge, because they catch on fabric there….
13. Glossy Pearl White Before The Tree
Glossy pearly white polish covers every nail in a bright smooth layer. Nails show a soft striped sheen that also shifts as the hands move. Red and green ornaments hang on the flocked tree behind the hands. White frost on the branches echoes the pale polish without stealing focus. Two hands overlap at the center, which shows all ten nails at once….
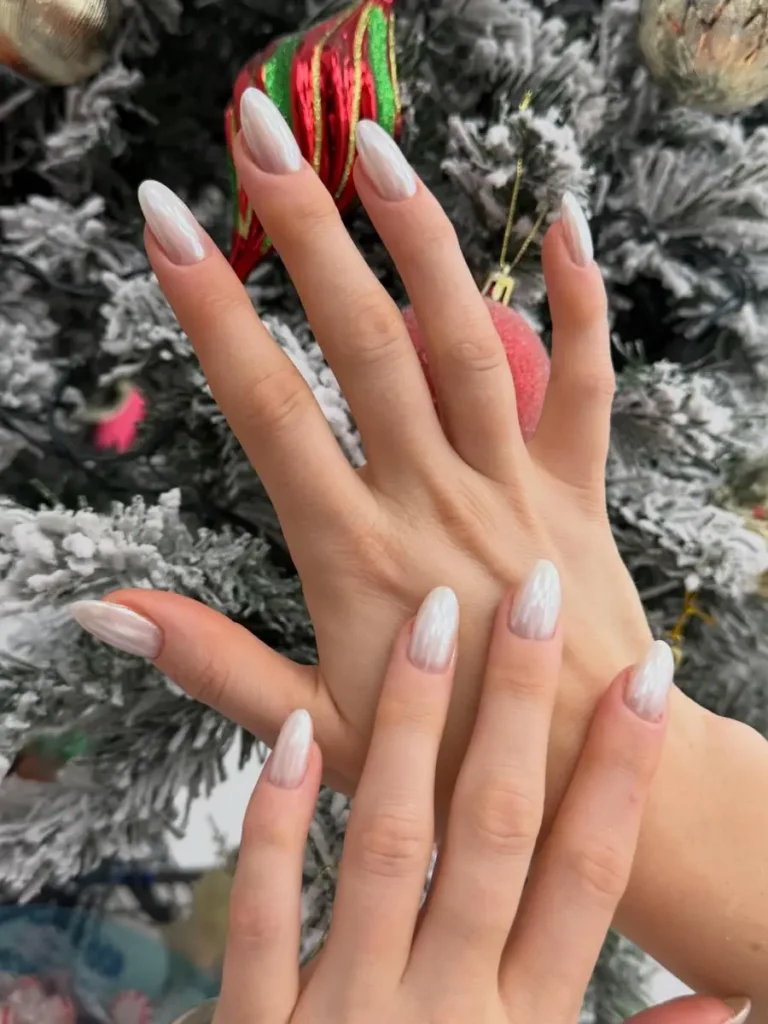
Layer two thin coats of the white shade on each nail. Buff the surface lightly between coats, then smooth any rough spots. Brush on a glossy top coat in one even pass to keep the sheen bright. Let the top coat dry fully before touching fabric or ornaments. Swap white for pale pink if the set needs a warmer tone….
14. Red And White With Pearl Snowflakes
Red glossy nails share the set with white nails in a bold festive mix. Pearls line the edges of a white snowflake on a red tip. Gold bow holds one pearl at its center on a nude nail. One white nail wears a thin gold frame around its edge. Red nails carry small pearl rows, so the beads link both colors together. White pleated sleeves frame the hands and keep the red bright….
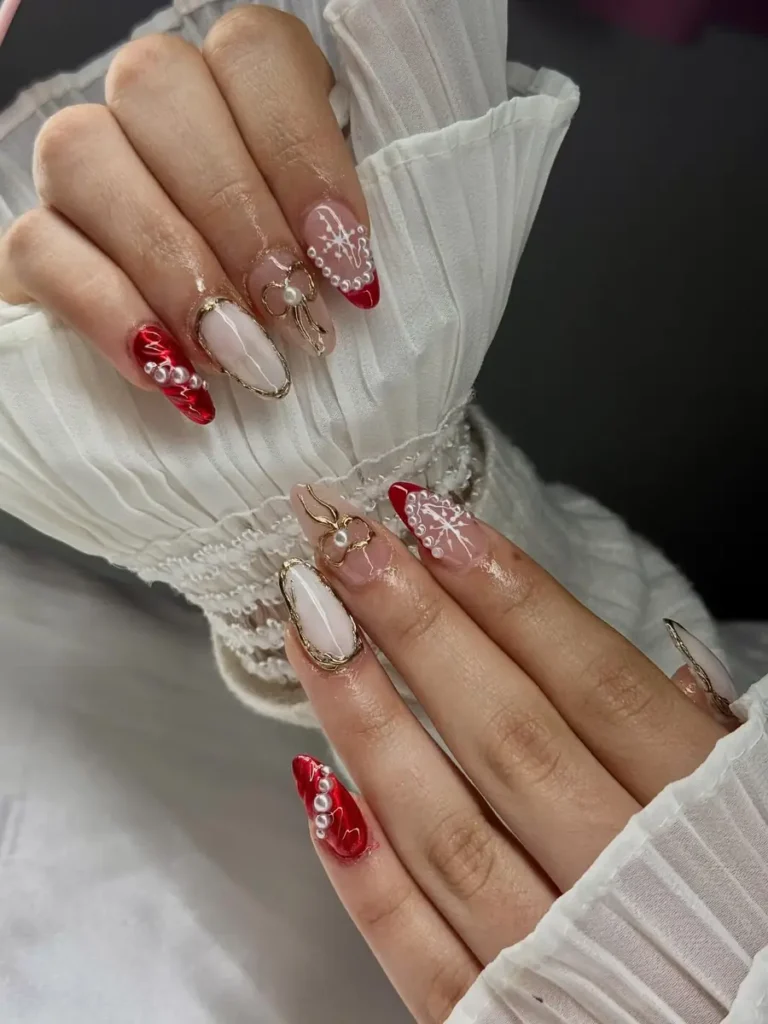
Set the red base with two thin coats and let them dry fully. Cover the white nails next with two thin coats and let them dry. Set the pearls with clear coat, placing the largest one first. Draw the snowflake lines with a thin brush, then dot the pearls along the edge. Brush a glossy top coat over the set, and leave the bead tops bare…
15. Milky White Pearl Without Decoration
Milky white pearl polish covers every nail in a soft opaque layer. Surface stays plain, with no beads, lines, or decals anywhere on the set. Pearl sheen also gives the white a gentle glow that shifts under light. Edges look clean and even, and the gloss stays smooth across all ten nails. Hands rest on dark leather, which makes the pale polish stand out….
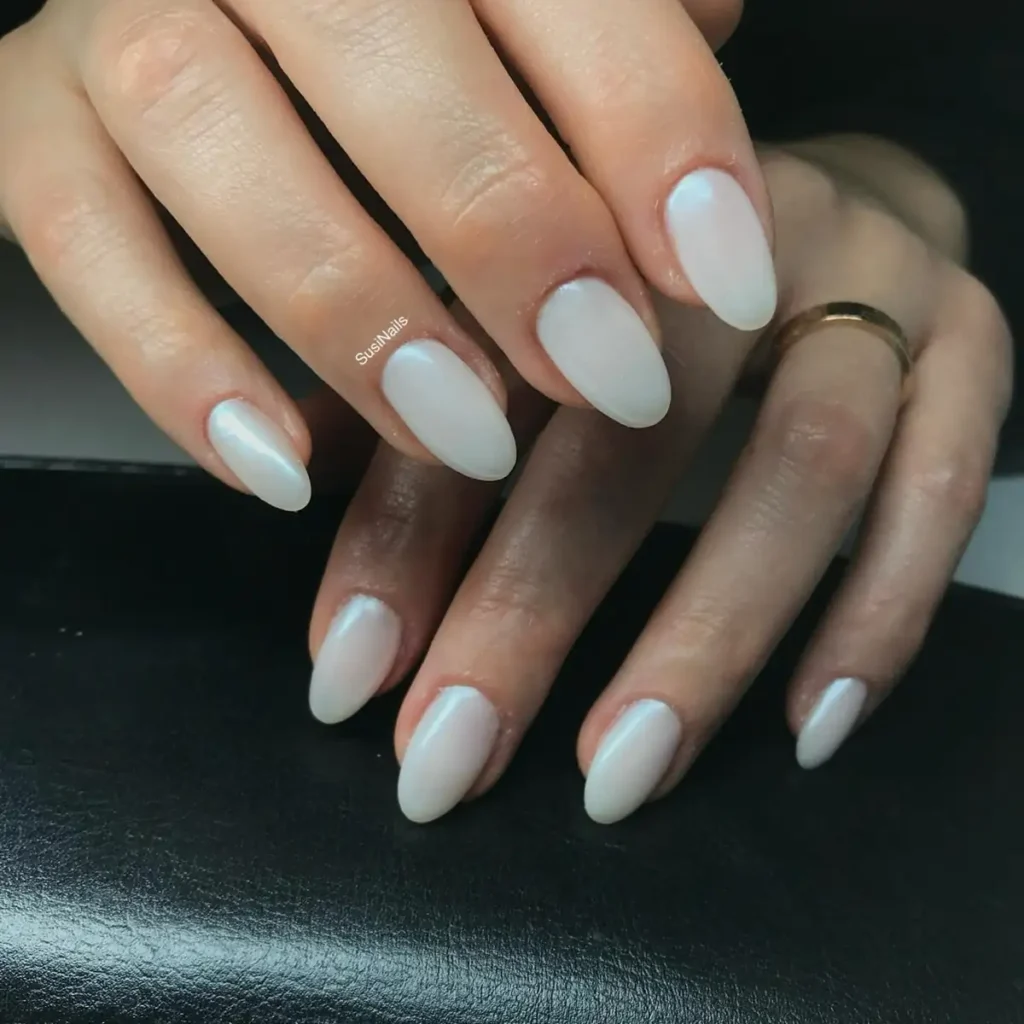
Sweep two thin coats of the milky shade onto each nail. Keep each coat thin, so the color stays even without streaks. Cap the free edge with each coat to limit chips at the tips. Add a glossy top coat in a single even pass for a bright sheen. Wear the set with dark sleeves, since the pale white pops against them….
16. Nude Polish With Shiny Tips And Pearl
Beige nude polish covers each nail up to a curved gold wire line. Below the line, the tips shine with an iridescent pearl glow in pale blue and gold. One small pearl and two gold beads sit on the wire at each tip. Wire curves follow the nail shape, so the design reads as one neat arc. Hands cross over grey cloth, and thin gold rings echo the wire….

Add two thin coats of nude and let them dry fully. Dab the shiny tip on with a sponge, layering the glow thinly. Draw the gold wire curve with a striping brush and a steady hand. Set the pearl and gold beads on the wire with a drop of clear coat. Seal the wire under a glossy top coat, so it stays put….
17. Pearl Pink With Marbled Texture
Pearlescent polish in light pink and white swirls across every nail. Marbled texture gives the surface a soft cloudy look with pale veins. Sheen shifts between pink and white as light moves across the nails. No beads or lines break the pattern, so the marble stays the whole story. Pinecones and dried flowers sit behind the hands in warm muted tones….

Blend two thin coats of the pale pink shade onto each nail. Swirl a little white polish into the wet pink with a thin brush. Drag the brush in loose curves, then stop before the colors blend flat. Seal the marble under a glossy top coat to keep the veins crisp. Keep the swirls loose, because tight lines can look muddy fast….
18. White Nails Edged With Pearl Beads
Clean white polish coats every nail in a smooth glossy layer. Small pearl beads run along the edges of each nail in neat lines. Clusters of beads also gather at the tips of several nails in larger groups. Beads vary in size, and the largest ones sit at the very tip. White lace sleeves frame the hands and echo the pale tones….
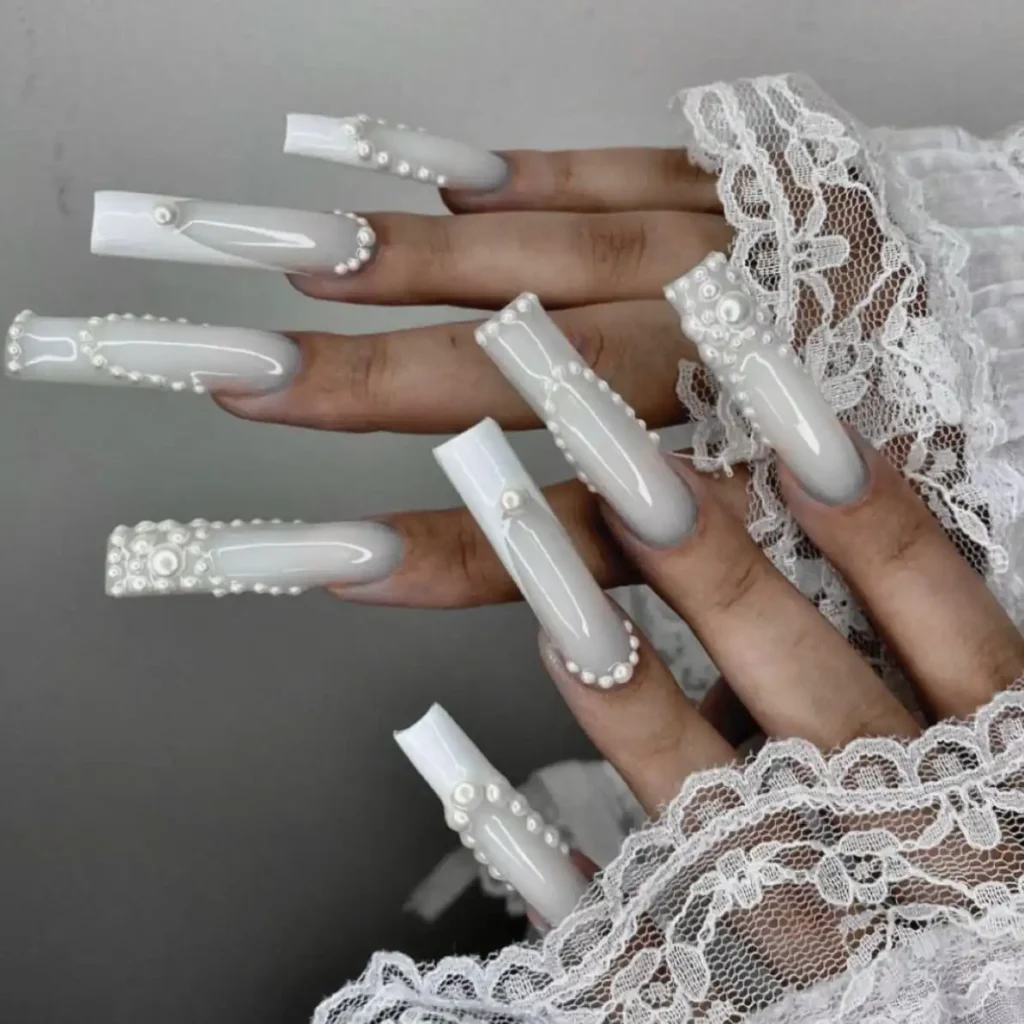
Dab two thin coats of white onto each nail and let them dry. Set the edge beads with clear coat, working from the cuticle toward the tip. Use a dotting tool to keep the bead lines straight and even. Add the tip clusters last, placing the largest bead first. Seal around the beads with a glossy top coat, so the beads stay put….
19. Pearl White With Red Metallic Bows
Soft pearl-white polish with a crinkled texture covers most nails. Pink polish fills the rest, and thin red metallic bows mark nearly every nail. Bows sit at different angles, so each nail reads a little differently. Red lines stay thin and bright against the pale pearl base. Hands fold together over a pale surface, which keeps the bows in focus….

Treat the pearl nails with two thin coats and dry each coat well. Cover the pink nails next, then let the whole set dry fully. Draw each bow with a thin brush in two loops and a small knot. Keep the lines thin, because thick lines can look heavy on pale bases. Seal the bows under a glossy top coat to stop the edges from lifting….
20. Shell Ridges With Pearls And Bows
Sheer white polish forms the base for a mix of shell and bow details. Raised shell ridges run down two nails, each crowned with a single pearl. White line bows mark two more nails, drawn in thin looping strokes. Gold loop outlines frame two nails, and tiny pearl beads also dot the rest. Hands rest on a large white shell, which echoes the sea theme….

Prime the set with two thin coats of sheer white. Build the shell ridges with a dotting tool, layering quick strokes upward. Set one pearl at the top of each shell with a drop of clear coat. Draw the bows with a thin brush, then add the gold ovals last. Seal the whole set with a glossy top coat, and leave the beads uncovered…
21. Clean Glossy White Pearl Finish
Shiny white pearl polish covers every nail in a bright even layer. No beads, lines, or decals mark any nail in this set. Sheen also runs down the center of each nail in a soft vertical stripe. Edges stay clean and even, with gloss smooth across all ten nails. White paper star and silver ornaments hang on the tree behind the hands…
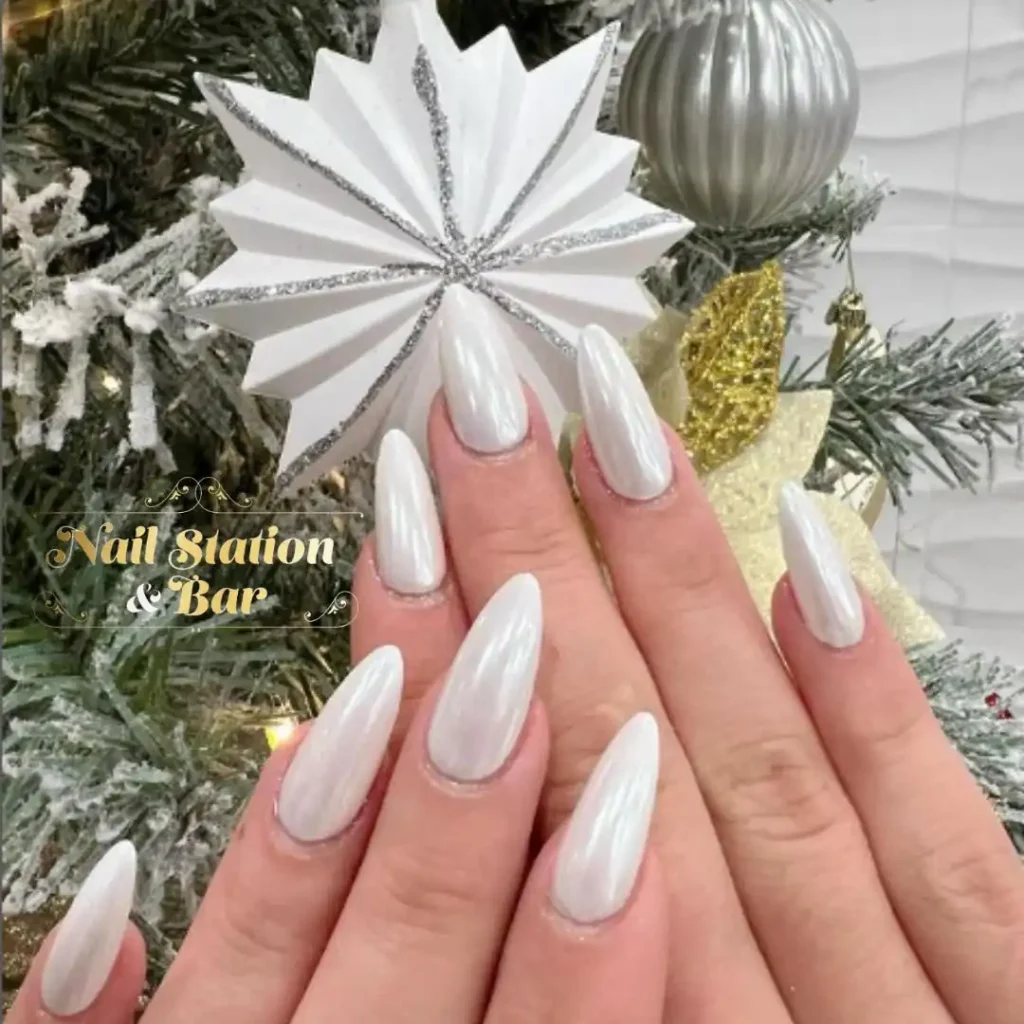
Give each nail two thin coats of the white shade. Use thin coats, so the color stays even without streaks. Seal the free edge with each coat to limit chipping at the tips. Top the set with a glossy coat in one even pass to keep the sheen bright. Wear the set with dark greens, since the bright white pops against them….
22. Red Glitter With Pearl White Accents
Red glitter polish coats several nails in a deep sparkling layer. White pearl nails share the set, each marked with pearls, rhinestones, or silver lines. One white nail also carries a rhinestone bow, and another wears a dotted silver line. Small red gems sit beside the pearls on the white nails. Hands cross at the center, which shows the red and white mix at once….
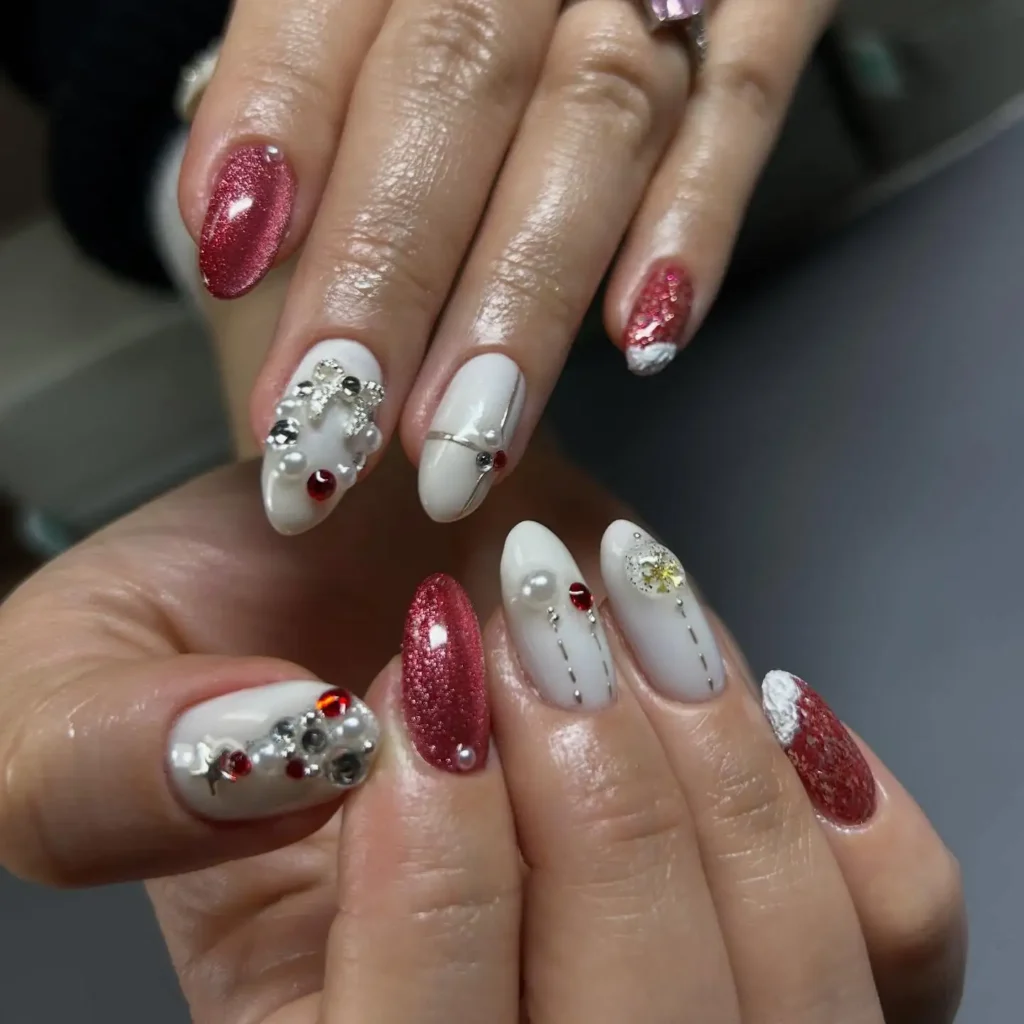
Brush two thin coats of red onto the red nails and let them dry. Paint the white nails next with two thin coats and let them dry. Set the pearls and stones with clear coat, placing the largest one first. Keep the glitter coats thin, because thick glitter can feel rough. Finish with a glossy top coat, and keep it off the bead tops…
23. Sheer Pink With Pearl Cuticle Arcs
Pale pink polish in a sheer layer leaves the natural nail faintly visible beneath. Tiny pearl beads curve along the cuticle of each nail in a small arc. Arcs follow the base of the nail, so the beads read as a neat border. Surface stays glossy and calm, with no other pattern on the set. Hands rest flat on a pale surface, which keeps the arcs easy to see….
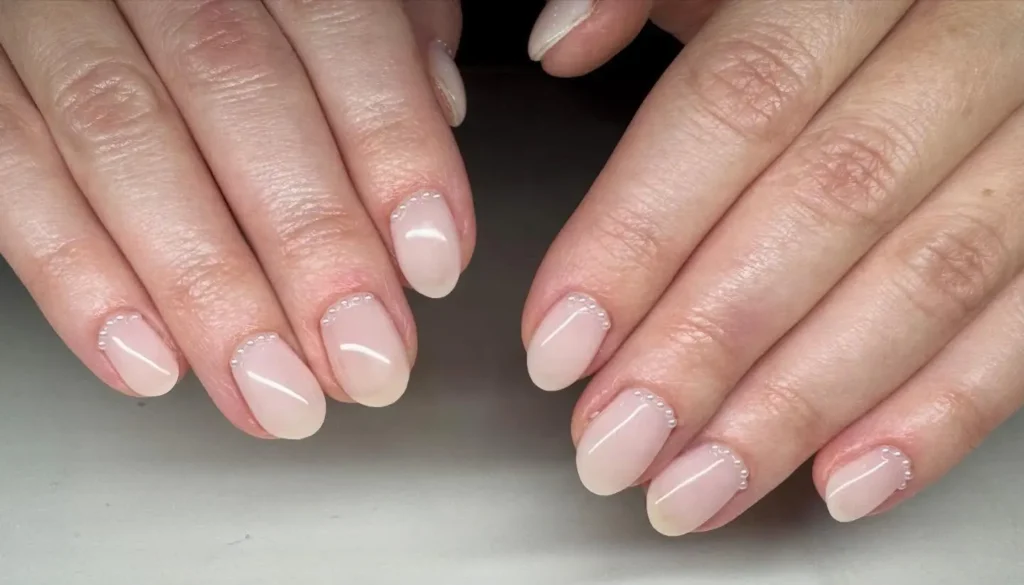
Start with two thin coats of sheer pink and dry each coat well. Set the beads with a drop of clear coat, starting at the center of the arc. Use a dotting tool to place the beads one by one along the curve. Keep the arcs small, because large ones can crowd the nail base. Seal around the beads with a glossy top coat, and skip the bead tops….
24. Pearly White With Rhinestone Rows
Clear glossy polish in pearly white coats each nail evenly. Vertical rows of small rhinestones run down two nails near the center. Stones also catch light in tiny flashes, while the other nails stay plain. White satin drapes around the hand and echoes the pale polish tones. One hand shows four nails clearly, with the thumb cropped at the frame edge…

Coat each nail with two thin coats of the white shade. Set the stones in a straight line with a drop of clear coat each. Use a dotting tool to keep the spacing even, then check the line twice. Seal around the stones with a glossy top coat, and leave the stone tops bare. Swap the rhinestones for pearls if the set needs a softer shine….
25. Pale Pearl Pink With Red Berries
Pearlescent polish in pale pink and white covers every nail in a smooth layer. Sheen also shifts softly between pink and white as the hands move. One sprig of red berries rests beside the hands on white fur. Red berries echo the holiday theme without touching the nails at all. Silver name ring on one finger adds a small bright accent to the set…
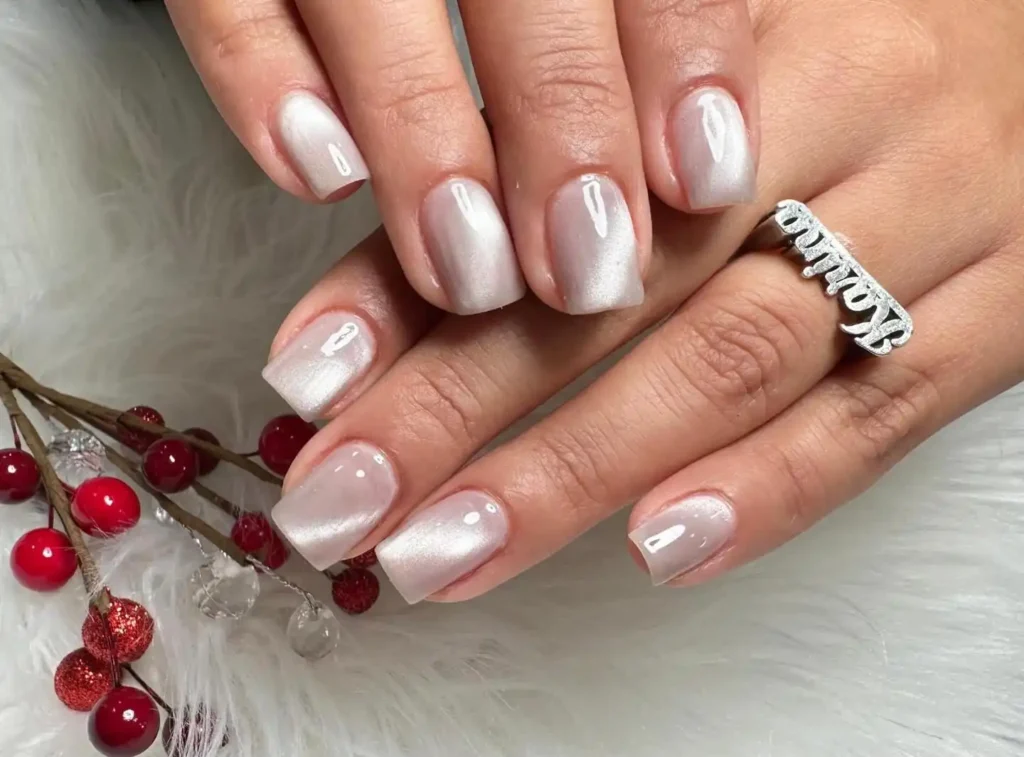
Lay two thin coats of the pale shade onto each nail. Thin coats keep the color even and free of streaks, so the finish stays smooth. Run each coat over the free edge to limit chipping at the tips. Finish with a glossy top coat in one even pass to keep the sheen bright. Wear the set with cream knits, since the pale pink suits soft layers….
Closing
Keep the pearl as the star and everything else small. One bead, one bow, or one row of dots is enough to make a set feel finished. Thin coats keep the sheen even, and a capped free edge slows chips at the tips. Christmas pearl nails also snag less when beads stay away from the edge and the top coat is sealed around them, not over them. Store the set away from rough knitwear, and refresh the glossy top coat when the shine fades. Choose the base that flatters your hands, add one detail, and enjoy it all season.