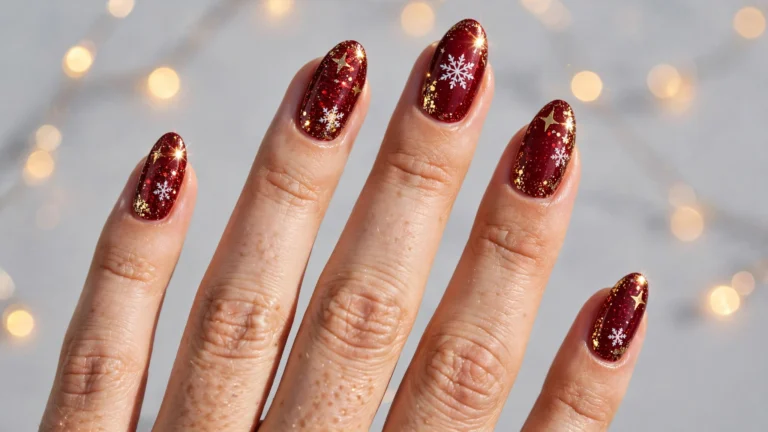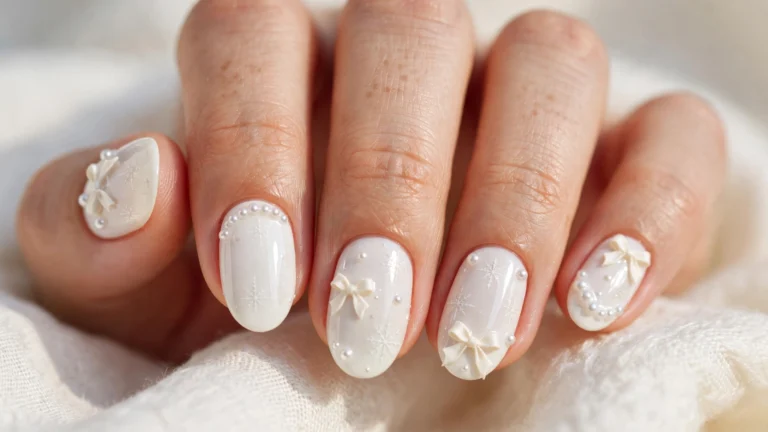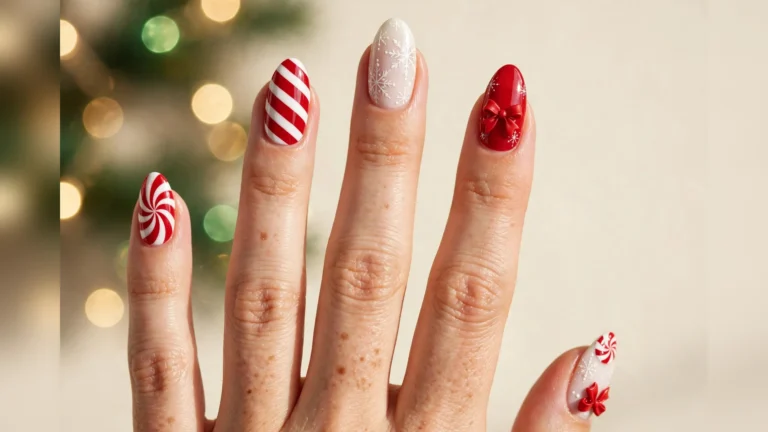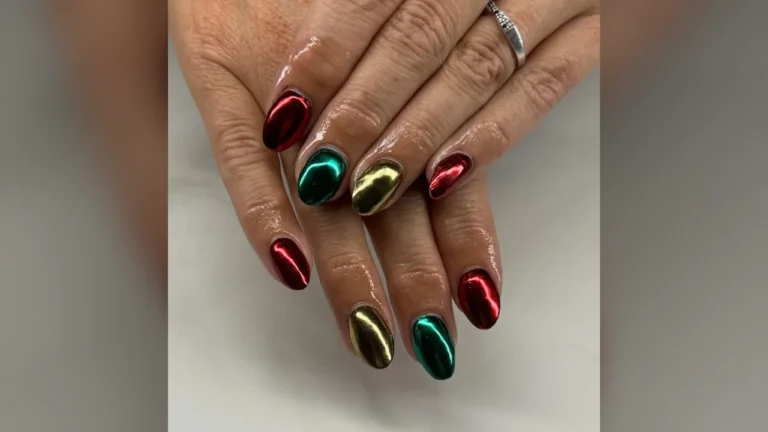


Quiet luxury suits the holiday season, and these Elegant Christmas Nails prove it with deep burgundy, forest green, pearl white and warm gold. Sheer pink bases carry fine gold lines, while cat-eye shimmer and soft ombre add depth to darker polish. Tiny bows, stars, leaves and holly dots sit on select accent nails so the design never feels crowded. Gold foil, chrome and glitter bring warmth where the colour runs dark. Every look leans on clean lines and a restrained palette, which makes the set easy to wear from office parties to late dinners. Choose the mood that matches the wardrobe and let the polish do the work.
1. Emerald French Tips With Gold Bows
Sheer pink covers each nail with a soft wash that lets the natural nail show through. Deep green tips curve across the free edge in a clean French line. Small gold bows sit near the tips on several nails. Tiny gold stars and dots also scatter across the sheer base between the bows. One nail carries a deep green glitter coat for extra depth.

Paint two thin coats of pale rose. Let each coat dry fully before moving on. Next, paint the tip line with dark emerald and a striping brush. Draw small ribbon loops with a thin brush. Add spark shapes with a dotting tool, then seal the work with a glossy top coat. Cap the edge as well, because that step tends to reduce chipping.
2. Burgundy Nails With Tortoise Accent
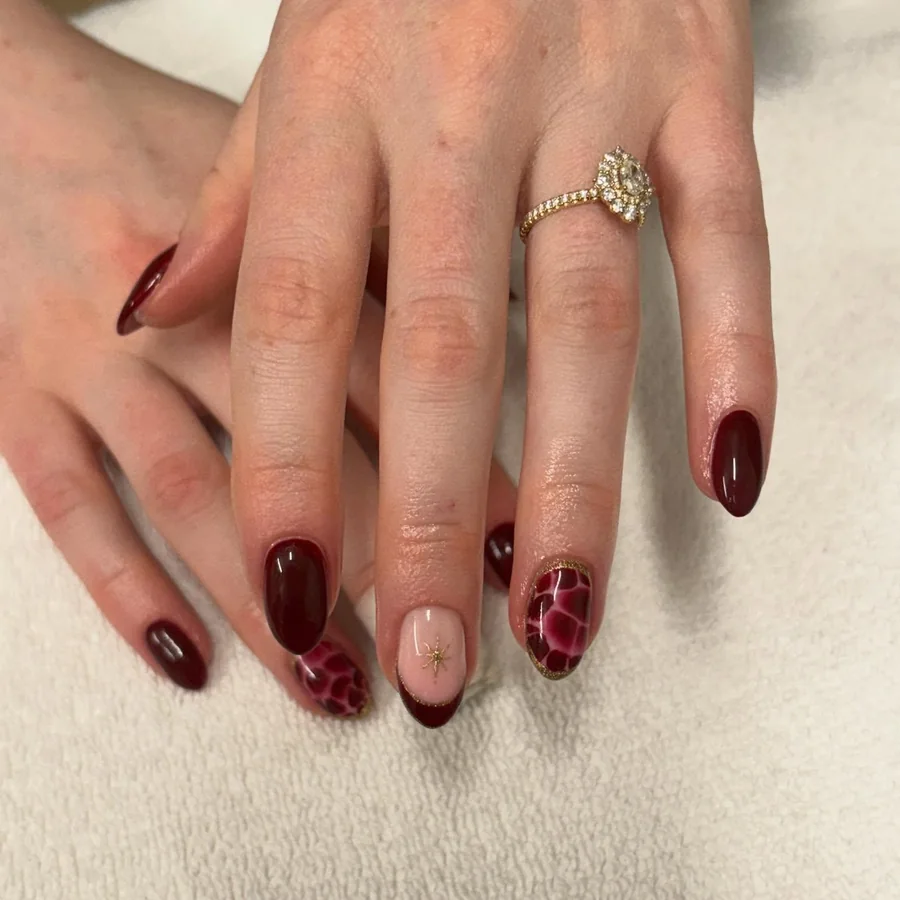
Rich burgundy covers most nails in a smooth, glossy coat. Two accent nails carry a tortoise pattern in wine, rose and amber tones. Thin gold lines outline the tortoise shapes and add a warm edge. One nail shows a sheer pink base with a burgundy French tip. Small gold star also sits near the tip and catches the light. Warm gold against deep burgundy gives the set a quiet balance.
Cover the plates with the base shade in two even layers and let each layer dry. Next, blend wine and rose on a makeup sponge for the tortoise accent. Dab the sponge lightly so the colours stay soft and uneven. Outline the accent with a fine brush and metallic gold. Add a tiny spark shape on the French accent, then seal with top coat. Cap the edge too, because dark shades tend to show chips fast.
3. Gold Spiral Tree On Sheer Nude
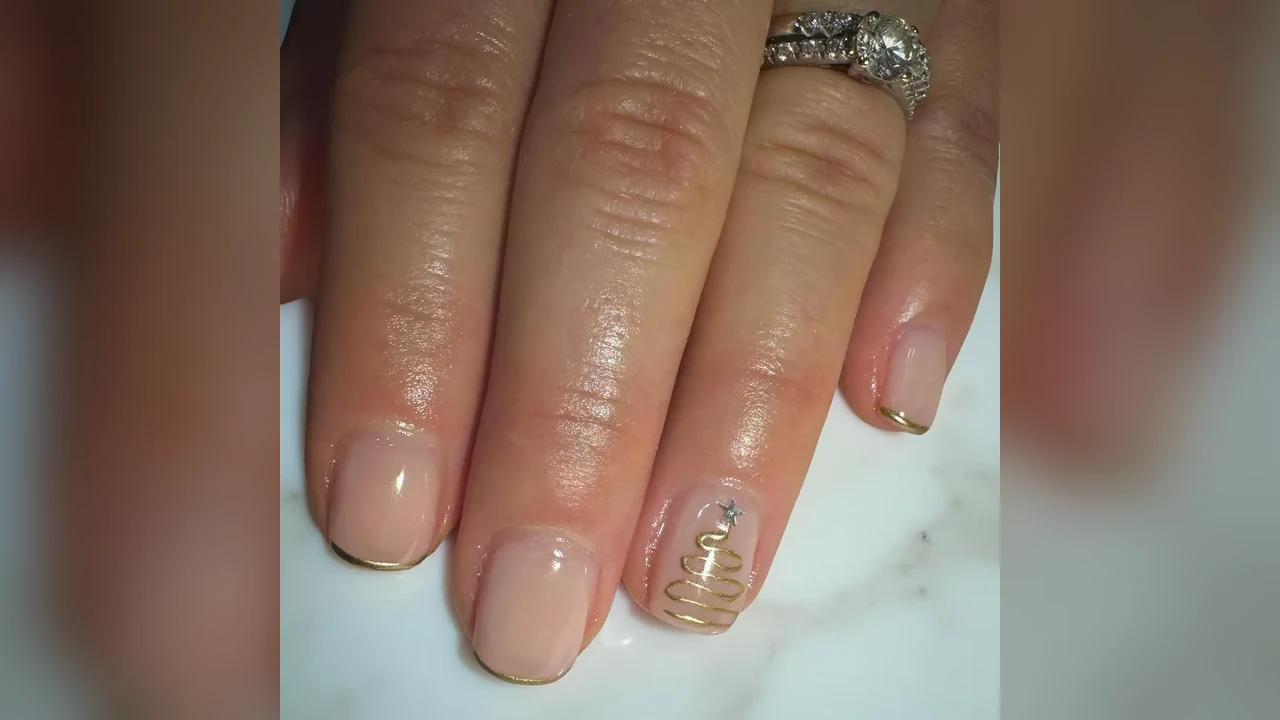
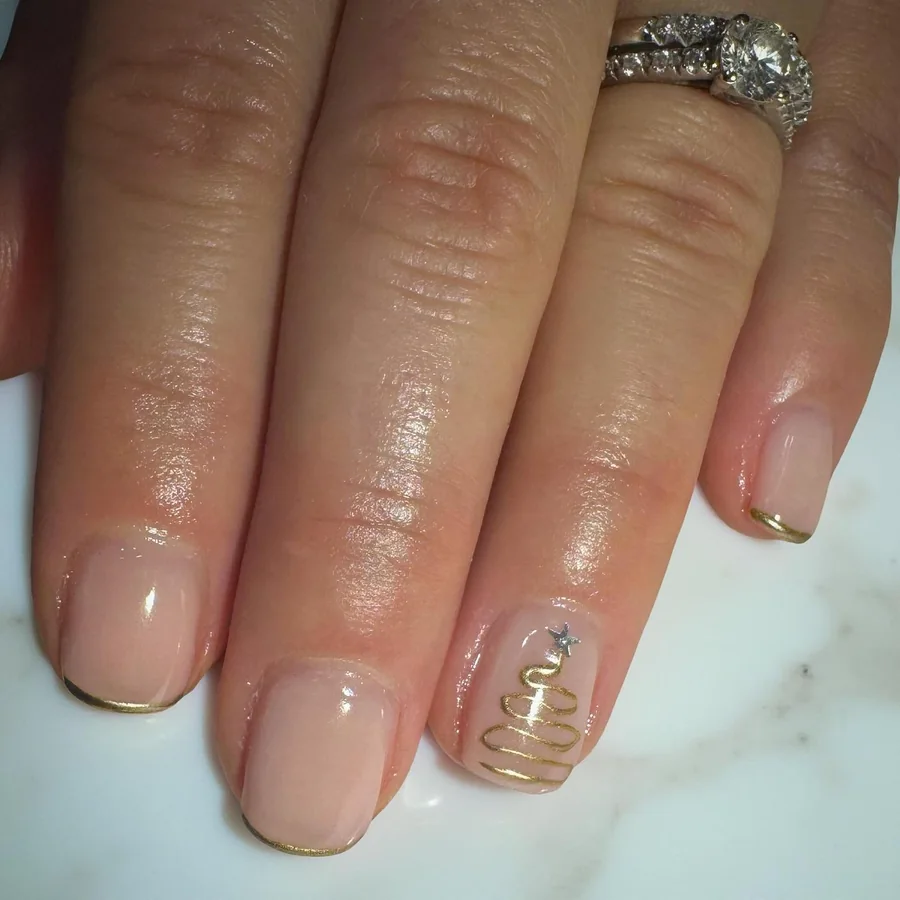
Sheer nude washes over each nail with a pale, glassy finish. Thin gold lines trace the free edge on most nails in a fine arc. One accent nail carries a gold spiral that coils upward like a small tree. Silver star tops the spiral and adds a cool glint. Tiny gold dots also sit near the cuticle on the plain nails.
Fill the plates with two layers of soft blush and let each layer dry. Next, draw the edge line with a striping brush and metallic gold. Coil a slim spiral on one nail with the same brush. Place a silver star at the top with tweezers, then press it down gently. Add small dots by the base with a dotting tool. Seal with a glossy top coat and cap the edge to stop lifting.
4. Forest Green With Gold Foil Edge
Deep forest green covers most nails in a rich, glossy finish. Two accent nails show a nude pink base with a clean, pale surface. Gold foil runs along one edge of each accent nail in a rough, torn line. Tiny gold flecks also catch the light across the green nails. Soft shine keeps the whole set calm and polished. Gold foil along the edge adds warmth without crowding the design.
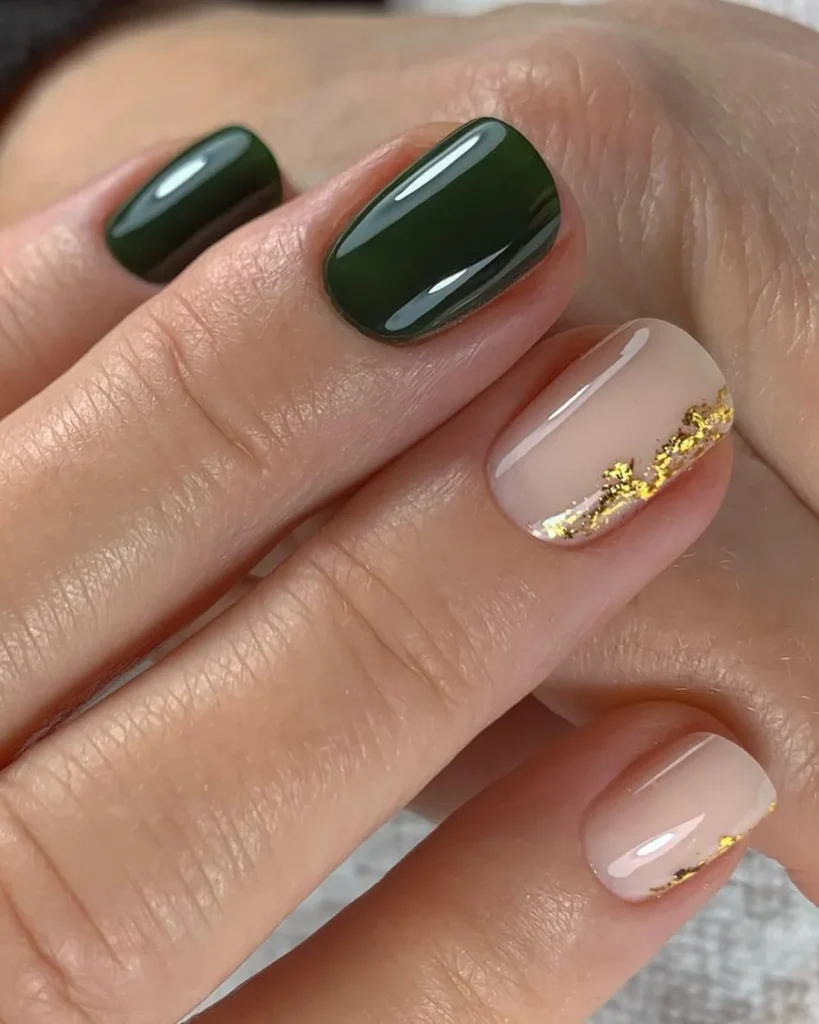
Start with two coats of dark green and let each coat dry. Next, paint the accent plates in pale rose. Press small pieces of metal leaf along one side with tweezers. Smooth the pieces down, then seal with a glossy top coat. Cap the free edge as well, because foil tends to lift at the corners. Keep the foil away from the skin so the edge stays neat.
5. Pearl White Ombre And Silver Swirls
Milky white fades into pale pink across each nail in a soft ombre. Silver-white swirls sweep over the surface in thin, wavy lines. Fine glitter dusts the tips and gives a frosty shimmer. One nail shows a brighter white tip with a delicate silver curve. Sheer shine also keeps the whole set light and airy. Frosty shimmer across the tips keeps the ombre bright and airy.

Blend ivory and blush with a makeup sponge in thin layers. Draw wavy curves using a striping brush and metal-white polish. Dust fine sparkle onto the tips while the surface stays tacky. Seal with a clear top coat, then check the blend in daylight. Soft fades usually need a second sponge pass for an even finish. Cap the free edge so the pale tips resist wear.
6. Red And Green With Gold Holly
Bold red covers several nails in a smooth, glossy coat. One nail shows a gold bow drawn with thin metallic lines. Green holly leaves and small red berries sit on a sheer pink accent. Another nail carries a dark green base with gold foil patches. Tiny gold stars also dot the sheer nails between the motifs. Green and gold against deep red keep the set balanced and calm.
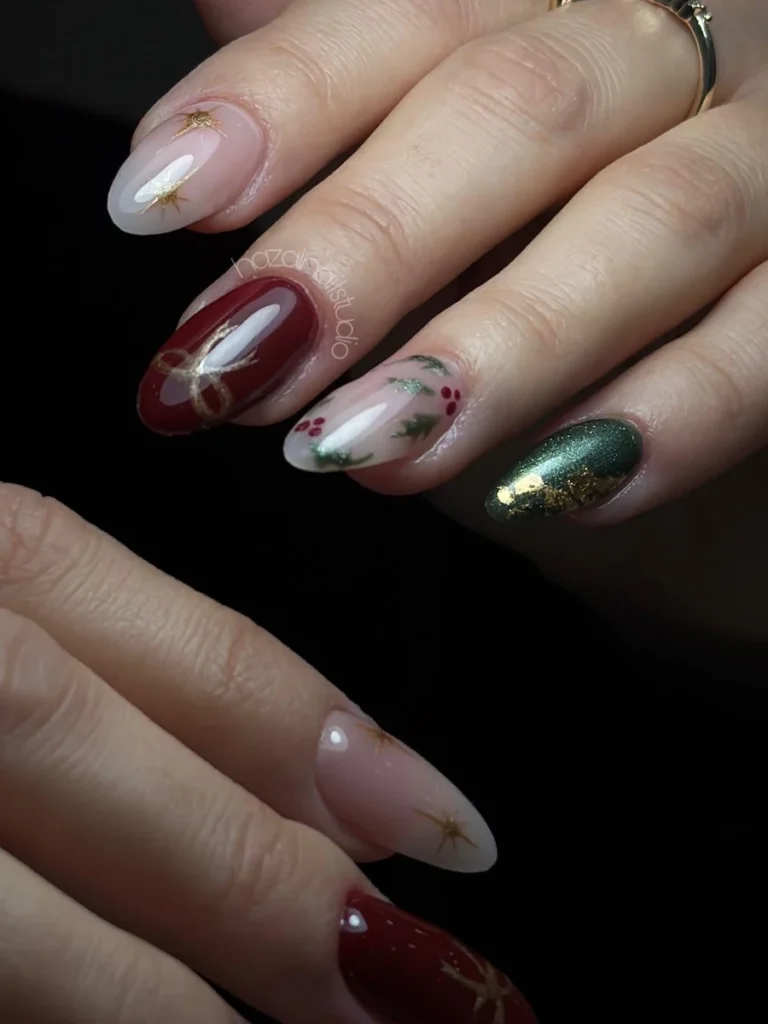
Use two even layers of the main shades and let each layer dry. Draw the bow using a thin brush and metal gold. Add holly foliage with a small flat brush and forest green. Dot tiny red berries with a dotting tool, then seal with top coat. Keep the foliage slim, because large shapes tend to crowd the plate. Cap the edge so the rich colours resist chipping.
7. Gold Foil Tree On Pearl White
Pearl white covers each nail with a soft, milky glow. Gold foil flakes scatter across several nails in uneven patches. One accent nail carries a gold tree with a small star at the top. Tiny pearls and gold dots also sit near the cuticle. Warm shimmer keeps the white base from looking flat. Delicate gold work on a milky base keeps the design soft and refined.
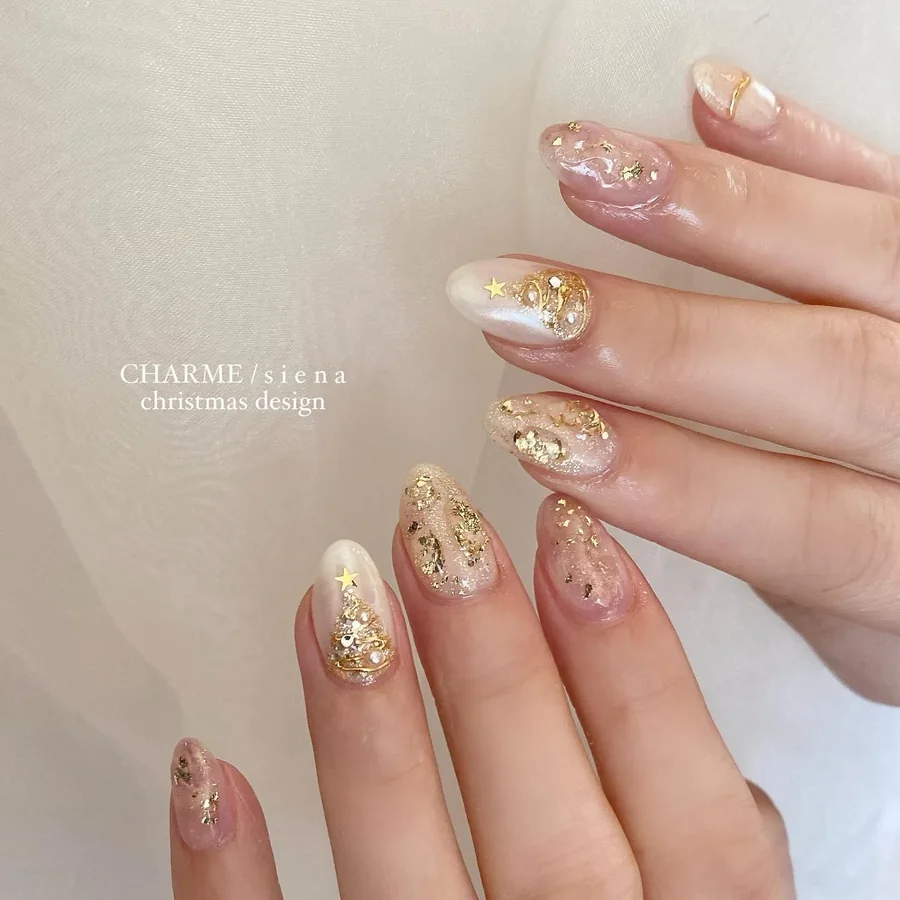
Start with two coats of milky white and let each coat dry. Press small foil pieces onto the wet surface using tweezers. Draw a slim tree on one plate with a thin brush and metallic gold. Place a tiny star at the top, then add pearls with a dotting tool. Seal with a glossy top coat, because foil tends to lift without it. Cap the edge so the pale surface stays neat.
8. Burgundy Cat-Eye With Red French
Velvet burgundy shimmers with a cat-eye glow that shifts as the hand moves. Cat-eye means a magnetic polish pulled into a soft light band. Two nails show a sheer pink base with a deep red French tip. Gold bows sit on the French nails with a small green gem at the centre. One accent nail also carries a scalloped red and pink design.
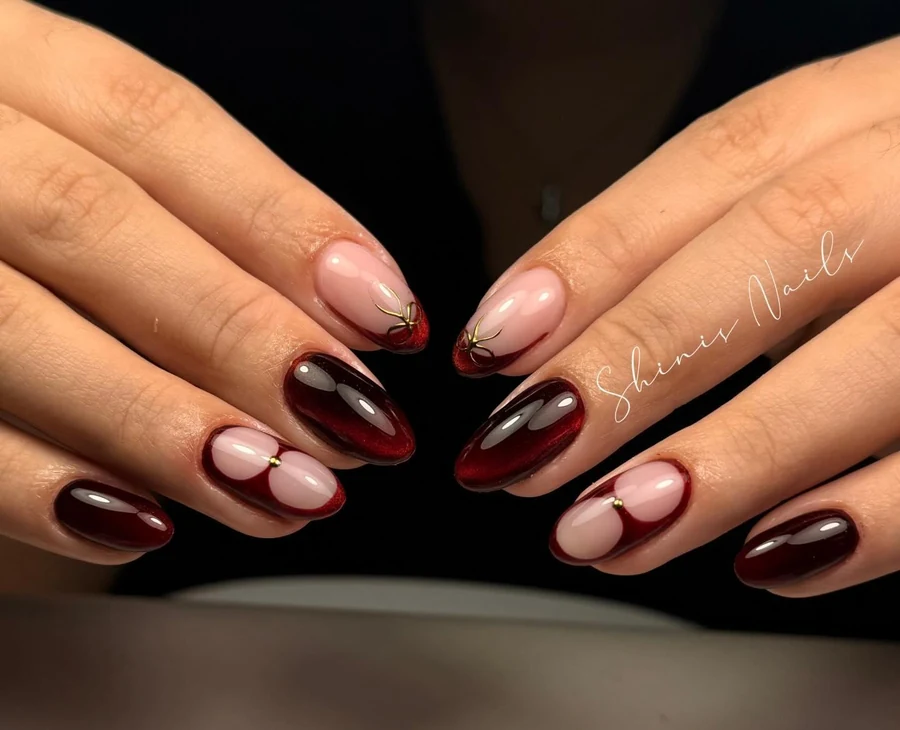
Prep the plates with the base shade in two even layers. Hold a magnet over each wet layer. Next, paint the French tips with deep red and a striping brush. Draw small ribbon loops on the tips with a thin brush. Place a tiny green gem at the centre of each loop with tweezers. Seal with a glossy top coat, then check the light band in daylight. Cap the edge, because magnetic shades tend to show chips fast.
9. Deep Green With Gold Leaves
Forest green covers each nail in a smooth, glossy coat. One accent nail shows a nude pink base with gold leaves. Small green dots also sit between the leaves on the accent nail. Thin gold veins run through the leaves in fine, curving lines. Soft shine keeps the green rich and the accent calm. Green dots between the leaves add a small, playful accent.
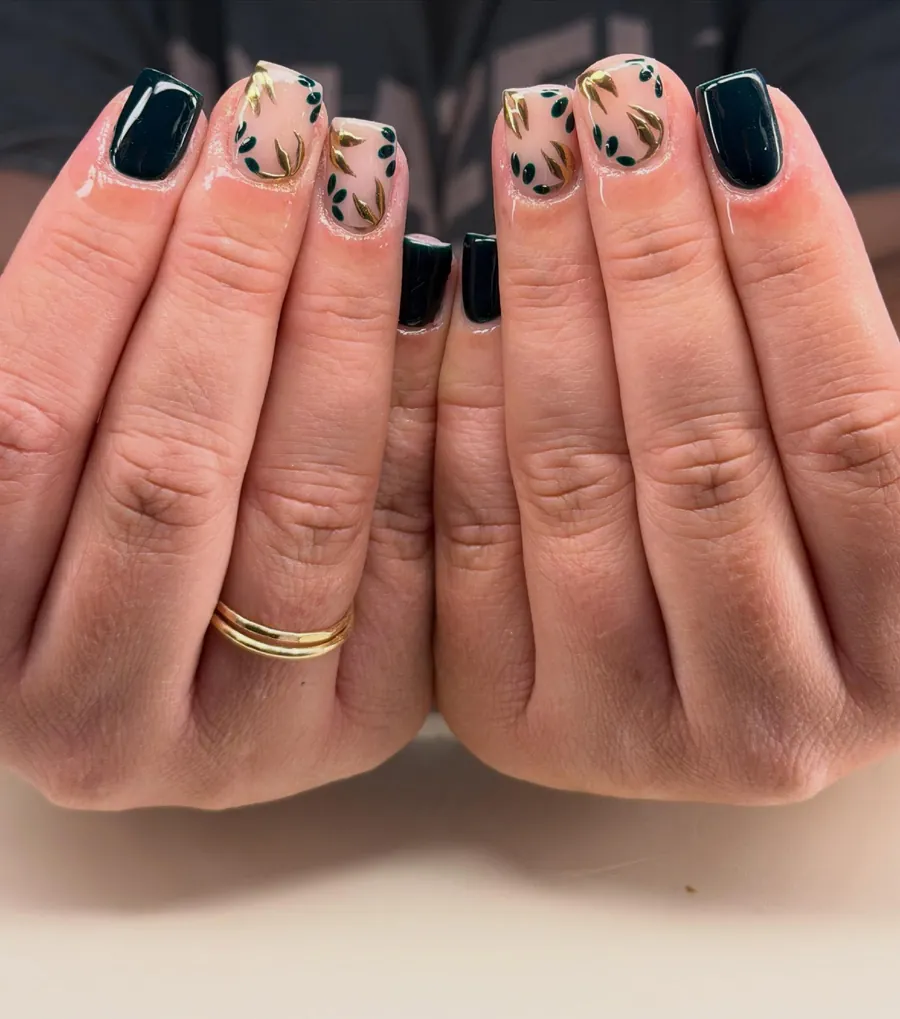
Use two coats of dark green and let each coat dry. Next, paint the accent plate in pale rose. Draw slim leaves with a thin brush and metallic gold. Dot tiny green specks between the leaves with a dotting tool. Seal with a glossy top coat and cap the edge to stop chipping. Keep the leaves slim, because wide leaves tend to crowd the plate.
10. Pale Pink With Gold Flecks
Pale pink washes over each nail with a sheer, glassy finish. Fine gold glitter flecks scatter across the surface in a light dusting. One nail shows a denser patch of glitter near the tip. Soft pink underneath keeps the glitter from looking heavy. Tiny flecks also catch the light when the hand moves. Light-catching flecks give the pale pink a gentle, festive glow.

Begin with two thin coats of pale rose and let each coat dry fully. Next, sprinkle fine sparkle over the wet surface with a fan brush. Press the sparkle down gently, then seal with a glossy top coat. Add a second sprinkle on the accent plate for extra density. Cap the edge as well, because glitter tends to lift at the corners. Keep the layer thin so the surface stays smooth.
11. Red Bows And Gold Star Gems
Rich red covers most nails in a glossy, even coat. Small gold dots line the cuticle edge on the red nails. One accent nail shows a sheer pink base with a red bow. Gold stars and tiny red gems also sit near the bow. Another nail carries a deep red French tip on sheer pink. Red and gold together keep the set warm and festive.

Lay down two coats of dark red and let each coat dry. Next, dot the cuticle edge with metallic gold and a dotting tool. Draw a slim ribbon loop on the accent plate with a thin brush. Place little star shapes and red gems near the loop with tweezers. Brush the French tip onto the last plate with a striping brush. Seal with a clear top coat and cap the edge to stop chipping.
12. Teal Green With Gold Foil Flecks
Dark teal-green covers each nail in a smooth, glossy coat. Gold foil flecks scatter across the surface in small, uneven patches. One nail also shows a denser cluster of foil near the tip. Soft shine keeps the teal rich without looking loud or busy. Tiny flecks catch the light gently when the hand moves. Warm gold against cool teal gives the set a quiet balance.

Begin with two coats of dark teal and let each coat dry fully. Next, press small foil pieces onto the tacky surface with tweezers. Press the pieces flat, then seal with a glossy top coat. Keep the pieces small, because large pieces tend to lift at the edges. Cap the free edge as well so the foil stays put. Check the set in daylight and smooth any raised corners.
13. Emerald Cat-Eye And Green French
Bright emerald covers most nails with a cat-eye glow that shifts in the light. Magnetic polish drawn into a soft light band creates the cat-eye glow. Two nails show a sheer pink base with emerald French tips. Small gold dots also sit along the tip line on the French nails. Soft shine keeps the emerald rich and the pink base calm.
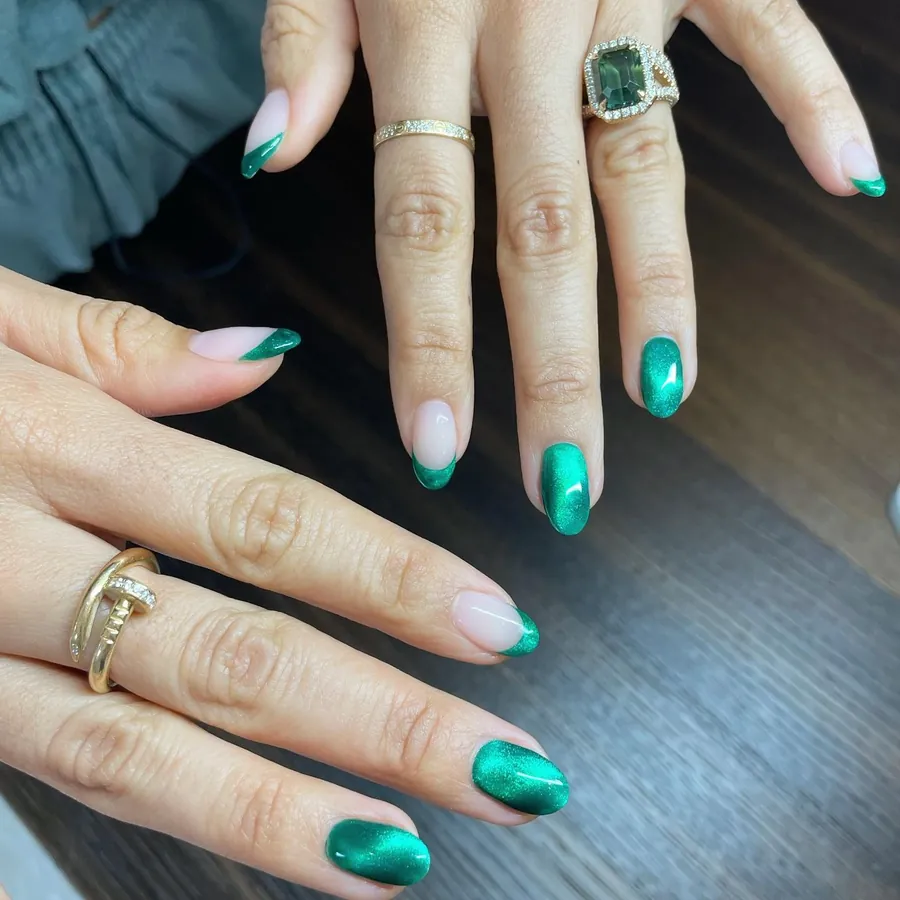
Lay down the base shade in two even coats and hold a magnet over each wet coat. Next, paint the French tips in emerald and a striping brush. Keep the magnet still for a few seconds so the light band stays sharp. Dot tiny gold specks along the tip line with a dotting tool. Seal with a glossy top coat, then check the glow in daylight. Cap the rim, because dark shades tend to show chips fast.
14. Nude Ombre With Gold Chrome
Nude fades into white across each nail in a soft ombre. Gold chrome, a mirror-finish powder, sweeps over one accent nail in smooth strokes. Fine gold glitter also dusts the tips of several nails. Pale pink underneath keeps the ombre from looking stark or cold. Delicate gold dots sit near the cuticle on the chrome nail. Warm gold ties the pale shades into one calm set.
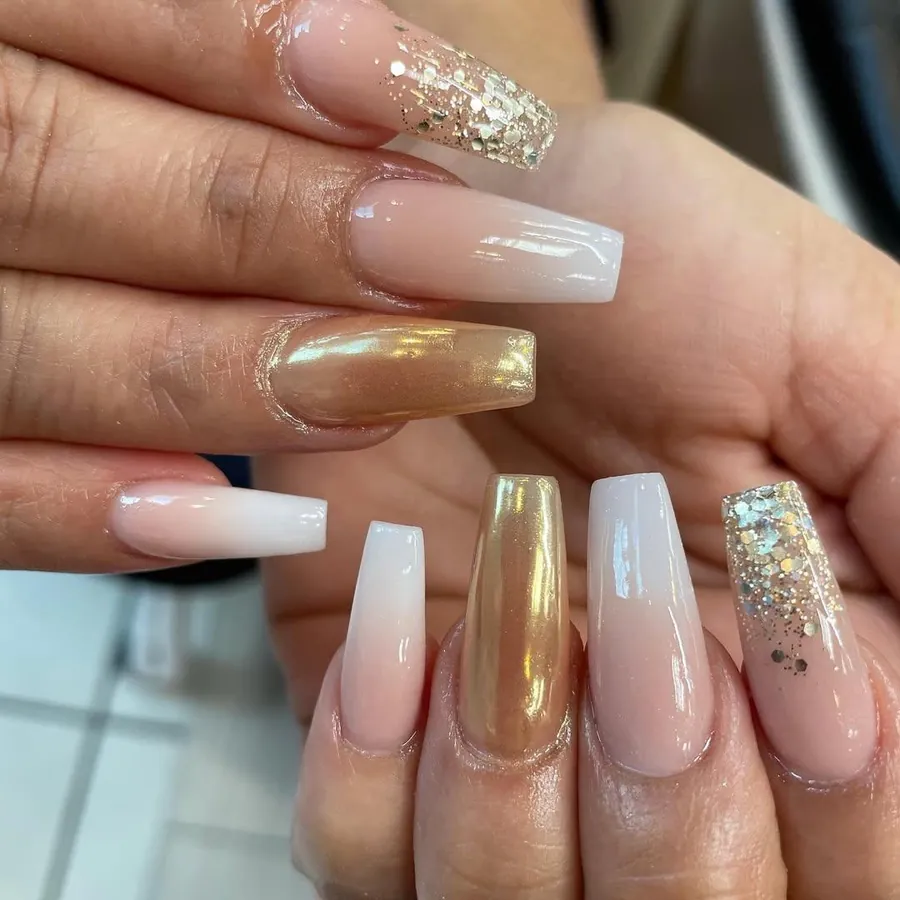
Blend nude into white with a makeup sponge in thin layers. Next, press mirror powder onto the accent plate with an applicator. Dust fine sparkle over the tips while the surface stays tacky. Seal with a glossy top coat, then check the blend in daylight. Soft ombre usually needs a second sponge pass for an even fade. Cap the edge so the pale tips resist wear.
15. Marble Veins In Burgundy And Gold
Warm burgundy marble swirls across most nails with gold veins. Cat-eye shimmer runs through the marble and shifts in the light. One accent nail fades from burgundy into nude in a soft ombre. Thin gold lines also trace the marble veins on several nails. Soft shine keeps the dark marble rich and calm. Dark marble with gold veins gives the set a rich, polished feel.
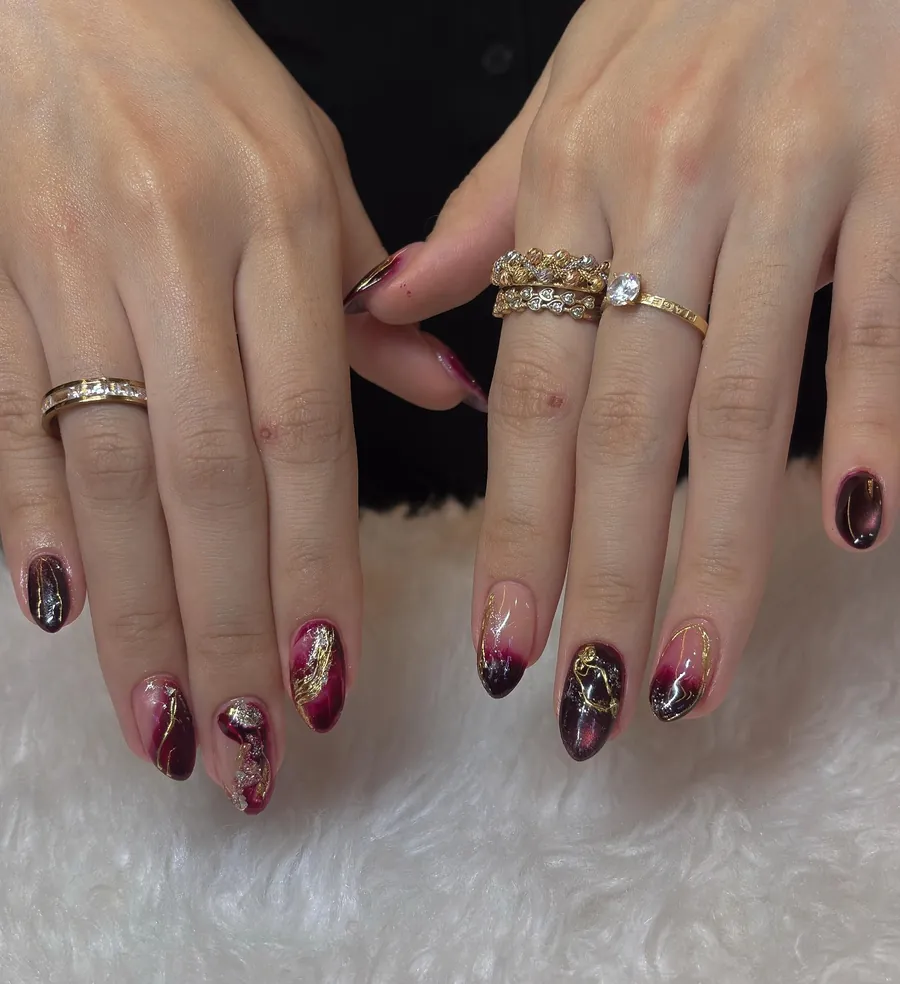
Work the base shade in two even coats and let each coat dry. Next, swirl dark red and wine together with a thin brush. Add fine metallic lines through the swirls and blend the edges lightly. Hold a magnet over the wet surface to pull a soft light band. Seal with a glossy top coat, then check the veins in daylight. Cap the rim, because dark marble tends to show chips fast.
16. Sage Green With Gold Leaves
Pale sage covers most nails in a soft, matte finish. Deeper teal accent carries gold leaves on one nail. Fine gold veins wind through the leaves in soft, curving lines. Small gold dots also sit near the cuticle on the sage nails. Quiet green tones keep the whole set calm and fresh. Velvety texture softens the gold and keeps the look restrained.

Work with two coats of pale sage and let each coat dry. Next, paint the accent plate in deep teal. Draw slim foliage with a thin brush and metallic gold. Add tiny dots near the cuticle with a dotting tool. Seal with a matte top coat, because shine tends to dull the sage. Cap the edge so the matte surface resists wear.
17. White French With Gold Outline
White French tips curve across the free edge on a nude pink base. Thin gold glitter outlines each tip in a fine, sparkling line. Solid white tip with a gold glitter edge marks one accent nail. Soft pink underneath keeps the white from looking stark. Delicate gold dots also sit near the cuticle on several nails. Gold outline against white tips gives the set a crisp, neat edge.
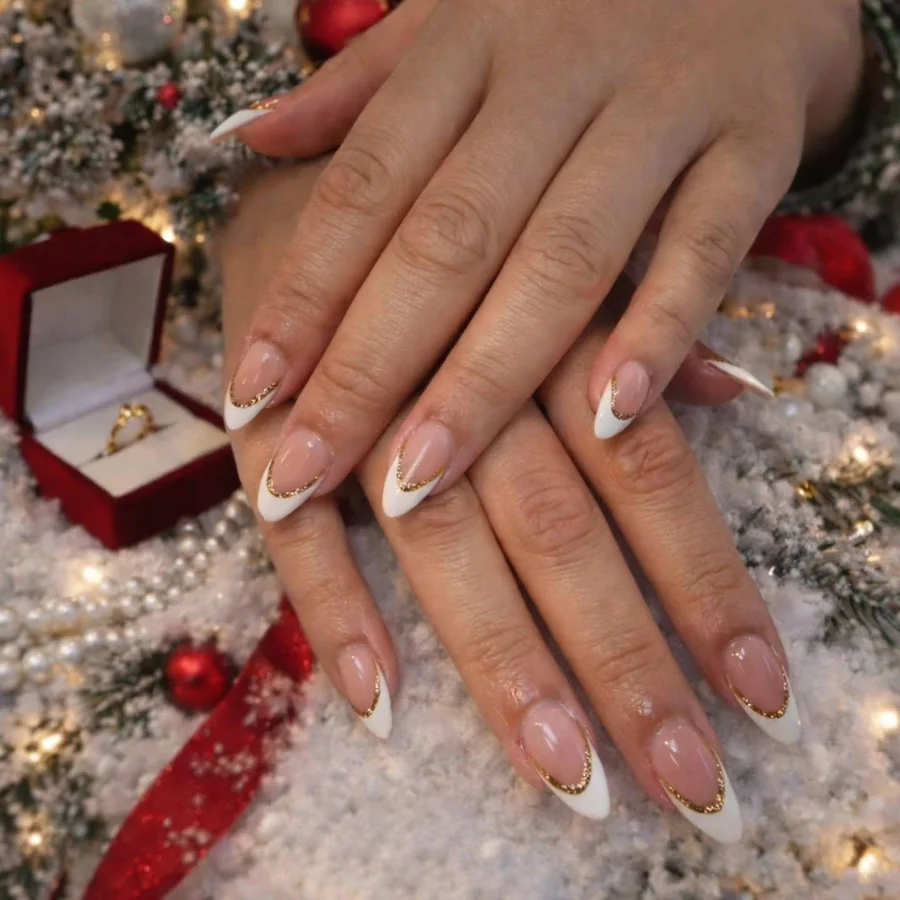
Brush on two thin coats of pale rose and let each coat dry fully. Next, paint the tip line in white with a striping brush. Trace a fine glitter outline along the tip with a thin brush. Keep the outline slim, because a wide line tends to look heavy. Seal with a glossy top coat, then cap the edge to stop chipping. Check the outline in daylight and fix any uneven spots.
18. Red Nails With Gold Starbursts
Bold red covers most nails in a glossy, even coat. Nude pink bases carry gold starbursts on the two accent nails. Red gems sit at the centre of each starburst. Thin gold rays spread from the gems across the nude base. Soft shine also keeps the red rich and the starbursts bright. Gold rays on nude pink keep the red from feeling heavy.
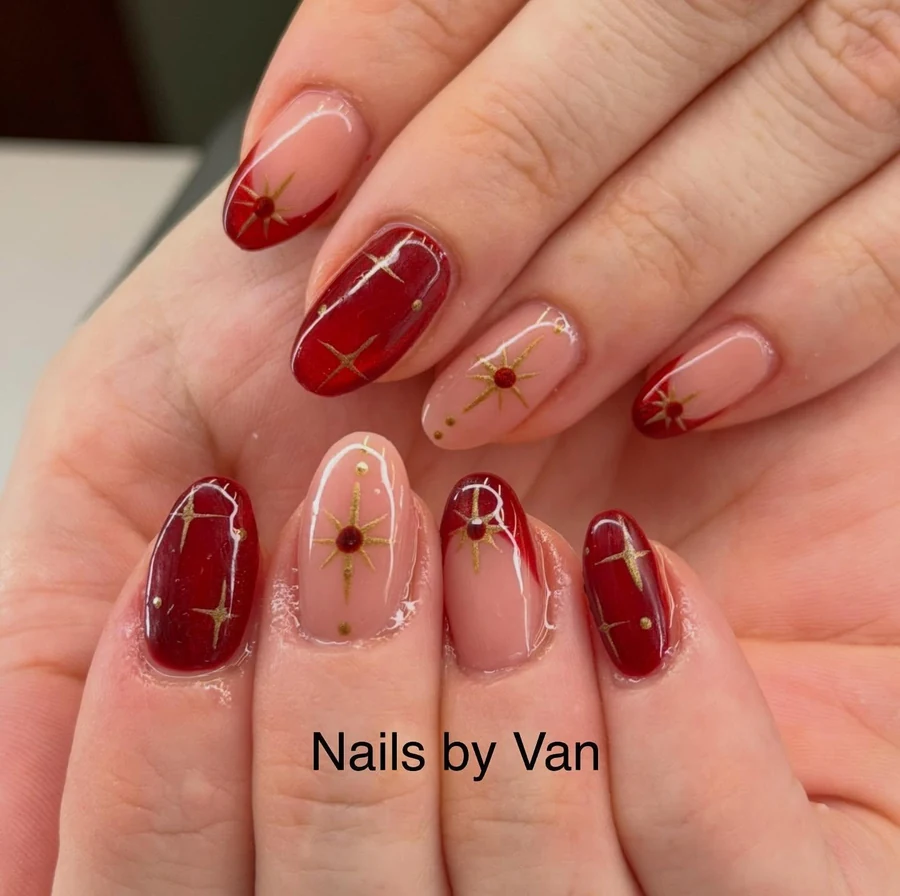
Brush on two coats of dark red and let each coat dry. Paint the feature plates in pale rose with a flat brush. Draw starburst rays with a thin brush and metallic gold. Place a red gem at the centre of each burst with tweezers. Seal with a glossy top coat, then check the rays in daylight. Cap the edge, because dark shades tend to show chips fast.
19. Olive Cat-Eye With Gold Lines
Dark olive-green shimmers with a cat-eye glow that shifts in the light. Magnetic polish pulled into a soft light band gives the cat-eye glow. Thin gold lines run across the surface like fine leaves. Small gold dots also sit near the cuticle on several nails. Soft shine keeps the olive deep and the gold warm. Olive and gold together give the set an earthy, quiet glow.

Spread the base shade in two even coats and hold a magnet over each wet coat. Next, draw fine leaf lines with a thin brush and metallic gold. Keep the lines slim, because wide lines tend to look heavy. Dot tiny metal specks near the cuticle with a dotting tool. Seal with a clear top coat, then check the glow in daylight. Cap the edge so the dark surface resists wear.
20. White French Trim And Gold Bows
White French tips arc across the free edge on a nude pink base. Slim gold trim outlines each tip in a thin, metallic line. Bows in gold sit on two accent nails with a small pearl at the centre. Pale pink below keeps the white from looking harsh. Faint gold dots also sit near the cuticle on several nails. Gold trim and small bows keep the French tips neat and refined.
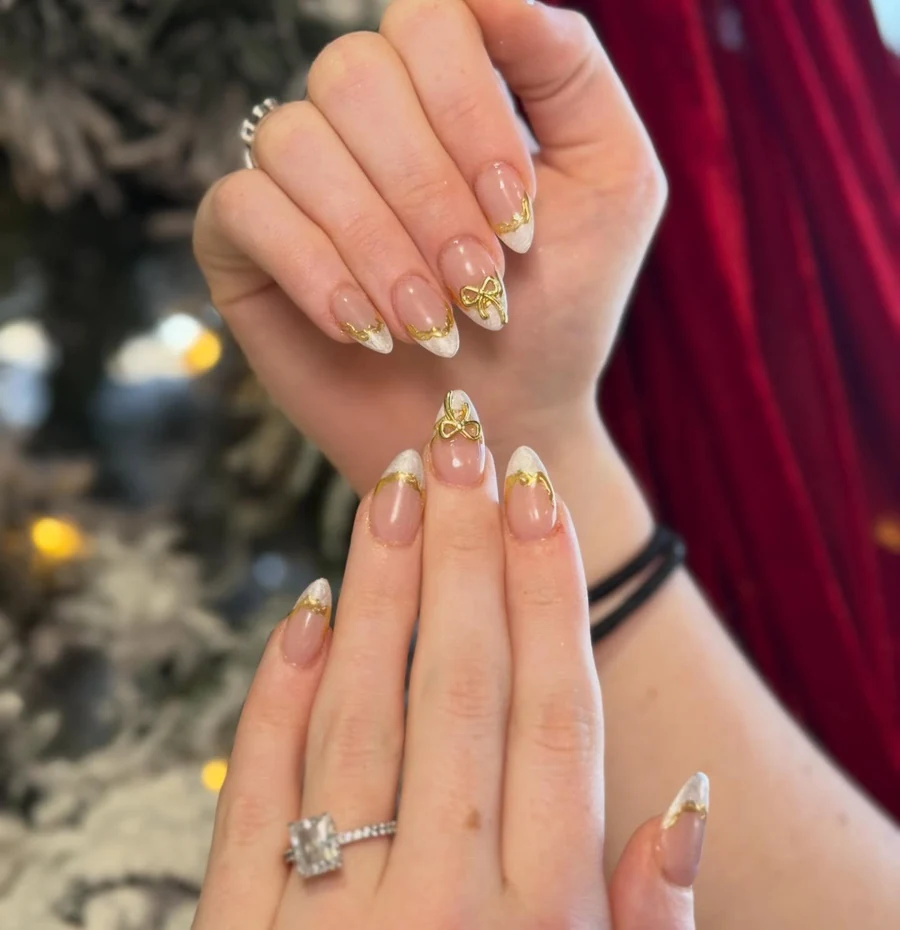
Spread two thin layers of pale rose and let each layer dry fully. Paint the tip line in white with a striping brush. Trace a slim metal trim along the tip using a thin brush. Draw small ribbon loops on the feature plates using the same brush. Place a little pearl at the heart of every loop using tweezers. Seal using a clear top coat, then cap the free rim to stop wear.
21. Green Marble With Gold Leaf
Forest green covers most nails in a smooth, glossy coat. Green-gold marble swirl covers one accent nail over a dark base. Another accent nail carries a nude pink base with gold leaves. Thin gold veins run through the marble in fine lines. Soft shine also keeps the green rich and the accents calm. Marble and leaf accents break up the solid green without noise.
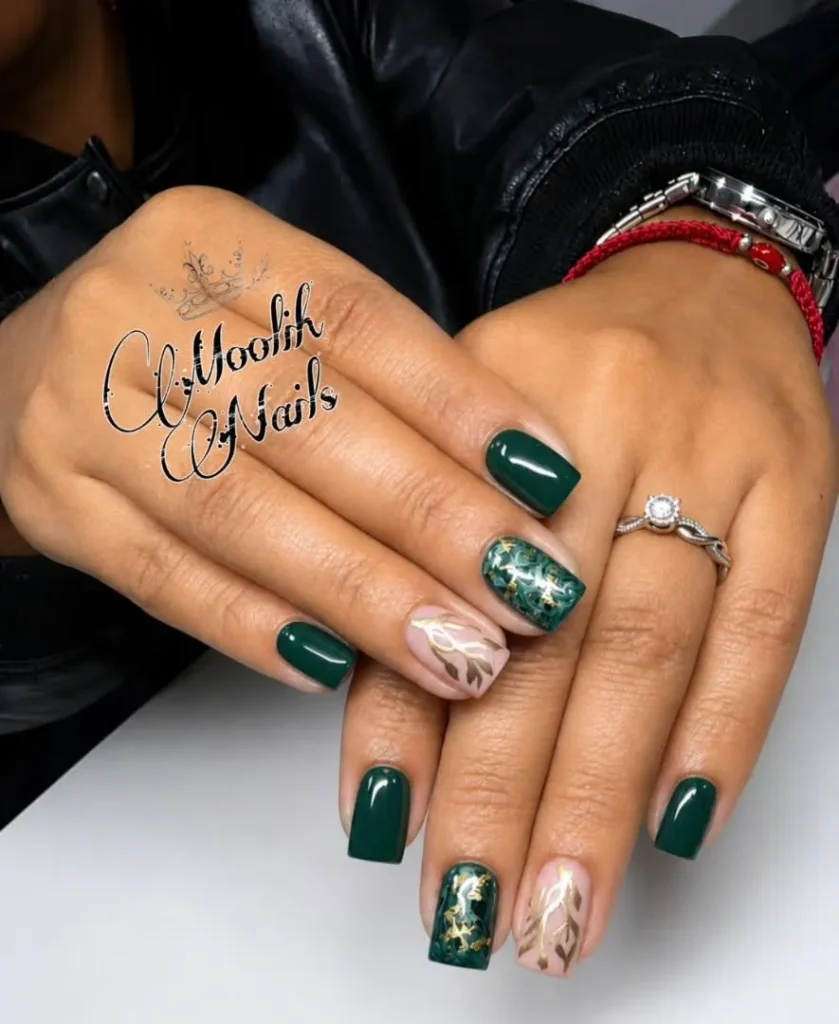
Coat the plates with two layers of dark green and let each layer dry. Next, swirl green and gold together on the accent plate with a thin brush. Cover the second accent plate in pale rose. Draw slim leaves with metallic gold and a thin brush. Seal with a glossy top coat, then check the marble in daylight. Cap the rim, because dark green tends to show chips fast.
22. Matte Red With Sage And Gold
Matte red covers most nails in a soft, velvety finish. Sage green base in a matte finish marks one accent nail. Gold metallic sweeps over a third nail in a smooth, warm band. Faint gold dots also sit near the cuticle on the red nails. Quiet tones keep the whole set calm and restrained. Velvety texture tones down the red and keeps the gold warm.
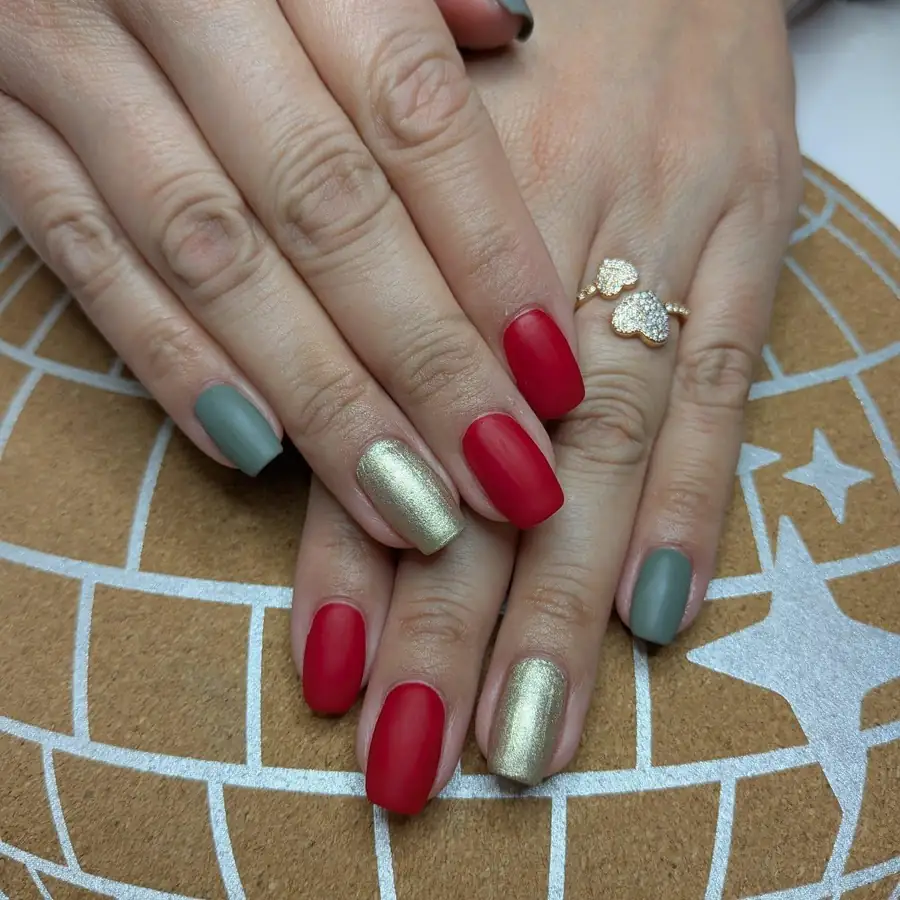
Coat the plates with the main shades in two even layers and let each layer dry. Next, seal the red plates with a flat top coat. Cover the accent plate in sage tone and seal it flat as well. Press a warm metal band onto one plate with an applicator. Dot tiny metal specks by the base with a dotting tool. Keep the flat finish clean, because shine tends to dull it fast.
23. Teal Nails With Gold Bow
Cool teal covers most nails in a smooth, glossy coat. Nude pink base with a gold bow marks the first accent nail. Snowflake in gold sits on another accent nail with tiny gold dots. Thin gold lines frame the bow in a fine, neat border. Soft shine also keeps the teal rich and the accents calm. Teal and gold together keep the set cool and festive.

Cover the plates with two layers of dark teal and let each layer dry. Paint the feature plates in blush pink with a flat brush. Draw a small ribbon loop on one plate with a thin brush. Add a snowflake shape with a striping brush and metallic gold. Dot tiny metal specks around the snowflake using a dotting tool. Seal using a clear top coat, then cap the free rim to stop chipping.
24. Pearl White With Silver Stars
Milky pearl covers each nail with a soft, white glow. Silver stars scatter across the surface in different sizes. Glossy pearls sit near the cuticle on several nails. Gold glitter ornament hangs from one star in a fine, sparkling drop. Sheer shine also keeps the set light and airy. Cool silver against warm pearl gives the set a quiet balance.
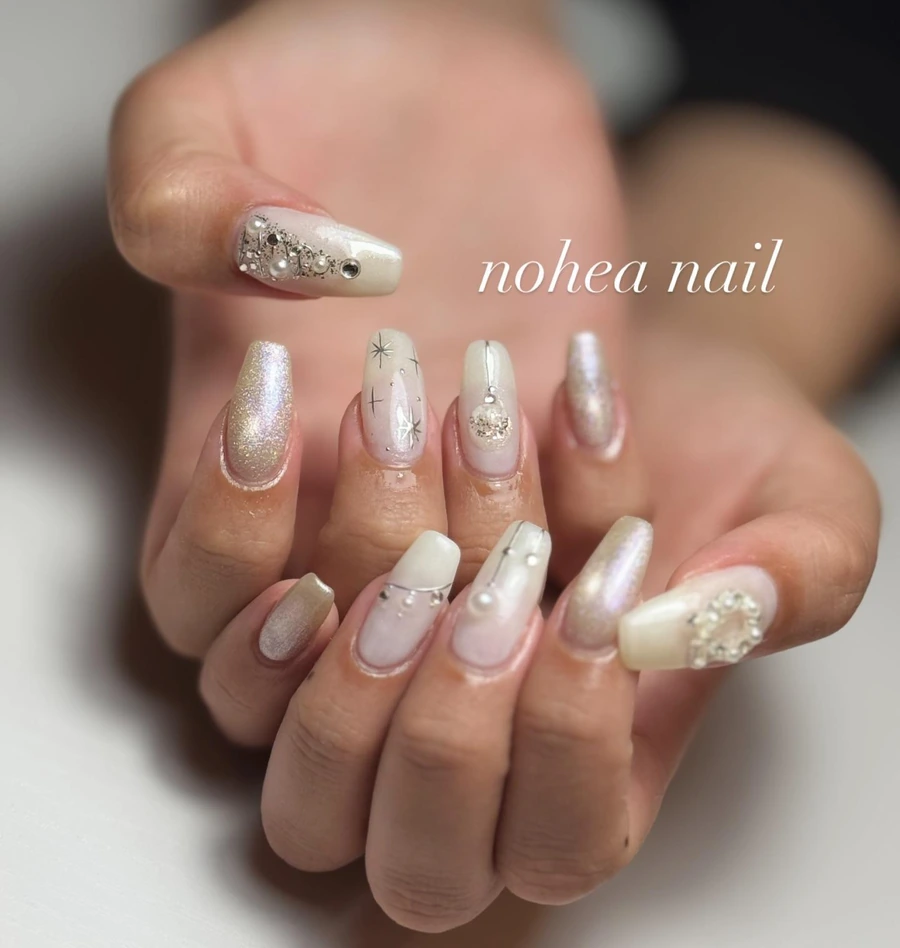
Prep the plates with two layers of pale ivory and let each layer dry. Next, place metal spark shapes on the surface with tweezers. Add pearls by the base with a dotting tool. Draw a fine sparkle drop from one spark with a thin brush. Seal with a clear top coat, then check the shapes in daylight. Cap the edge so the ivory surface resists wear.
25. Dark Green With Gold Tree
Very dark green covers each nail in a smooth, glossy coat. Tree in gold sits on one accent nail with a small star at the top. Gold bow marks another accent nail in thin, metallic lines. Bright gold dots scatter across the green nails. Soft shine also keeps the dark shade rich and calm. Gold tree and bow on dark green keep the set calm and festive.

Fill the plates with two layers of deep forest and let each layer dry. Next, draw a slim tree on one plate with a thin brush and metal gold. Place a little star at the top with tweezers. Draw a small ribbon loop on the second plate with the same brush. Seal with a clear top coat, then check the tree in daylight. Cap the rim, because deep shades tend to show chips fast.
Conclusion
Muted shades reward patience more than loud colours do. Thin coats and clean edges show clearly on dark polish because every layer stays visible, so slow application pays off. Keep a small detail on each hand and let the base colour carry the rest. Gentle removal and regular cuticle oil protect the nails between sets. Handled this way, elegant Christmas nails stay neat for days, and a classy holiday manicure reads as considered rather than plain. Even a refined festive set looks its best when the finish stays smooth to the very last day.