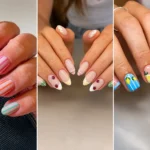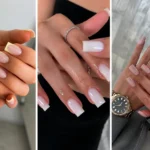

Fake nails can instantly make your hands look polished, elegant, and stylish, but removing them incorrectly can seriously damage your natural nails. Many people make the mistake of peeling, pulling, or forcing fake nails off to get quick removal. Unfortunately, this often leads to painful nail thinning, breakage, peeling layers, and long-term nail weakness. In some cases, improper removal may even damage the nail bed and cause irritation that takes weeks to heal.
That is why learning how to remove fake nails safely is just as important as applying them correctly. Whether you wear acrylic nails, gel extensions, dip powder nails, or press-on nails, every nail type needs a proper removal method. Safe removal protects the natural nail underneath while helping your nails stay healthier, smoother, and stronger over time.
The good news is that fake nails can be removed safely at home when you use patience, proper tools, and the right technique. Instead of rushing the process, it is important to soften the artificial product gradually and remove it gently. A slow and careful approach always gives the best results.
This complete guide explains how to remove fake nails correctly, what mistakes you should avoid, the safest methods for every nail type, and how to restore your natural nails afterward.
Why Proper Fake Nail Removal Is So Important
Many people focus only on how beautiful fake nails look after application, but very few consider the condition of their natural nails after removal. The removal process has a major impact on nail health. If fake nails are removed aggressively, the top layers of the natural nail can tear away with the product. This leaves the nails thin, rough, and extremely sensitive.
Healthy natural nails contain protective layers that help maintain strength and flexibility. Pulling fake nails off damages these layers and weakens the structure of the nail. As a result, the nails become more likely to split, bend, and break.
Improper removal can also create small openings between the nail plate and the nail bed. These openings may trap moisture and bacteria, increasing the risk of infection. This is especially common when acrylic or gel nails are ripped off before they have softened properly.
Safe removal methods help prevent all of these problems. When fake nails are removed gently, the natural nail remains smoother and healthier. In addition, the recovery time becomes much shorter.
Different Types of Fake Nails and Their Removal Methods
Not all fake nails are removed the same way. Each type uses different materials and adhesives, which means the removal process also changes.
Acrylic Nails
Acrylic nails are created using a mixture of liquid monomer and powder polymer. Once hardened, they become extremely strong and durable. Because acrylic nails bond tightly to the natural nail, they usually require acetone soaking for proper removal.
Gel Nails
Gel nails are cured under UV or LED light, creating a glossy and flexible finish. Although gel nails are softer than acrylics, they still require careful soaking and gentle lifting.
Dip Powder Nails
Dip powder nails involve layering adhesive and colored powder repeatedly. These nails are thick and durable, which means the removal process often takes longer.
Press On Nails
Press-on nails are attached using nail glue or adhesive tabs. They are generally easier to remove compared to acrylic or gel nails, especially when warm water and oil are used.
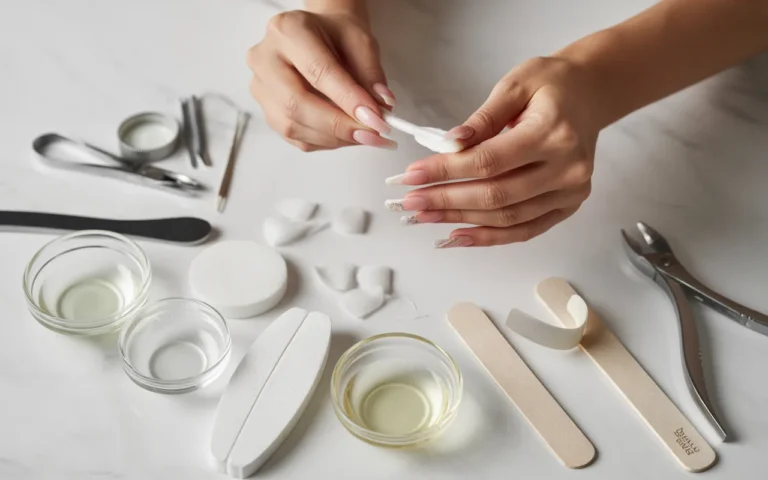
Things You Need Before Removing Fake Nails
Before starting the removal process, prepare all the necessary tools and products. Having everything ready makes the process safer and more comfortable.
Essential Nail Removal Supplies
- Nail clippers
- Nail file
- Pure acetone
- Cotton balls or cotton pads
- Aluminum foil
- Cuticle pusher
- Wooden orange stick
- Warm water
- Cuticle oil
- Petroleum jelly
- Nail buffer
- Hand moisturizer
Using proper supplies helps reduce unnecessary damage during removal.
How to Remove Press-On Nails Safely
Press-on nails are often considered the easiest fake nails to remove. However, many people still damage their natural nails by pulling them off too quickly.
Step 1: Soften the Adhesive
Fill a bowl with warm water and add a small amount of gentle soap. You can also add a few drops of cuticle oil. Soak your nails for 15 to 20 minutes.
Warm water helps loosen the adhesive underneath the press-on nails. Oil also helps soften the glue while reducing dryness.
Step 2: Lift the Edges Carefully
After soaking, gently lift the edge of the press-on nail using a wooden stick or cuticle pusher. Never force the nail upward. If it feels tight or painful, continue soaking for a few more minutes.
The nail should gradually loosen on its own.
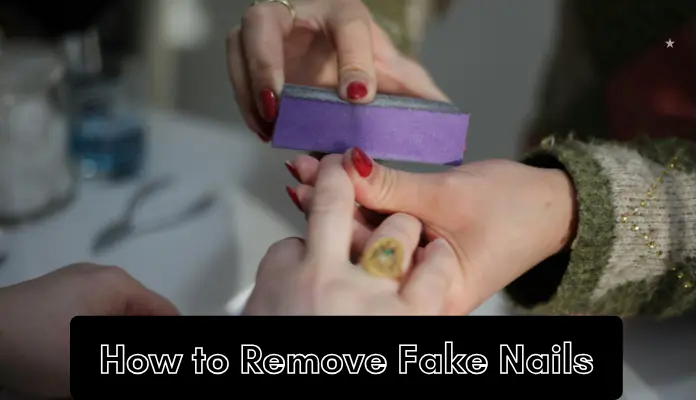
Step 3: Remove Remaining Glue
After removing the nails, some glue residue may remain on the natural nail. Use a soft nail buffer to gently smooth the surface. If needed, apply a small amount of acetone to remove stubborn adhesive.
Step 4: Hydrate the Nails
Wash your hands thoroughly and apply cuticle oil immediately. This restores moisture and helps the nails recover faster.
How to Remove Acrylic Nails Without Damage
Acrylic nails are one of the strongest nail enhancements, which means they require patience during removal. Ripping acrylic nails off can severely damage the natural nail underneath.
Step 1: Trim Excess Length
Use nail clippers to cut the acrylic nails as short as possible. Shorter nails soak more effectively and reduce pressure on the natural nail.
Be careful while trimming because thick acrylic nails may crack if clipped too aggressively.
Step 2: File Off the Top Layer
Acrylic nails usually have a shiny protective top coat that blocks acetone from penetrating properly. Use a coarse nail file to remove the shiny layer gently.
This step helps speed up the soaking process significantly.
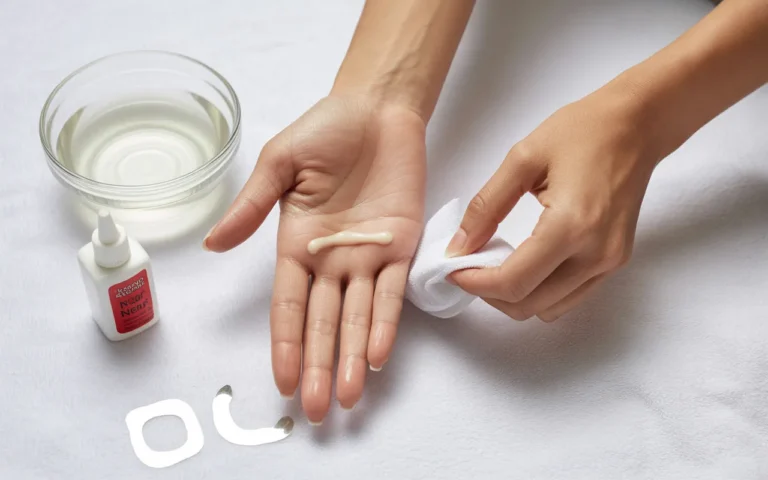
Step 3: Protect the Skin Around the Nails
Acetone can dry the skin quickly, so apply petroleum jelly around your fingertips before soaking. This creates a protective barrier and reduces irritation.
Step 4: Soak Cotton Balls in Acetone
Soak cotton balls in pure acetone and place them directly on top of each acrylic nail.
Avoid using diluted acetone because it works much slower.
Step 5: Wrap the Nails with Foil
Wrap each fingertip tightly with aluminum foil to hold the cotton in place and trap heat. Heat helps the acetone work faster.
Leave the wraps on for approximately 25 to 30 minutes.
Step 6: Remove Softened Acrylic Gently
After soaking, the acrylic should appear soft and slightly lifted. Use a cuticle pusher carefully to slide off the softened product.
Never scrape aggressively because this can remove layers of the natural nail.
Step 7: Repeat the Process if Necessary
Some thicker acrylic nails may not come off completely after the first soak. If this happens, repeat the acetone soaking process again instead of forcing the remaining product off.
How to Remove Gel Nails Properly
Gel nails require a slightly different approach because they are thinner and more flexible than acrylic nails.
Step 1: Break the Glossy Seal
Use a nail file to gently remove the shiny top coat. This allows acetone to penetrate the gel more effectively.
Step 2: Apply Acetone Wraps
Place acetone-soaked cotton pads over each nail and wrap them with foil.
Step 3: Wait for the Gel to Soften
Allow the nails to soak for about 15 to 20 minutes.
Patience is important here because rushing often causes nail peeling.
Step 4: Push Off the Softened Gel
Once softened, the gel should lift away easily. Use a wooden stick or cuticle pusher carefully to remove the remaining product.
If the gel still feels hard, soak it again instead of scraping forcefully.
Step 5: Smooth the Nail Surface
Use a soft nail buffer lightly to smooth the nail surface after removal.
Avoid over-buffing because this can weaken the natural nail.
How to Remove Dip Powder Nails Safely
Dip powder nails are durable and often thicker than standard gel nails. Removing them correctly prevents unnecessary nail damage.
Step 1: Shorten the Nails
Trim the nails first to reduce soaking time.
Step 2: File the Top Layer
Remove the glossy outer coating using a nail file.
Step 3: Soak in Pure Acetone
Place acetone-soaked cotton on the nails and wrap them with foil. Alternatively, soak your fingertips in a bowl of acetone.
Leave the nails soaking for around 20 minutes.
Step 4: Wipe Away the Softened Powder
Once softened, the dip powder should begin breaking apart easily. Use a cotton pad or cuticle pusher gently to remove it.
Step 5: Moisturize Thoroughly
Dip powder removal often leaves the nails feeling dry, so apply nourishing oil and hand cream generously afterward.
Common Mistakes People Make When Removing Fake Nails
Many nail problems happen because people use unsafe removal methods. Avoiding these mistakes helps protect your natural nails.
1. Peeling Fake Nails Off
Peeling fake nails off forcefully can tear away the top protective layers of the natural nail along with the artificial product. This weakens the nail structure and often leaves the nails thin, rough, sensitive, and more likely to crack or break. In many cases, repeated peeling can also slow healthy nail growth and make the nails look uneven for weeks.
2. Scraping Too Aggressively
Forceful scraping can damage the surface of the natural nail by removing healthy nail layers along with the softened product. This often creates rough patches, thinning, and increased sensitivity, especially when pressure is applied repeatedly. As a result, the nails may feel sore, look uneven, and become more vulnerable to splitting or breakage.
3. Using Sharp Tools Incorrectly
Metal tools can easily injure the nail bed when used carelessly because the area underneath the nail is delicate and sensitive. Applying too much pressure while scraping or lifting fake nails may cause cuts, irritation, bleeding, or painful damage. In some cases, improper tool use can even increase the risk of infection or nail lifting.
4. Skipping Moisturizing After Removal
Acetone removes fake nails effectively, but it also strips away natural oils from the nails and surrounding skin. This can leave the nails feeling dry, brittle, and rough after removal. Applying cuticle oil and moisturizer afterward helps restore hydration, improve flexibility, and keep the nails healthier during recovery.
5. Rushing the Process
Safe fake nail removal takes time because the artificial product needs to soften properly before it can be removed gently. Trying to rush the process by pulling, peeling, or scraping too hard often damages the natural nail underneath. Patience helps prevent thinning, breakage, pain, and long-term nail weakness.
How to Care for Natural Nails After Fake Nail Removal
After fake nails are removed, your natural nails often go through a short recovery period because they may feel dry, weak, sensitive, or thinner than usual. This happens because fake nail products, adhesives, filing, and acetone exposure can temporarily reduce the nail’s natural moisture and flexibility. Proper recovery care is essential because it helps restore strength, improve hydration, and protect the nails from further damage. During this time, it is important to keep the nails clean, moisturized, and protected from harsh chemicals or excessive water exposure. Applying cuticle oil and hand cream regularly can help replenish lost moisture, while keeping the nails short reduces the risk of splitting or breakage. In addition, giving your nails a small break before applying another set of fake nails allows the natural nail surface to recover more effectively. Healthy recovery habits not only improve the appearance of your nails but also help them grow back smoother, stronger, and healthier over time.
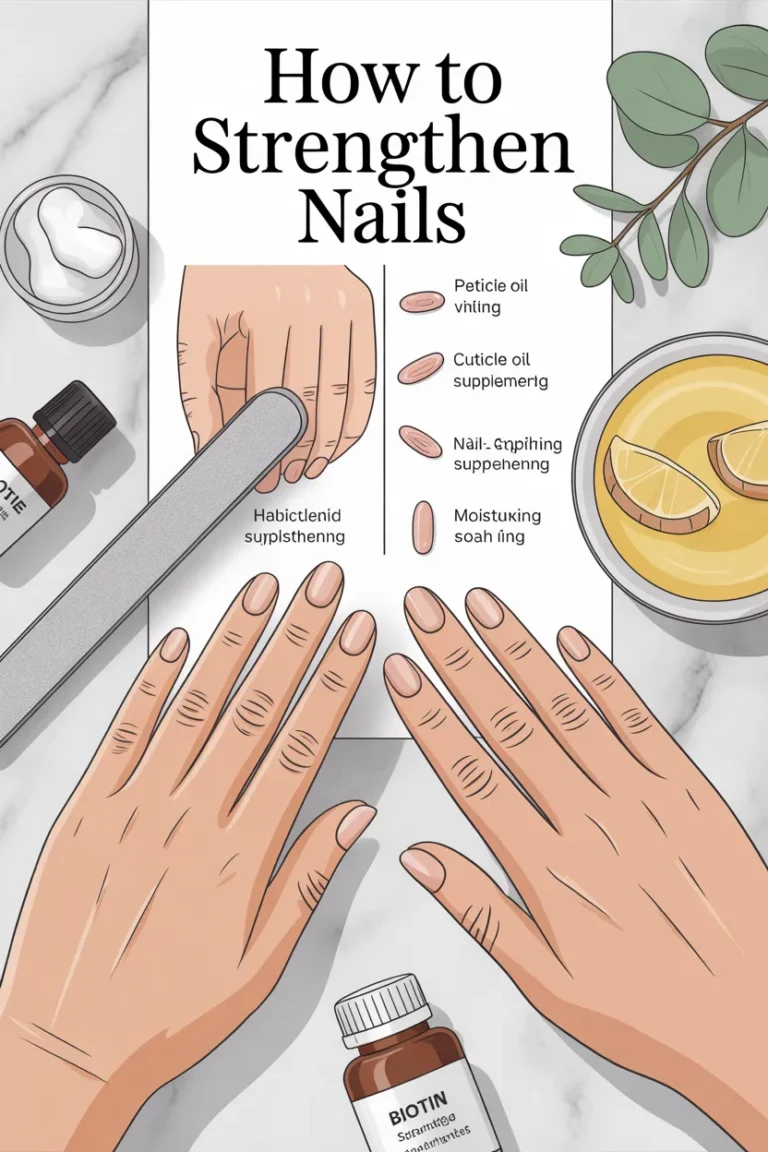
Apply Cuticle Oil Daily
Cuticle oil plays an important role in restoring moisture after fake nail removal because both acetone and nail adhesives can leave the nails and surrounding skin extremely dry. When the nail area loses moisture, the nails often become brittle, rough, and more likely to crack or split. Applying cuticle oil daily helps nourish the nail plate and the delicate skin around it, keeping everything softer and healthier. In addition, properly hydrated nails become more flexible, which reduces the chances of painful breakage during the recovery period. Oils that contain ingredients like jojoba oil, vitamin E, almond oil, or coconut oil are especially helpful because they absorb deeply and support healthier nail growth over time. Massaging the oil gently into the cuticles also improves blood circulation around the nail area, which can further support stronger and smoother natural nails.
Keep Nails Short for a Few Days
Keeping your nails short after removing fake nails is one of the best ways to protect them during the recovery process. After fake nail removal, natural nails often become softer, thinner, and more sensitive than usual, which makes them more vulnerable to splitting, bending, or breaking. Longer nails place additional pressure on weakened nail tips during everyday activities like typing, cleaning, opening containers, or even washing your hands. In contrast, shorter nails experience less stress and are easier to manage while the nail structure regains strength. Trimming the nails to a comfortable short length also helps prevent painful snags and reduces the chances of further peeling or cracking. As your natural nails slowly recover and regain moisture, flexibility, and strength, you can gradually allow them to grow longer again in a healthier condition.
Use a Gentle Nail Strengthener
A strengthening treatment may help support weak nails temporarily by creating a protective layer over the natural nail while it recovers from fake nail removal. After acrylics, gel nails, or dip powder nails are removed, the natural nail surface can sometimes feel thin, soft, or fragile due to filing, adhesives, and acetone exposure. Nail strengthening products are designed to reinforce the nail structure and reduce the risk of bending, peeling, or breaking during this sensitive recovery period. Many strengthening treatments contain ingredients such as keratin, calcium, biotin, vitamin E, or protein compounds that help improve the appearance and condition of weakened nails over time. However, it is important to use these treatments correctly and avoid overapplying them because excessive use of certain hardeners can sometimes make nails too rigid and more likely to crack. For the best results, a gentle strengthening treatment should be combined with regular moisturizing, cuticle oil application, and proper nail care habits so the nails can recover in a healthier and more balanced way.
Avoid Harsh Chemicals
Wearing gloves while cleaning or washing dishes is extremely important after removing fake nails because your natural nails are usually more delicate and vulnerable during the recovery period. Cleaning products often contain strong chemicals that can strip away natural oils from the nails and surrounding skin, leaving them even drier and weaker. In addition, constant exposure to water may soften the nail plate excessively, which increases the chances of bending, peeling, or splitting. Dish soap, detergents, and household cleaners can also irritate sensitive cuticles that may already be dry from acetone exposure. Protective gloves act as a barrier that shields the nails from harsh chemicals, moisture damage, and unnecessary friction during daily tasks. By keeping the nails protected while they recover, you help maintain their strength, reduce breakage, and support healthier nail growth over time.
Give Your Nails a Break
Allowing your nails time to recover before applying another set of fake nails is extremely important for maintaining long-term nail health. After fake nail removal, the natural nails often become temporarily weaker because they have been exposed to filing, adhesives, pressure, and acetone. Applying a new set of fake nails immediately can place additional stress on nails that are already fragile, increasing the risk of thinning, peeling, splitting, and breakage. Giving your nails a short recovery period allows the natural nail surface to rebuild moisture, restore flexibility, and regain strength naturally. During this time, regular use of cuticle oil, hand cream, and gentle nail care can help improve the condition of the nails significantly. Even a short break of one to two weeks may help the nails feel healthier and stronger before the next manicure. Allowing proper recovery time not only improves the health of your natural nails but also helps future fake nail applications last better and look smoother.
Signs of Nail Damage You Should Never Ignore
Healthy nail recovery is normal, but some symptoms may indicate serious damage or infection.
Watch for these warning signs:
- Severe redness
- Swelling
- Bleeding
- Green or yellow discoloration
- Strong pain
- Nail lifting
- Pus or unusual odor
If you notice any of these symptoms, contact a professional nail technician or healthcare provider as soon as possible.
The Safest Way to Remove Fake Nails
The safest removal method is always slow, gentle, and moisture-focused. Acetone works effectively when used correctly, but patience is the most important factor. Whether you are removing acrylics, gel nails, dip powder, or press-on nails, never pull the product off forcefully.
Healthy nails are not only about appearance. Strong natural nails also protect the sensitive skin underneath. Taking extra time during removal helps prevent unnecessary pain and long-term damage.
Final Thoughts
Learning how to remove fake nails correctly is essential for protecting the health of your natural nails. Although fake nails can look beautiful and stylish, careless removal can leave nails weak, painful, thin, and damaged for weeks. The safest approach is always to soften the product slowly, remove it gently, and restore moisture immediately afterward.
Every type of fake nail requires patience and proper care. By following the correct removal techniques and avoiding aggressive methods, you can safely enjoy fake nails without ruining your natural nails underneath.
Healthy nails always start with safe nail care habits. When removal is done properly, your nails remain smoother, stronger, and healthier long after the fake nails are gone.
Frequently Asked Questions
Can I remove fake nails without acetone?
Some press-on nails may loosen with warm water, oil, and soap. However, acrylic and gel nails usually require acetone for safe removal.
Is it bad to peel fake nails off?
Yes. Peeling fake nails can remove layers of the natural nail and cause serious weakening.
How long does fake nail removal take?
The process usually takes between 20 and 45 minutes, depending on the nail type and thickness.
Why do my nails feel soft after fake nail removal?
Acetone and prolonged nail enhancements may temporarily dehydrate the nails, making them feel softer or weaker.
Can I reuse press-on nails?
Yes. Many high-quality press-on nails can be reused if they are removed carefully and cleaned properly.
Should fake nail removal hurt?
No. Safe nail removal should never cause severe pain. Pain usually means the nails are being forced off too early.