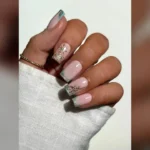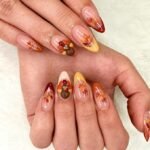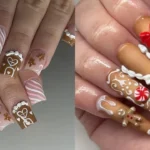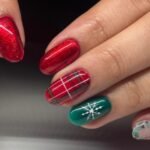



Square nails have flat tips and straight sides, which makes them a roomy canvas for plaid, glitter, and French edges. Red and green tips, gold bows, cable-knit texture, and tiny reindeer faces all sit comfortably on that shape. Christmas nails square also keep stripes and snowflakes neat, because the wide free edge leaves room for every line. Whether you prefer short square nail designs for daily work or longer party-ready sets, each idea keeps one clear colour story. Expect practical tips on gems, raised bows, and sealing, so square-shaped holiday nails stay smooth and snag-free through wrapping, baking, and busy December days.
1. Green and Red French Tips with Rhinestone Stripes
Dark green tips cap several nails with a deep, glossy edge. Bright red tips balance the green on the remaining nails. Clear nails sit between the coloured tips with a clean, see-through base. Red and green rhinestones run in diagonal stripes across the clear nails. Small stones catch light along each stripe, so sparkle moves with the hand. Green, red, and clear sections share the set in even balance.

Paint forest tips on some nails, then ruby tips on the rest. Leave middle nails sheer, and shape every tip using a striping brush. Set gems down slanted bands using tweezers while top coat stays wet. Press every gem gently, because loose gems lift off during wear. Seal the set using a shiny top coat, and cap the free rim to slow chips. Swap ruby gems for gold ones when the set needs a warmer accent.
2. Nude Pink Base with Vertical Glitter Stripes
Soft nude pink covers every nail with a warm, sheer base. Vertical stripes run from cuticle to tip in red, green, white, and gold glitter. Gold glitter packs one stripe thickly, so it shines brighter than the rest. Red and green stripes sit beside the white one in even widths. Glossy shine keeps the base bright, and glitter adds depth across the set. Four colours share one hand, and the gold stripe leads the eye.

Lay down two thin coats of nude pink, then let both coats dry fully. Paint the stripes using a striping brush, working straight down from the top. Press glitter into every stripe while polish stays tacky, so grains hold fast. Keep stripe widths even by loading the brush the same way each time. Seal using a clear top coat, because glitter edges can catch on fabric. Swap the gold band for silver when the set needs a cooler accent.
3. Plaid Tips Edged in Gold with Holly
Pale nude covers every nail with a soft, sheer base. Red plaid fills the tips in crossing bands of deep red. Thin gold lines edge every plaid tip, so the red reads crisp against the nude. Green holly leaves spread across one nail in small, pointed shapes. Red gems sit beside the leaves as berries, catching light with a bright gleam. Gold, red, and green share the set, and the plaid and holly stay linked.

Brush a bare pink bed on first, then shape plaid ends using tape guides. Cross slim crimson strokes over the ends, keeping gaps even on all nails. Trace the gold rim using a striping brush while the crimson stays wet. Draw holly foliage using a fine brush, and set three ruby stones by them. Press all stones into wet top coat, because stones slip off dry surfaces. Seal the plaid ends last, since straight strokes chip first at the rims.
4. Metallic Red French Tips with a Gem Bow
Sheer pale pink washes every nail with a soft, light base. Shiny metallic red caps the tips with a bold, mirror-like edge. Red shines brighter where light hits the tips, so the edge reads sharp. One nail holds a red bow with a small gem at its centre. Gem catches light from the bow, and the pink base keeps the set soft.
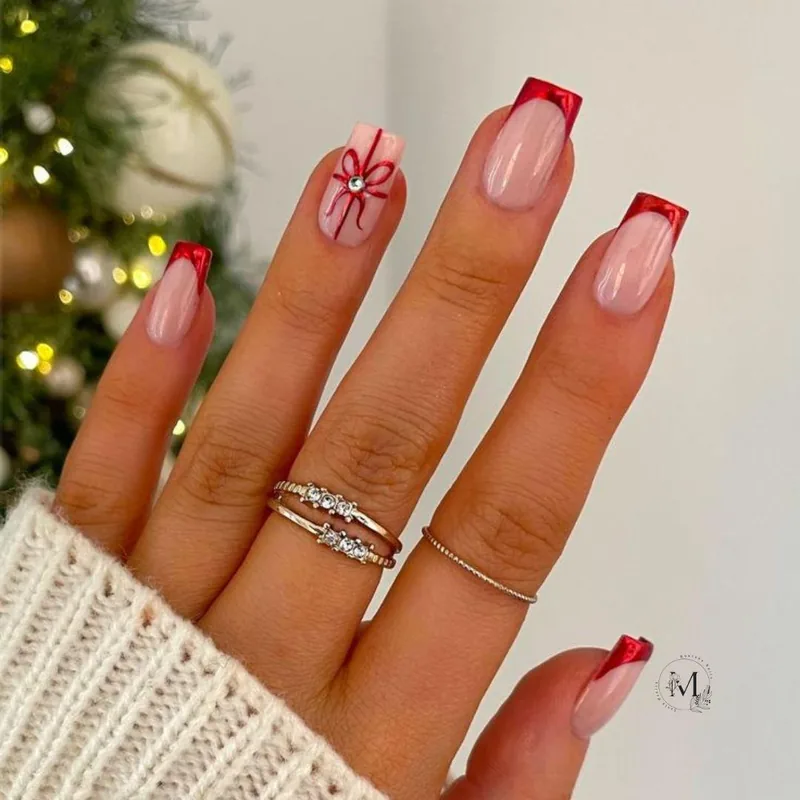
Coat the nails in blush, then shape the ruby ends using a striping brush. Buff mirror polish over the ends for shine, because plain ruby looks flat. Paint the bow using a thin brush, keeping both loops the same size. Set the gem using tweezers, and press it into wet top coat. Seal using a glossy top coat, since metallic rims can wear fast. Swap the gem for a pearl when the set needs a softer middle.
5. Golden and Silver Glitter Tips with Snowflakes
Pale pink forms the base under glitter tips and white details. Gold glitter packs some tips thickly, while silver glitter packs the rest. White snowflakes sit on the glitter, crisp and fine against the shine. Small white dots scatter between the flakes like falling snow. Light shifts across gold and silver, so the tips change colour as hands move. Two metals share the set, and the white flakes tie them together.

Spread a blush bed first, then shape the ends using tape guides. Pack gold sparkle onto some ends, and silver sparkle onto the rest. Draw crystals using a thin brush, starting from the middle of every end. Add snowy specks using a dotting tool, spacing them unevenly for a natural look. Seal twice using a clear top coat, because sparkle texture can feel rough. Swap silver for copper sparkle when the set needs a warmer tone.
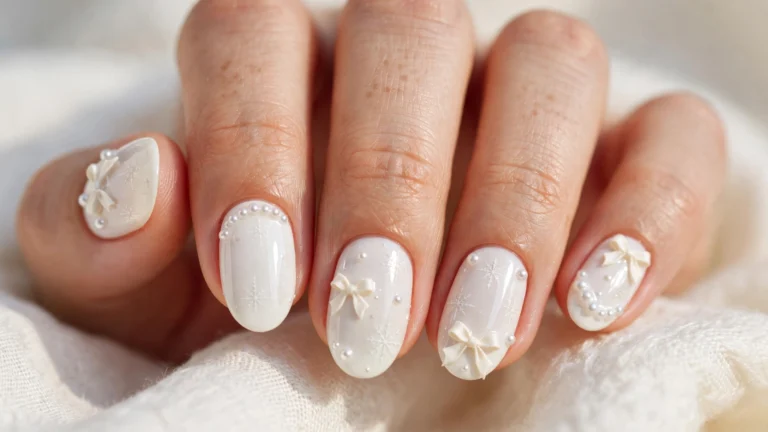
6. Milky White Glitter with a Large Snowflake
Milky white glitter covers every nail with a soft, frosty sparkle. Fine glitter packs the milky base densely, so the surface glows under light. One nail holds a large white snowflake, bold against the glitter. Flake arms spread wide across the nail, with even gaps between every arm. White on white stays readable, because the flake stays large and crisp.

Layer snowy shimmer in thin coats, then let all coats dry fully. Press shimmer flat using a wrapped fingertip, since grains can stand up. Draw the big crystal using a striping brush, starting from the middle outward. Keep the crystal arms level, and clean stray marks using a small brush. Seal using two coats of top coat, so shimmer keeps a smooth cover. Swap the single crystal for two small crystals when the set needs more detail.
7. Glossy Red Nails with Reindeer and Gingerbread
Solid glossy red covers most nails with a deep, polished shine. Nude nails break up the red with a soft, sheer base. One nude nail holds a reindeer face with brown antlers and a dark nose. Another nude nail holds a small gingerbread man with tiny limbs and a smile. Red and nude sit in sharp contrast, so the painted faces stand out at once.

Coat the ruby nails first in two thin coats, then let all coats dry fully. Leave accent nails bare, and sketch all faces in thin lines first. Colour the antlers tan, and keep the gingerbread arms little. Use a dotting tool for the eyes, because tiny dots stay round and neat. Seal using a shiny top coat, and cap the free rim to slow chips. Swap the gingerbread figure for a snowman when the set needs a cooler accent.
8. Burgundy Glitter Tips with Bow Line Art
Deep burgundy glitter covers several nails with a dense, sparkling coat. Burgundy glitter tips cap nude nails with a bright, curved edge. Thin burgundy lines draw bows on the nude nails in fine, looping shapes. Glitter packs the tips thickly, fading to sheer near the curved smile line. Dark burgundy and pale nude sit side by side, so the bows read clearly.
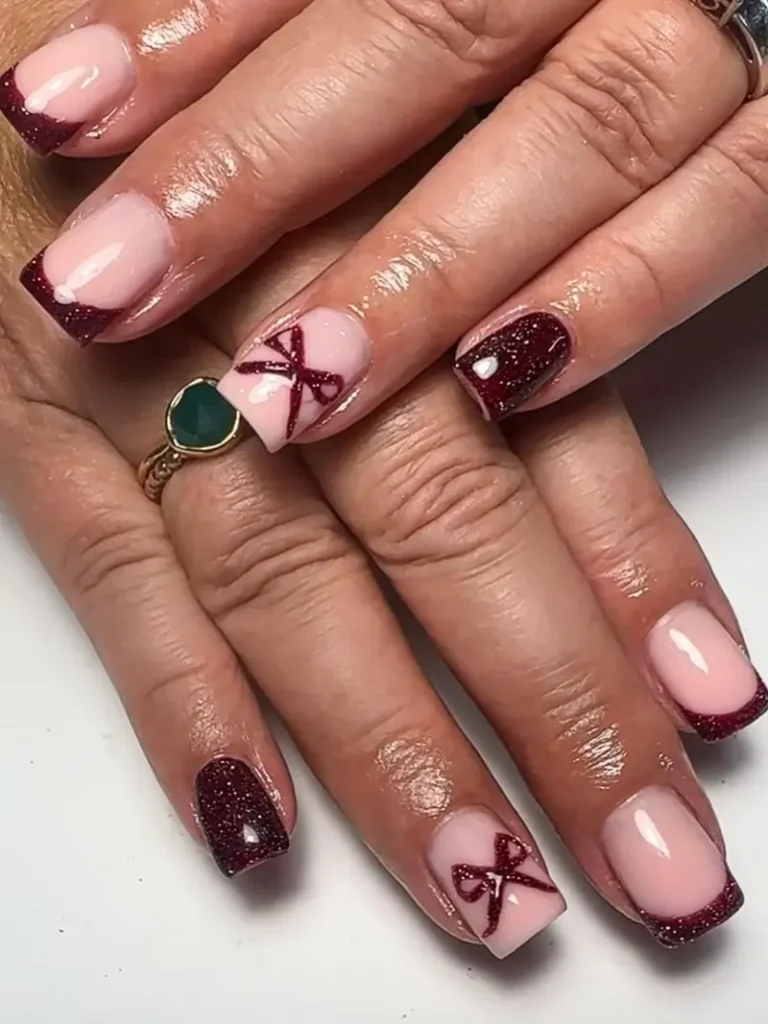
Start the tip nails in bare pink, then shape the ends using tape. Pack wine sparkle onto the open ends, and press it flat using a brush. Sketch the bows using a striping brush, keeping both loops the same size. Paint the solid sparkle nails in slim coats, because thick layers hide sparkle. Seal twice using clear layers, since sparkle texture can feel rough. Swap wine sparkle for plum sparkle when the set needs a cooler tone.
9. Scarlet Glitter Tips with White Tips and Bows
Soft nude covers every nail with a warm, sheer base. Red glitter tips cap several nails with a bright, sparkling edge. White tips cap the remaining nails with a clean, crisp edge. Red 3D bows sit on the white tips, raised and bold against the clean white. Glitter, white, and nude share the set, so the bows stay the focus.

Brush a bare bed on first, then shape ruby sparkle ends using tape guides. Shape snowy ends using a striping brush, following the natural curve of all nails. Set all bows using tweezers, and press them into wet top coat. Seal only the flat nails, since top coat can flatten lifted bows. Carry a spare bow, because bows can loosen during wear. Swap ruby bows for gold bows when the set needs a warmer accent.
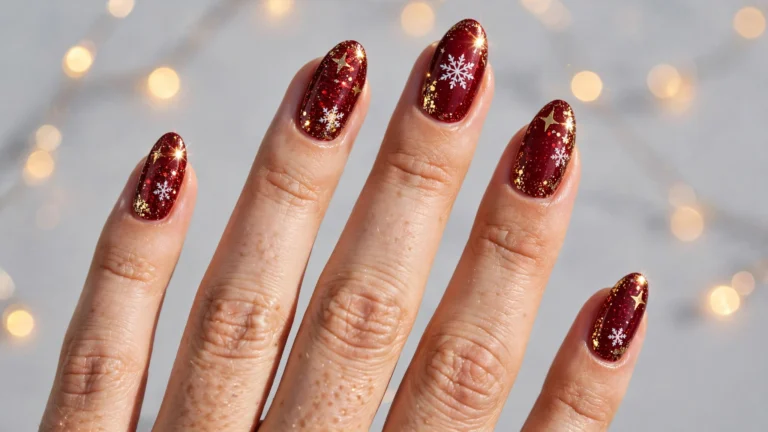
10. Starry Red Glitter Tips with Gold Stars
Glittery red covers several nails with a dense, sparkling coat. White French tips cap the remaining nails with a clean, curved edge. Gold stars scatter across the red glitter, small and bright against the sparkle. White-red ribbon bows sit on two nails, tied in neat loops. Red, white, and gold share the set, so the stars and bows stay linked.

Sweep ruby shimmer onto the nails, then shape snowy ends using tape guides. Place gold stars using tweezers, spacing them so no two rest too close. Paint ribbon bows using a thin brush, keeping both loops the same size. Press every star gently into wet top layer, because loose stars lift fast. Seal twice using a clear top layer, since shimmer texture can feel rough. Swap gold stars for silver stars when the set needs a cooler accent.
11. Knitted Green Nail with Plaid Tips and Holly
Dark green covers one nail in a raised cable-knit pattern. Red-green plaid fills the French tips in crossing bands of colour. White holly nail holds green leaves and red berries on a pale base. Knit ridges catch light, so the green nail reads soft and textured. Green, red, and white share the set, and every pattern keeps its own space.
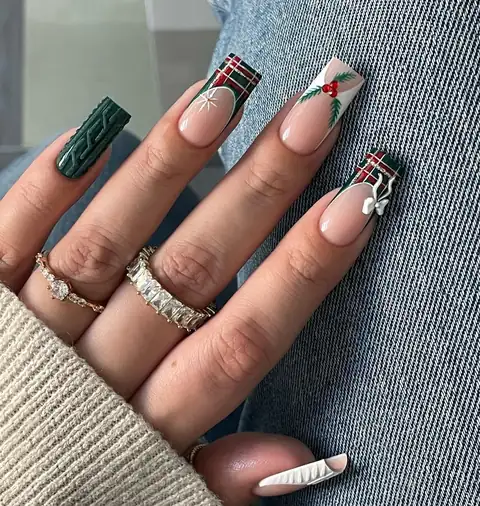
Build knit cords using a thin brush, then dust them using matte powder. Shape plaid ends using tape guides, and cross ruby strokes over forest ones. Draw holly foliage using a fine brush, and dot ruby fruit beside them. Seal the flat nails first, since heavy top coat can flatten lifted knit. Touch up the knit using a dry brush, because top coat dulls the cords. Swap the holly nail for a snowflake one when the set needs cooler detail.
12. Gingerbread Scene with Candy Canes and Lights
Nude base covers every nail with a soft, sheer, warm tone. Red French tips cap the nails with a bold, glossy, bright edge. One nail holds a gingerbread man with tiny limbs and a smile. Candy canes bend across another nail in red and white stripes. Holly leaves, a green tree, and tiny fairy lights fill the rest, so the set feels busy.

Spread a bare bed first, then shape the ruby ends using a striping brush. Sketch all motifs in thin lines, and cover the shapes using colour. Paint the tree before the bulbs, because the bulbs sit on top of it. Use a dotting tool for the twinkle bulbs, spacing them unevenly down the tree. Keep the gingerbread arms little, so the grin stays the focus. Seal using two coats of top coat, since wee details wear fast without cover.
13. Pink Nails with Gingerbread and Candy Canes
Milky pink covers every nail with a soft, light base. Small gingerbread men stand on several nails with tiny limbs and smiles. Red candy canes bend beside them in bright red and white stripes. Pink stays light and calm, so the red candy canes read bright by contrast. Every motif stays small and neat, with clear space around all figures.
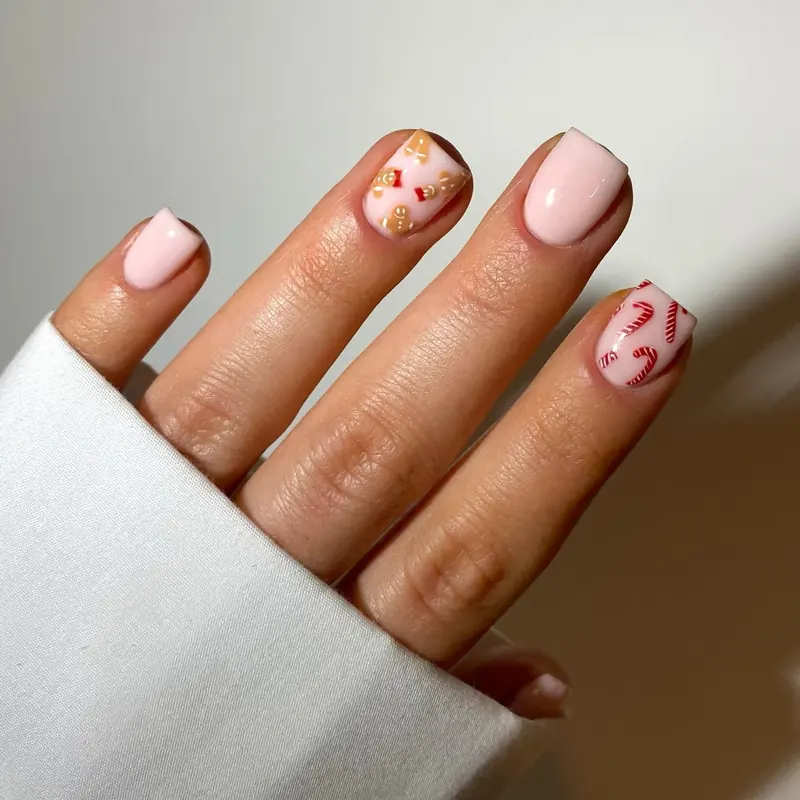
Wash the nails in blush, then let all coats dry fully. Sketch all gingerbread figures in thin lines, and cover the shapes using colour. Paint the striped hooks using a striping brush, alternating ruby and snowy bands. Use a dotting tool for eyes, because wee dots stay round and tidy. Keep the motifs little, so the blush bed still shows around all of them. Seal using a clear top coat, and cap the free rim to slow chips.
14. Crimson Knit, Gingerbread House, and Candy Canes
Crimson cable-knit nail carries raised ridges in a deep, glossy red. Red glitter bow sits on another nail, bright against a pale base, so it draws the eye. Gingerbread house stands beside a candy cane on one nail, with tiny icing lines. White 3D bow crowns a third nail, raised and bold against the red. Candy cane gingerbread thumb mixes red, white, and brown in one busy motif.
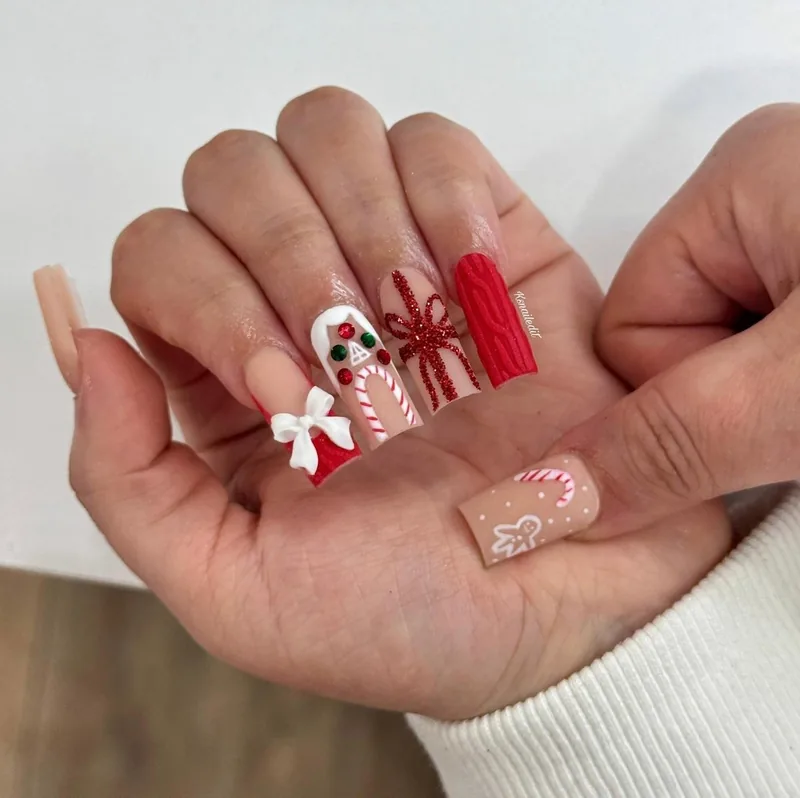
Build knit cords using a thin brush, and dust them using matte powder. Sketch the gingerbread cottage in thin lines, then cover the shapes using colour. Paint the striped hook using a striping brush, alternating ruby and snowy bands. Set the snowy bow using tweezers, and press it into wet top coat. Seal the flat nails only, since top coat can flatten lifted bows and cords. Swap the gingerbread cottage for a snowman when the set needs cooler detail.
15. Sparkling Red Glitter Tips with Snow Dots
Sparkling red covers several nails with a dense, glittering coat. Red glitter French tips cap nude nails with a bright, curved edge. White snow dots scatter across the pale nude nails in varied sizes. Glitter packs the tips thickly, fading to sheer near the arched smile line. Red and nude sit in sharp contrast, so the white dots read clearly.

Lay a bare bed down first, then shape the ruby sparkle ends using tape guides. Pack ruby sparkle onto the ends, and press it flat using a brush. Add snowy specks using a dotting tool, spacing them unevenly down the nails. Keep the specks tiny by the cuticle, and larger toward the ends. Seal twice using a clear top layer, because sparkle texture can feel rough. Swap snowy specks for tiny stars when the set needs more sparkle.
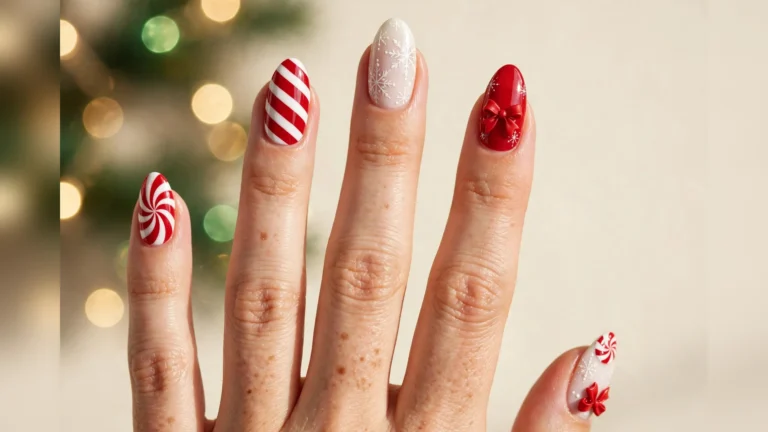
16. Candy Stripes with Red Snowflakes and White Tips
Bright red French tips cap several nails with a bold, glossy edge. White French tips cap the rest with a clean, crisp edge. Red snowflakes sit on the white tips, fine and sharp against the white. Red-white diagonal candy stripes cross two nails in even bands. Red and white share the set in equal balance, so the stripes stay the focus.

Shape ruby ends first using tape guides, then snowy ends the same way. Draw crystals using a thin brush, starting from the middle of all ends. Paint the slanted bands using a striping brush, alternating ruby and snowy shades. Keep band widths level by loading the brush the same way all times. Clean the grin line using a small brush, so all ends stay tidy. Seal using a glossy top coat, and cap the free rim to slow chips.
17. Starburst Red Tips with White Knit Nails
Glossy red French tips cap several nails with a bold, shiny edge. White cable-knit nails carry raised ridges in a soft, pale, creamy white. Snowy French tips cap the remaining nails with a clean, crisp edge. White starbursts spread across the red nails in fine, sharp lines. Red and white share the set, so the knit and starbursts stay balanced.

Paint the ruby base first on the starburst nails, then let it dry fully. Build the knit cords using a thin brush, and dust them using matte powder. Draw starbursts using a striping brush, working outward from a middle dot. Shape the frosty ends using tape guides, keeping all curves the same. Seal the flat nails first, since thick top coat can flatten lifted knit. Swap a starburst nail for a snowflake nail when the set needs cooler detail.
18. Candy Stripes and Bows on Red White Tips
Red-white French tips cap several nails with a bold, glossy edge. White 3D bows sit on the tips, raised and bold against the red. Red-white candy-stripe nails cross the set in even diagonal bands. Stripes alternate red and white, so the pattern reads crisp and clean. Red, white, and raised bows share the set, and the bows hold the focus.

Shape the French ends using tape guides, then paint the ruby and snowy rows. Paint the striped rows using a striping brush, alternating ruby and snowy shades. Set all bows using tweezers, and press them into wet top coat until they hold. Seal the flat nails only, since top coat can flatten lifted bows. Carry a spare bow and top coat, because bows can loosen during wear. Swap snowy bows for gold bows when the set needs a warmer accent.
19. Gilded Red French Tips with Gold Bows
Sheer nude covers every nail with a soft, light tone. Red French tips cap the nails with a bold, glossy edge. Thin gold lines edge every red tip, so the colour reads crisp and warm. Bow line art in gold loops across the nude nails in fine, delicate shapes. Gold repeats on all nails, and the red tips and bows stay linked.
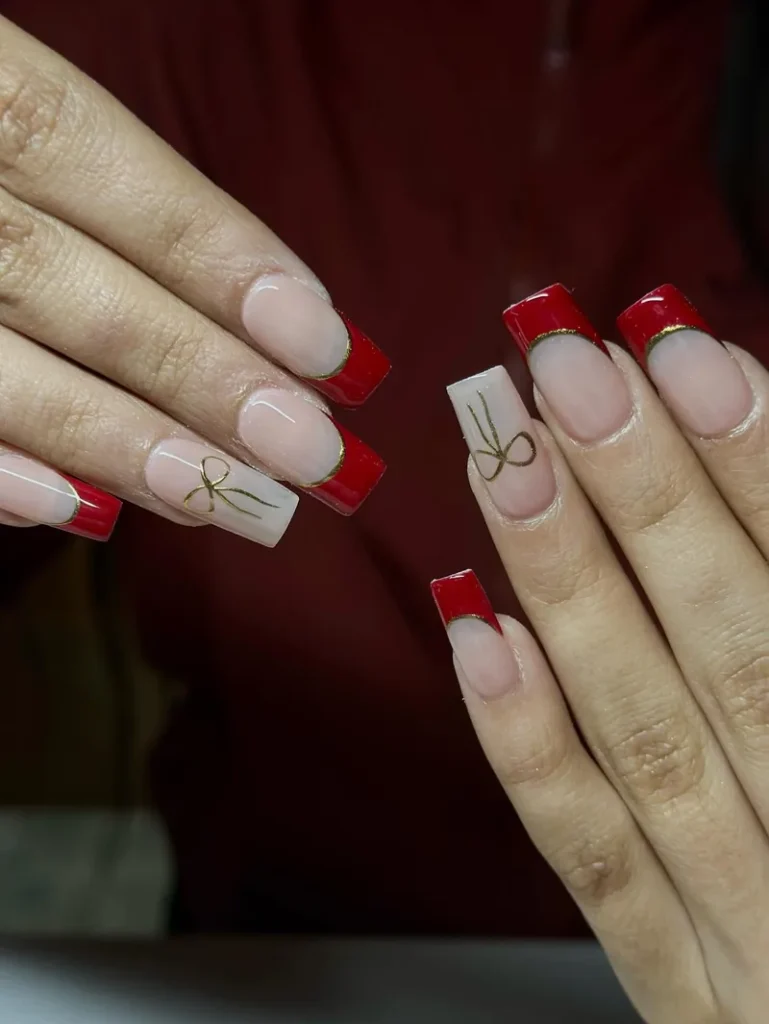
Start using a bare bed, then shape the ruby ends using tape guides. Trace the gold rim using a striping brush while the ruby stays wet. Draw the bows using a slim brush, keeping both loops the same size. Keep the gold strokes slim, so the bare bed still shows through. Seal using a shiny top coat, since gold strokes can wear fast. Swap gold for silver strokes when the set needs a cooler accent.
20. Gold Starbursts on Burgundy Glitter Tips
Burgundy-red glitter tips cap the nude nails with a bright, curved edge. Gold starbursts spread across the burgundy glitter nails in fine, sharp lines. Two accent nails wear gold glitter in a dense, sparkling coat. Solid burgundy glitter covers the remaining nails in a deep, rich shine. Burgundy and gold share the whole set, so the starbursts stay the focus.

Tape the grin line first, then paint wine sparkle onto the ends. Draw starbursts using a slim brush, working outward from a middle dot. Pack gold sparkle onto the feature nails, and press it flat using a brush. Paint the full sparkle nails in slim layers, because thick layers hide sparkle. Seal twice using clear top layers, since sparkle texture can feel rough. Swap gold starbursts for silver ones when the set needs a cooler tone.
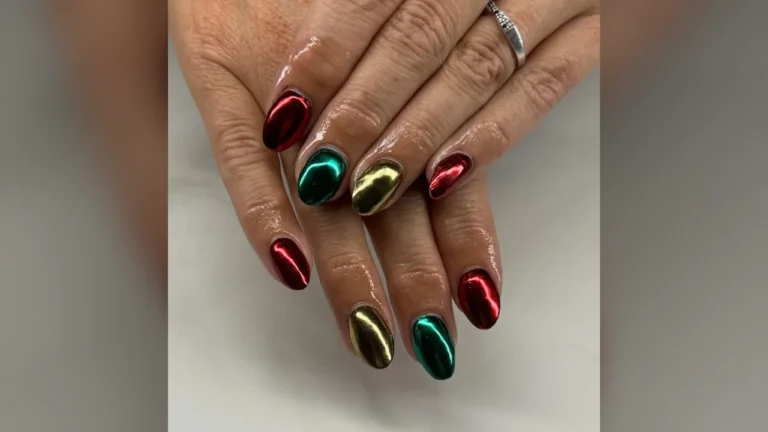
21. Wreath, Poinsettias, and Chrome Swirls
Green wreath wraps one nail with leaves and a small red bow. Red poinsettias bloom on green polka dots across another nail. Green Christmas tree rises on a third nail with a gold star on top. Gold and silver chrome swirls twist across the remaining nails in bright bands. Chrome shine shifts as hands move, so the swirls change with the light.
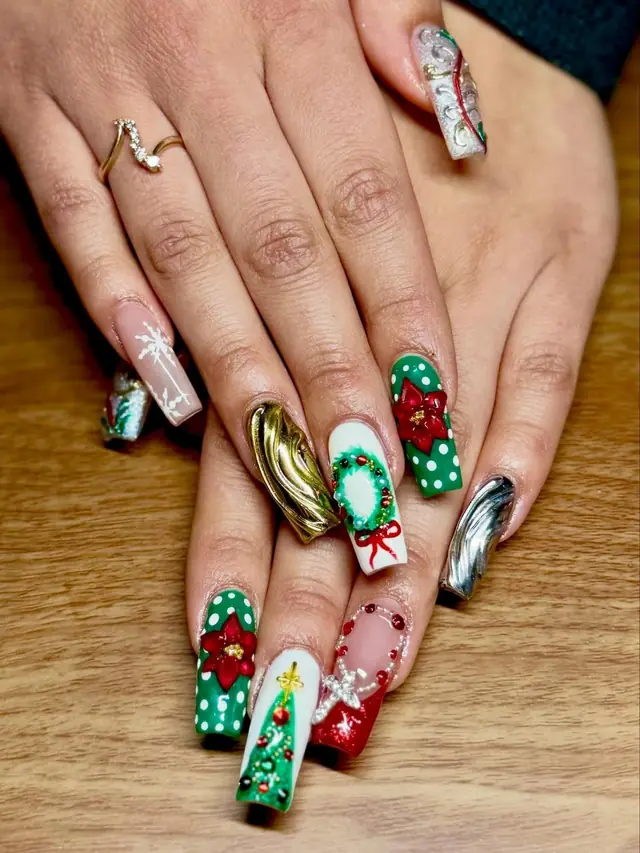
Sketch all motifs in thin lines first, then cover the shapes using colour. Paint wreath foliage first, and set the ruby bow on top of them. Dot the poinsettia petals using a dotting tool, keeping all petals the same size. Buff chrome powder, a fine powder that gives a mirror shine, over the swirl nails. Seal the chrome nails first, because chrome powder rubs off easily. Swap silver swirls for gold ones when the set needs a warmer tone.
22. Ribbon Nails with Red Glitter Tips and Snowflakes
Red glitter tips cap bare nails with a bright, curved edge. White snowflakes rest on the glitter, crisp and fine against the shine. Red-white-gold candy ribbon nails twist across the set in bright bands. Red glitter bows sit on two nails, raised and bold against the nude. All three colours share the set, so the bows and ribbons stay linked.
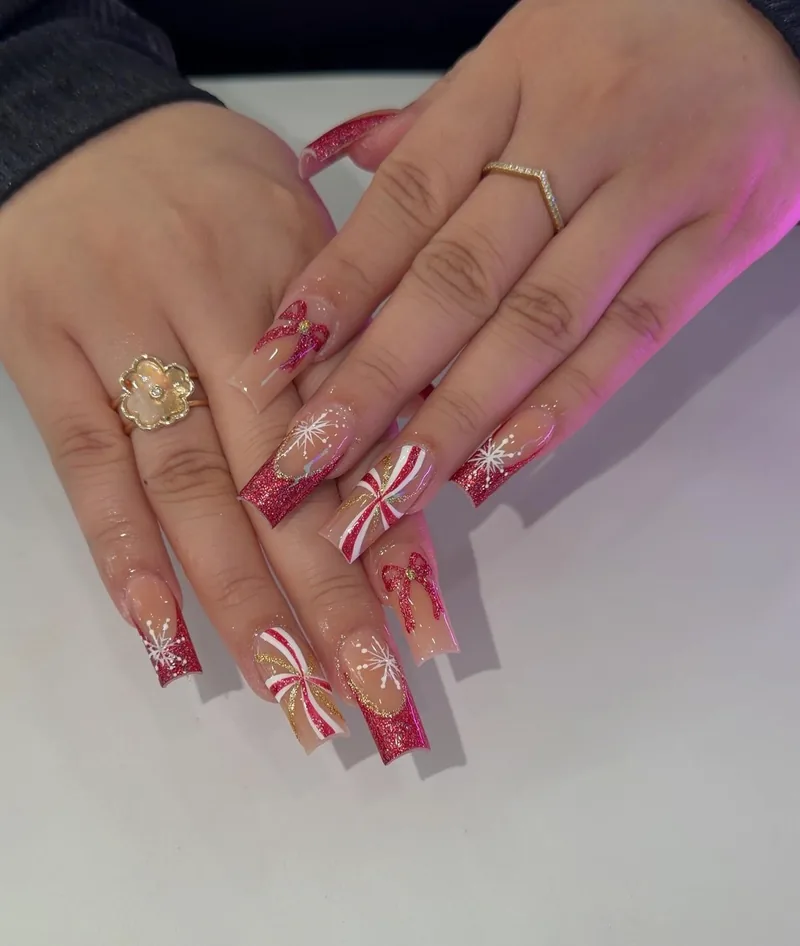
Begin using a bare bed, then shape the ruby sparkle ends using tape guides. Draw crystals using a slim brush, starting from the middle of all ends. Paint the striped rows using a striping brush, alternating the three shades. Set all bows using tweezers, and press them into wet top layer until they hold. Seal the flat nails first, since top coat can flatten lifted bows. Carry a spare bow and top layer, because bows can loosen during wear.
23. Reindeer Faces with Snowflakes and a Wreath
Nude base covers every nail with a soft, sheer tone. White snowflakes and dots scatter across the nude nails in varied sizes. Small green wreath wraps one nail with leaves and a tiny red bow. Reindeer faces sit on two nails with brown antlers and red noses. Nude base keeps the set soft, so the white flakes read bright by contrast.
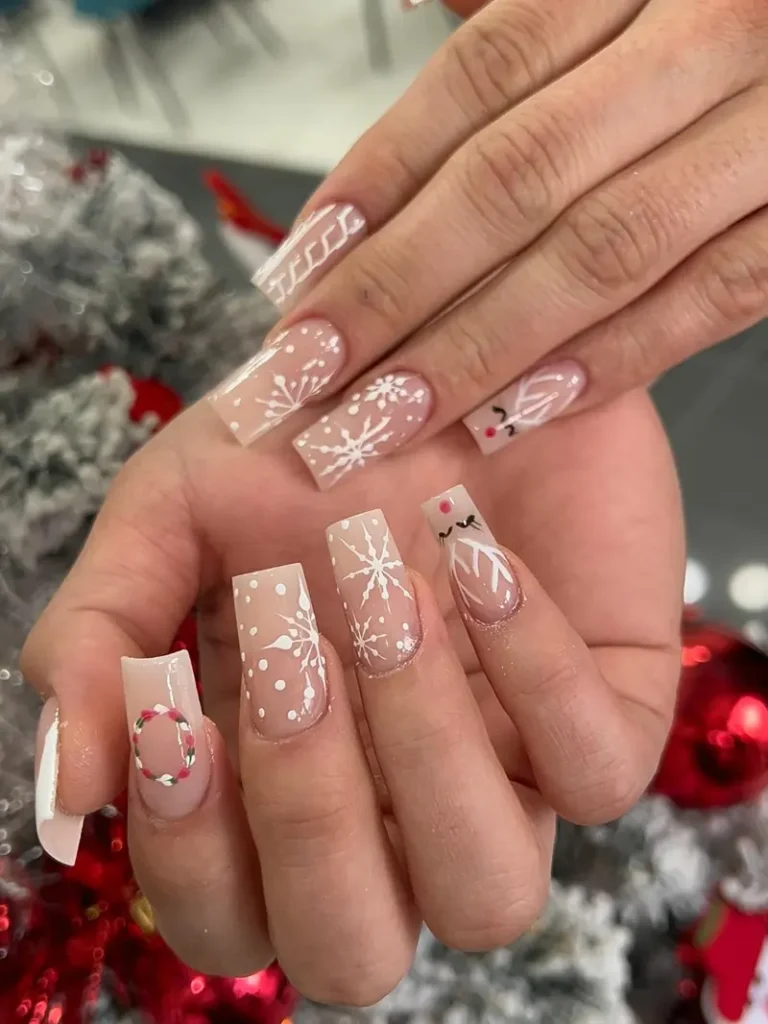
Wash the nails in bare pink, then draw crystals using a thin brush. Add snowy specks using a dotting tool, spacing them unevenly across the bed. Sketch the wreath in thin lines, and cover the foliage using forest green. Use a dotting tool for ruby snouts, because wee dots stay round and tidy. Keep reindeer muzzles little, so the bare bed still shows around them. Seal using two clear layers, since wee details wear fast.
24. Foil Bow Nail on Glossy Deep Red
Glossy deep red covers most nails with a rich, polished shine. One nail wears burgundy and gold foil in a warm, metallic patch. White bow sits on the foil nail, neat and bright against the gold. Red stays deep and even, so the foil nail reads brighter by contrast. Foil catches light in warm flashes, and the white bow keeps the set soft.

Sweep dark ruby over the nails in thin coats, then let all coats dry fully. Press gold foil onto the accent nail while the bed feels tacky. Paint the snowy bow using a thin brush, keeping both loops level. Seal the foil nail first, because foil lifts off a dry surface. Cap the free rim using top coat, since dark shades chip first at the ends. Swap the snowy bow for a gold bow when the set needs warmer detail.
25. Icy Blue Tips with Snowflakes and Bows
Warm nude covers every nail with a soft, light base. Light blue caps the tips in a bright, icy edge. White snowflakes spread across the nude base in fine, sharp lines. Light blue gift bows sit on several nails, tied in neat loops with loose ribbon tails. Small white dots scatter near the flakes like falling snow. Shine keeps the blue bright, so the pale base keeps the set calm.
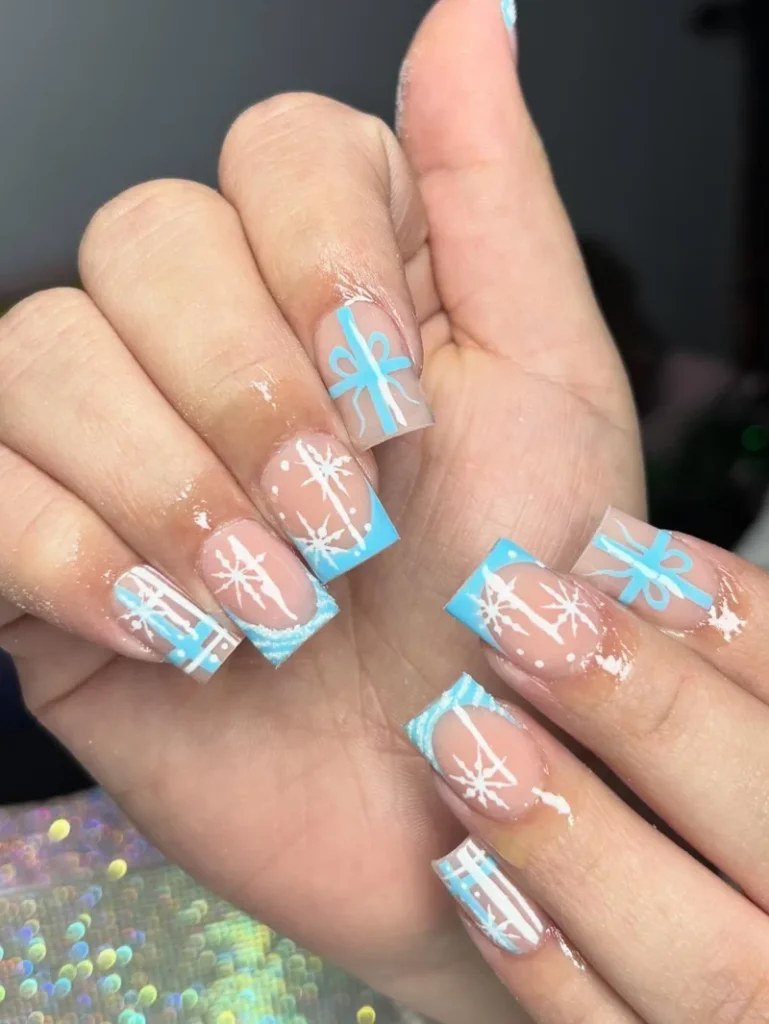
Begin with a bare pink bed, then shape the ends with tape guides. Cover the ends in icy blue with two thin coats, and let each coat dry fully. Draw the crystals with a thin brush, starting from the middle outward. Keep the arms even, and clean stray marks with a small brush. Sketch the present loops next, crossing two strokes over each accent. Seal with a clear top coat, because raised lines can catch on fabric.
Closing
Pick the colour story that matches your wardrobe, then let one or two nails carry the detail. Red with gold feels warm, while green with white feels crisp and calm. Christmas nails square look their best when the free edge is capped, gems are pressed into wet top coat, and raised bows stay on a few fingers. Thin layers dry smoothly and chip less at the corners, which matter most on a square shape. Keep a spare gem and a small bottle of top coat close, and your square nail set will stay neat all season.