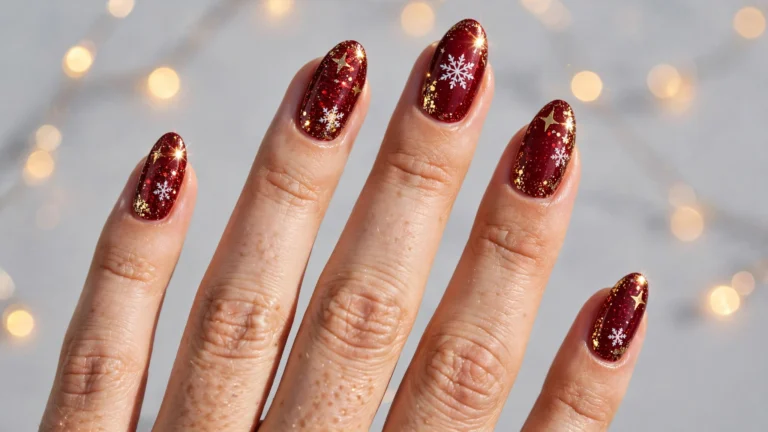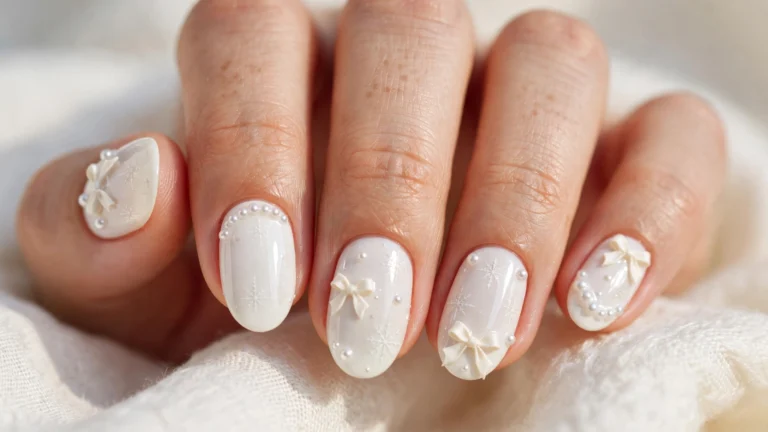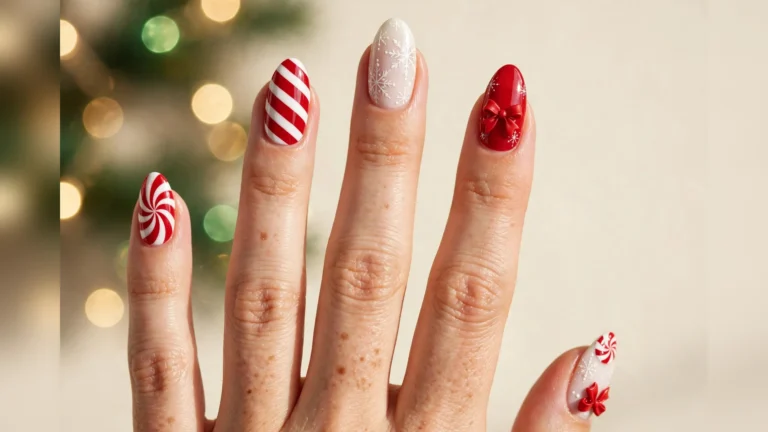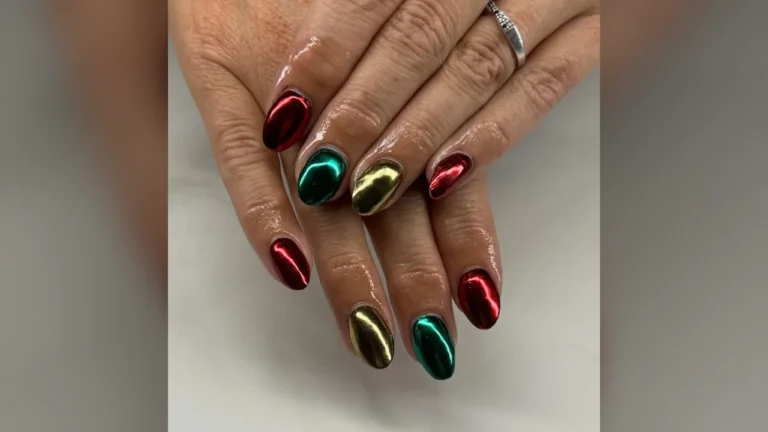


Red glitter, pink shimmer, pale blue, and warm brown set the range. Each design below pairs one clear color story with one playful detail. Santa faces, snowmen, penguins, reindeer, gnomes, and gingerbread men appear across the set. Candy stripes, bows, wreaths, snowflakes, and tiny trees fill the gaps between characters. Glitter, 3D shapes, and soft pastel bases also keep the mood light. Cute Christmas nails work best when one character leads and the rest stay simple. Pick one idea, then let its colors guide the rest of the set.
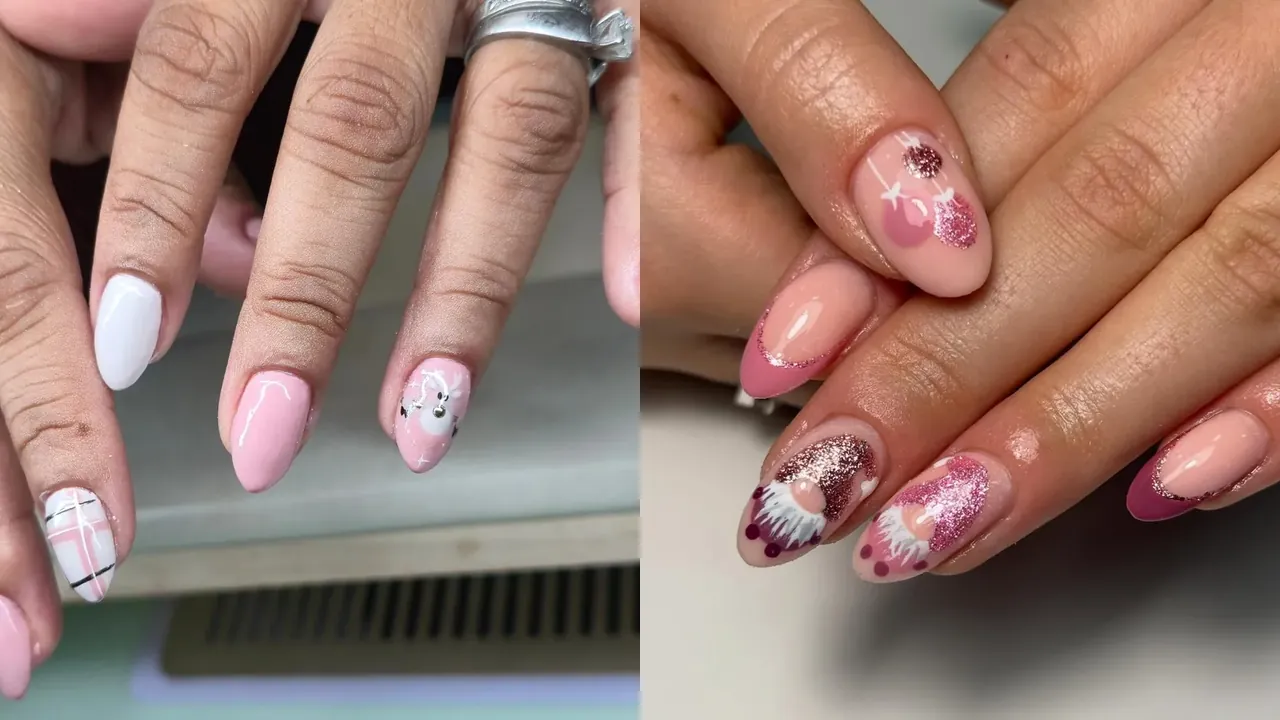
1. Plaid Gift Wrap with Reindeer Face
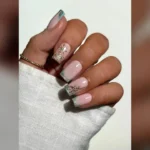
Soft pink covers most nails in a smooth, glossy coat. Glossy white fills one nail with clean, pale contrast. White reindeer face sits on a pink nail with dark eyes. Silver ball nose shines at the center of the face. Pink plaid crosses the last nail in thin black and white lines. Small white stars scatter near the reindeer, so pink glows against white.

Layer the pink base in two thin coats, then let each dry fully. Paint one nail solid white while the pink base sets. Draw the plaid with a striping brush, crossing pink lines over white. Sketch the deer head next with a fine brush, keeping the muzzle neat. Dot the silver nose after the face dries, because wet paint smears the plaid. Seal with a clear coat, and refresh it after a few days for shine.
2. Pink Glitter Gnomes with White Beards
Nude pink base covers each nail in a soft, sheer wash. Pink glitter fills the gnome hats with dense, sparkling color. White beards puff below each hat in thick, fluffy strokes. Pink glitter baubles hang on several nails like small ornaments. French tips, pale tips over a sheer base, edge the nails in pink glitter. Glitter catches light across the set, so pink glows against nude.
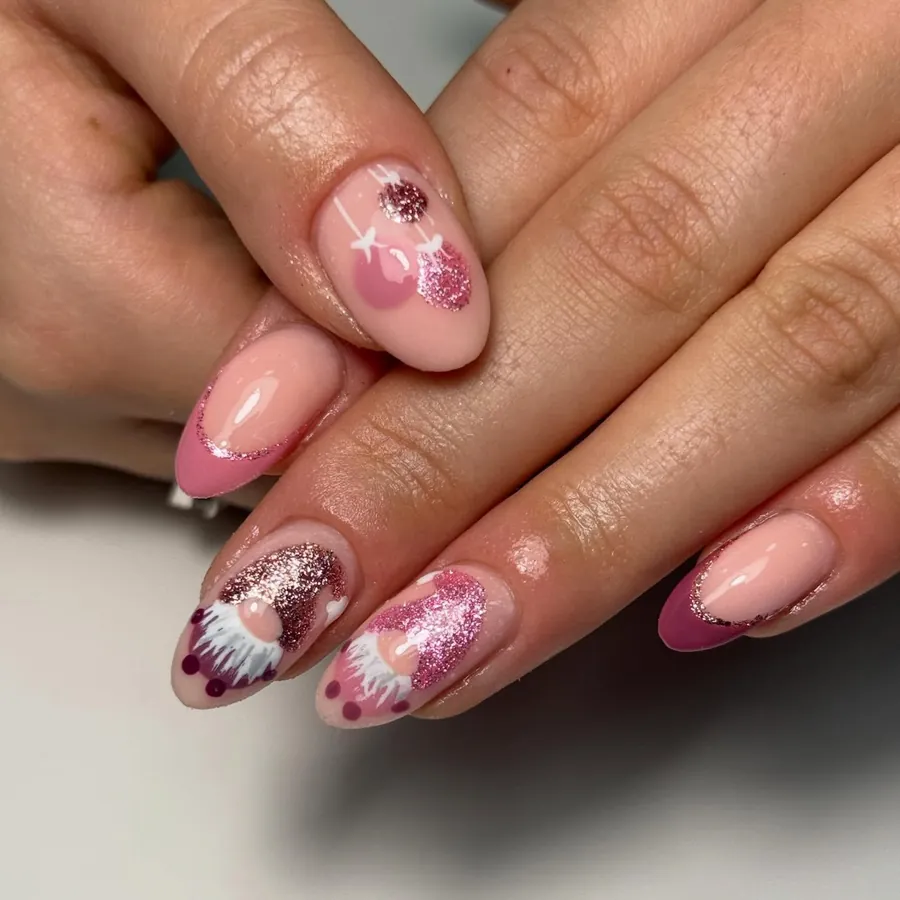
Lay down the nude pink base in two thin coats, then smooth the edges. Pack glitter onto the hats with a flat brush while the base stays tacky. Paint beards with a dotting tool, layering white in light upward strokes. Shape the tips with tape guides, so the glitter edge stays crisp. Seal with two coats of top coat, because glitter edges can snag fabric.
3. Icy Blue Snowflakes with Penguin Pals
Shimmery blue covers several nails in a cool, frosty glow. White snowflakes spread across the blue in varied sizes and angles. Icicle tips drip white down from the ends in sharp, fine lines. Pale pink nails hold a small penguin with a dark head and pale belly. Snowman beside the penguin wears a dark hat and a carrot nose. Blue and pink share the set, so warm and cool tones balance.

Paint the blue base first, then sponge on shimmer for a frosty depth. Draw snowflakes with a thin brush, working from the center outward. Shape icicle tips with a striping brush, tapering each line neatly. Keep the penguin small, because a large face crowds the pink nail. Seal everything with a glossy top coat, and cap the free edge to slow chips.
4. Gingerbread Icing Lines on Warm Brown
Warm brown covers half the nails in a rich, glossy coat. White icing-style lines curl across the brown in thin, delicate swirls. Small hearts and leaf sprigs sit between the lines in white. Nude pink nails alternate with the brown for a softer contrast. Brown French tips edge the nude nails in a neat, clean line. White on brown reads crisp, so the line work stays easy to read.
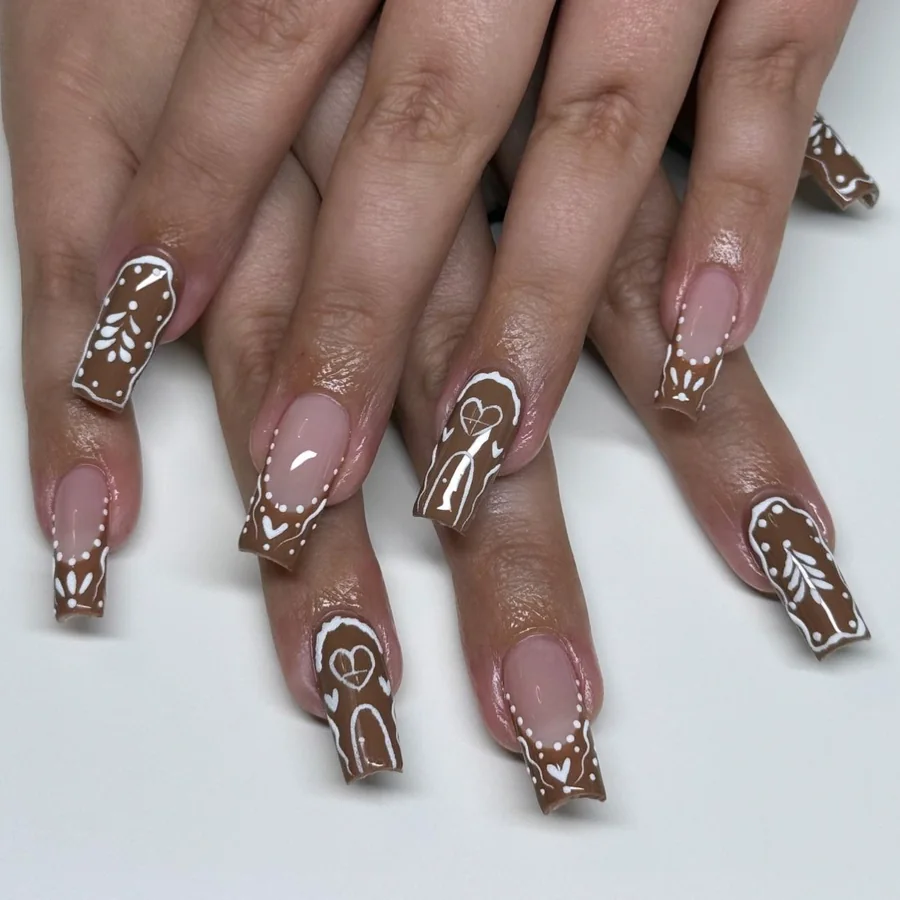
Begin with brown and nude bases in two thin coats, then let each dry fully. Draw the white lines with a striping brush, keeping pressure light and even. Dot hearts with a dotting tool, joining two dots into a point. Shape the brown tips with tape, because freehand curves can wobble. Seal with a glossy top coat, and reapply it after a few days to protect the lines.
5. Hello Kitty Faces with Candy Hearts
Soft pink and white share the set in a light, playful mix. Hello Kitty faces sit on several nails with whiskers and a small bow. Red and white candy hearts scatter across the pink in varied sizes. White 3D bows rise from two nails with soft, full loops. Red glitter tips cap the remaining nails with dense, sparkling color. Pink, white, and red hold together, so the set reads sweet and bright.
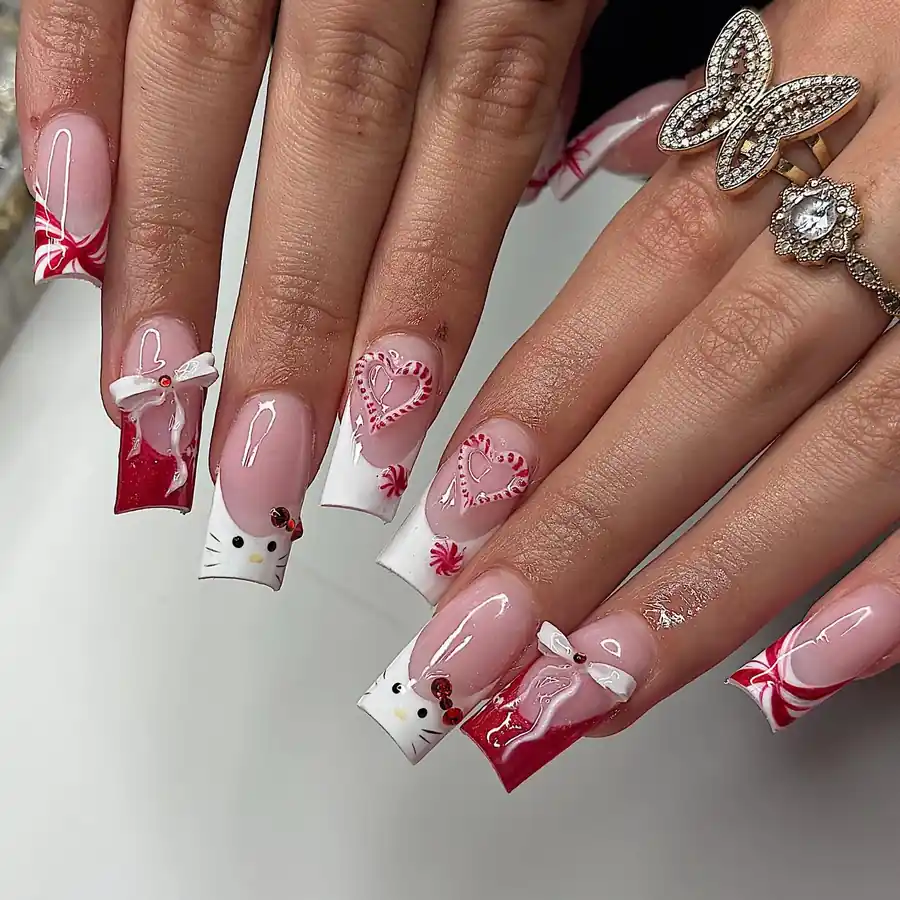
Lay down pink and white bases first, then map the faces with pencil-thin lines. Paint the whiskers with a thin brush, keeping each line short and straight. Set the bows with tweezers, pressing each one into wet top coat until it sets. Pack glitter onto the tips with a flat brush while the polish stays tacky. Seal the flat nails first, because raised bows need a thicker top coat.
6. Hot Chocolate Mugs on Pale Blue
Pale blue covers the nails in a soft, cool, milky wash. Raised hot-chocolate mugs sit on several nails with tiny handles. Gingerbread man floats on one mug with a smiling face. Penguin and snowman decorate the other mugs in dark and white. White snowflake rests on a pale blue nail, crisp against the blue. Blue and white share the set, so the mugs stand out clearly.

Coat the nails in pale blue, two thin layers, then let them dry fully. Build each mug with builder gel, a thick gel that holds its form. Shape the handles with a small brush, keeping them thin and neat. Paint the tiny faces last, because small details smear when rushed. Seal the flat nails first, and add a thicker top coat over the raised mugs.
7. Red Glitter with Peppermint Swirls
Dense red glitter covers most nails in a rich, sparkling coat. Glitter flecks of varied size catch light across every nail. White accent nails carry red peppermint swirls in bold, curving bands. Swirls twist from cuticle to tip, widening and narrowing as they turn. Red and white sit in sharp contrast, so the swirls read clearly. Gloss seals the glitter, and the set glows warm under lamplight.

Layer red glitter polish in thin coats, then let each coat dry fully. Press glitter flat with a wrapped fingertip, because grains can stand up. Draw swirls with a thin brush, alternating red bands over the white base. Keep the bands even, so no swirl crowds its neighbor. Seal with two coats of top coat, and cap the free edge to slow chips.
8. Tiny Green Trees on Pale Pink
Pale pink covers each nail in a soft, sheer, milky wash. Tiny green trees stand on several nails with pointed tops. Pink baubles hang beside the trees like small round ornaments. White polka dots scatter across the pink in varied sizes. Green, pink, and white share the set in a light balance. Dots and trees sit small, so the pale base stays the focus.
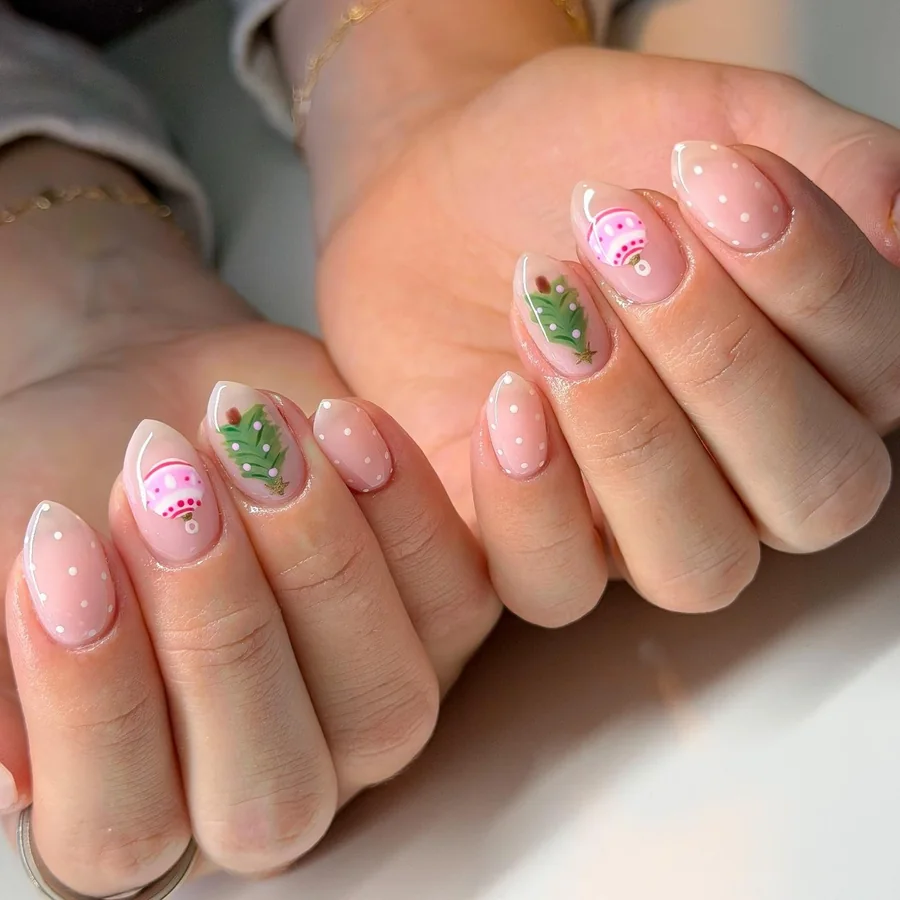
Spread the pale pink base in two thin coats, then let it dry. Paint trees with a thin brush, building each one in light stacked strokes. Dot the baubles with a dotting tool, keeping each one round and spaced. Scatter the polka dots unevenly, because even rows can look stiff. Seal with a glossy top coat, and refresh it after a few days for shine.
9. Snowman, Reindeer and Santa on Pink
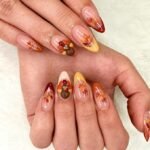
Gold dots scatter across two nails in a loose, sparkling mix. Sheer pale pink washes the rest in a soft, milky coat. Snowman wears an orange nose and thin stick arms on one nail. Reindeer face beside him shows brown antlers and a red nose. Santa face, green squiggle tree, and red-white candy cane fill the last nails. Holly leaves with red berries sit on the smallest nail, so green pops against pink.

Sweep the sheer pink base on first, then let it dry fully. Dot gold accents with a dotting tool, spacing each one wide apart. Sketch the faces before the dots, because small art crowds fast on pink. Draw the tree with a thin brush, looping one green line down the nail. Give every character its own nail, so the set stays easy to read. Seal with a glossy top coat, and refresh it after a few days.
10. Green Wreaths with Gold Starbursts
Sheer pale pink covers each nail in a soft, milky wash. Green wreaths ring several nails in neat, leafy circles. Black bow line art sits inside the wreaths with thin, fine strokes. Gold starbursts flash between the wreaths with sharp, fine rays. Black and gold dots scatter across the pink in varied sizes. Pink, green, and gold share the set, so light and dark tones balance.
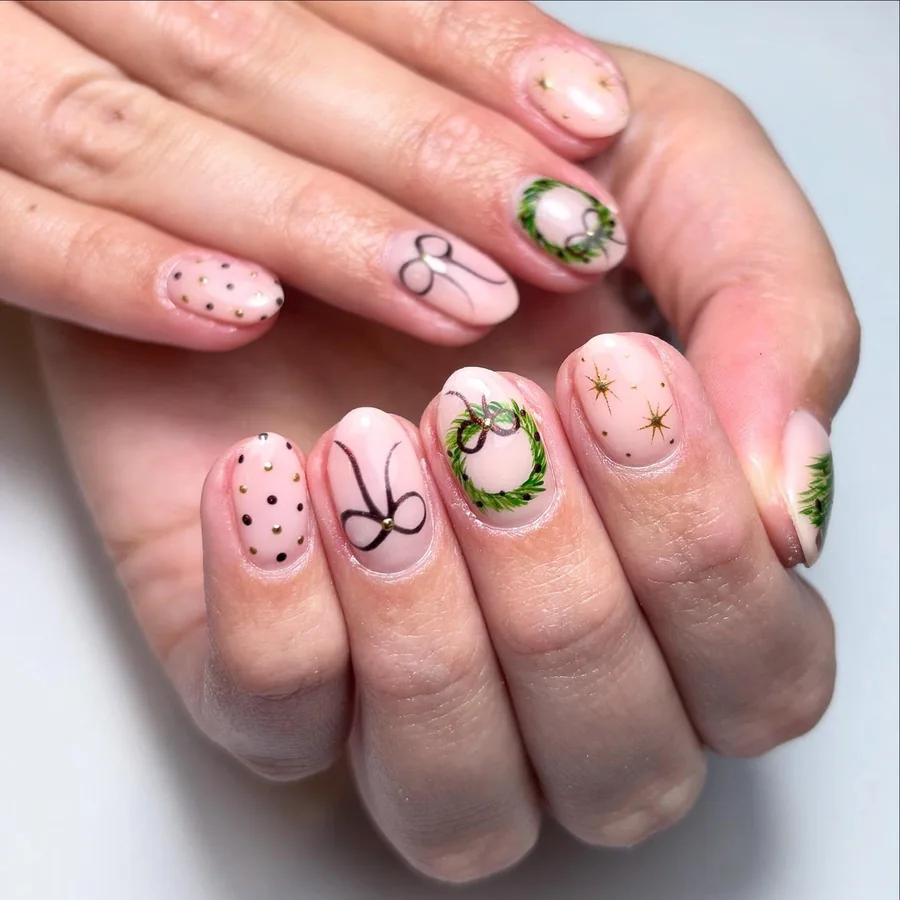
Work the pale pink base first, then let it dry fully. Draw wreaths with a thin brush, looping small leaves into a ring. Sketch the bows next, keeping each loop small and even. Dot the starbursts with a dotting tool, pulling each ray outward. Seal with a glossy top coat, because thin line art chips fast without cover. Touch up the dots after a few days, so the gold stays bright.
11. Candy Cane Stripes with Red Bows
Nude nails form a soft, sheer base across the set. Red and white candy-cane stripes run down several nails in bold bands. Raised red bows rise from two nails with full, rounded loops. White French tips edge the remaining nails in clean, straight lines. Red glitter snowflakes rest on the nude nails, crisp against the base. Stripes and bows share the set, so red and white read bold and bright.

Begin with the nude base, then shape the stripes with tape guides. Paint red bands over the white, keeping each band even and straight. Set the bows with tweezers, pressing each one into wet top coat until it holds. Draw snowflakes with a thin brush, starting from the center outward. Seal the flat nails first, and add a thicker top coat over the raised bows.
12. Brown Icing Borders with Snowflakes
Glossy brown covers each nail in a deep, warm, even coat. White icing-style borders frame the nails in thin, scalloped lines. Snowflakes sit inside the borders with crisp, pointed arms. Leaf sprigs curl beside the flakes in fine white strokes. Burgundy knit sleeve frames the hand, and a Christmas tree fills the background. Brown and white share the set, so the borders read crisp and clear.

Brush on a cocoa base in light layers, then let it dry fully. Draw the wavy edges with a striping brush, keeping the curves steady. Press flake stamps onto the surface, centering each motif by eye. Add the foliage last, because wet paint can smear under the brush. Finish with a clear top layer, and cap the free edge to guard against chips.
13. Smiling Cartoon Characters on Pink Glitter
Pink glitter covers each nail in a dense, sparkling coat. Smiling tree stands on one nail with a happy face and tiny star. Red cocoa mug beside it wears a cheerful face and a small handle. Two earmuff pals, a bauble, and a reindeer fill the next nails. Pudding and candy cane finish the cast on the last nails. Pink glitter ties the cast together, so each face reads bright.

Pack pink glitter onto the nails in thin coats, then let each dry. Sketch each face with pencil-thin lines before filling in color. Paint the smallest faces first, because large shapes crowd the glitter base. Use a dotting tool for eyes, keeping each dot neat and even. Seal with two coats of top coat, and reapply it after a few days for shine.
14. Gingerbread Pink with Gold 3D Bows
Tan and pink share the set in a warm, gingerbread-style mix. Gold 3D bows rise from two nails with bright, metallic loops. Pink hearts dot the tan nails in varied sizes and angles. Rhinestones catch light between the hearts with small, clear sparkle. Candy swirl in pink and white twists down one nail in bold bands. Gold and pink hold the set together, so warm tones glow.

Mix pink and tan bases across the nails, then let each dry fully. Set the gold bows with tweezers, pressing them into wet top coat. Place rhinestones with a wax pencil, spacing them so none touch. Draw the candy swirl with a thin brush, alternating pink and white bands. Seal the flat nails first, and add a thicker top coat over the gold bows.
15. Full Festive Cast on Sheer Pink
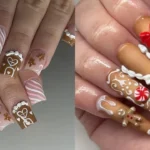
Sheer pink covers each nail in a soft, milky wash. White French tips edge the nails in clean, straight lines. Santa face sits on one nail with a white beard and red hat. Reindeer beside him wears a green bow and a red nose. Snowmen, gingerbread man, red gift boxes, green tree, and candy cane fill the rest. Pink and white frame the cast, so each character reads clearly.

Smooth on the sheer pink base first, then shape the white tips with guides. Sketch the largest faces first, because small nails crowd fast. Paint details with a thin brush, working from the biggest shape inward. Keep the gift boxes simple, so the faces stay the focus. Seal with a glossy top coat, and cap the free edge to slow chips.
16. Tan 3D Bow with Sugar Glitter
Rose pink and nude share the set in a soft, warm balance. Tan 3D bow rises from one nail with full, soft loops. White sugar-glitter outlines trace the French tips in a grainy sparkle. Small hearts dot the pink nails in varied sizes and spots. Pink and brown candy stripe runs down one nail in even bands. Glitter and bow share the set, so texture leads the design.

Alternate pink and nude bases across the nails, then let each dry. Set the tan bow with tweezers, pressing it into wet top coat until it holds. Trace the tip outlines with a thin brush, dusting glitter over the wet lines. Dot hearts with a dotting tool, keeping each one neat and spaced. Seal the flat nails first, because the raised bow needs a thicker top coat.
17. Santa and Holly on Glossy Red
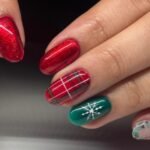
Glossy red covers most nails in a deep, rich, even coat. Painted Santa face sits on one nail with a white beard and red hat. Green tree beside him wears a small red bow at its top. Candy-cane knit pattern crosses one nail in red and white ridges. Holly sprig rests on a cream nail with green leaves and red berries. Red, green, and cream share the set, so the colors read bold.

Cover the nails in red and cream first, then let each dry fully. Sketch the Santa face with pencil-thin lines before adding color. Build the knit ridges with a thin brush, layering light strokes side by side. Dot the holly berries last, because wet leaves can smear under the brush. Seal with a glossy top coat, and cap the free edge to guard against chips.
18. Postage Stamp Frames with Winter Friends
Milky sheer pink covers each nail in a soft, pale wash. White postage-stamp frames edge each nail in neat, perforated borders. Penguin sits inside one frame with a dark head and pale belly. Snowman fills the next frame with a dark hat and carrot nose. Holly berries and poinsettia share the last frames in red and green. Pink and white frame the scenes, so each one reads clearly.
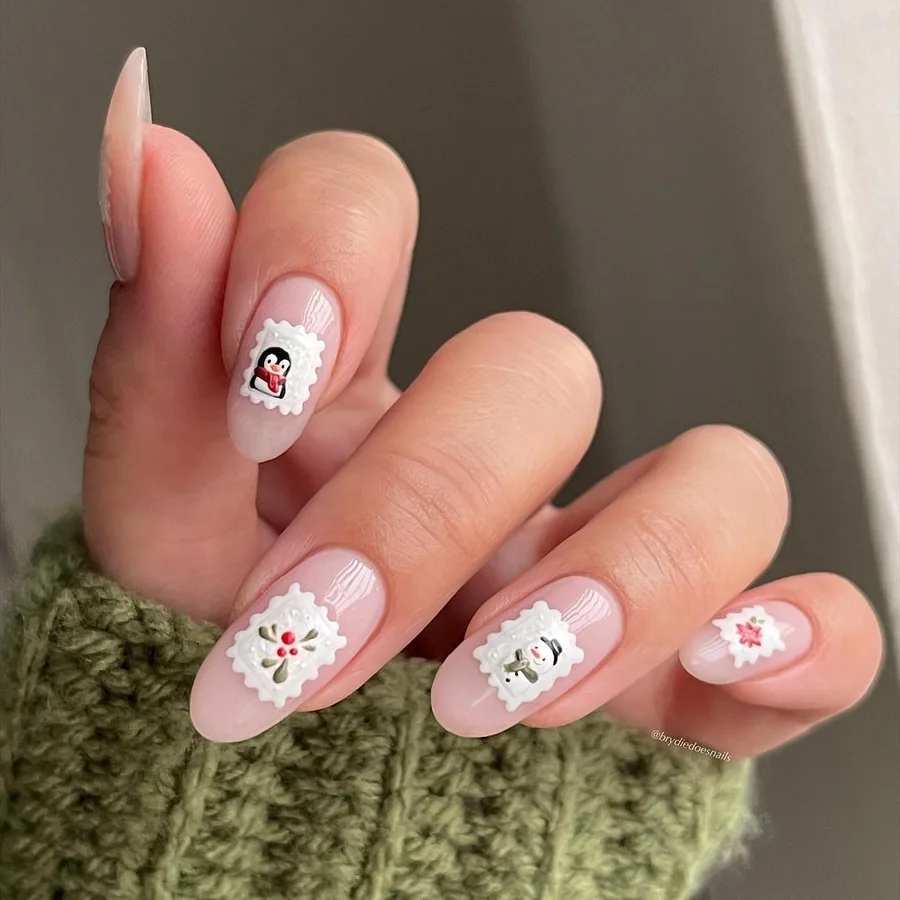
Smooth the sheer pink base onto the nails, then let it dry fully. Draw the stamp frames with a thin brush, keeping the borders even. Dab the perforated edge with a dotting tool, spacing the dots evenly. Paint the tiny scenes last, because the frames need a dry base. Seal with a glossy top coat, and add a fresh layer after a few days.
19. HO HO HO Lettering with Gnome Tips
Warm pink covers each nail in a soft, even, glossy coat. Black HO HO HO lettering runs across two nails in bold capitals. Gnome tips cap several nails with festive hats and white beards. White snowflakes drift across the pink in varied sizes and shapes. Candy stripes in white run down the last nails in even bands. Pink, black, and white share the set, so the lettering stands out.

Start with a rose base in thin layers, then let it dry fully. Letter the HO HO HO text with a fine brush, keeping the letters straight. Shape the tiny hats with a small brush, tapering each tip neatly. Draw the white lines with tape guides, so each row stays straight. Finish with a clear top layer, because dark text smudges when rushed.
20. Pastel Pink Cast with Knit Sweater
Pastel pink covers each nail in a soft, milky, even coat. Snowman wears a pink bow on one nail with a carrot nose. Reindeer beside him shows a red nose and a pink scarf. Gingerbread man stands on the next nail with a smiling face. Hot-pink bows and a pink knit-sweater nail fill the rest. White snowflakes and a candy-cane bow finish the set in pale contrast.

Coat the nails in pastel pink first, then let it dry fully. Sketch each character with pencil-thin lines before adding color. Build the knit lines with a thin brush, layering short strokes side by side. Set the bows with tweezers, pressing them into wet top coat until they hold. Seal the flat nails first, and add a thicker top coat over the raised loops.
21. Gold Glitter Ombre with Reindeer Face
Milky pale pink covers each nail in a soft, sheer wash. Gold glitter ombre tips fade from dense sparkle to sheer pink. Ombre, a soft fade from one shade to another, gives the tips their glow. Reindeer face sits on one nail with dark eyes and small antlers. Gold glitter nose shines at the center of the reindeer face. Dots in gold glitter scatter across the pink, so sparkle links the set.
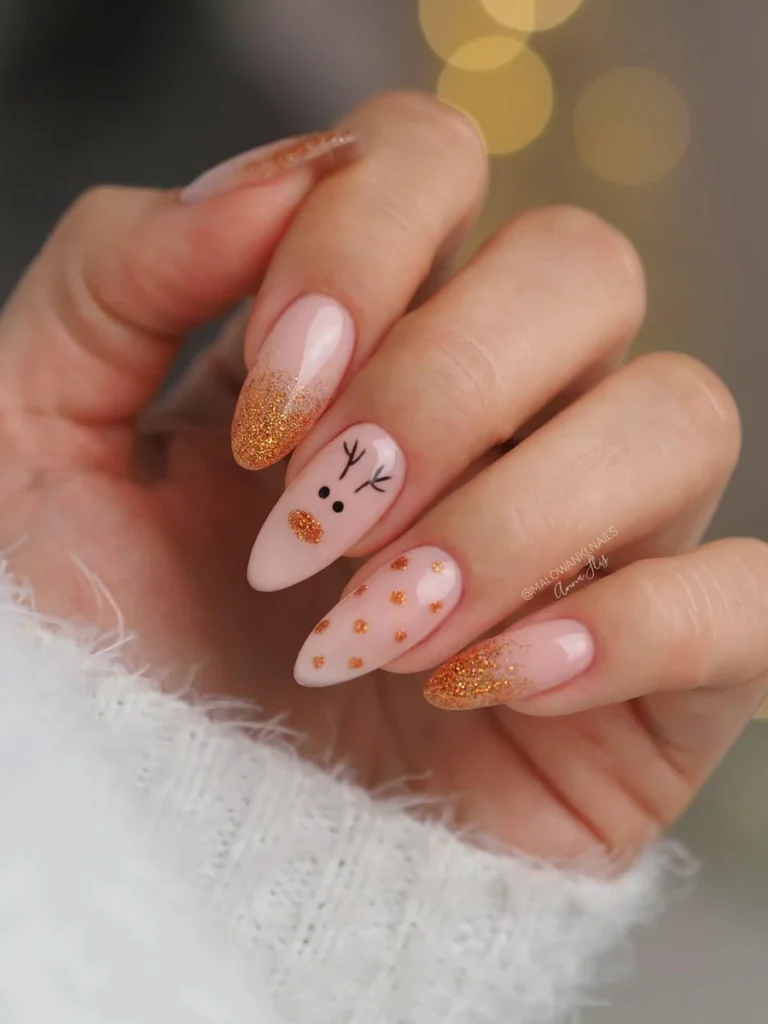
Spread the pale pink base first, then sponge gold glitter onto the tips. Build the fade in thin layers, because thick glitter hides the pink. Draw the reindeer face with a thin brush, starting with the muzzle. Dot the gold nose last, keeping it neat and centered. Seal with two coats of top coat, and cap the free edge to guard against chips.
22. Glow-in-the-Dark Christmas Light Bulbs
White covers each nail in a bright, clean, even coat. Neon light bulbs glow across the white in red, turquoise, and green. Yellow and orange bulbs join the rest in varied sizes and spots. Each bulb hangs from a thin dark line like a string of lights. Glow-in-the-dark polish, polish that shines after light exposure, fills each bulb. White base keeps the bulbs bright, so the colors glow in dim light.

Brush a snow-white ground onto the surface first, then let it dry fully. Draw the black cords with a fine brush, keeping them loose and wavy. Fill each lamp with vivid paint, working one shade at a time. Charge the shine under a desk lamp, because dull paint needs light first. Finish with a clear top layer, and refresh it every few days.
23. Pink and Red Stripes with Santa
Red and pink stripes run down each nail in bold, even bands. Stripes alternate pink and red, so the set reads bright and lively. Red bow sits on one nail with full, soft loops. Santa face fills the next nail with a white beard and red hat. Gold HO lettering runs across one nail in neat, shiny capitals. Pink, red, and gold share the set in a warm, festive mix.

Tape off the stripes first, then paint pink and red in even bands. Set the red bow with tweezers, pressing it into wet top coat until it holds. Sketch the Santa face with pencil-thin lines, filling in the colors next. Letter the gold HO text with a thin brush, keeping the capitals even. Seal with a glossy top coat, because striped bands chip first at the edges.
24. Red Glitter Tips with Gnome Face
Rosy sheer pink covers each nail in a soft, pale wash. Red glitter French tips edge the nails in dense, sparkling color. White snowflakes rest on the pink in varied sizes and angles. Gnome face sits on one nail with a festive hat and white beard. White bow line art curls across the last nail in thin strokes. Pink, red, and white share the set, so the tips read bold.

Glide the sheer pink base onto the nails, then shape the red tips with guides. Press glitter onto the tips with a flat brush while the base stays tacky. Draw the snowflakes with a thin brush, starting each flake at its center. Sketch the gnome face next, keeping the hat small and neat. Seal with two coats of top coat, because glitter tips can snag fabric.
25. Tiny Motifs Across Pale Pink
Blush pale pink covers each nail in a soft, sheer wash. Tiny green tree stands on one nail with a gold star at its top. Snowman, candy cane, and Christmas pudding fill the next nails. Holly and gingerbread man share the last nails in green and brown. Each motif sits small, so the pale base stays the focus. Pink, green, gold, and brown share the set in a light balance.
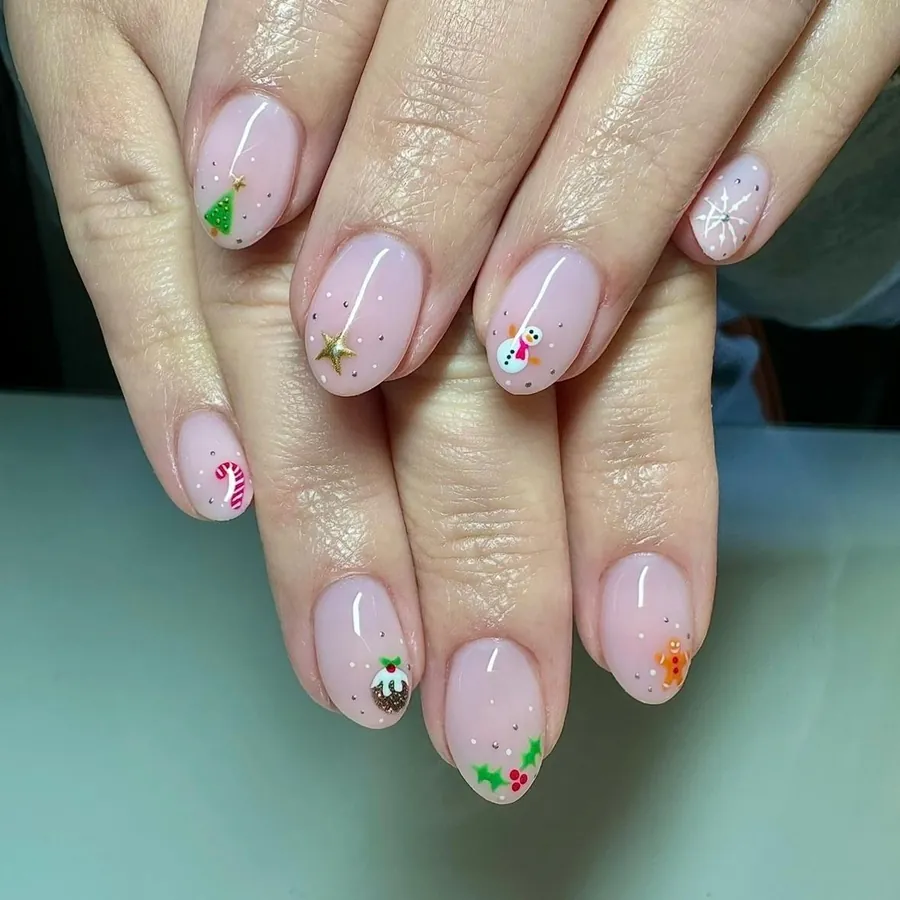
Sweep the pale pink base onto the nails, then let it dry fully. Paint the smallest motifs first, because tiny details need room. Use a dotting tool for the star, keeping it small and centered. Keep each motif on its own nail, so none crowd their neighbor. Top with a glossy coat, and reapply it after a few days for shine.
Conclusion
Matching polish to scarf and coat colors keeps a set feeling planned. One playful character plus one sparkle usually reads richer than five competing details. Keep raised shapes on two or three nails, so the rest stays calm. Thin coats dry more evenly than thick ones. Capping the free edge helps color last longer. Choose the Cute Christmas nails design that suits daily routines, then wear it with care.