


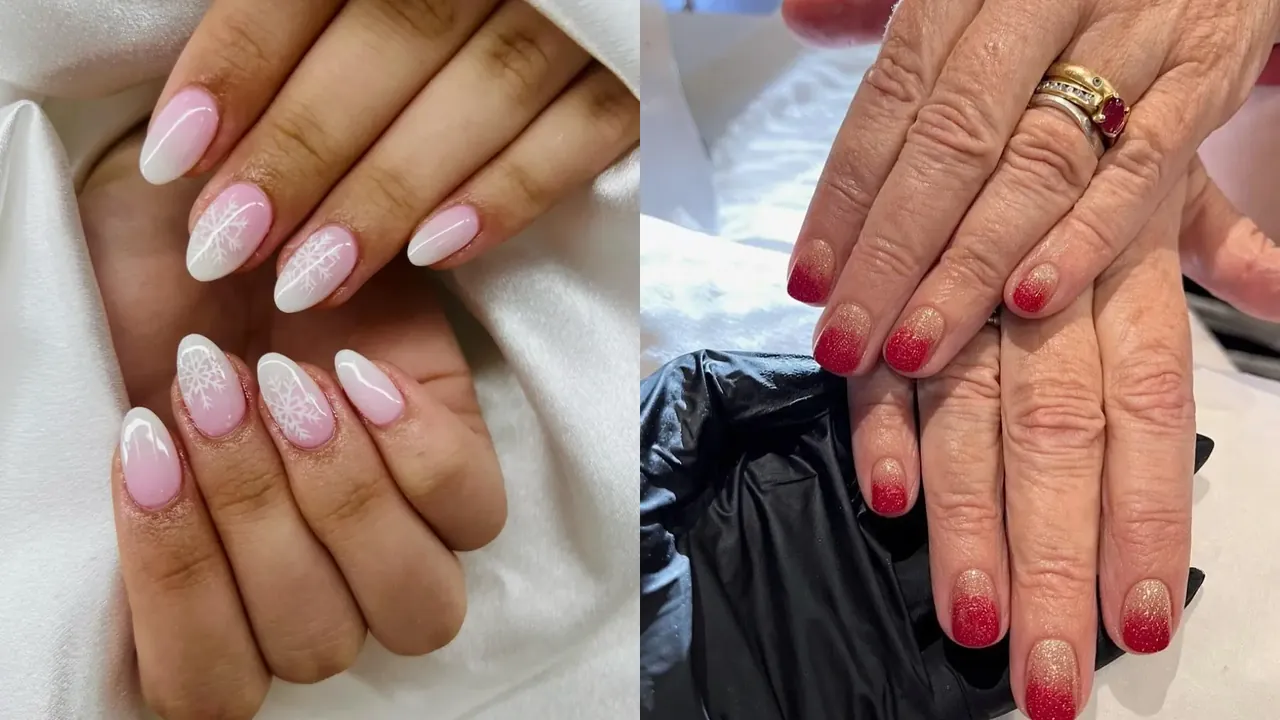
Chrome, glitter, velvet, and plaid carry this Christmas Nail Inspo set from soft pastels to deep burgundy. Each design below pairs one clear color story with one finish or pattern. Every nail reads as part of one set, so the look stays planned. Snowflakes, bows, holly, plaid, and small trees appear across red, green, gold, silver, and pink. Cat-eye shimmer, mirror chrome, crushed velvet, and holographic glitter add texture between the patterns. Hands, trees, lights, and fabric set the scenes for the photos.
1. Blue Aura Glitter with Gold Stars
Deep blue gathers at the tips and fades into silver glitter near the cuticle. Each nail carries the same gradient, with light shifting across the glitter as hands turn. Gold starbursts also sit on nails, some large and some tiny, catching light against the blue. Glow runs through the silver base, giving the set a night-sky mood. Grey fabric behind the hands keeps the blue and gold in focus.
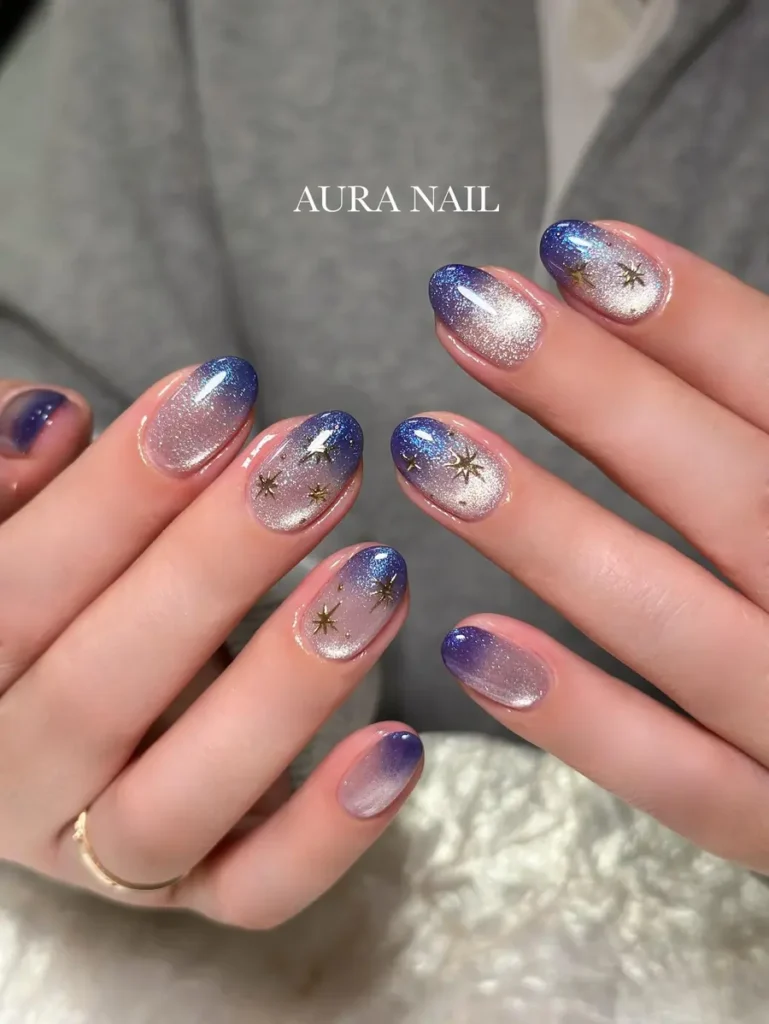
Start with a dark blue base in two thin coats, letting each coat dry. Blend silver glitter polish upward from the cuticle, fading it before the tip. Add starburst decals with tweezers, pressing each one gently into a tacky layer. Seal the set with a glossy top coat, because glitter edges can catch on fabric. Cap the free edge with top coat, since dark shades show chips at the tips.
2. Pink Ombre Snowflakes on White Tips
Soft pink melts into white at the tips across every nail. White snowflakes spread over several nails in fine, branching lines. Gloss stays high on the surface, so light runs in clean lines down each nail. Pink deepens near the cuticle and pales toward the tip, giving the set a frosted glow. White satin folds behind the hands, keeping pink and white in focus.
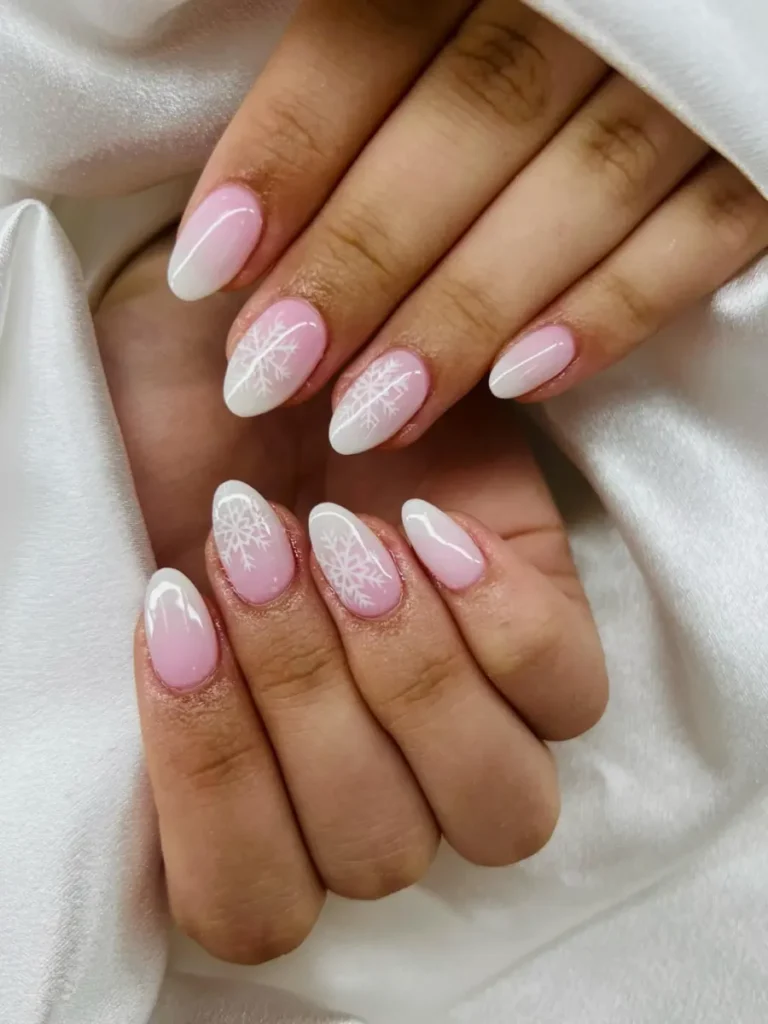
Sponge pale rose over a sheer base, fading it toward the ends. Work the fade while each coat stays damp, because dry edges leave a hard line. Stamp each flake with white polish, pressing the stamp firmly for a crisp print. Keep the flakes uneven in size, and leave one or two nails plain for balance. Seal the set with a glossy top coat, capping the free edge.
3. Gold to Red Glitter Ombre Fade
Gold glitter fades into deep red across each nail, brightest at the base and darkest at the tip. Fine grains pack the surface, giving the nails a dense, sparkling coat. Light also moves across the glitter, shifting the red from warm crimson to dark wine. Two hands rest together, showing the same gradient on every nail. Black glove steadies one hand, framing the red and gold.

Start with a gold glitter base in two thin coats, letting each coat dry. Add red glitter polish at the tips, blending downward with a dry brush. Repeat the red layer until the tips read deep and rich. Seal the set with a glossy top coat, because glitter texture can feel rough. Cap the free edge with top coat, since red shades show wear at the tips.
4. Gold Glitter Tips with Red Ribbon Bows
Pale nude covers most of each nail, leaving the tips for gold glitter. Glitter packs the tips densely, fading upward into the nude with a soft edge. Red ribbon bows sit on two nails, drawn in thin lines with flowing tails. Small hands rest over a white lamp, showing the bows clearly on both hands. Gold and red share the set, so the look stays festive without extra color.
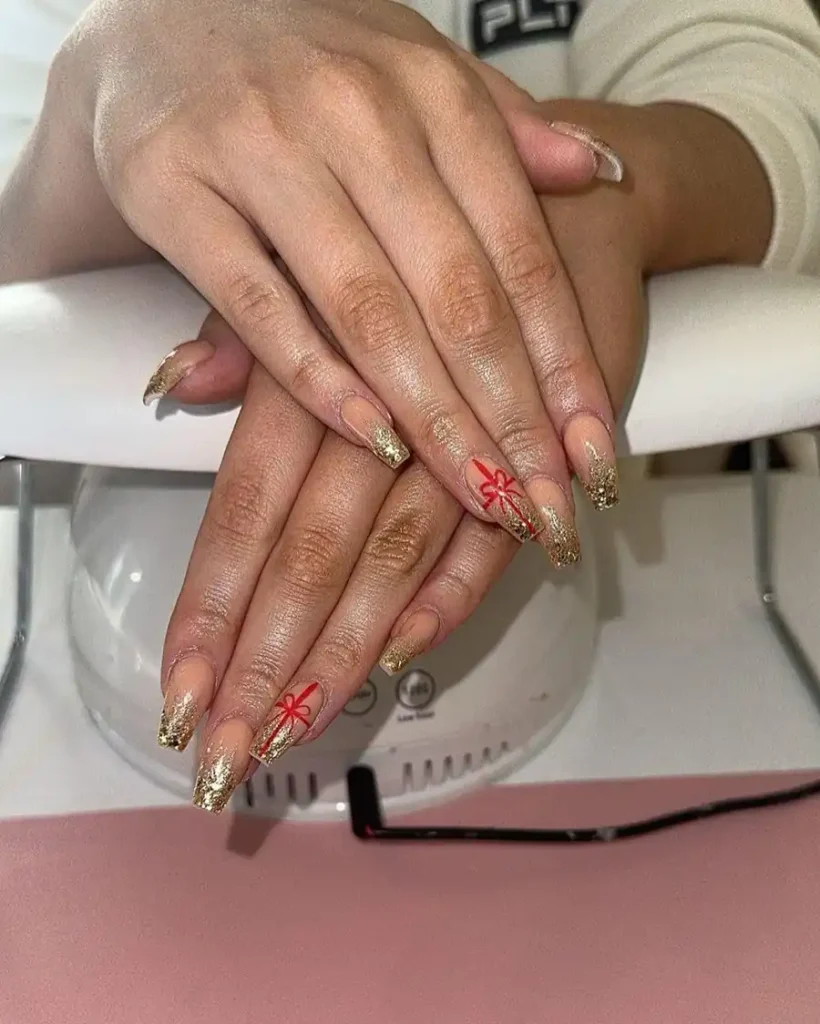
Lay down a nude base in two thin coats, letting each coat dry. Paint gold glitter onto the tips with a brush, pressing it while the coat stays tacky. Draw each bow with a striping brush, adding two loops and two tails. Seal the set with a top coat, because glitter edges can catch on fabric. Clean stray glitter from skin with a brush before the top coat dries.
5. Emerald Cat-Eye with Plaid Accents
Emerald shimmer covers most nails in a deep green glow. Cat-eye polish, a magnetic polish that forms a light stripe, gives the green its depth. Two pale nails also carry plaid in burgundy, green, and gold lines on white. Light slides across the shimmer, shifting the green from dark forest to bright emerald. Faint script watermark sits between the fingers, away from the nails.
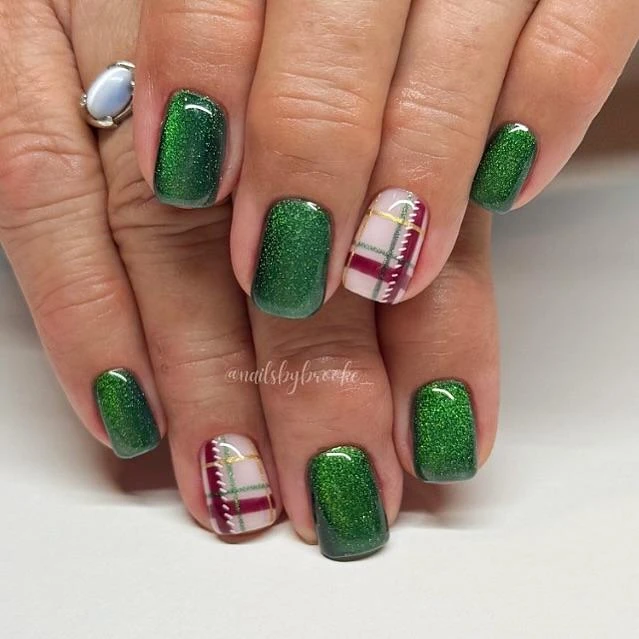
Sweep magnetic polish onto the nails, then hold a magnet near the wet surface. Work one nail at a time, because the magnet only shapes wet polish. Paint the plaid lines with a thin brush, crossing green over white first. Add burgundy and gold lines, keeping the gaps even across the nail. Seal the set with a glossy top coat to lock the shimmer in place.
6. Red Chrome Gift Wrap and Snowflakes
Mirror red chrome coats most nails with a bright, reflective gleam. Chrome powder, a fine powder rubbed over polish for a mirror shine, gives the red its depth. Nude nails break the red with white ribbon lines and red bows. White snowflakes sit on red chrome tips, sharp against the shine. Red and nude share the set, so the look reads bold yet balanced.
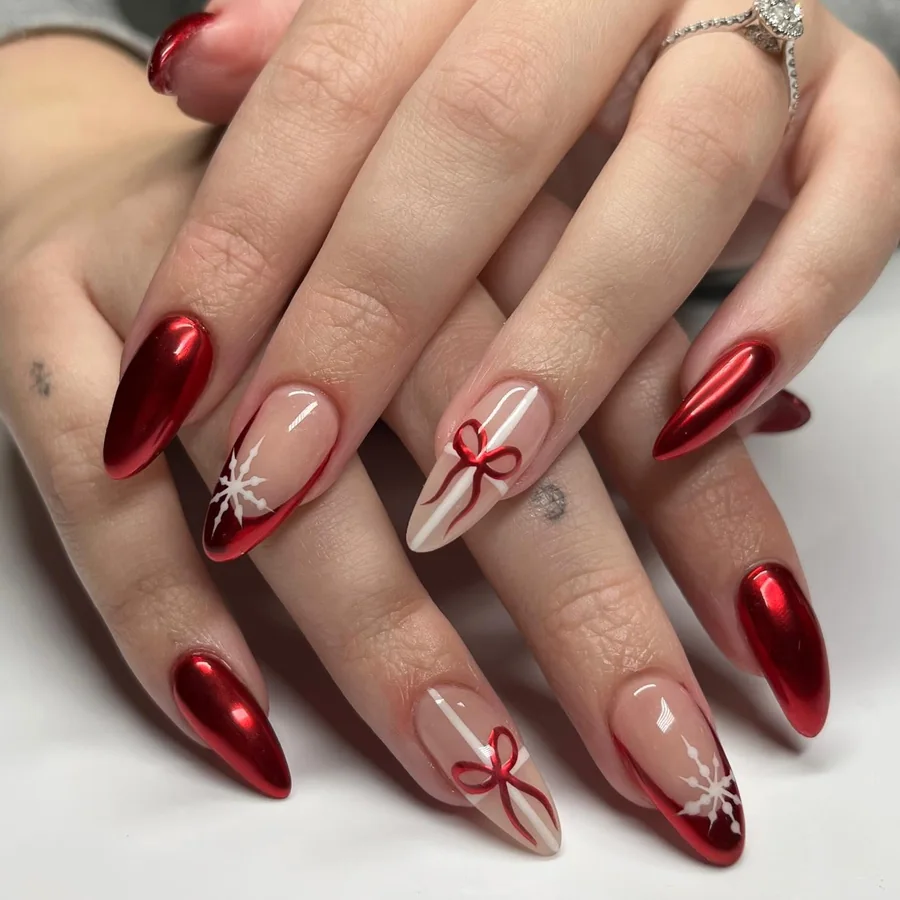
Begin with a base, buffing chrome powder over the tacky layer with an applicator. Draw the ribbon lines with a thin brush, keeping each line from cuticle to tip. Paint the bows at the center of nude nails, adding two loops and two tails. Stamp the snowflakes in white, pressing the stamp for a crisp print. Seal the set twice, because chrome dulls when the seal is thin.
7. Milky White with Red Chrome Bows
Milky white covers every nail in a soft, pearly coat. Red chrome bow outlines sit on each nail, drawn in thin metallic lines. Each bow holds two loops and two tails, placed at the center of the nail. Light slides across the white, giving the set a gentle glow. Chrome lines catch the light, so the bows stand out against the pale base.
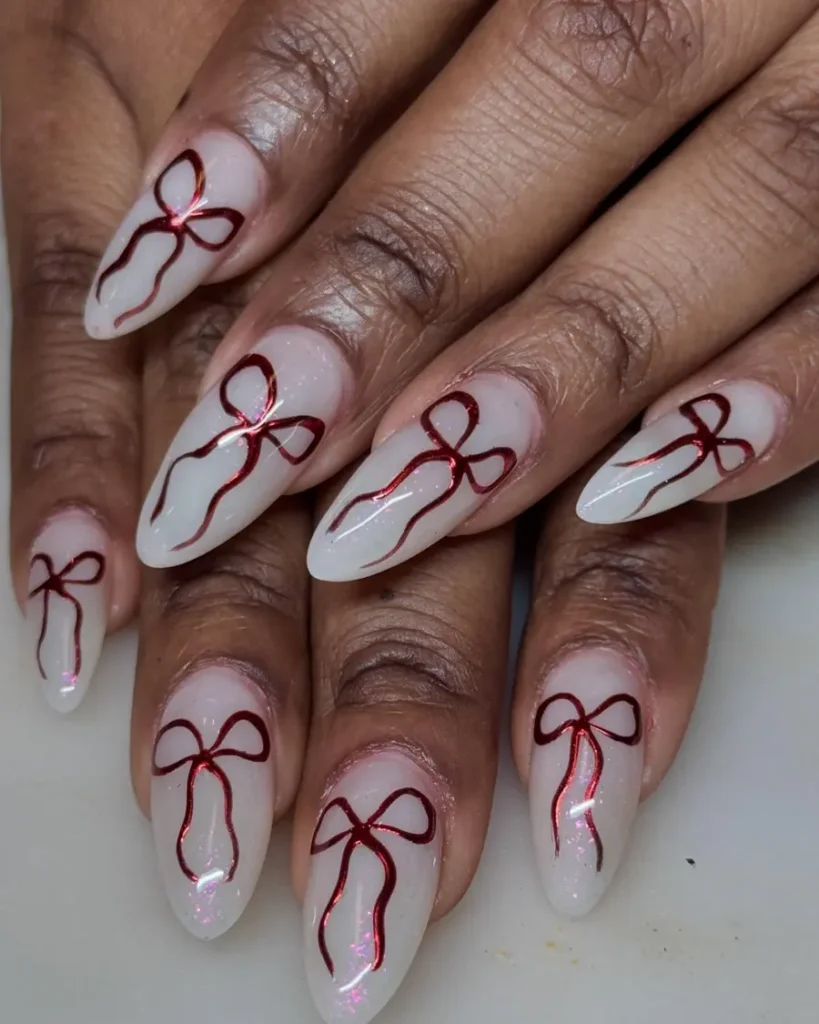
Lay a milky base in two thin coats, letting each coat dry fully. Draw each bow outline with a thin brush dipped in metallic red. Add two loops first, with tails after, keeping the lines even. Seal the set with a glossy top coat, because thin lines can lift without cover. Cap the free edge, and pale shades show chips quickly at the tips.
8. Mint and Pink Striped Glitter Bows
Mint stripes run over silver glitter on one hand, pink over red glitter on the other. Red bows sit on the mint nails, and green bows sit on the pink ones. Glitter packs each nail densely, giving both hands a sparkling coat. Stripes cross the glitter in even bands, keeping the pattern neat. Two color stories share one set, so the look feels playful yet planned.
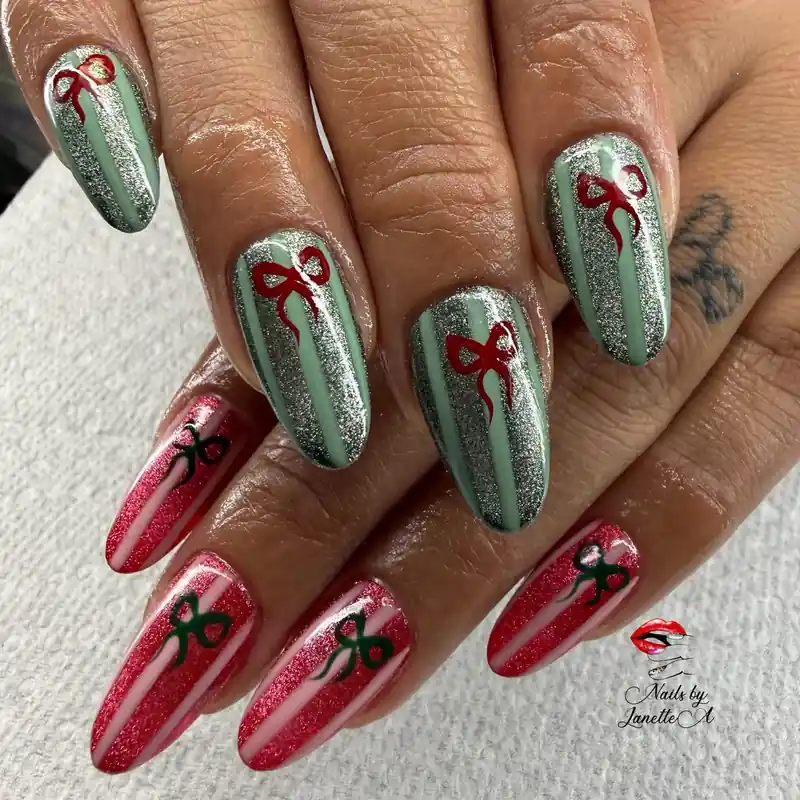
Alternate two color stories between the hands, keeping one hand mint and one hand pink. Paint glitter, adding stripes with a thin brush while the coat stays tacky. Draw the bows in a contrasting shade, adding two loops and two tails. Finish with a glossy top coat, because glitter edges can catch on fabric. Swap the bow colors on the other hand, keeping the set balanced.
9. Metallic Green Cat-Eye with White Bow
Metallic green shimmer covers the nails in a bright, glassy coat. Light moves across the surface, shifting the green from deep emerald to pale lime. White bow line drawing sits on one nail, fine and crisp against the green. Magnetic polish forms a light stripe, giving the set its glow. Gloss seals the shimmer, so the stripe stays bright from every angle.
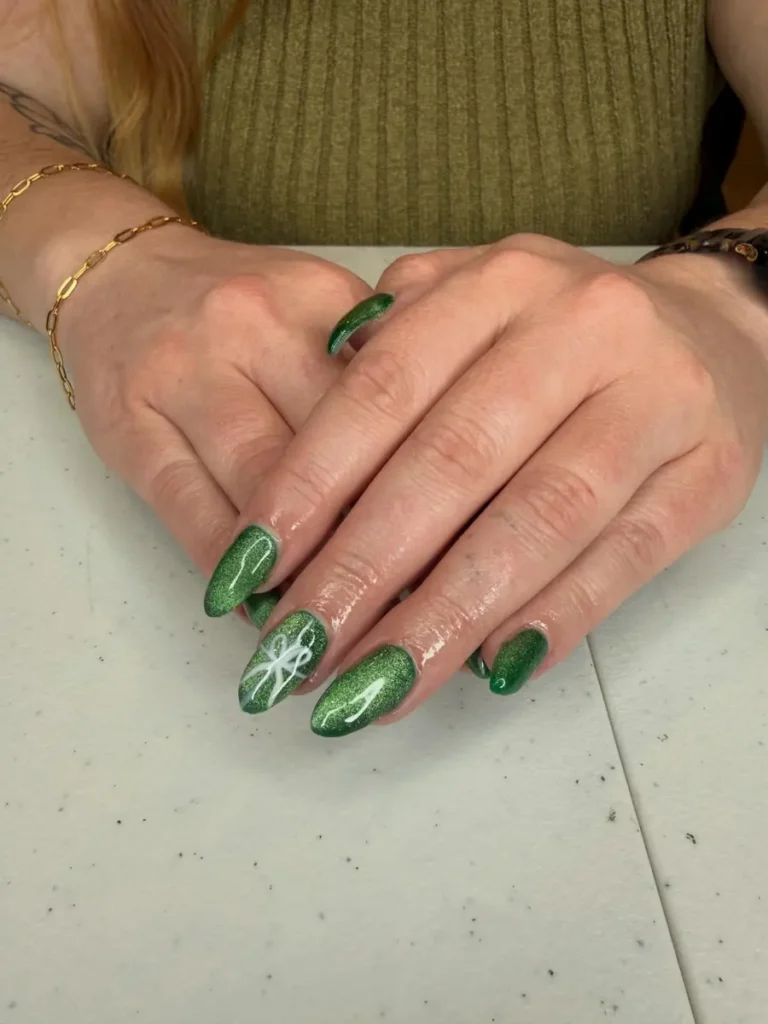
Hold a magnet over wet polish to pull the stripe into place before sealing. Keep the magnet at one angle for all nails, because shifting angles scatter stripes. Work nail by nail, keeping the polish wet while the magnet works. Top with a glossy coat, and skip matte here since matte dulls shine. Wipe the magnet clean after each use, keeping dust off the next set.
10. Velvet Bows on Red French Glitter
Crimson French tips cap nude pink nails, each tip edged with gold glitter. Gold glitter also coats several nails fully, sparkling against the red and pink. Dark red velvet bows sit on the glitter nails, each one raised with a tiny rhinestone center. Swirling gold glitter stripes cross the red nails, curving from cuticle to tip. Gloss seals the set, and red, gold, and velvet read rich together.
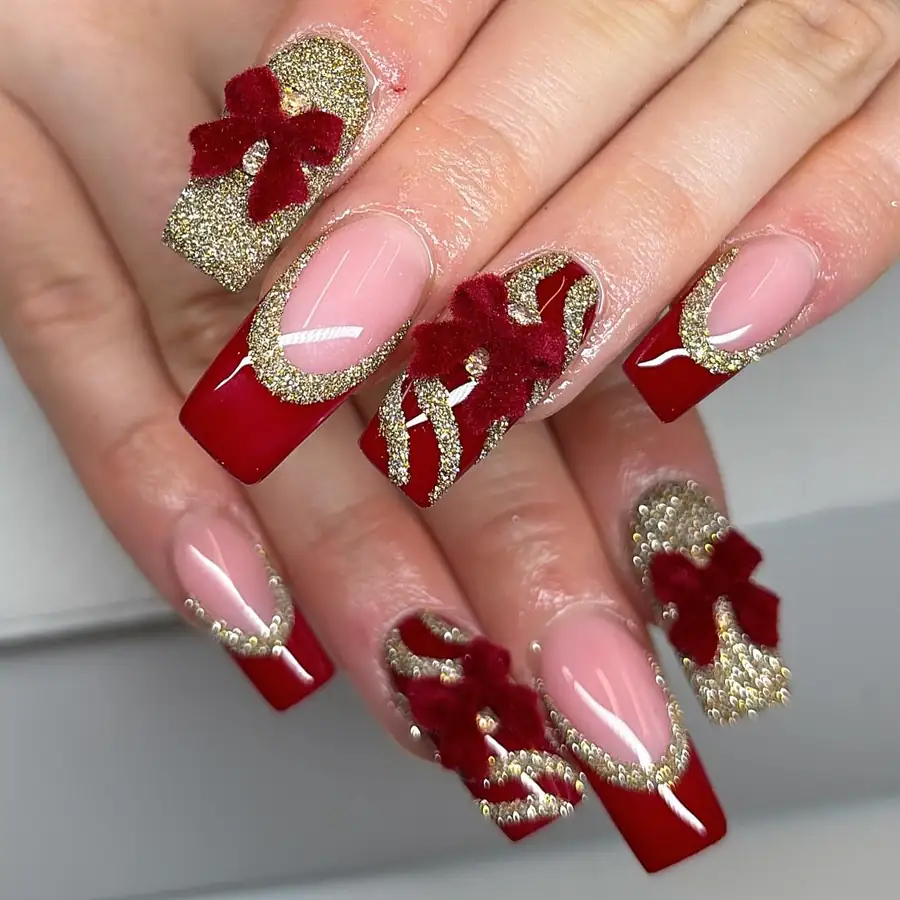
Paint a blush base in two thin coats, letting each coat dry. Add the red tips with a flat brush, keeping the smile line even. Outline each tip with gold glitter polish while the layer stays tacky. Press the velvet bows into place with tweezers, setting a small stone at the middle. Seal the set with a clear top coat, because raised pieces can catch on fabric. Touch up the edges promptly, since dark shades show wear fast.
11. Mixed Chrome Pearls Stars and Bows
Mixed chrome, pearl studs, red bows, and silver stars share one set. Milky nails also hold clusters of tiny pearls, packed close from cuticle to tip. Red bow outlines sit on nude nails, each one drawn in thin metallic lines. Pink nails carry red dots and a red outline, bright against the pale base. Silver stars rest on white nails, catching light at every angle.
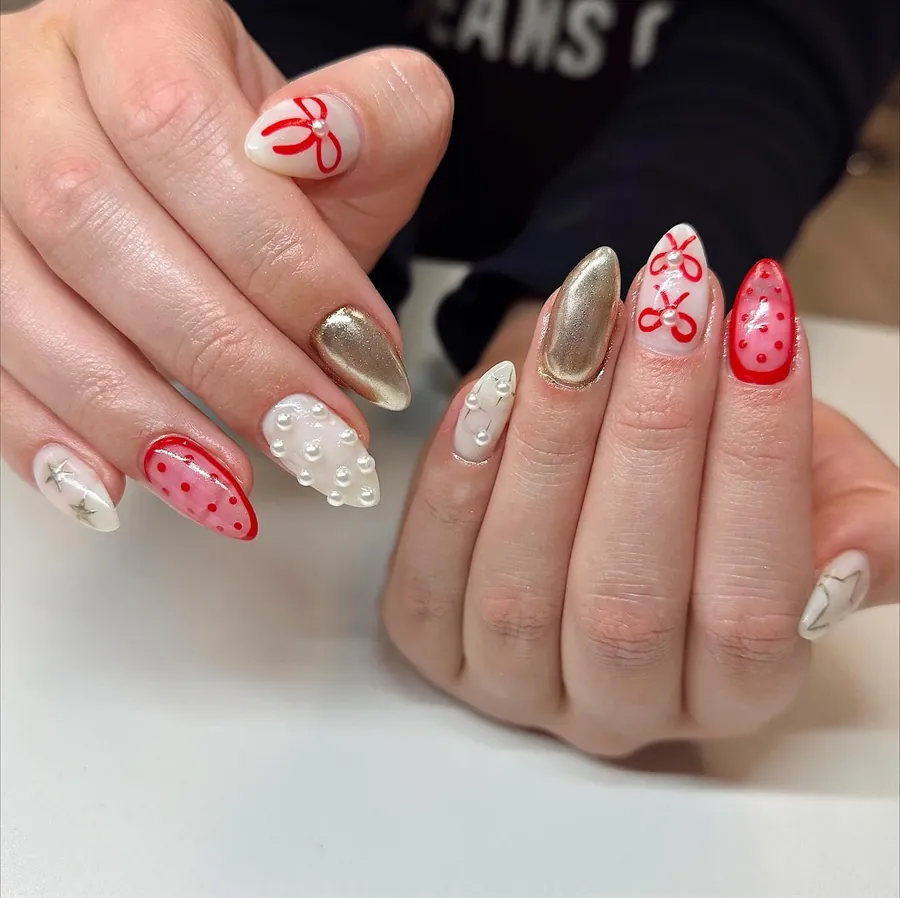
Work with one texture per nail, keeping the set varied without crowding. Set pearls with tweezers, pressing each one gently into a tacky layer. Draw the bow outlines with a thin brush, adding two loops and two tails. Swap the dot color on the second hand, keeping the set balanced. Seal the set with a glossy top coat, because raised details can catch on fabric.
12. Chrome Gold Plaid and French Tips
Bright gold chrome coats two nails with a mirror gleam. White French tips cap nude nails, each one edged with tiny red and green rhinestones. Red plaid fills the tips of two nails, crossed with fine black lines. Gold bow outlines sit on nude nails, drawn in thin metallic curves. Chrome and plaid share the set, so the look reads rich without extra color.
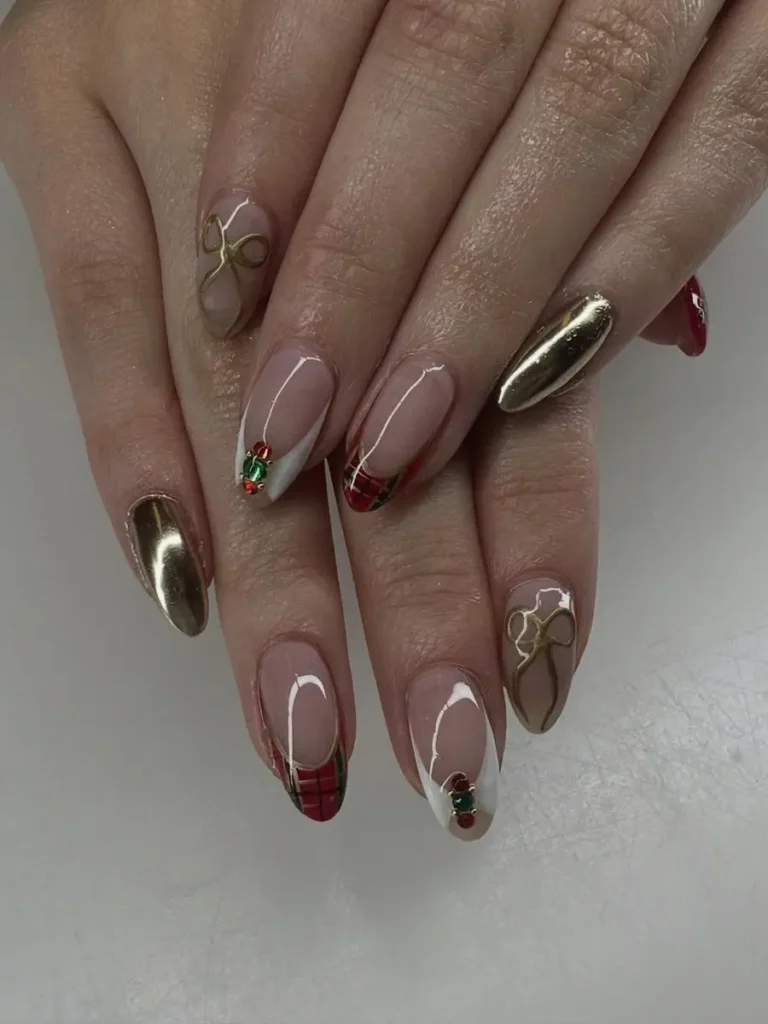
Tape off the French tips first, filling each tip with polish. Buff chrome powder onto the gold nails with a sponge applicator. Paint the plaid lines with a brush, keeping the gaps even across the nail. Avoid thick coats, because thick polish pools at the cuticle and lifts. Seal the set with a glossy top coat, and cap the free edge for extra wear.
13. Pearly Glazed Nails with Gold Snowflakes
Sheer pearly white covers every nail in a soft, glowing coat. Iridescent shimmer shifts across the surface, flashing pale blue and pink as hands turn. Delicate gold snowflakes sit on several nails, drawn in fine metallic lines with branching arms. Plain pearly nails balance the snowflake nails, so the set stays calm. Dark background frames the hands, keeping the pale glow and gold lines in focus.
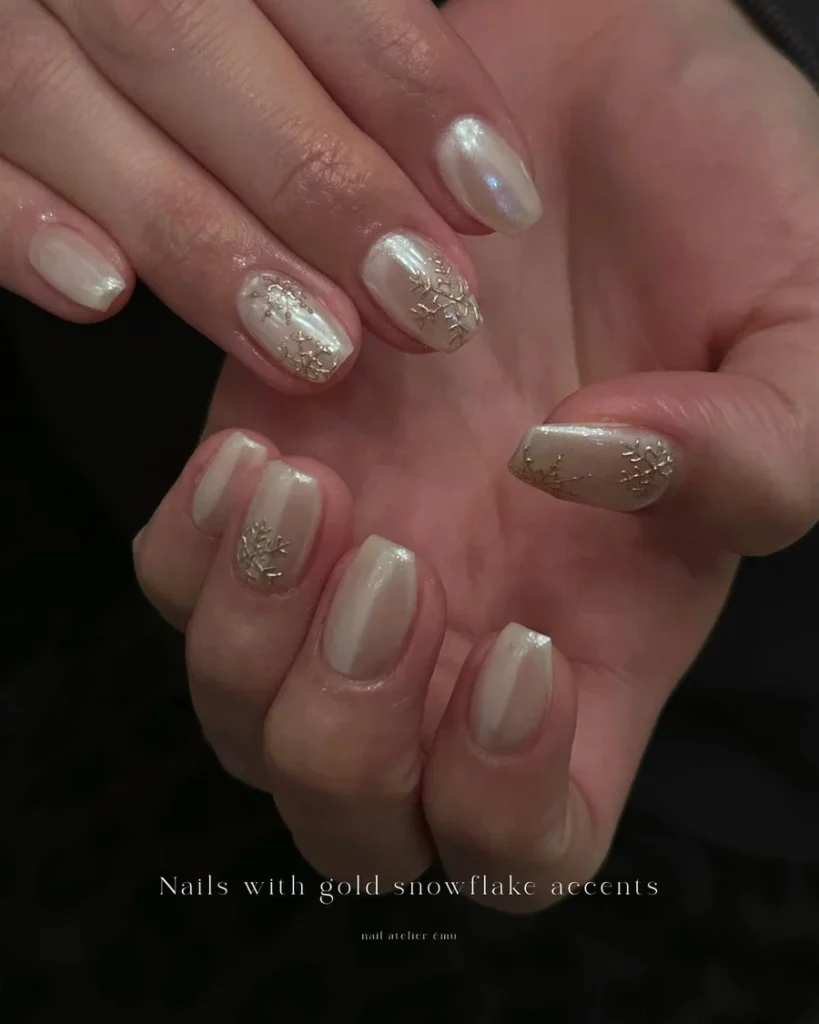
Smooth a sheer white base over nails in two thin coats, letting each coat dry. Rub a pearlescent powder over the tacky layer with an applicator for the glow. Draw each snowflake with a thin brush, starting from the center and working outward. Keep the lines fine, because thick lines blur the flake shape. Seal the set with a glossy top coat, and cap the free edge to slow chips. Wipe the brush clean between flakes.
14. Dark Emerald Cat-Eye by Christmas Tree
Dark emerald cat-eye shimmer glows against thick green tree branches. Light stripes run down each nail, shifting softly as the hands rest on the pine. Deep dark green covers every nail in a glossy, even coat. Fresh pine needles frame the hands, tying the set to the season. No pattern breaks the surface, so the shimmer itself carries the design.
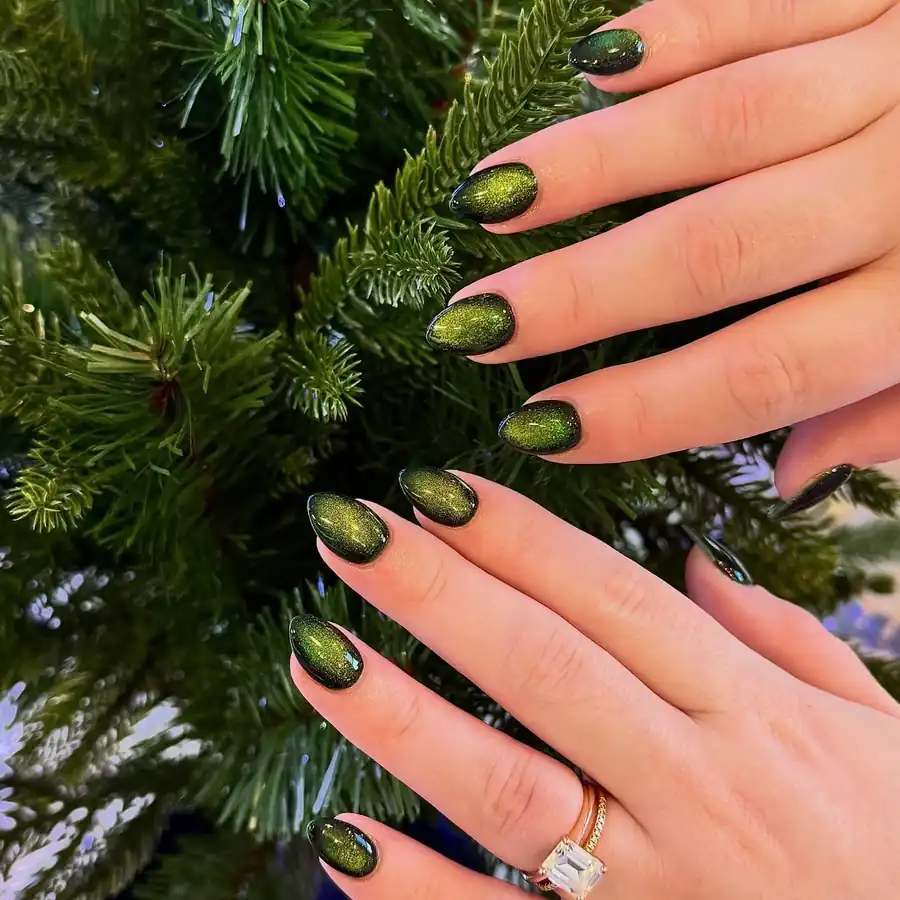
Sweep magnetic polish onto the nails, holding a magnet near the wet surface. Keep the magnet still for a few seconds, letting the pattern set cleanly. Work one nail at a time, keeping the polish wet while the magnet works. Top with a glossy coat, and skip matte here because matte hides the stripe. Store the magnet flat and dry, and wipe it clean after each use.
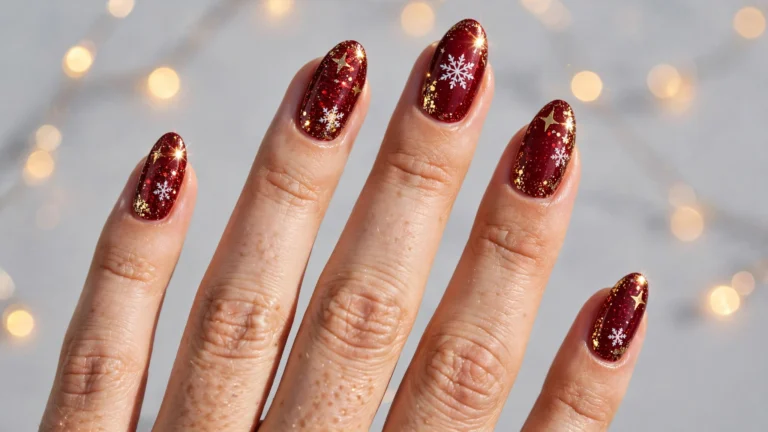
15. Burgundy Glitter Tips with White Snowflakes
Rich burgundy coats every nail in a deep, glossy wine shade. Silver glitter rises from the tips, fading upward into the burgundy with a soft edge. White snowflakes sit on two nails, drawn in fine lines with branching arms. Glitter catches light at the ends, so the tips glow against the dark base. White fur rests behind the hands, keeping the burgundy and silver in focus.
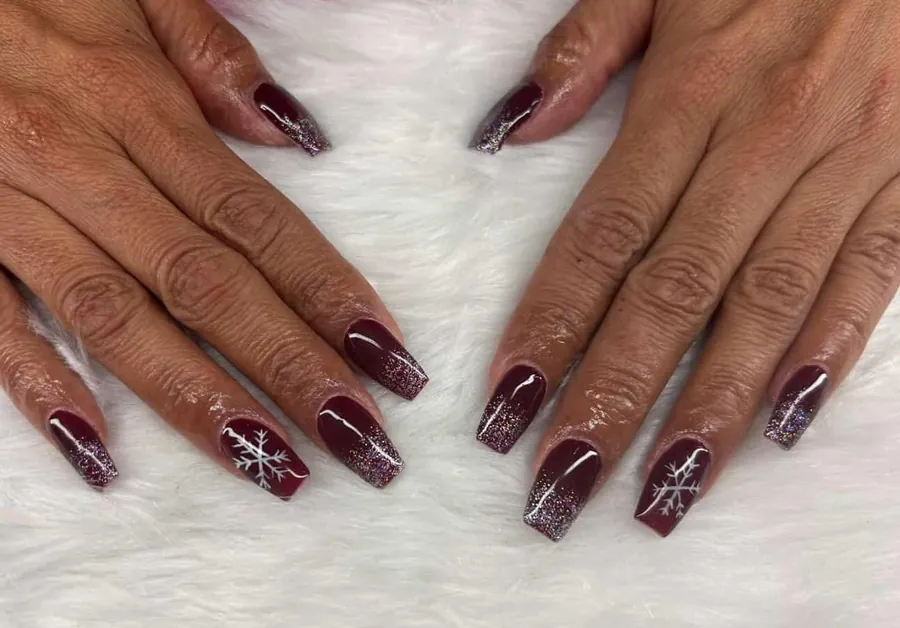
Brush two thin layers of burgundy, letting each layer dry fully. Sponge silver glitter over the ends, pressing it flat while the coat stays tacky. Draw each flake with a thin brush, starting from the center and working outward. Keep the flakes on two nails only, because glitter on every nail hides the flakes. Finish with a glossy top coat, and refresh it after a few days of wear.
16. Metallic Red Snowflakes Holly and Plaid
Metallic red coats most nails with a bright, reflective gleam. Pink nails hold white snowflakes, holly leaves, and red berries with white dots. Red and green plaid crosses two nails in thin, even lines. Gold ring rests on one finger, adding a warm accent to the set. Red, pink, and green share the set, so the look reads clearly festive.
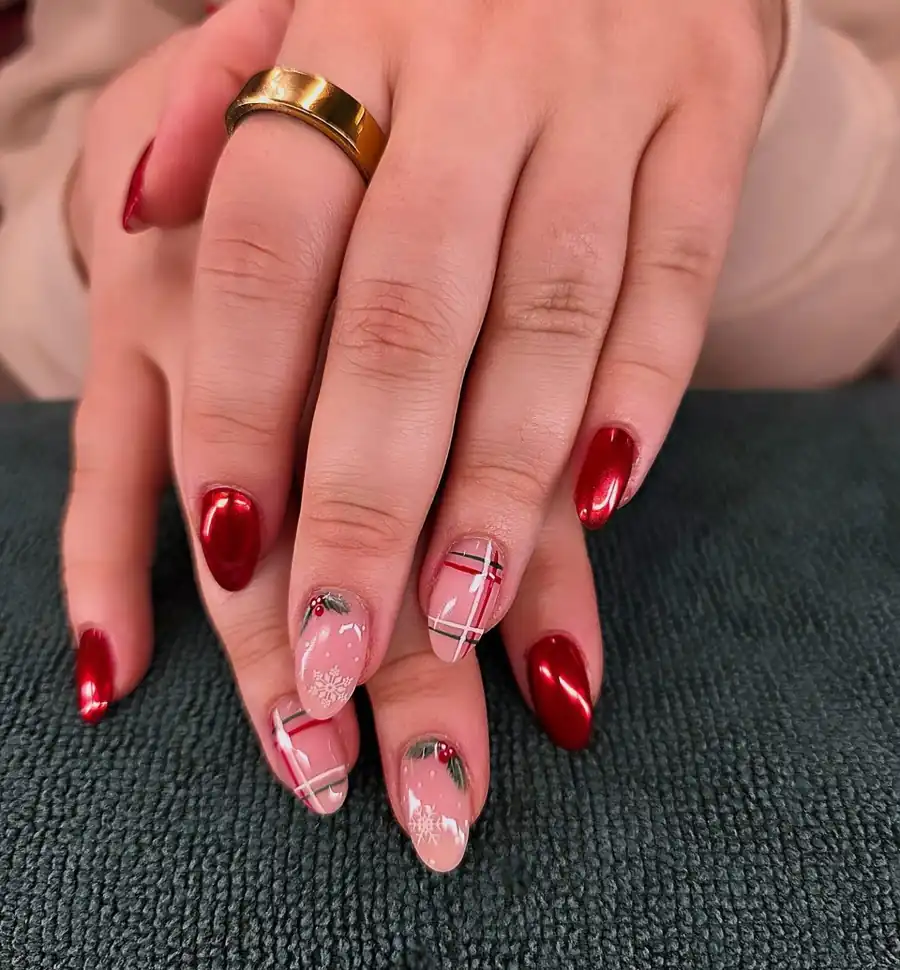
Begin on the red nails, letting each coat dry fully before moving on. Place snowflakes using a fine brush, working from the center outward. Cross green lines over the base next, spacing each gap the same way. Paint holly leaves in green, dotting red berries neatly beside them. Seal the set with a glossy top coat, because fine marks can lift without cover.
17. Matte Burgundy with Velvet Accent Nail
Matte burgundy covers most nails in a deep, rich, velvety red. One nail carries a crush velvet finish, richer and deeper than the matte ones. Light sinks into the matte surface, giving the set a soft, quiet glow. No pattern breaks the surface, so texture itself carries the design. Color sits evenly on every nail from cuticle down to the tip.
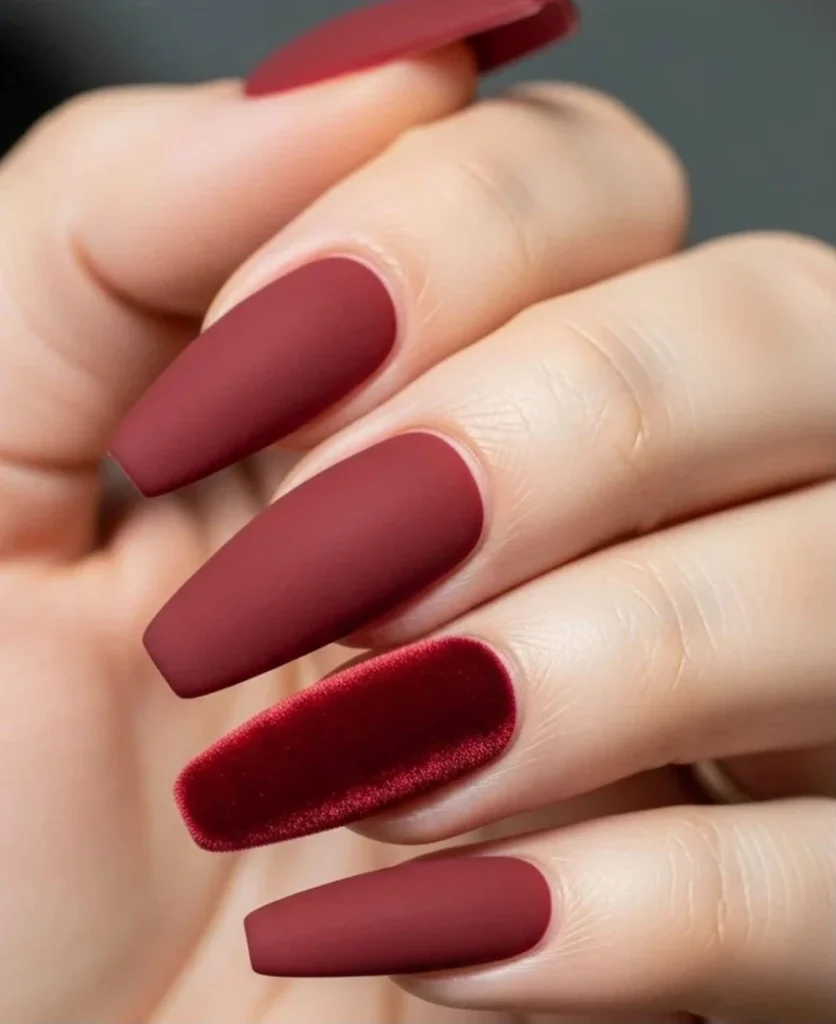
Rub the velvet powder onto one nail, pressing it flat with a fingertip. Keep the other nails matte, letting the velvet accent stand out. Seal the matte nails with a matte top coat, because gloss would dull the effect. Leave the velvet nail unsealed, and top coat can flatten texture. Touch up chips at the free edge promptly, and matte shades show wear quickly.
18. Green and Red Chrome Stars and Bows
Green chrome and red chrome share the set in bold, mirror-bright blocks. Bright green coats several nails, while deep red coats the rest. Pink nails hold gold stars, red bows, and green bows in fine lines. Light shifts across the chrome, moving from emerald to ruby as hands turn. Green and red sit side by side, so the set feels festive without extra color.
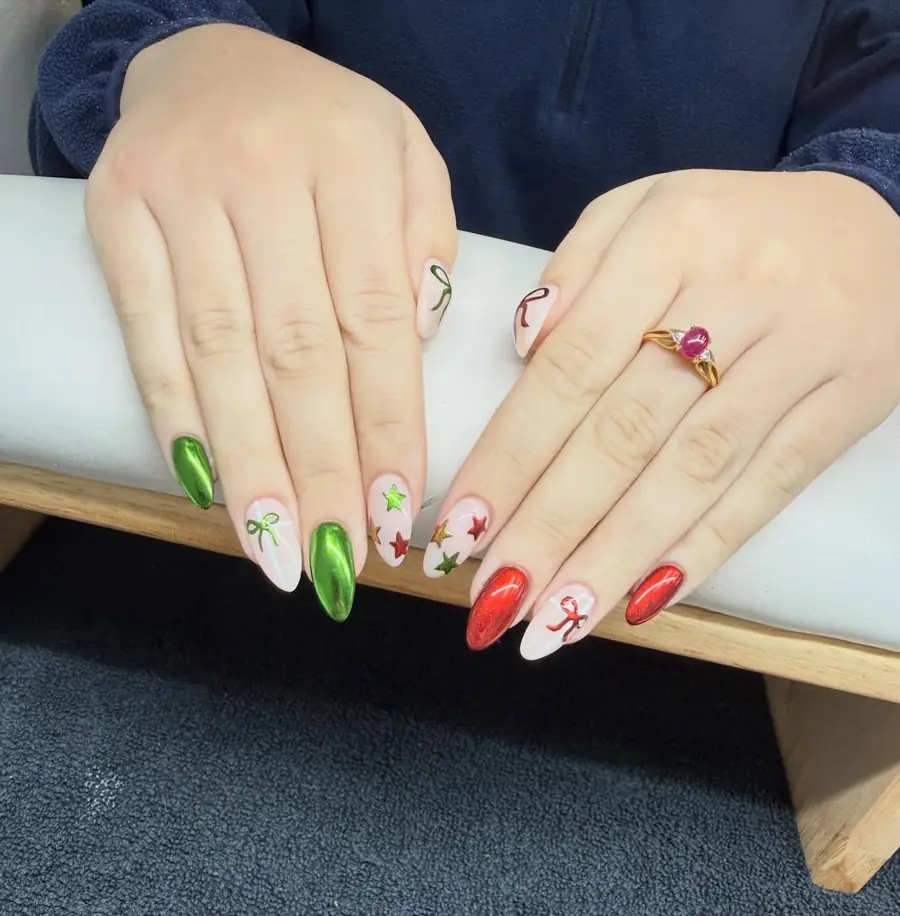
Buff chrome powder over the green nails with a sponge applicator. Repeat the same buffing on the red nails, keeping the powder even across each nail. Swap the star and bow colors between the hands, keeping the set balanced. Draw the bows with a thin brush, adding two loops and two tails. Seal the set twice, because chrome loses shine fast when the seal is thin.
19. Christmas Tree Plaid Bow and Pearls
Green tree sits on one nude nail, dotted with red and clear rhinestones. Red plaid fills one nail in bold red and black crossing lines. Ribbon bow in red sits on a nude nail, drawn in fine, thin lines. Metallic red also coats one nail, holding three small pearl studs. Soft white fur behind the hand keeps the colors bright and clear.
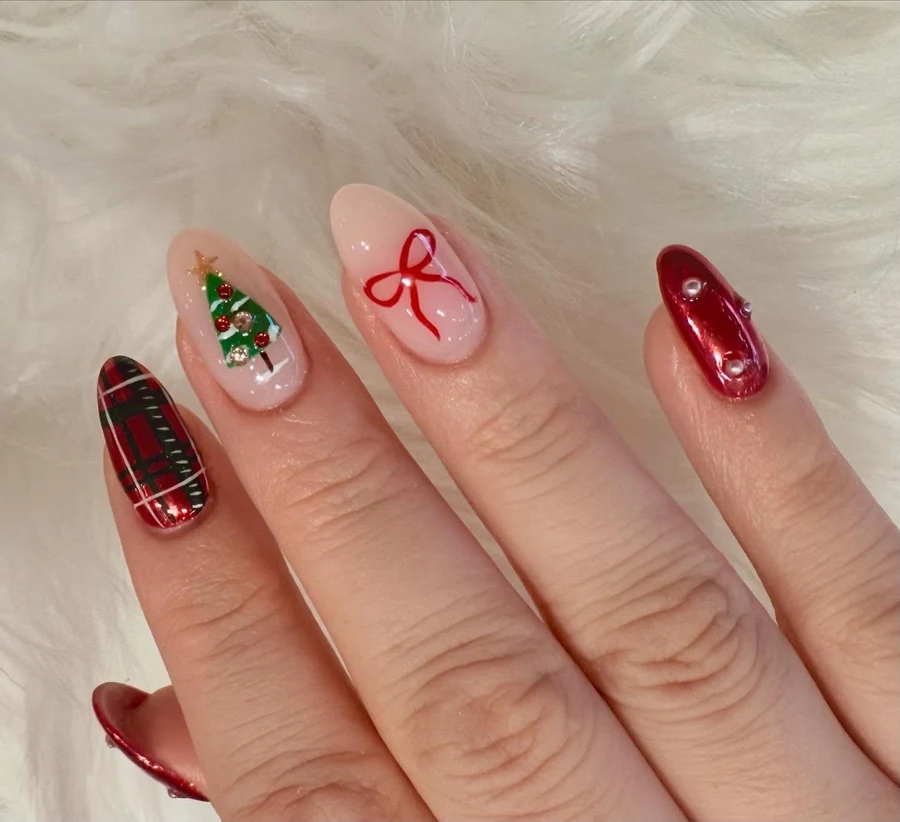
Brush the tree with a small brush, adding green branches before the rhinestones. Map the plaid lines with a thin brush, crossing red over black first. Draw the bow with a striping brush, adding two loops and two tails. Set the pearls with tweezers, pressing each one down into a tacky layer. Finish with a glossy top coat, because raised details can catch on fabric.
20. Nude Plaid Tips with Holly Berries
Pale nude covers most nails, leaving the tips for red plaid. Red and black lines cross the plaid tips in neat, even bands. Gold foil outlines also edge two nails, with small bead chains set along the tips. Holly leaves and red berries sit on nude nails, painted in fine detail. Light slides across the gloss, giving the set a bright, polished glow.
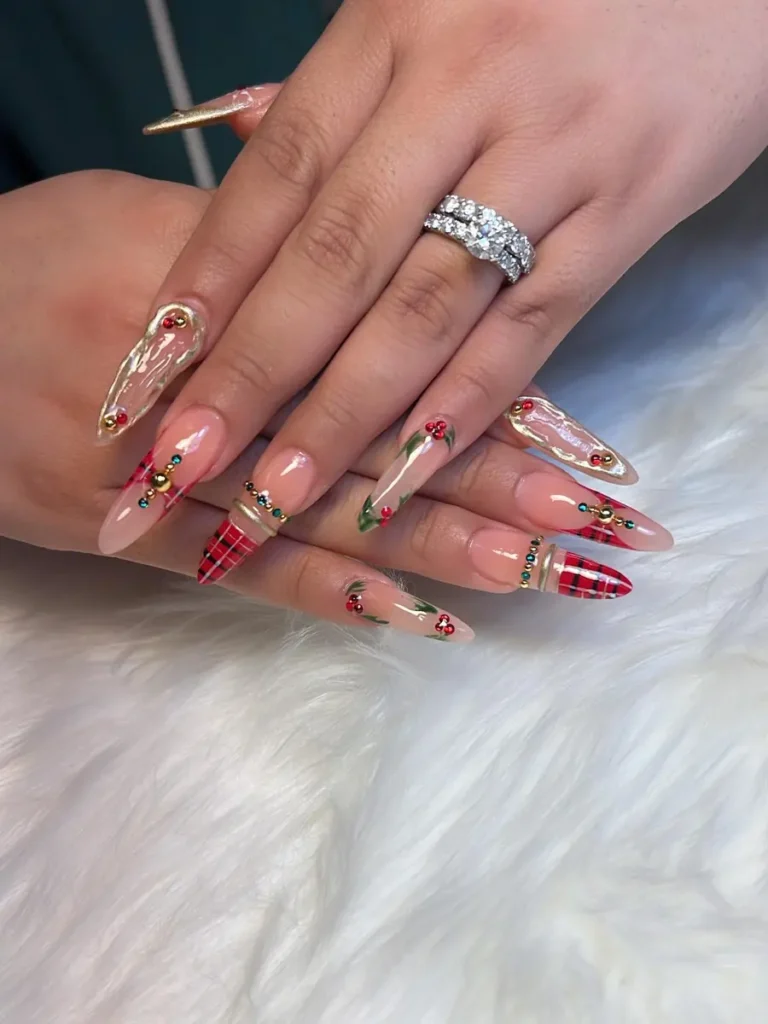
Apply a nude base first in two thin coats, letting each coat dry. Add red plaid tips, crossing dark lines evenly over the base first. Outline the tips in gold, pressing it gently into a tacky layer. Paint holly leaves in green, dotting red berries close beside them. Finish with a glossy top coat, because thin marks can lift without cover.
21. Buffalo Plaid Trees and Reindeer Stamping
Red and deep navy buffalo plaid covers four nails in bold, even checks. White trees also stand on two nails, stamped over the plaid in crisp silhouettes. Reindeer in white stand on the other two nails, set on snowy mounds. Faint script watermark sits on the skin between two fingers. Dark background keeps the plaid and white stamping clearly in focus.

Stamp the trees and reindeer with white polish, pressing the stamp firmly. Keep the stamp clean between nails, because dried polish blurs the print. Paint the plaid base first, letting each coat dry fully before stamping. Avoid thick coats, since thick polish pools at the cuticle and lifts. Seal the set with a glossy top coat, capping the free edge for extra wear.
22. Green Glitter with Red Bow and Plaid
Emerald green glitter coats two nails in a dense, sparkling finish. Red three-dimensional bows sit on the green, raised and glossy with flowing tails. Deep red glitter coats one nail in a bright, sparkling coat. Plaid also crosses nude nails in thin, even red, white, and green lines. White snowflakes sit on small red tips, crisp and sharp against the shine.

Pack green glitter onto the nails with a flat brush while the coat stays tacky. Attach the red bows with tweezers, pressing each one gently into wet top coat. Add red glitter to one nail, blending it upward from the tip. Map the plaid lines with a brush, crossing green over white first. Seal it with a clear top coat, because raised details can catch on fabric.
23. Metallic Red with Silver Checkerboard Plaid
Deep mirror red coats the nails in a bright, reflective gleam. Red and silver checkerboard also fills two nails in shiny, mirror-bright squares. Multicolored lights blur softly behind the hand, giving the photo a bright, festive glow. Red and clear stone bracelet rests on the wrist, catching light. One single hand shows the set, with five nails clearly in focus.
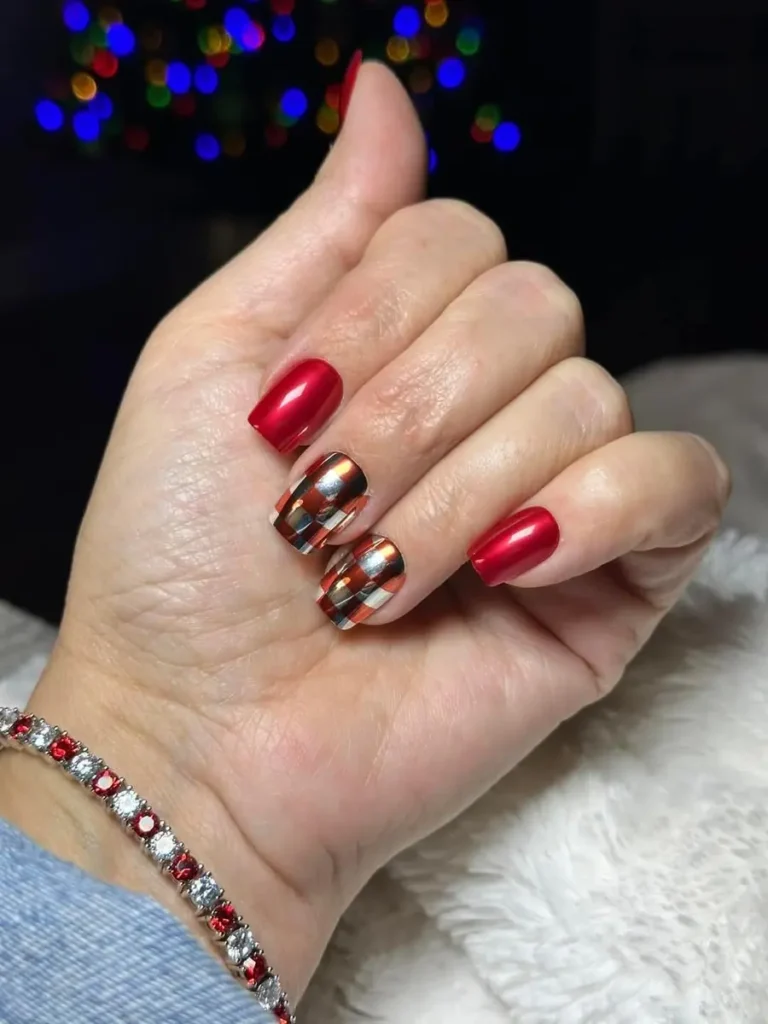
Wipe the nails with a soft cloth after wear, keeping the mirror shine clear. Buff the checkerboard with a sponge applicator, keeping each square even. Seal the set with a glossy top coat, because mirror finishes show scratches fast. Cap the free edge, and red shades show chips first at the tips. Store the set away from rough fabric, keeping the shine bright.
24. Red Glitter with Gold Outlined Bows
Sparkle fills the set, with bright red glitter glowing against soft tree lights. Gold-outlined bows also sit on nude nails, each one drawn in thin metallic lines. Red glitter coats most nails in a dense, sparkling finish. Nude nails break the red with pale, calm, quiet spaces. Tree lights blur softly behind the hands, giving the photo a warm, festive glow.
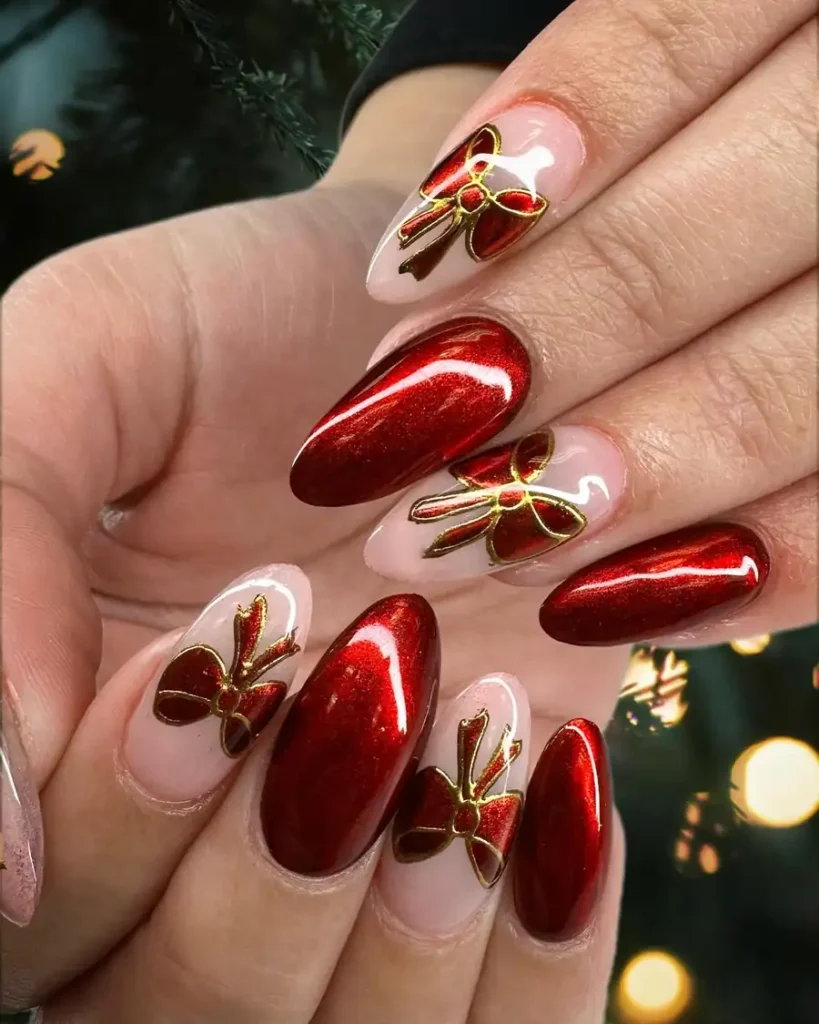
Pack red glitter onto most nails with a brush while the coat stays tacky. Draw each bow with a thin brush, adding two loops and two tails. Swap the bow color on the second hand, keeping the set balanced. Top the set with a glossy coat, because glitter edges can catch on fabric. Wear the set with deep green or gold, letting the red stay the lead.
Closing
Pick one finish as the lead for the set, letting the other details support it. Red chrome suits bold looks, while green cat-eye suits quieter ones. Keep glitter and plaid on a few nails, so the rest of the set stays calm. Thin coats dry more evenly, and capping the free edge helps color last. Choose the Christmas Nail Inspo design that suits daily routines, and wear it with care.



[…] December nails reward a little planning before the first coat goes on. Pick one main colour for the week, then let one accent nail carry the detail. Thin coats dry more evenly, so patience at the start saves fixes later. Cap the free edge with each coat, because that small step cuts down chipping. Keep clear top coat nearby for quick repairs through busy days. Good prep and steady upkeep keep the manicure looking neat right into January. […]
[…] nails move with the light, which suits quiet evenings and crowded gatherings alike. A polished chrome holiday set stays the star of every […]