

Mirror chrome, dense glitter, cat-eye shimmer, and foil veins all shine brighter when Silver Christmas Nails set the tone for the holidays. Festive art like reindeer faces, pinecones, bell charms, and a rhinestone wreath joins plain metallic finishes for extra variety. Some sets stay pure silver, while others mix pale blue, soft pink, or evergreen. Short round nails, almond shapes, long stilettos, and coffins all get a turn, so every length has options. Each idea explains the finish, the art, and the exact wording to bring to a nail tech, which turns a vague screenshot into a clear plan for a party night or a quiet winter week.
Silver Chrome Mirrors on Almond Nails
Mirror shine covers each almond nail from base to tip in a silver coat. Length ends just past the fingertip, with a soft point at the centre of each tip. Light moves across the surface in a bright band. No art sits on the nails, so the chrome finish carries the whole design. Edges stay clean, and the shine reads the same from every side.
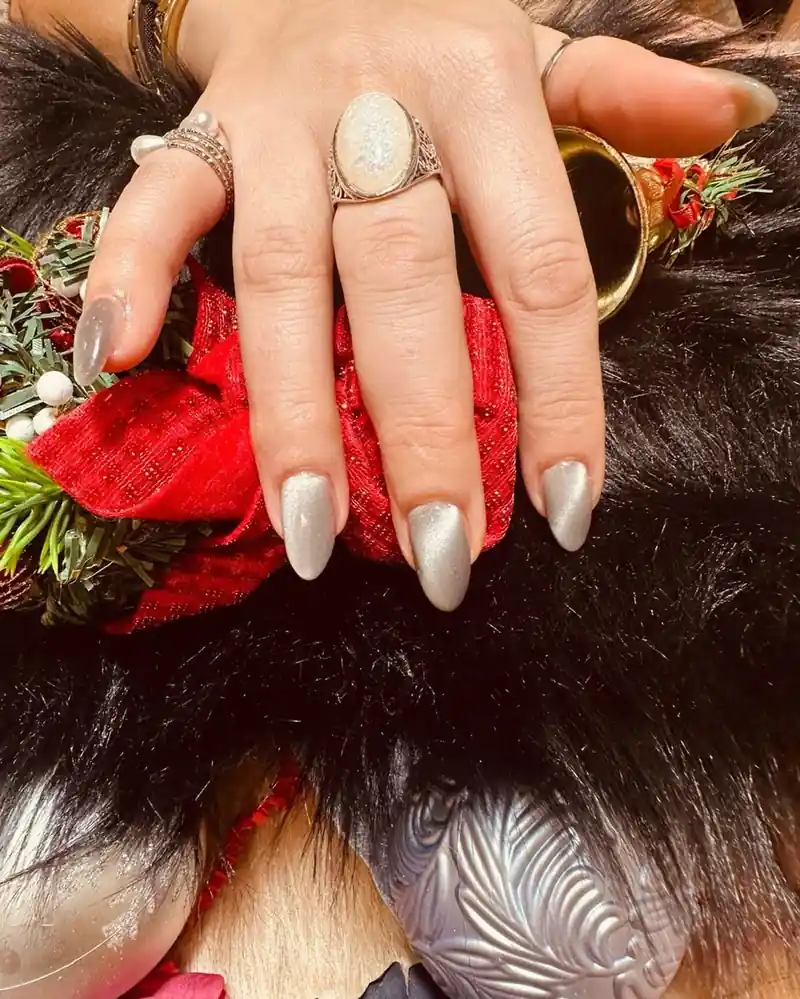
Ask for chrome powder over a dark base, since dark polish makes the shine stronger. Nail techs buff the powder into a sticky clear coat, then seal it with one more clear layer. Keep hands off rough surfaces for a day, because fresh chrome can scratch while the seal sets. Wear gloves for washing up, as water and soap wear the shine down fast. Chips show at the tips first, which means a fill should come before gaps grow wide.
Silver Glitter Nails With a White Snowflake Accent
White snowflake art sits on the ring finger, drawn in fine lines against silver glitter. Each coffin nail carries dense silver sparkle from base to tip. Length ends well past the fingertip, with flat squared tips. Light catches the glitter at every turn, and the sparkle reads bright against the white art. Silver fills the other nails fully, with no bare gaps near the cuticle.
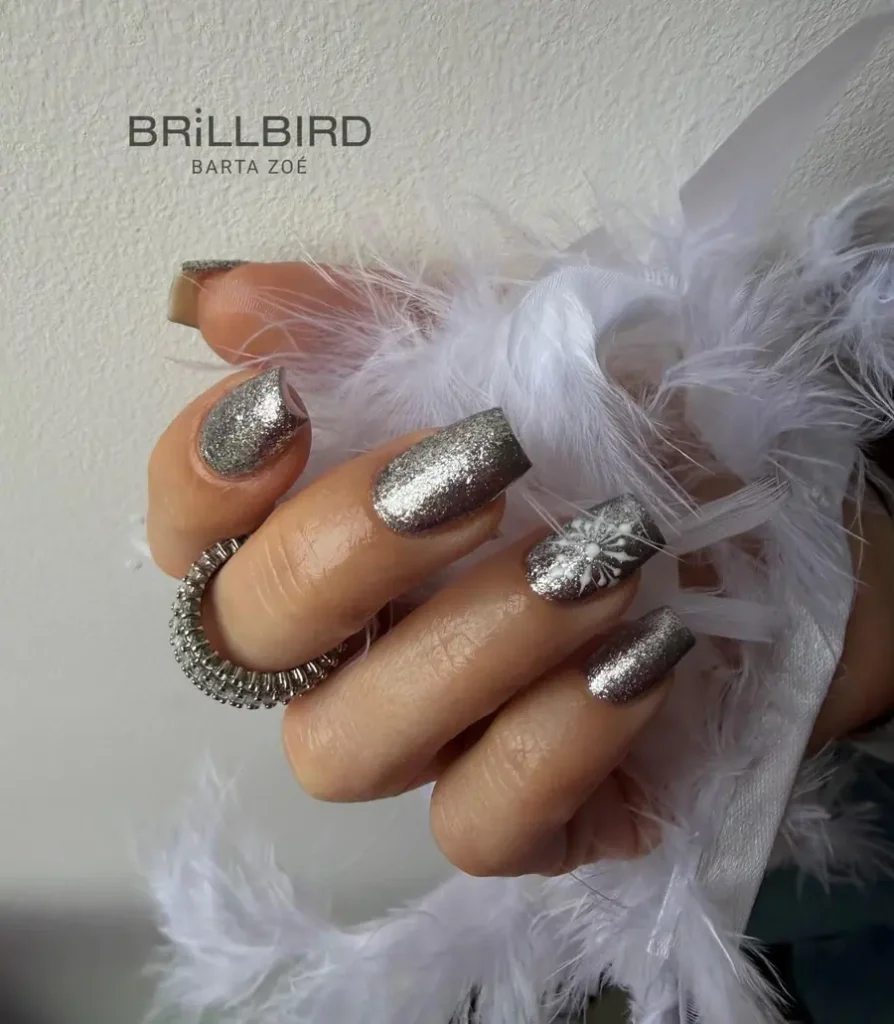
Tell a nail tech to cover every nail in full glitter, with one hand-painted accent nail. Fine brushes paint the snowflake, while a dotting tool adds the small centre dot. Shorter nails hold this look well, since less length means less glitter to catch on fabric. Swap the accent to the middle finger, but keep the art on one nail only. Seal the art with two clear coats, because glitter edges can lift without a thick seal.
Nude to Blue Tips With Silver Glitter at the Cuticle
Soft nude sits near the cuticle, then fades into pale blue at the tips. Silver glitter gathers thick at the base of each nail, and thins toward the middle. White snowflakes rest on two nails, with fine lines and small dots. Oval shape keeps the long length soft at the tip, and each nail ends in a smooth curve. Light picks up the glitter near the base before it reaches the blue tips.
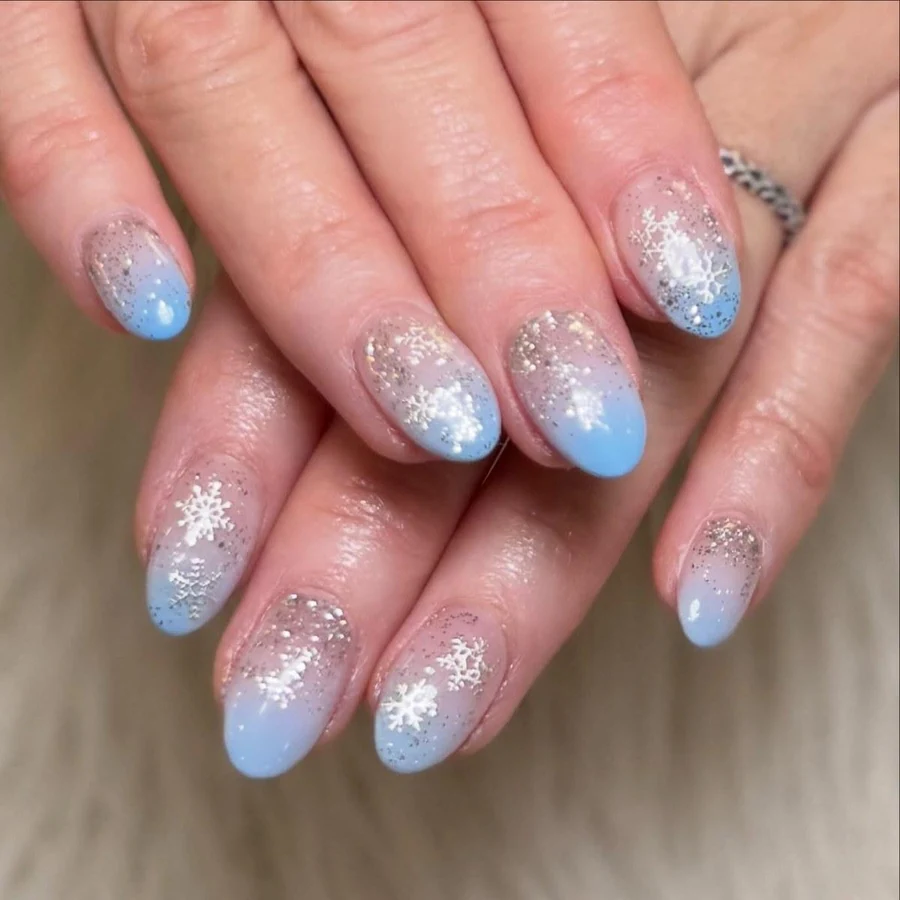
Request a glitter fade that starts heavy at the base and thins toward the middle. Sponges layer the glitter in thin coats, which builds depth without a thick edge. Long nails suit this fade, since the extra length gives the glitter room to thin out. Shorter nails need a lighter hand, because dense glitter can crowd a short nail bed. Keep the tips sealed with a clear coat, which keeps the edge smooth.
Snowflakes Scattered Over Silver Glitter
Fine silver glitter covers each short nail in a dense, even coat. White snowflakes sit on two nails, drawn in thin lines. Oval shape keeps the tips softly rounded, and length ends just past the fingertip. Light bounces off the glitter in small bright points, which shift as the hand turns. Glitter grains sit close together, with no bare polish showing through.
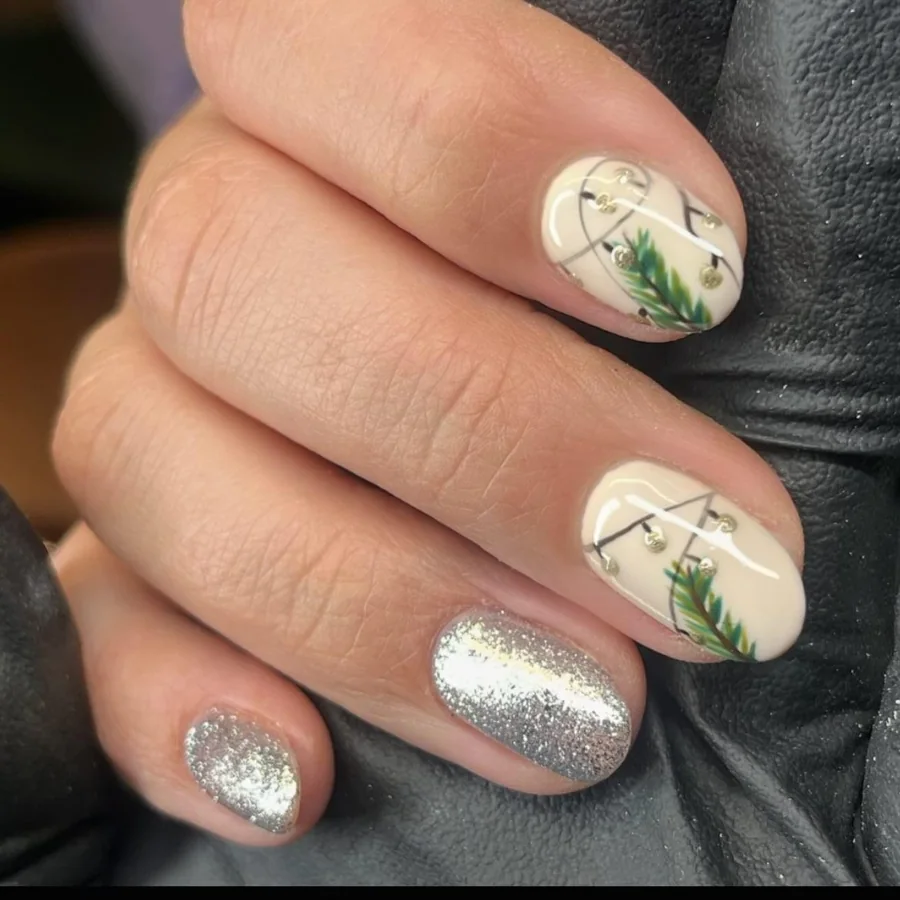
Book a nail tech for fine glitter, since fine grains sit flat and catch less. Nail techs paint the snowflakes with a thin brush after the glitter dries. Keep a clear coat on top, because glitter edges lift fast without a seal. Avoid picking at the tips, as loose glitter pulls away with the top layer. Reapply a clear coat after a week to hold the shine through the second week.
Nude Nails With Silver Chrome Tips
Most of each short round nail holds nude polish, and silver chrome caps the tips. Length ends just past the fingertip, and each tip curves softly. Chrome tips shine like metal, and the line between nude and silver stays crisp. Silver wraps the tip edge fully, so it shows from every side. Cuticles sit neat, with no polish pooling near the skin.
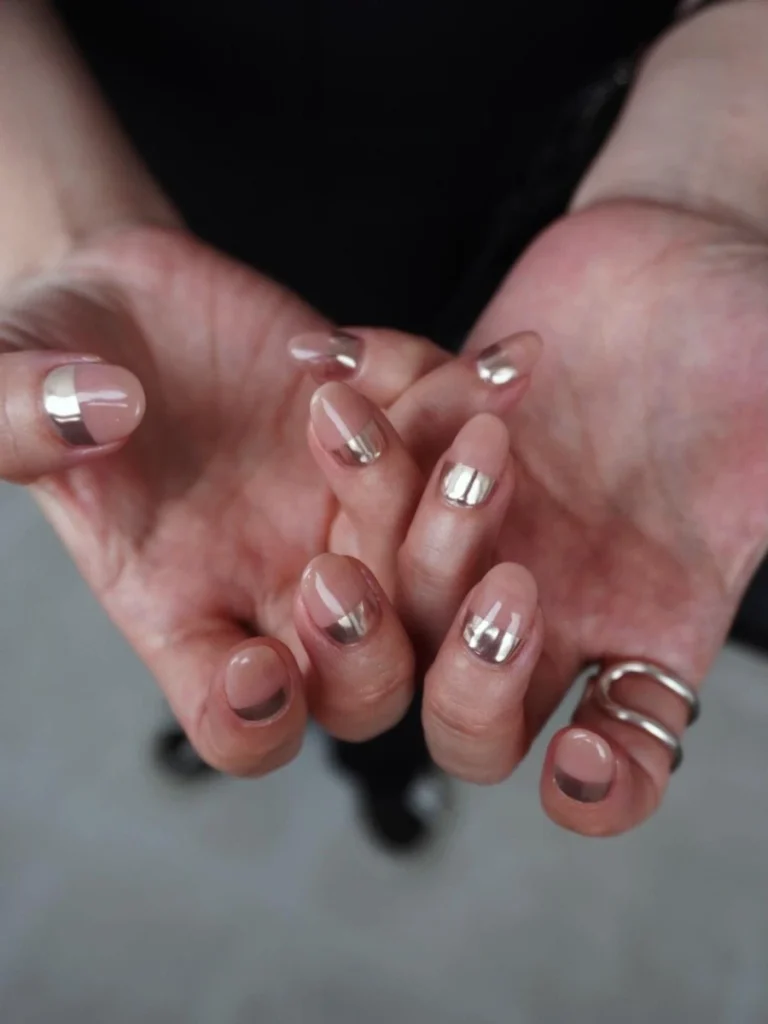
Choose a chrome tip kept to the very end of the nail. Nail techs dust chrome powder over a sticky clear coat and seal it clear. Short nails suit this style, since a thin tip line keeps the nail looking long. Try a wider silver band for more shine, but keep the line crisp at the join. Wipe the tips clean each night to keep the chrome bright.
Pale Pink Nails With Silver Stars, a Tree, and a Bow
Stars in silver, a white tree, and a white bow sit on separate nails over pale pink. Glitter fades up from the tips, dense at the edge and thin near the base. Short square nails keep the art clear, and length ends just past the fingertip. One nail holds a small white tree, while another holds a neat bow. Light catches the glitter at the tips first, then moves across the pink base.
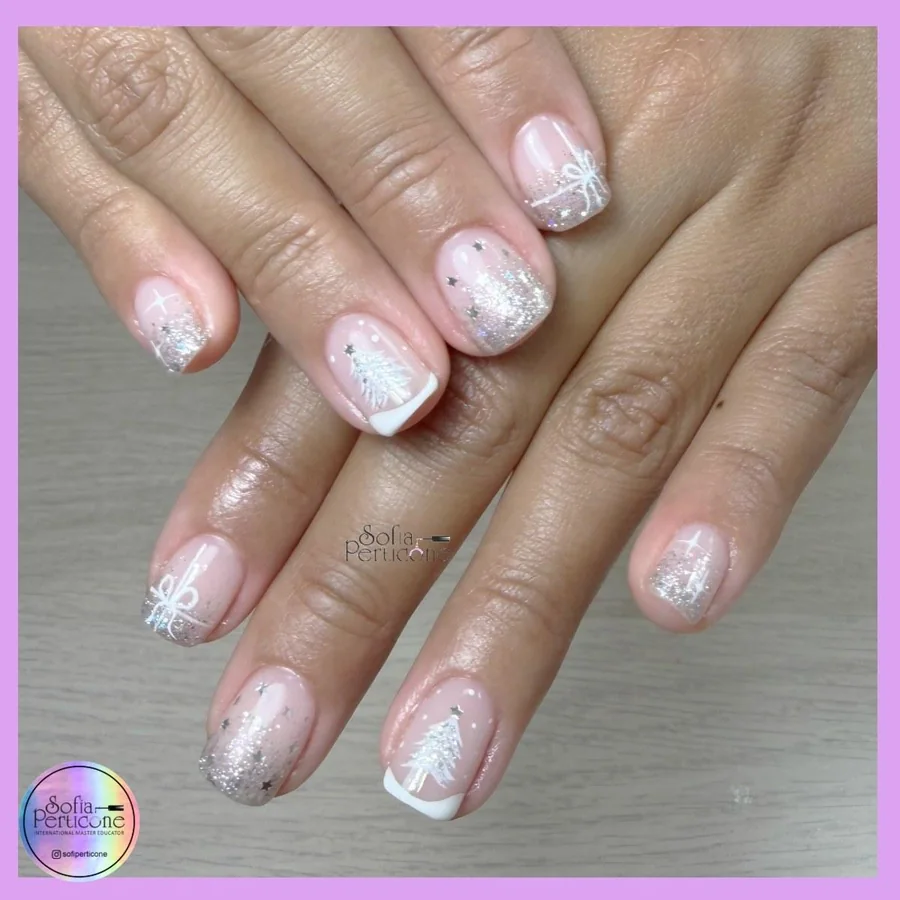
Name the glitter fade first, with the art on top once the glitter dries. Thin brushes draw the stars, tree, and bow, while a dotting tool sets the star centres. Keep each art piece on its own nail, because crowded art blurs at small size. Short nails suit this set, since the art stays readable on a short plate. Seal with a thick clear coat, which leaves the raised glitter smooth.
Silver Glitter Ombré Tips on Long Almond Nails
Pale pink covers the base of each long almond nail, then gives way to silver glitter. Glitter starts soft near the middle and grows dense at the very tip. Length ends well past the fingertip, with a tapered point at each end. Light hits the glitter tips first, and the shine reads brightest at the edges. Bare polish shows nowhere, so the fade carries the whole design.
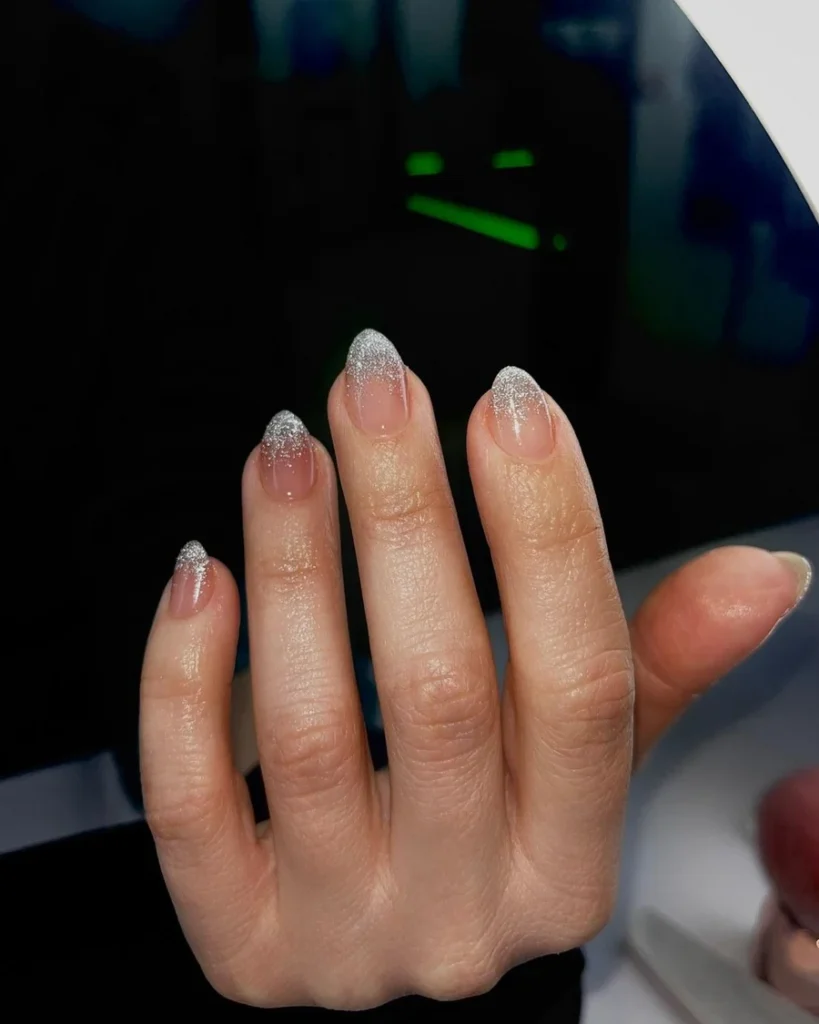
Describe a glitter fade built up in thin layers, with the densest glitter at the tips. Sponges press the glitter on in light taps, which keeps the fade soft. Long nails suit this fade, since the length gives the glitter room to thin out. Keep the tips sealed, because glitter wears first at the very edge. File snags gently with a soft file to keep the glitter in place.
A Reindeer Face With Silver Flakes on Nude Nails
Dark lines draw a small reindeer face on the ring finger. Silver glitter covers the index nail fully, while flakes scatter across the middle nail. Nude beige shimmer fills the other nails, with a glow near the base. Short squoval nails keep the art clear, and length ends at the fingertip. Square tips with softly rounded corners frame the face. Light catches the glitter nail first, then the flakes on the next nail.
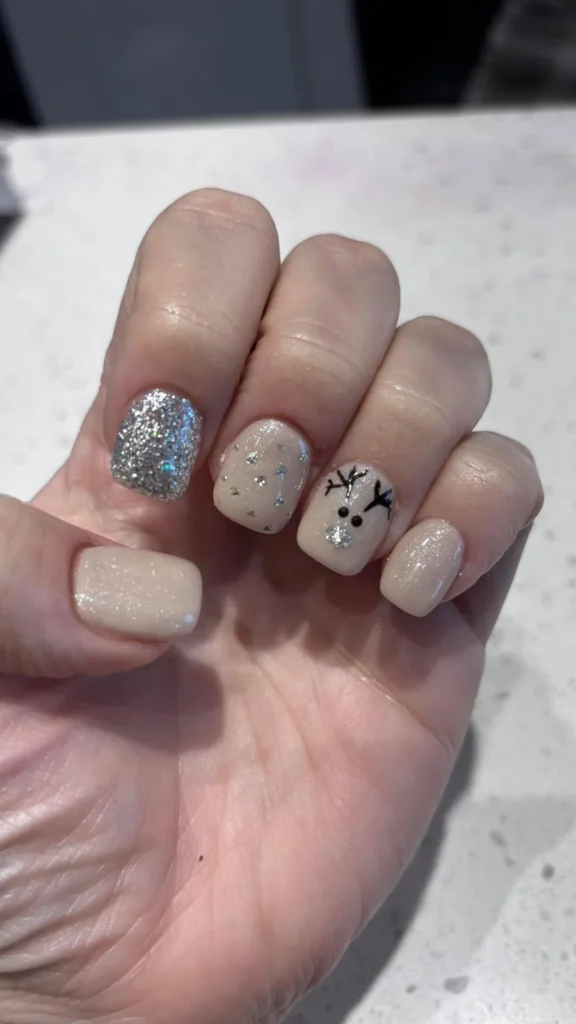
For the reindeer, keep it on one nail only, with the rest kept plain. Thin brushes draw the face, while a dotting tool sets the eyes. Short nails suit this art, since the small face fits a short plate well. Swap the face to the middle finger for a fresh placement, but keep the glitter on one nail. Seal the art with two clear coats, because fine lines chip fast without a seal.
Hand-Painted Blue Snowflakes Over Silver Grey
Grey silver covers each long pointed nail from base to tip. Blue snowflakes sit on two nails, painted in fine lines. White dots scatter between the flakes, with tiny star shapes near the tips. Length ends well past the fingertip, and each nail tapers to a sharp point. Light moves across the silver base first, then catches the blue art.
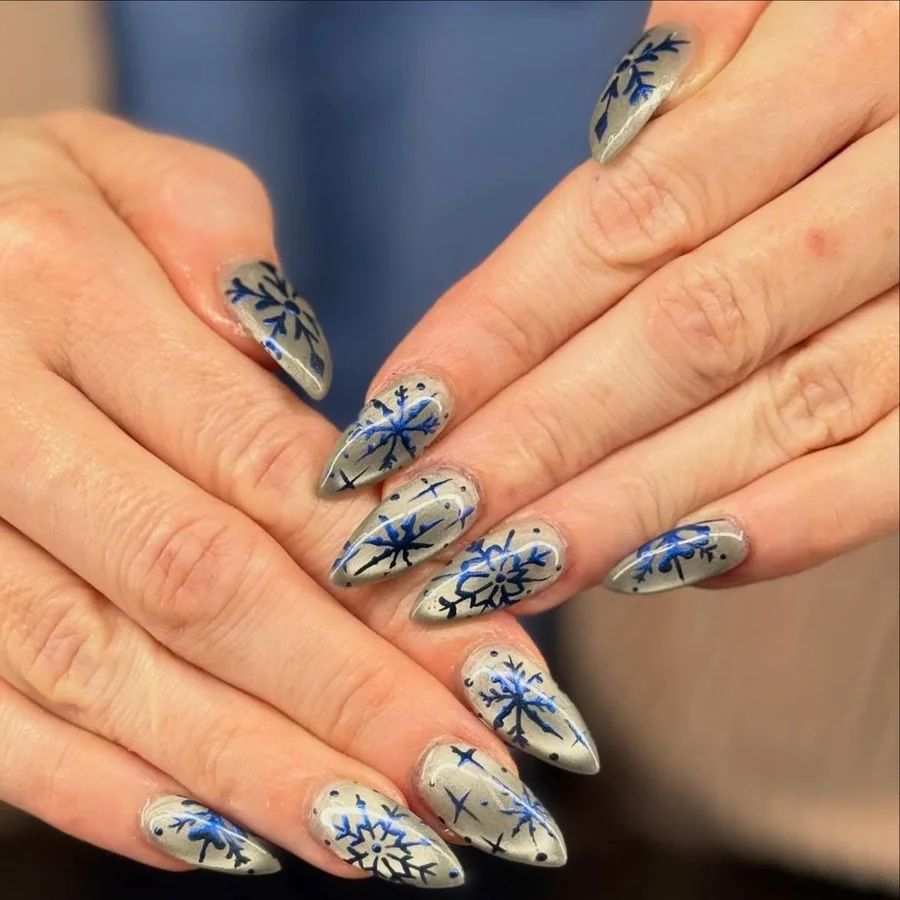
Bring the snowflakes to life with hand-painted flakes and small dots between them. Fine brushes paint each flake, while a dotting tool adds the small dots. Long nails suit this art, since the length gives each flake room to show. Shorter nails need fewer flakes, because crowded art blurs at small size. Seal the art with a clear coat, which keeps the lines sharp.
Pink Above, Silver Below on Short Round Nails
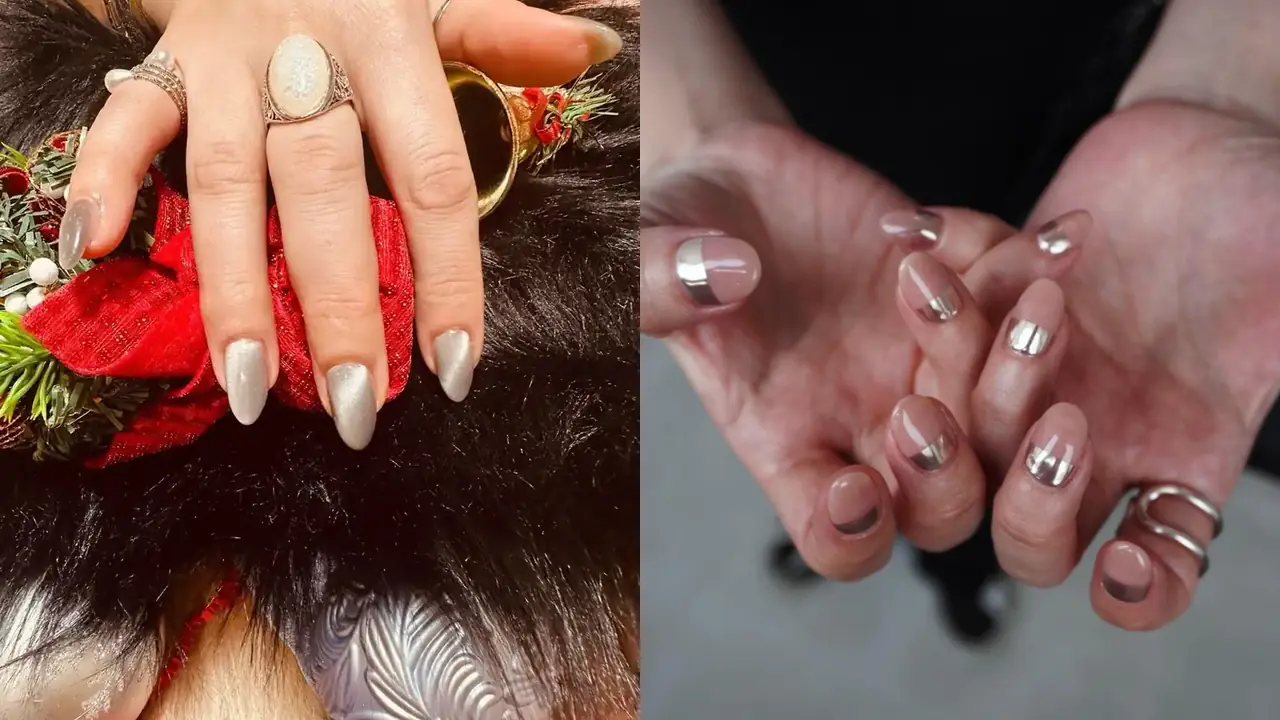
Light pink fills the upper half of each short round nail. Silver fills the lower half near the cuticle. Metallic silver shines like a mirror, and the line between the two halves stays clean. Length ends just past the fingertip, with a gentle curve on every tip. Bare polish shows nowhere, so the two-tone split carries the whole design. Light hits the silver half first, then moves up to the pink.
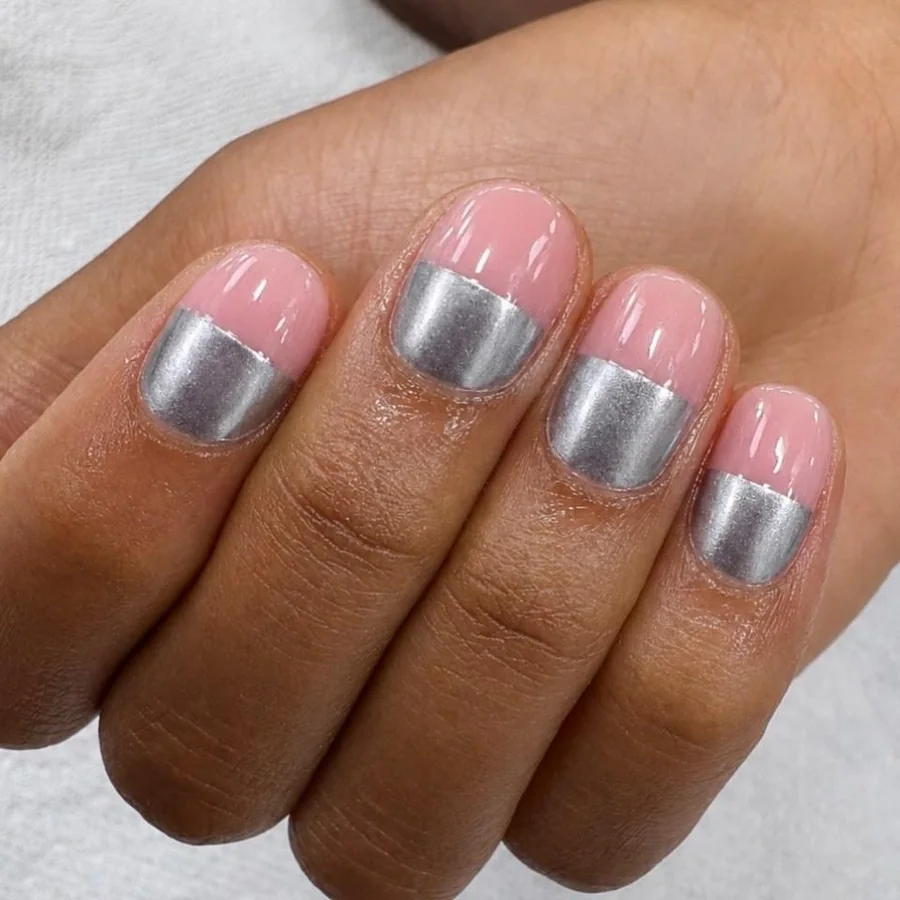
Show a nail tech a reverse French, a flipped tip style with silver at the base. Nail techs paint the silver first and add the pink over the top half. Keep the line between halves crisp, since a wobbly join shows fast on short nails. Short nails suit this split, because the small surface keeps both halves even. Wipe the silver clean each night to keep its mirror shine.
Black, White, and Silver Holiday Characters on Stiletto Nails
One long stiletto nail holds a 3D Santa head, with a white beard and black hat. White reindeer face fills another nail, with black antlers and closed eyes. Candy canes and peppermint swirls cover a third nail in black and white. Silver glitter swirls run down one nail, while snowflakes sit on another. Each nail ends in a sharp point, and length runs well past the fingertip.
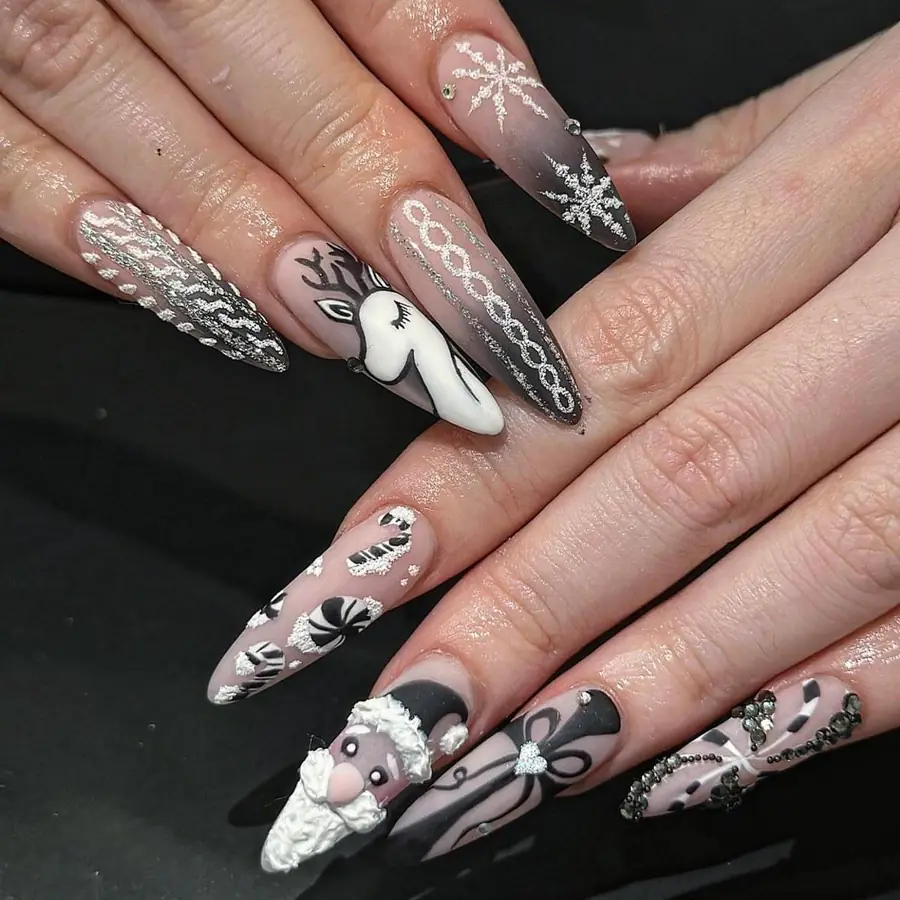
Start with the character art on two nails only, with the rest kept simpler. Fine brushes paint the faces, while a dotting tool sets the small eyes. Keep the busiest art near the tips, since heavy art near the base lifts fast. Shorter nails need fewer characters, because each face needs room to show. Seal with a thick clear coat, which leaves the raised parts smooth.
Thin Silver Glitter French Tips on Pale Pink
Glitter in silver lines the tip of each short squoval nail in a neat edge. Pale pink fills the rest of each nail, with a soft glow near the base. Length ends just past the fingertip, with corners softly rounded. Light catches the glitter tips first, and the shine reads bright against the pink. No art sits on the nails, so the thin glitter line carries the whole design.
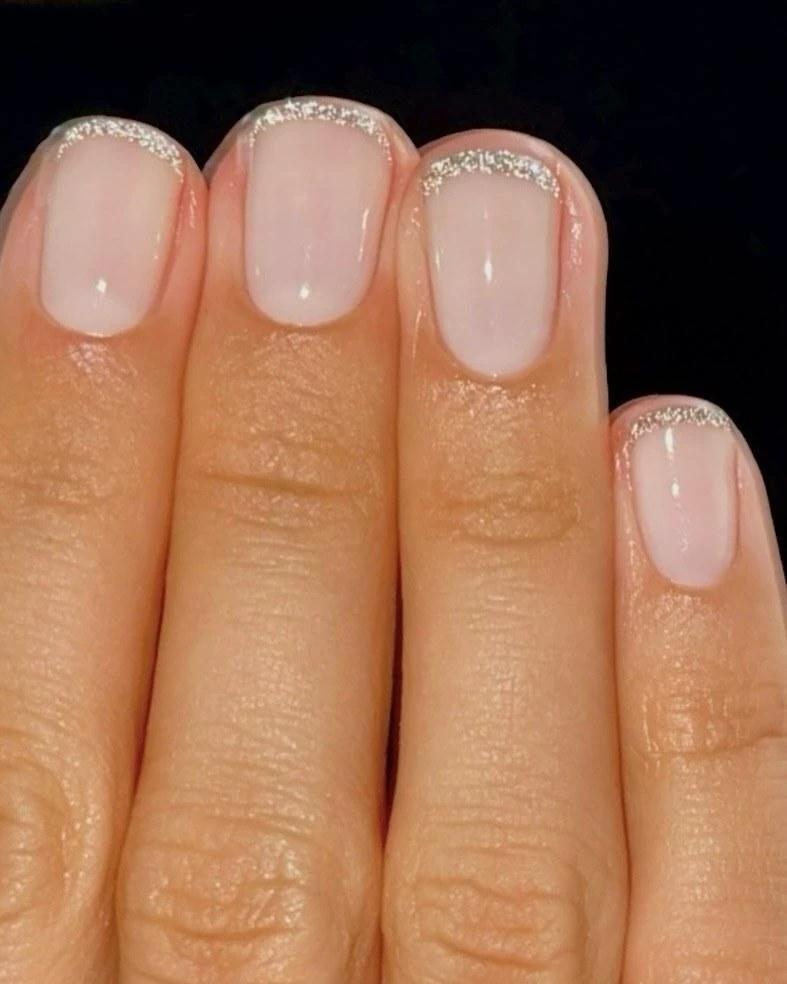
Plan a French tip in silver glitter, a thin line at the very end of the nail. Thin brushes paint the tip line, while a clean brush sharpens the edge. Keep the line thin, since a wide band hides the pale pink base. Short nails suit this style, because the short length keeps the line crisp. Wipe the tips clean each night to keep the glitter bright.
Embossed White Reindeer on Silver Glitter Nails
Raised white reindeer face sits on the ring finger, lifted from the nail in soft relief. Silver glitter covers the other nails fully, with dense sparkle from base to tip. Long square nails keep the art clear, and length ends well past the fingertip. Closed eyes and a gold nose mark the reindeer face, with small antlers above. Light catches the glitter first, then the raised white face.
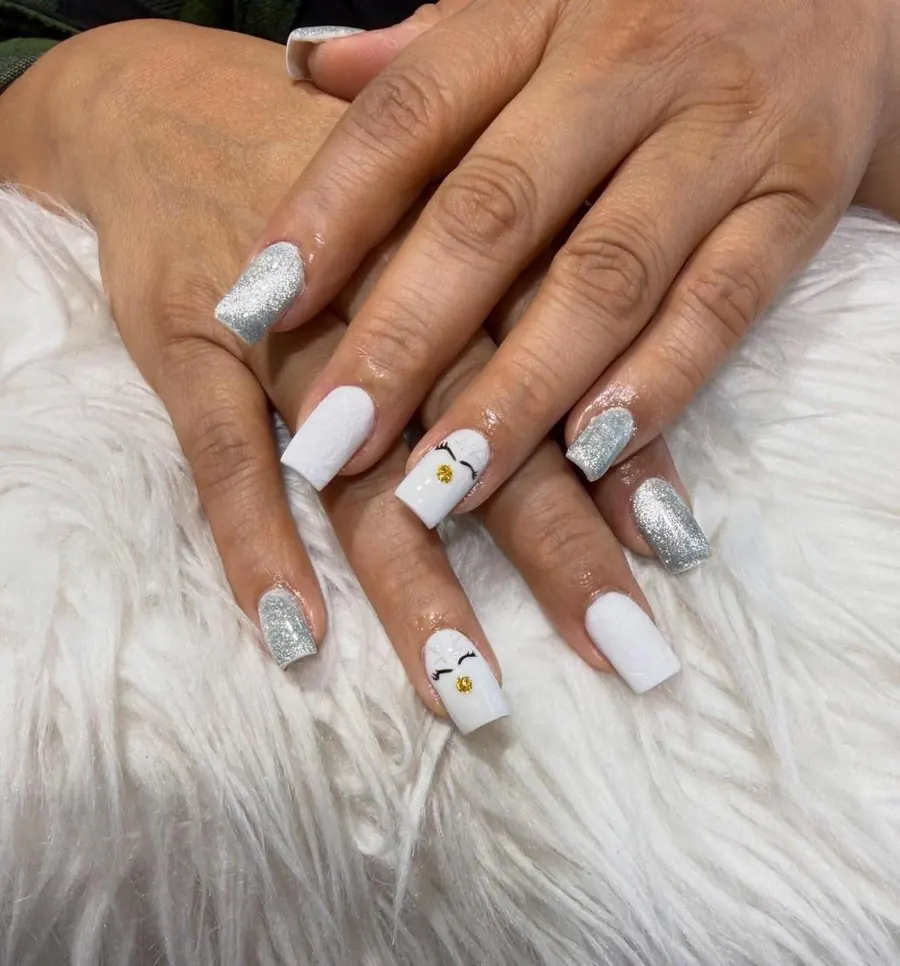
Pick the reindeer in raised white, with the rest in full glitter. Fine brushes draw the face, while a dotting tool sets the gold nose. Keep the art on one nail only, because a second face crowds the set. Long nails suit this art, since the length gives the face room to show. Seal with a thick clear coat, which keeps the raised face smooth.
Diagonal Silver Stripes Across Glossy White
Glossy white covers each long nail, with a diagonal silver glitter stripe on every nail. Silver stripes run from one side to the other, thick at one end and thin at the other. Flare shape widens toward the tip like a fan, with a flat squared end. Length ends well past the fingertip, and the stripe follows the full nail. Light hits the silver stripe first, and the shine reads bright against the white.
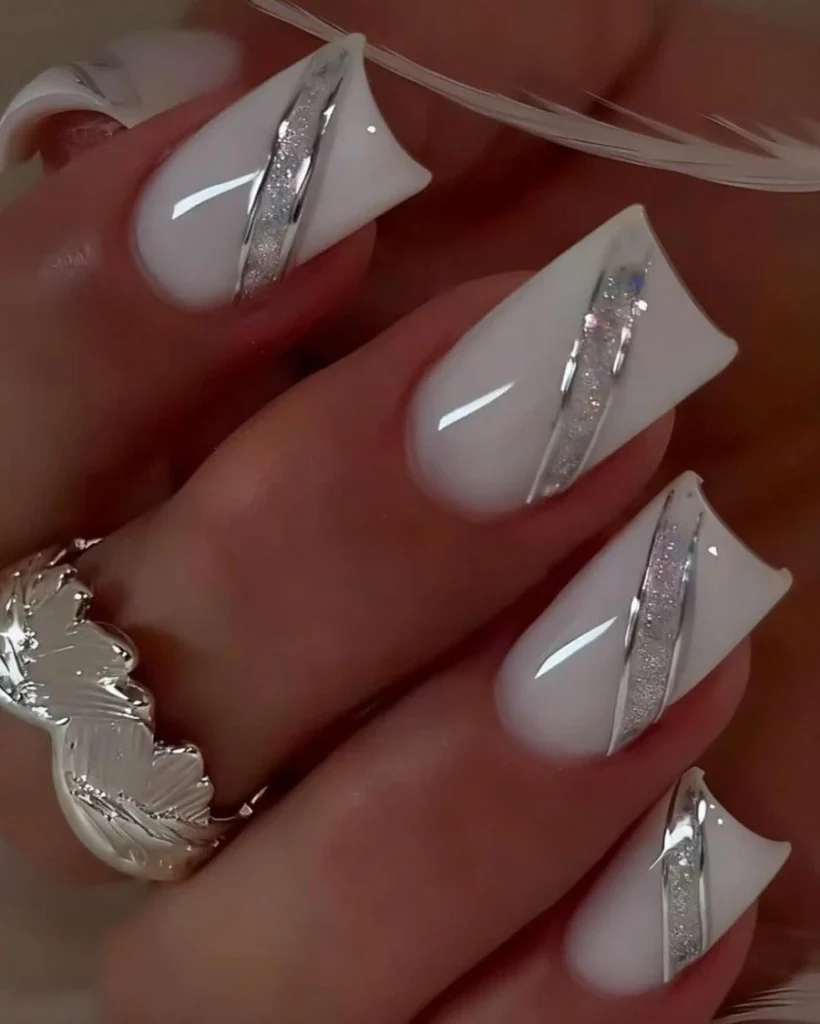
Mention a diagonal stripe in silver glitter over a white base. Thin brushes paint the stripe, while tape keeps the edges straight. Keep the stripe the same width on each nail, since uneven stripes show fast. Long nails suit this design, because the length gives the stripe room to run. Seal with a clear coat, which leaves the glitter edges smooth.
Silver Cat-Eye Shimmer on Long Pointed Nails
Metallic silver shimmer covers each long pointed nail, with a light stripe that shifts as the nail moves. Shimmer pools near the centre of each nail, then fades toward the edges. Length ends well past the fingertip, and each nail tapers to a point. No art sits on the nails, so the shimmer carries the whole design. Edges stay clean, and the silver reads the same on every nail.
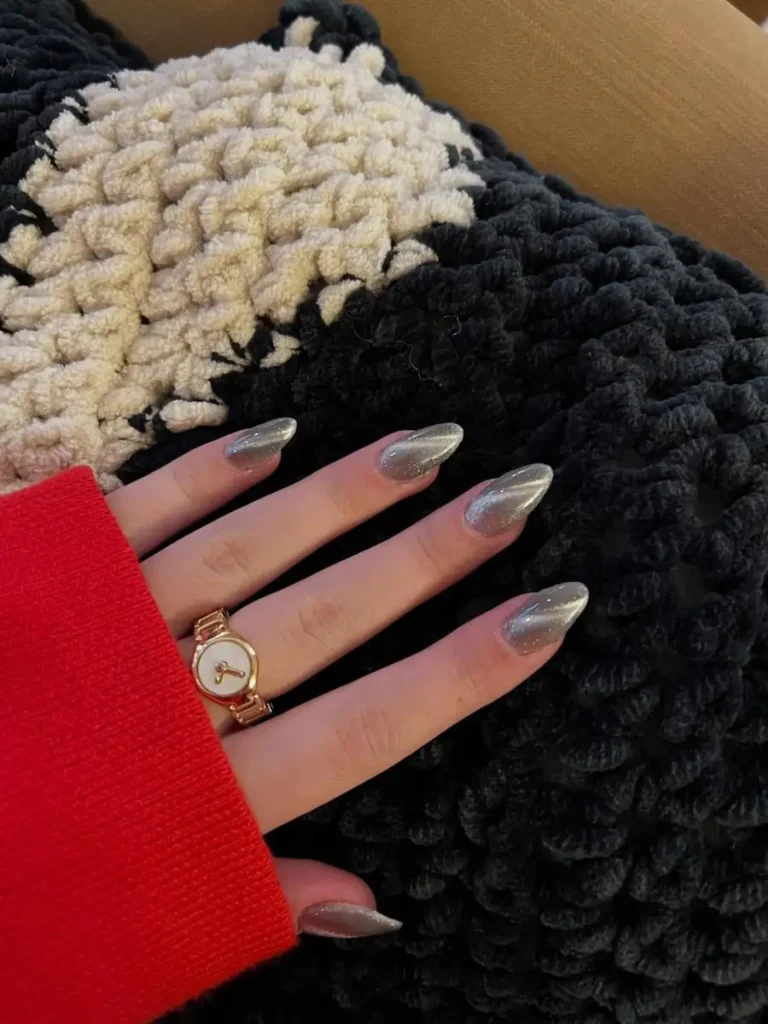
Order a cat-eye finish, made with a magnet held over wet polish. Nail techs move the magnet close and lift it to set the stripe. Long nails suit this finish, since the length gives the stripe room to show. Shorter nails need a lighter hand, because a strong stripe can crowd a short nail. Keep the nails sealed with a clear coat, which keeps the shimmer bright.
Blue Ombré Tips With Silver Lines
Bare polish fades into soft blue at the tips of each long stiletto nail. Thin silver chrome lines run along the sides, from base to tip. Length ends well past the fingertip, with a fine point at each end. Light catches the silver lines first, then the blue tips. No art sits on the nails, so the fade and lines carry the whole design.
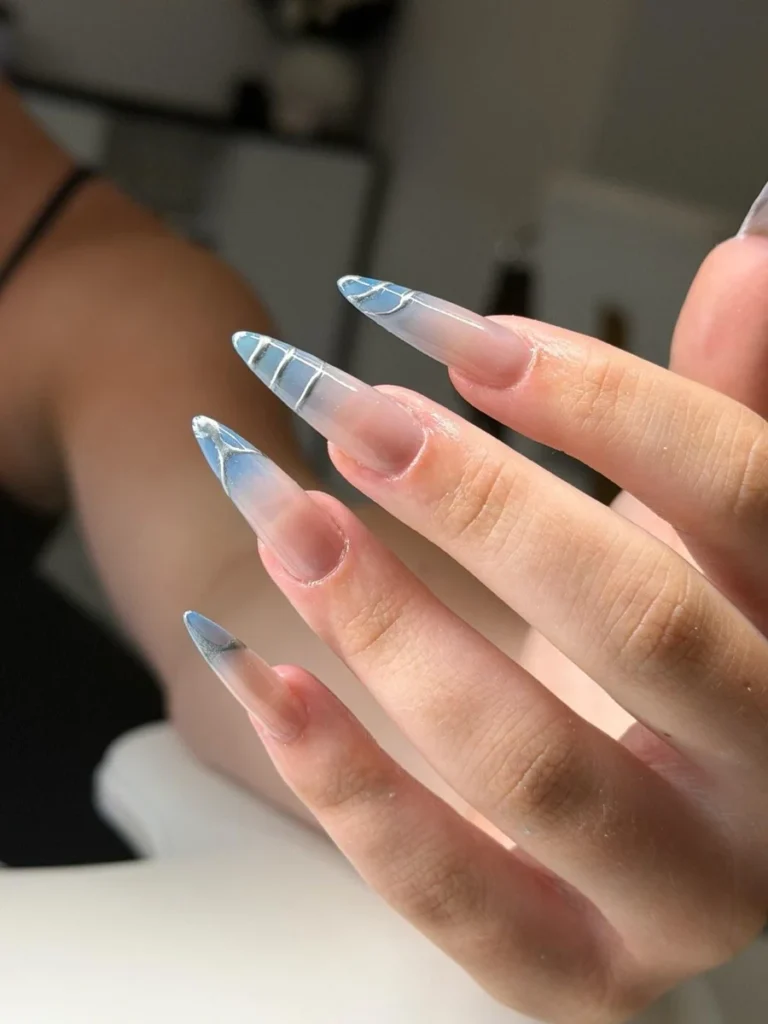
Seek a blue ombré fade with thin silver lines along the sides. Sponges blend the blue into the nude, while a thin brush draws the lines. Long nails suit this fade, since the length gives the blue room to blend. Swap the blue for pale pink for a softer look, but keep the silver lines. Seal with a clear coat, which keeps the lines sharp.
Silver Glitter Tips, Foil, and Rhinestones on Very Long Stilettos
Tips in silver glitter cap each very long stiletto nail, with foil pieces scattered near the base. Rhinestones sit on two nails, set in small clusters near the cuticle. Sheer nude fills the rest of each nail, with a soft glow near the base. Length ends far past the fingertip, with a sharp point at each end. Light catches the rhinestones first, then the glitter at the tips.
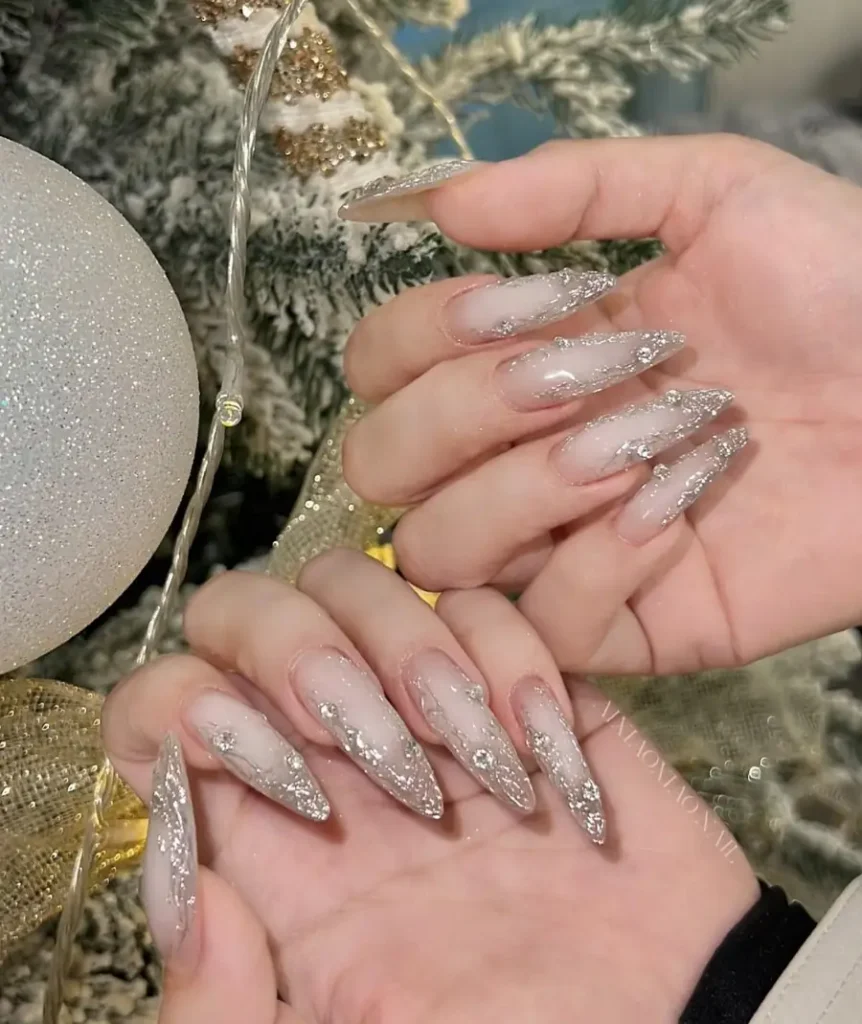
Note the glitter tips with foil and rhinestones kept to two nails. Nail techs set the stones in gel and cover them with a thick coat. Keep the stones away from rough fabric, since snags pull them off fast. Very long nails need care at the tips, because the length catches on things. Check the stones each night to catch loose ones before they fall.
Silver Chrome Sunburst Outlines on Sheer Nude
Metallic silver chrome outlines each short oval nail, with rays that spread from the centre. Sheer nude fills the space inside each outline, with a soft glow near the base. Length ends just past the fingertip, with each tip softly curved. Light hits the chrome rays first, and the shine reads bright against the nude. No art sits inside the outlines, so the chrome frame carries the whole design.
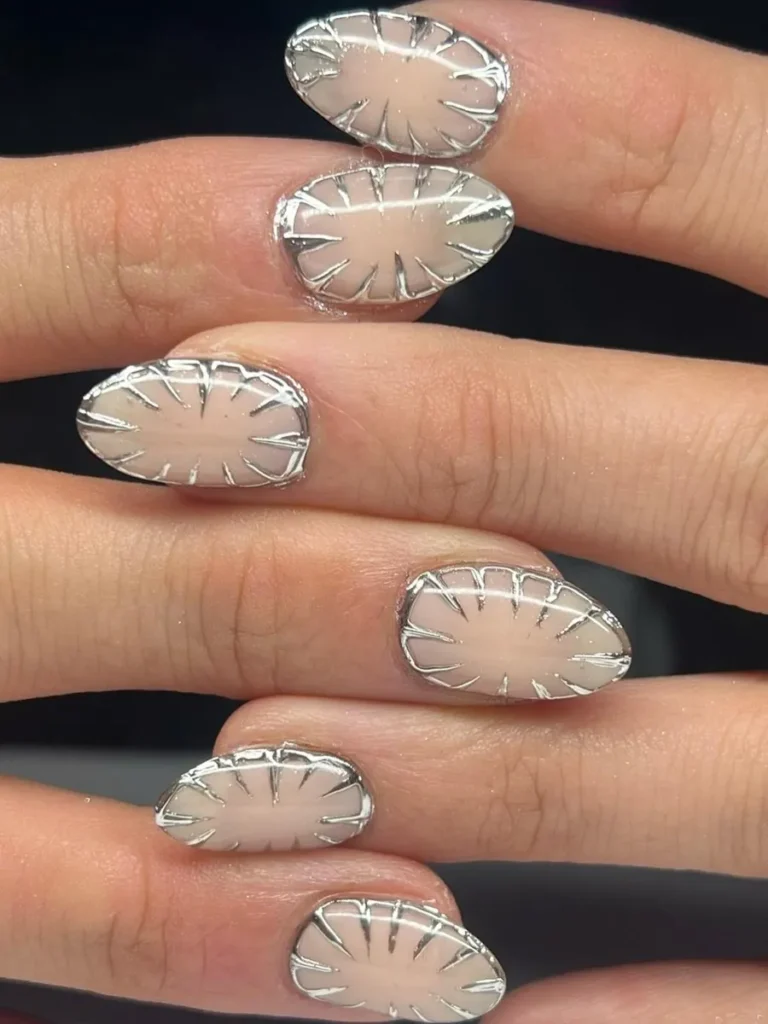
Point to a chrome outline with rays spread on a sheer nude base. Thin brushes draw the rays, while a dotting tool sets the centre point. Short nails suit this design, since the small surface keeps the rays even. Keep the lines thin, because thick lines crowd a short nail. Seal with a clear coat, which keeps the chrome bright.
White Marble With Silver Veins
Creamy white covers each short squoval nail, with silver foil veins that branch across the surface. Veins run thin in some spots and thick in others, like cracks in stone. Length ends just past the fingertip, and the corners round off gently. Light moves across the white base first, then catches the silver veins. No art sits on the nails, so the marble pattern carries the whole design.
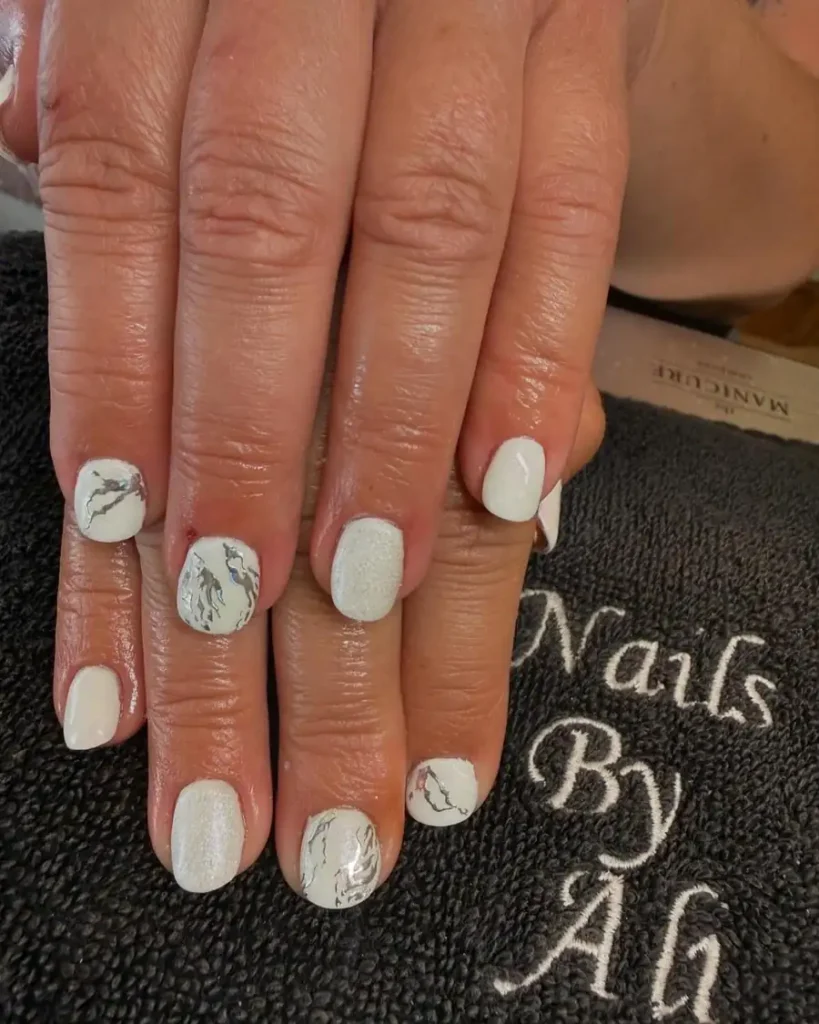
Share a white marble base with the thin silver foil veins. Thin brushes draw the veins, while a sponge softens the white base first. Keep the veins uneven and varied, since straight lines look stiff on marble. Short nails suit this pattern, because the small surface keeps the veins clear. Seal with a clear coat, which leaves the foil smooth.
Silver Glitter With Pinecones and Evergreen
Brown pinecones sit on silver glitter nails, with dark green evergreen branches around them. Silver glitter covers the base of each short square nail fully, with no bare gaps. Pinecones show orange highlights, with small scales drawn in fine lines on each cone. Length ends just past the fingertip, and each tip stays flat and square. Light catches the glitter first, then the green branches.
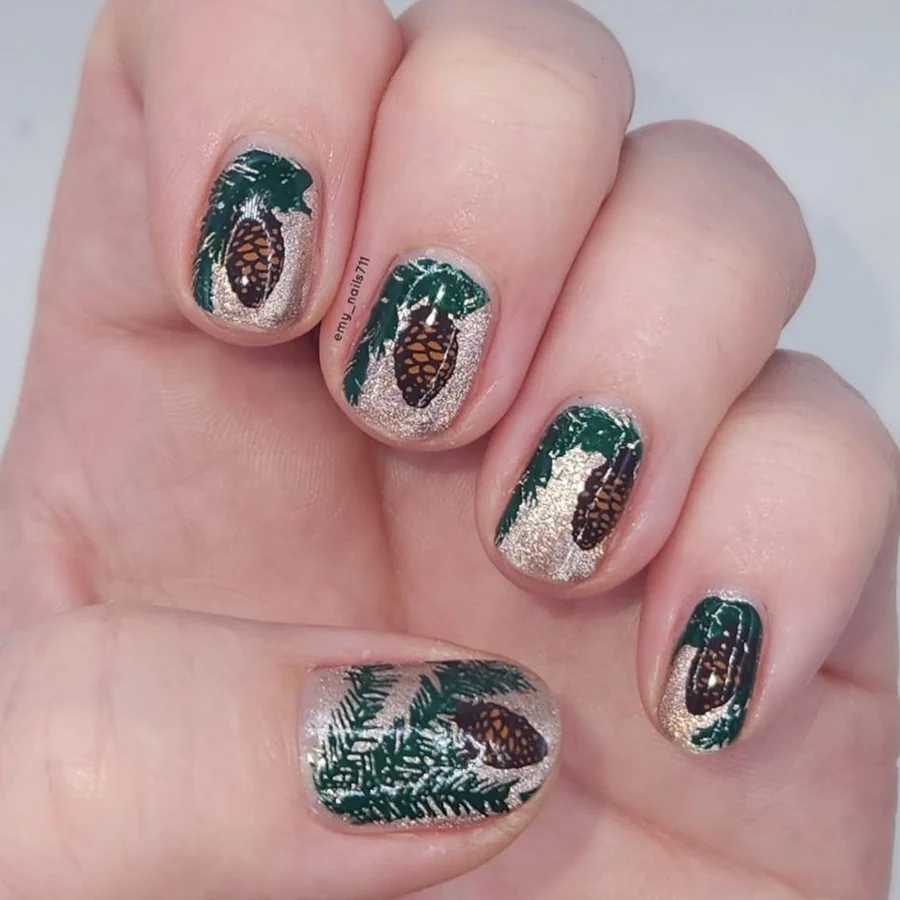
State the pinecones in brown with green branches over silver glitter. Fine brushes paint the cones, while a dotting tool adds the small scales. Keep the art on each nail small, since large pinecones crowd a short nail. Short nails suit this art, because the small surface keeps the cones clear. Seal with two clear coats, which leaves the raised paint smooth.
Dense Silver Glitter With 3D Bell Charms
Holographic silver glitter covers each extremely long coffin nail from base to tip in a dense coat. Light shifts across the glitter in blue and pink flashes as the hand turns. Small silver bell charms hang on some nails, with tiny red bows tied above them. Length ends far past the fingertip, with a flat squared tip. No other art sits on the nails, so the glitter and bells carry the whole design.
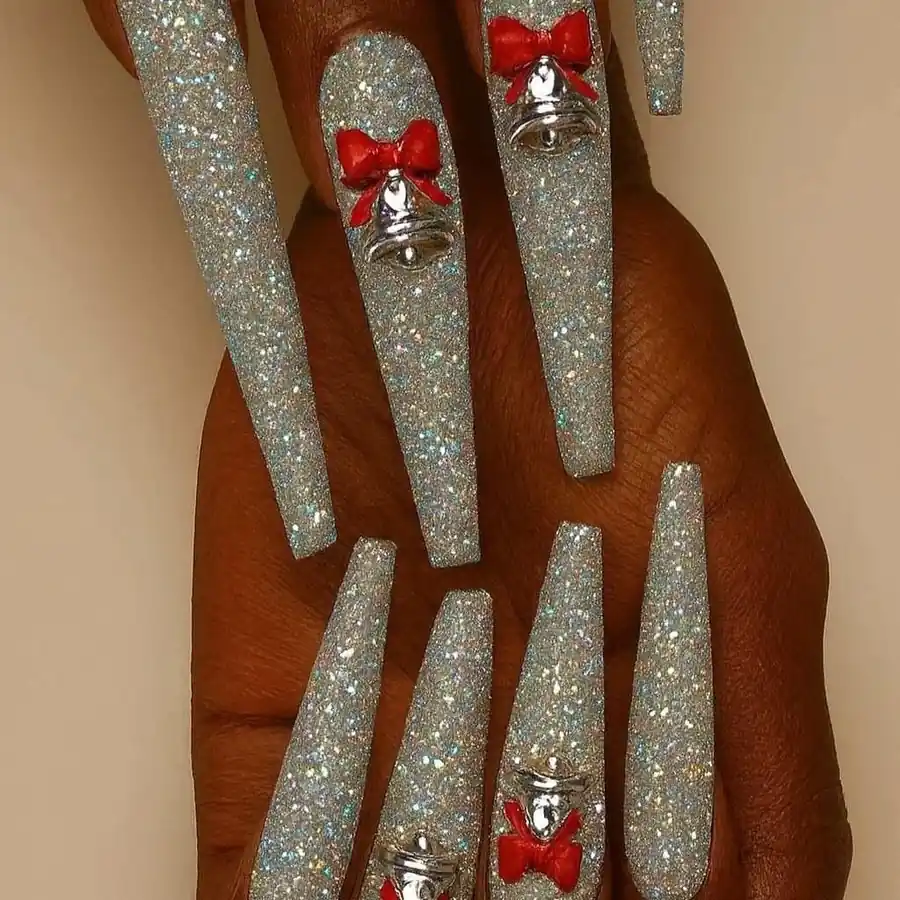
Spell out full glitter coverage with bell charms kept to a few nails. Nail techs glue the charms on with gel and seal them under a thick coat. Swap the bells for small stars for a lighter feel, but keep the glitter dense. Shorter nails hold charms well, since less length means less weight at the tips. File any rough glitter edges with a soft file to keep the surface smooth.
Silver French Tips With a White Half-Moon Line
Each short square nail holds nude polish, with metallic silver French tips at the ends. White half-moon sits near the cuticle on each nail, joined by a thin white line. Length ends just past the fingertip, with a square flat tip on each nail. Light hits the silver tips first, and the shine reads bright against the nude. Edges stay clean, and the white line reads the same on every nail.
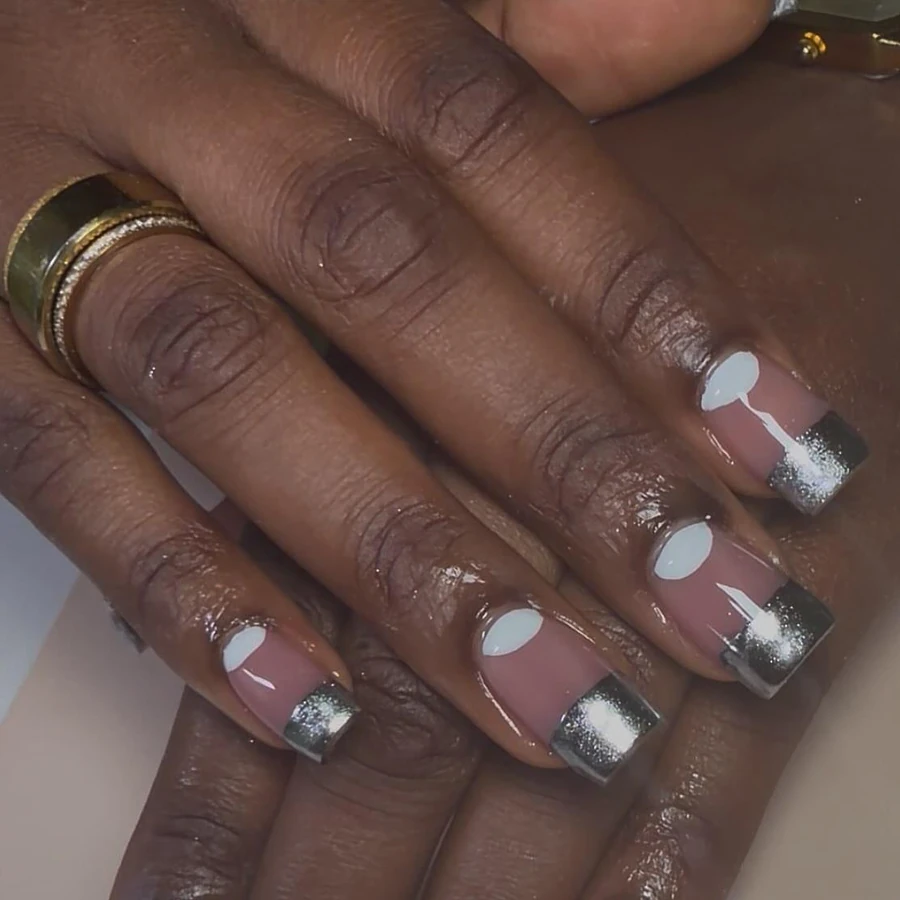
List silver French tips with a white half-moon line near the base. Thin brushes paint the tips, while a dotting tool sets the half-moon curve. Keep the white line thin, since a thick line hides the nude base. Short nails suit this design, because the short length keeps the lines crisp. Seal with a clear coat, which keeps the silver bright.
Silver Glitter, Snowflakes, and Peppermint Swirls
Full silver glitter covers some nails, while others hold a nude French with silver glitter tips. White snowflakes sit on two nails, with fine lines and small dots. Peppermint swirls in white and silver wrap around one nail in soft curves. Short oval nails keep the art clear, and length ends just past the fingertip. Light catches the full glitter nails first, then the snowflakes.
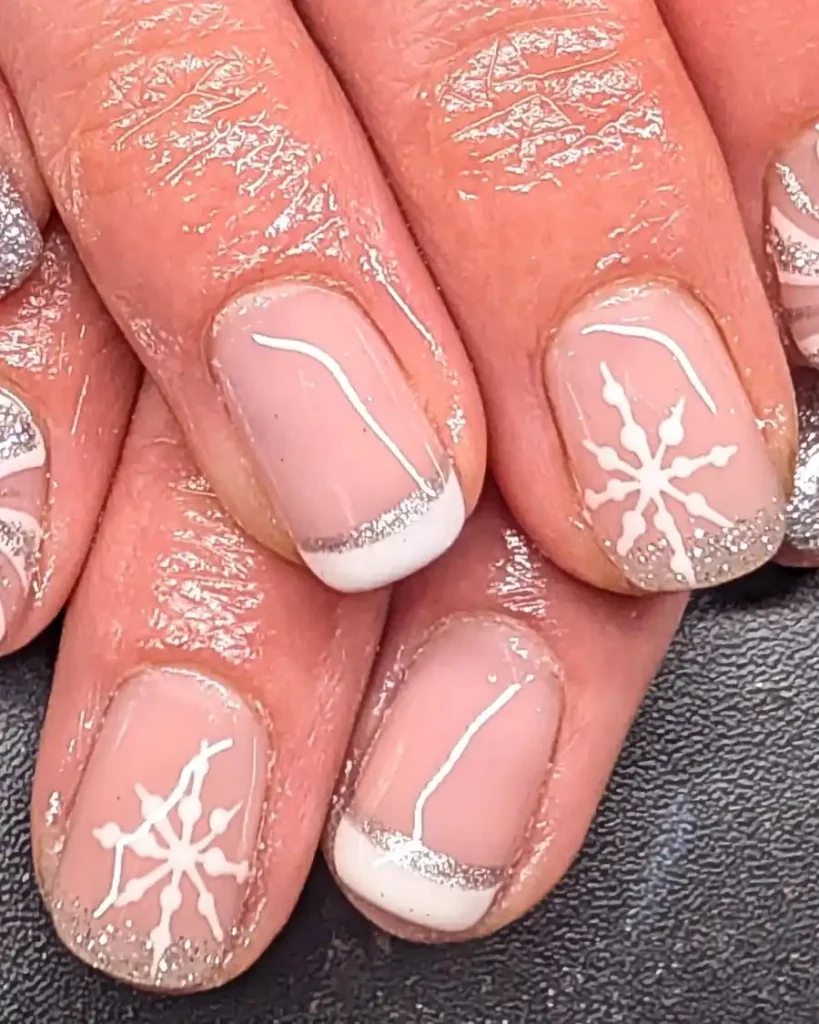
Outline full glitter on some nails, with French tips and art on the rest. Fine brushes paint the snowflakes, while a dotting tool adds the small dots. Swap the peppermint swirl for a plain glitter nail for a calmer set. Store a clear coat at home, since a quick top layer fixes dull spots fast. Book a fill when the base shows a gap to keep the set neat.
Silver Glitter With a Rhinestone Wreath Accent
Almond nails hold silver glitter from base to tip in a dense coat. Rhinestone wreath sits on the ring finger, with red, green, blue, and purple stones. Small silver studs ring the wreath, set in a neat circle. Length ends just past the fingertip, with a soft point at each tip. Light catches the glitter first, then the coloured stones.
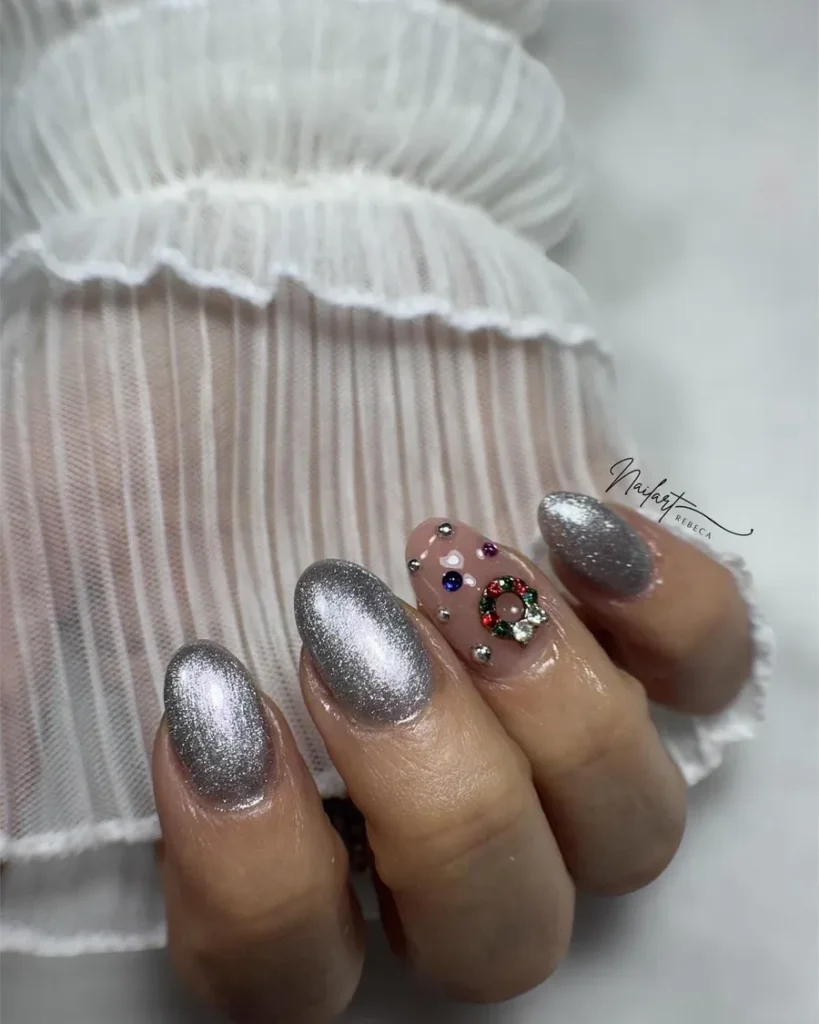
Sketch a full glitter set with a rhinestone wreath on one nail only. Nail techs glue the stones on with gel and seal them under a thick coat. Keep the wreath small, since large stones lift fast on a short nail. Short nails suit this accent, because the small surface keeps the wreath neat. Press each stone gently each night to catch loose ones before they fall.
Matte Grey Nails With Full Silver Glitter Accents
Flat light grey covers most nails, with a soft finish and no shine. Two ring fingers hold full silver glitter, dense from base to tip. Short coffin nails keep the look neat, and length ends just past the fingertip. Light catches the glitter nails first, then moves across the matte grey. No art sits on the nails, so the matte and glitter split carries the whole design.
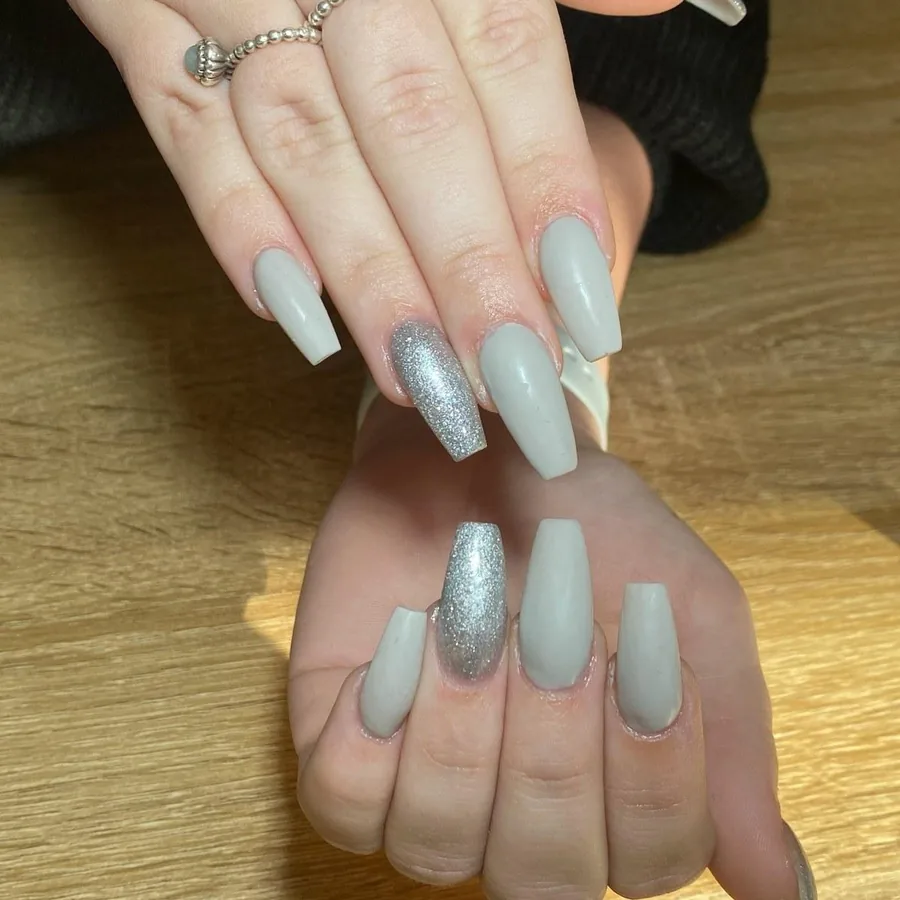
Frame a matte grey base with full glitter on two nails only. Nail techs add a flat-finish clear coat over the grey and seal the glitter clear. Keep the glitter to the ring fingers, since more glitter hides the matte contrast. Short nails suit this split, because the small surface keeps both finishes even. Wipe the matte nails clean each night to keep dust from showing.
Conclusion
Hands do the daily work, so Silver Christmas Nails should be picked for wear as much as for photos. Short nails handle chrome, glitter, and foil through a busy week, while long stilettos and coffins need extra care at the tips. Add clear top coat weekly to keep the shine, and wear gloves for dishes because soap dulls chrome fast. Cuticle oil each night keeps skin soft beside bright metal. Ask about soak-off removal before booking so the set comes off without harming natural nails.