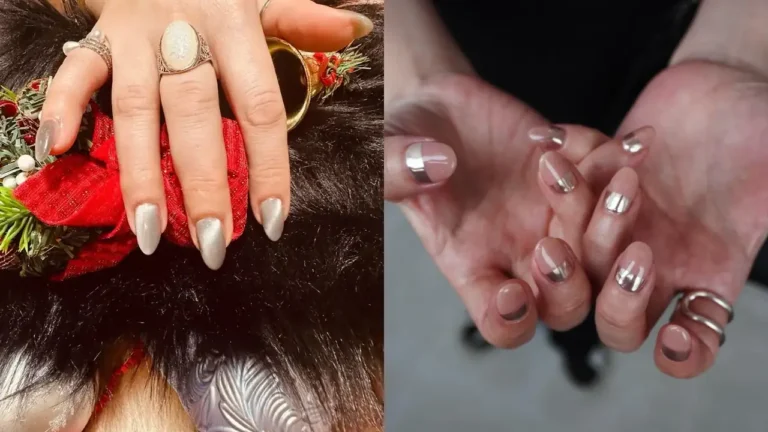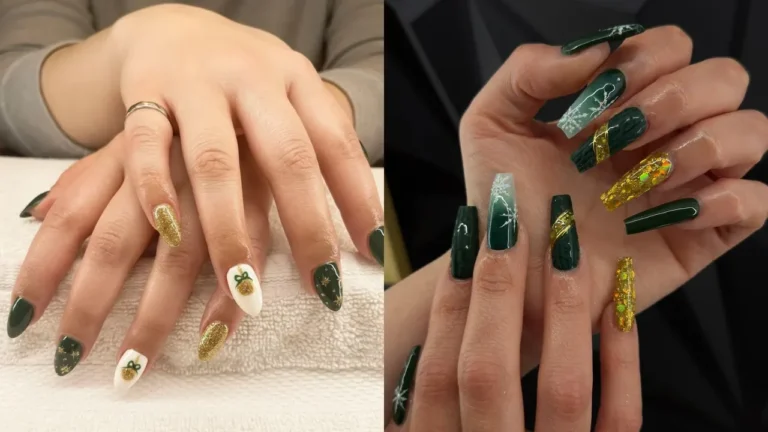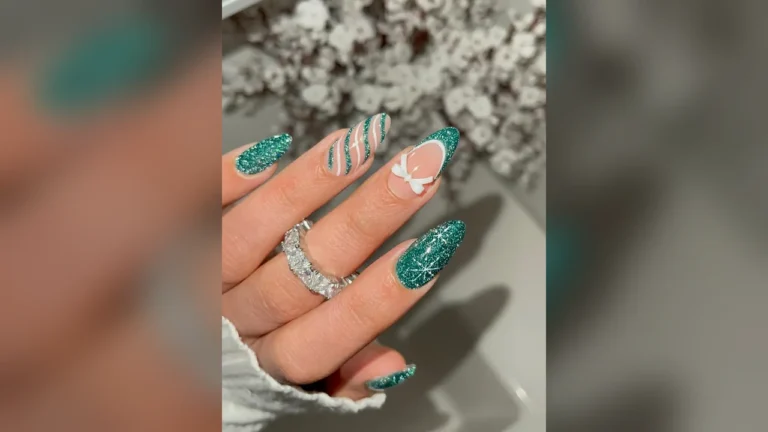


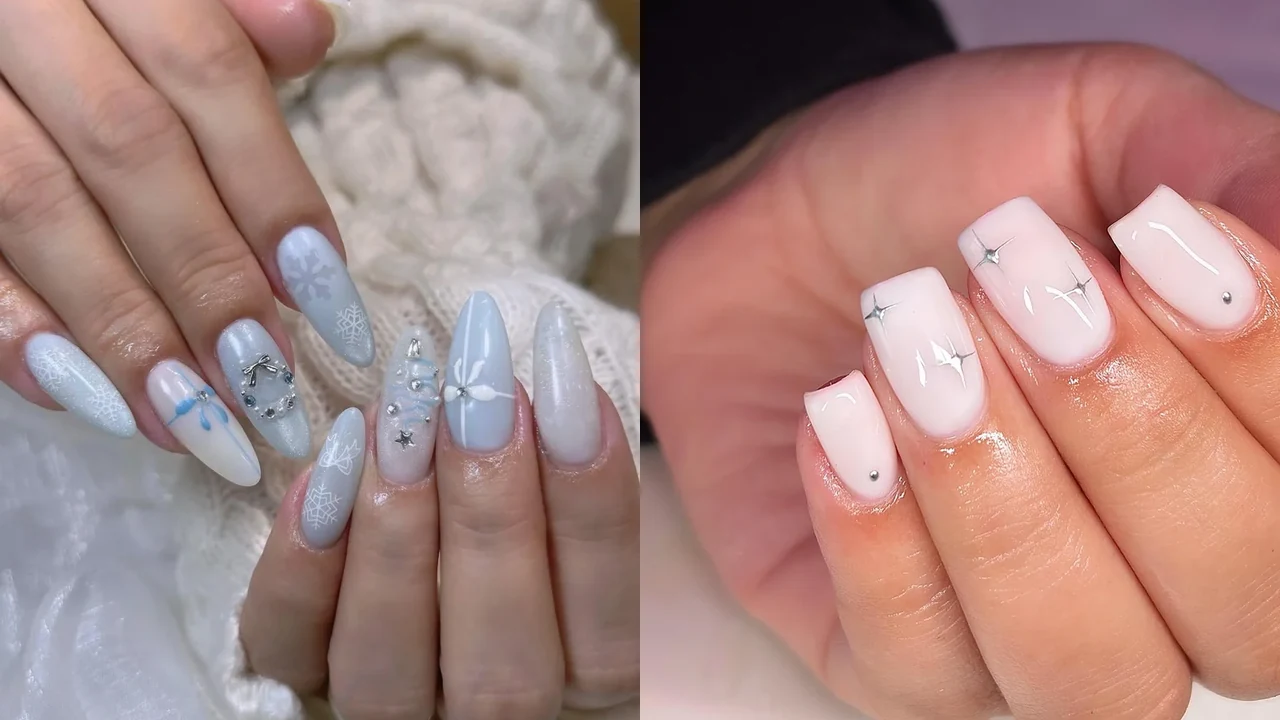
Snow-white manicures get festive fast when the right detail leads, and White Christmas Nails prove it with simple art and calm color. Soft white pairs with silver glitter, pale blue snowflakes, raised knit ridges, and even a tiny snowman face. Gloss sits beside matte, and clear tips melt out of solid white for a glassy finish. Short square nails and long almond or stiletto shapes both appear, so every length gets a fitting set. Each photo comes with salon wording, application tips, and care notes, which makes booking an appointment easier and offers home manicures a clear plan from the first coat to the final seal.
1. White Snowflake French Tips With Silver Glitter Stripes
Long square nails carry white tips over a sheer base. Each tip ends in a clean straight line. White snowflakes sit on several nails, with fine arms and small dots at each centre. Silver glitter stripes run diagonally across two accent nails, and thin silver lines also frame the white tips. Gloss covers the whole set, and light catches the glitter lines first. One ring finger holds a larger snowflake, while the rest keep smaller marks.
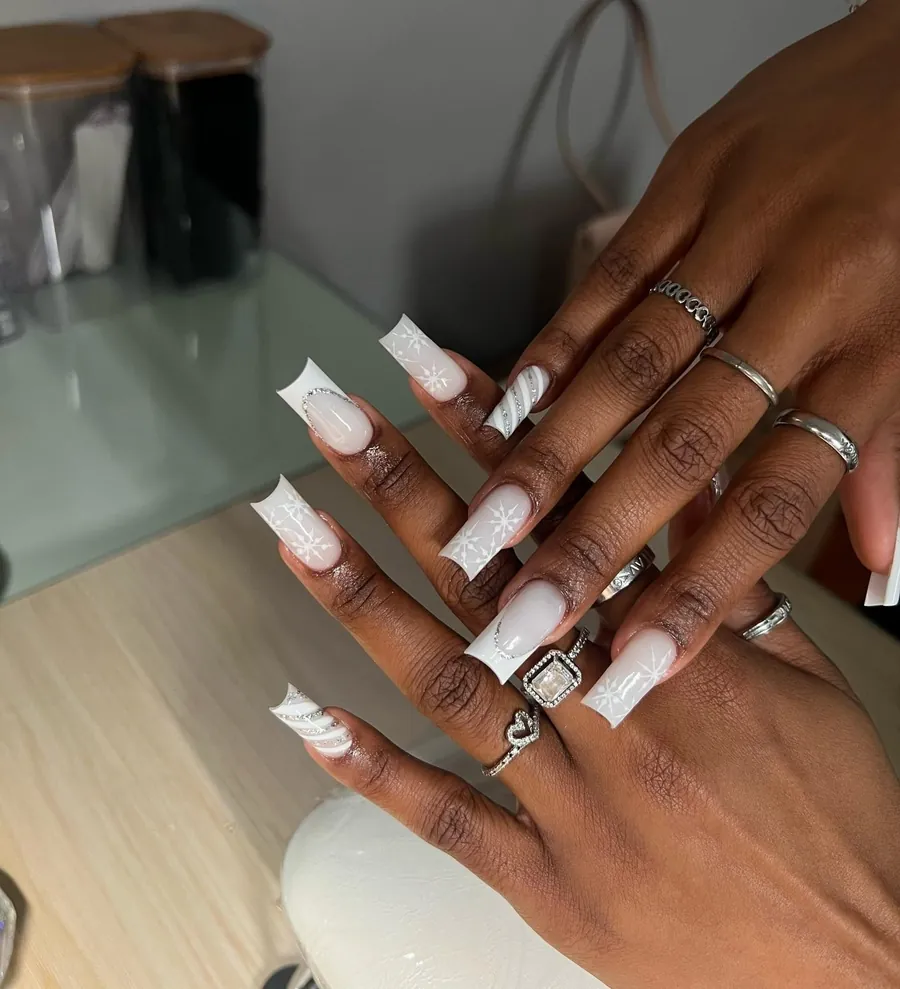
Ask for a sheer base with crisp white tips, and name the snowflake size before art starts. Fine liner brushes keep snowflake arms thin. Dotting tools make even centres. Shorter lengths still hold this art, because tips need less room. Seal glitter stripes with two thin layers of top coat, which is a clear seal layer. Smooth edges last longer that way. Skip thick glitter near the cuticle, because lumps lift fast and catch fabric.
2. French Tips Fading Into Silver Glitter
Almond nails end in white tips that soften into silver glitter near each free edge. Sheer pink fills the nail beds, and the glitter grows denser toward the tips. One accent nail holds a white snowflake line drawing, with a small silver dot at its centre. Gloss gives the set a wet shine, but the glitter catches light when hands move. Length ends past the fingertips, with a smooth almond curve on each nail.
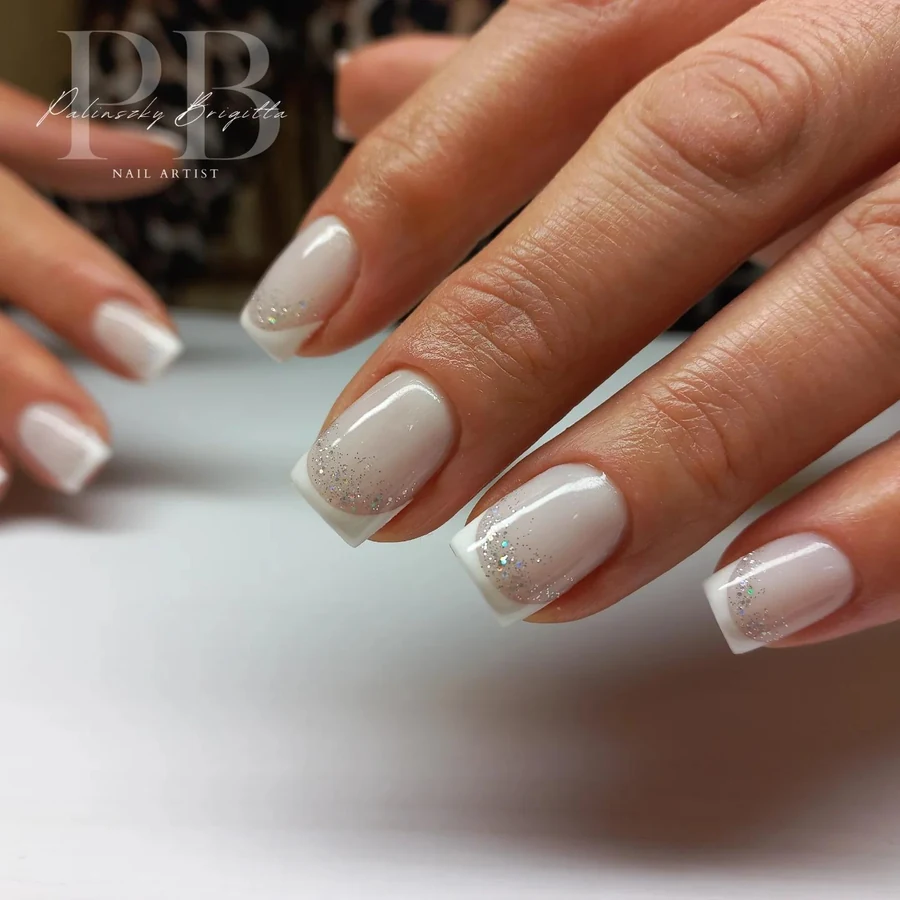
Begin with a sheer pink base, then sponge silver glitter onto the tips in thin layers. Soft brushes blend the lower edge. No hard line shows between glitter and pink. Ask a nail tech for a “glitter fade French”, and show which nail holds the snowflake. Keep tips short for daily typing, because long almond tips chip sooner at the corners. Reapply top coat after three days, so the glitter edge stays sealed and smooth.
3. Matte White Nails With Silver Tree and Star Lines
Matte white covers long almond nails from cuticle to tip, with no shine on the surface. Silver line art draws a slim tree on one nail, with a small star at its top. Thin silver lines form a starburst on another nail, with fine rays from a central point. Small silver dots also sit near the tips of two more nails. Length ends well past the fingertips, and each nail keeps a smooth almond point.
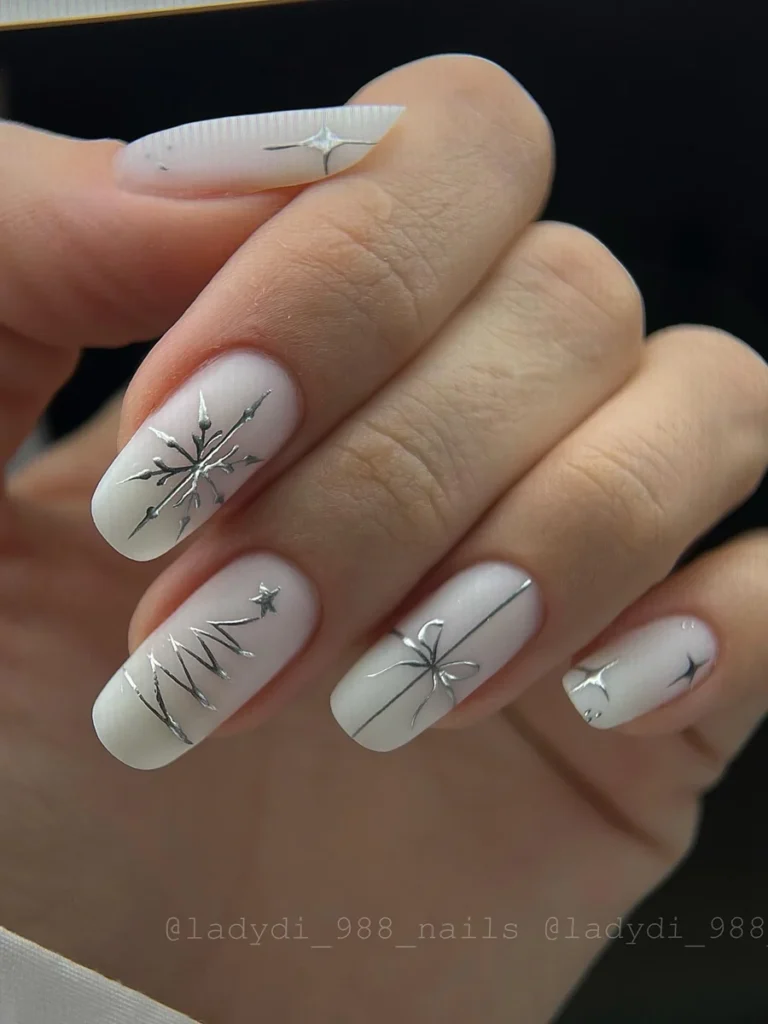
Pick a matte top coat over solid white, because gloss would change the whole mood of this set. Ask for thin silver line art, and keep the tree slim so it fits one nail. Fine brushes draw cleaner lines than thick ones. Smudging at the edges stays light. Shorter almond nails suit this art too, since the tree needs height more than width. Avoid hand cream right after curing, so the matte surface stays soft.
4. White Ombre Nails Melting Into Clear Tips
Nails fade from solid white near the cuticle into clear tips at the free edge. Ombre means a soft blend from one shade into another, with no hard line between them. One accent nail carries dense silver glitter, with fine grains packed across the whole nail. Gloss covers the set, but the clear tips look like glass in bright light. Length ends past the fingertips, with a gentle almond curve on each nail.
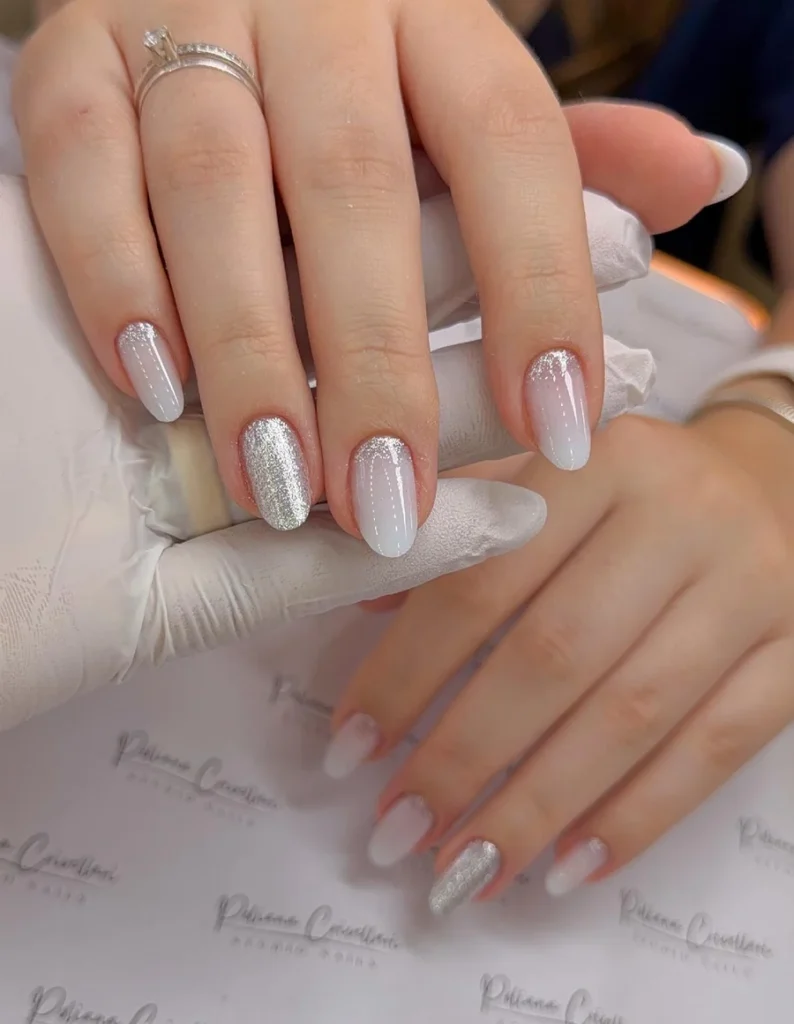
Work white gel from the cuticle down, then blend toward the tip in thin layers. Clean sponges give a softer fade than brushes, since they leave no streaks behind. Ask for a “white to clear ombre”, and name the glitter accent nail before work starts. Longer nails show the fade best, while short nails need a quicker blend. Seal the glitter nail with two layers of top coat, so grains stay flat and do not snag.
5. Pearly White Nails With Snowflakes and Silver Glitter
Pearly white covers long almond nails, with a soft shine that shifts as hands turn. White snowflakes sit on several nails, with fine arms and tiny dots between them. One accent nail also holds dense silver glitter, with grains packed from cuticle to tip. Thin silver glitter rings the cuticle of another nail. Gloss seals the set, and the pearl base glows under warm light.
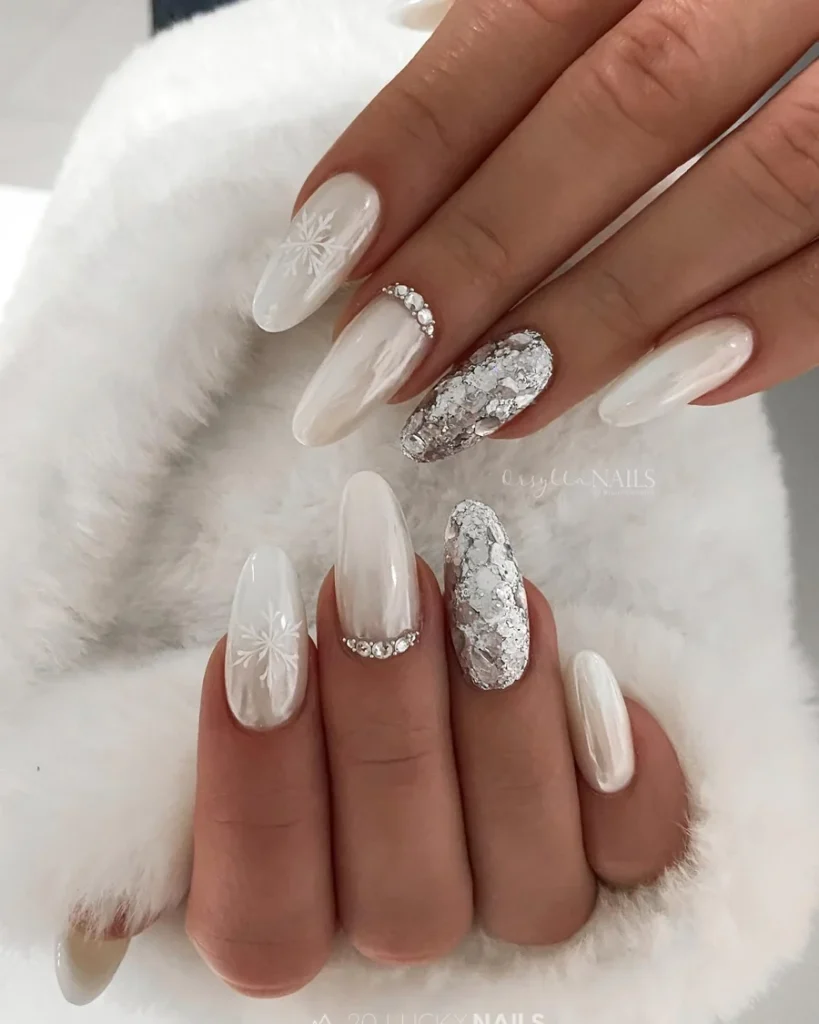
Rub pearl chrome powder, which is a fine shimmer powder, over a cured white base for this glow. Sponge applicators press the powder flat. Soft brushes clear loose grains. Ask for “pearl white with snowflake art”, and keep snowflakes small so they fit almond nails. Shorter lengths still hold the pearl shine, because the finish needs no extra room. Wipe the free edge before the final seal, so chrome does not peel from the tip first.
6. Raised Sweater-Knit Nails With Snowflake French Tips
Raised white knit lines cross two accent nails, with braided ridges that stand up from the surface. Other nails carry white French tips over a sheer pink base, with small white snowflakes near the tips. Gloss covers the French nails, but the knit nails hold a softer shine. Length ends past the fingertips, with a square shape and straight free edges. One snowflake sits larger on a ring finger, and the rest stay small.
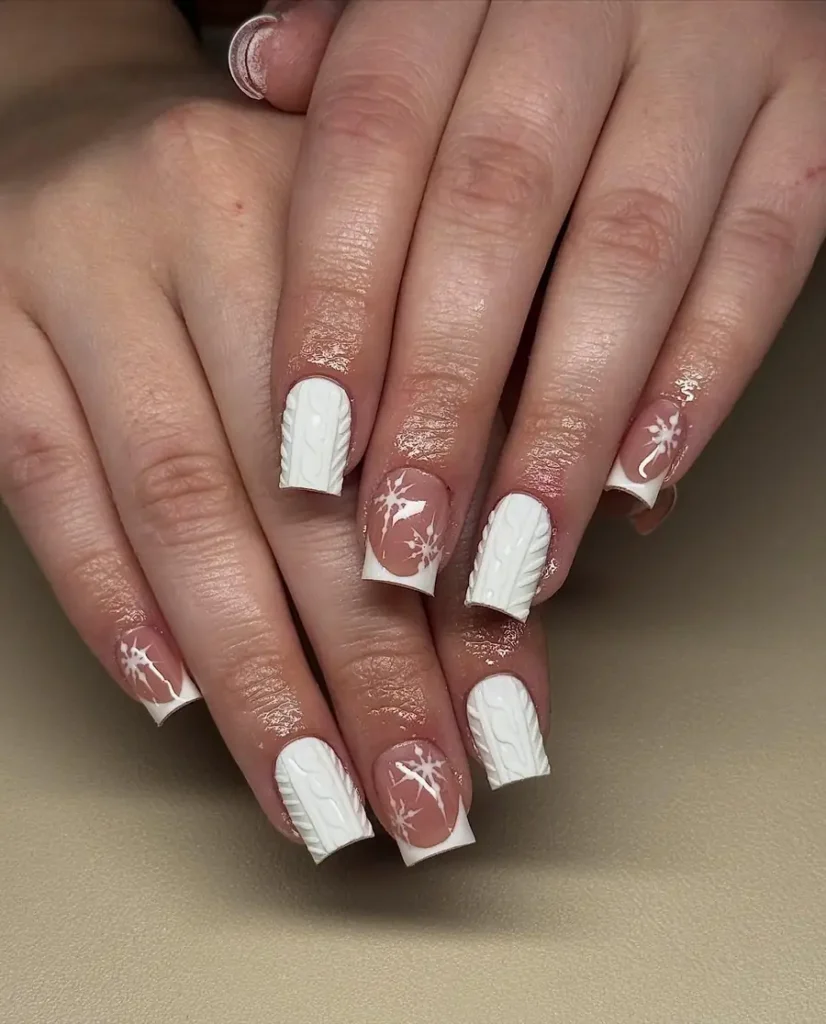
Pipe knit lines with builder gel, which is a thick gel that adds strength and height. Add thin braids with a fine brush, then cure before adding a second ridge. Ask for “sweater knit accent nails”, and keep the knit on two nails only. Short square nails suit this texture, because long knit ridges catch more often. File the free edge smooth after curing, so the raised lines do not snag on knit fabric.
7. Icy Blue Nails With White Snowflakes and a Bow
Pale blue covers long almond nails, with a cool wash that fades toward the tips. White snowflakes sit on several nails, with fine arms and small dots at each centre. One accent nail holds a pale blue bow. Thin lines form it, with a small silver dot at its knot. Silver glitter also dusts the tips of two nails, and gloss seals the whole set. Length ends past the fingertips, with a smooth almond curve on each nail.
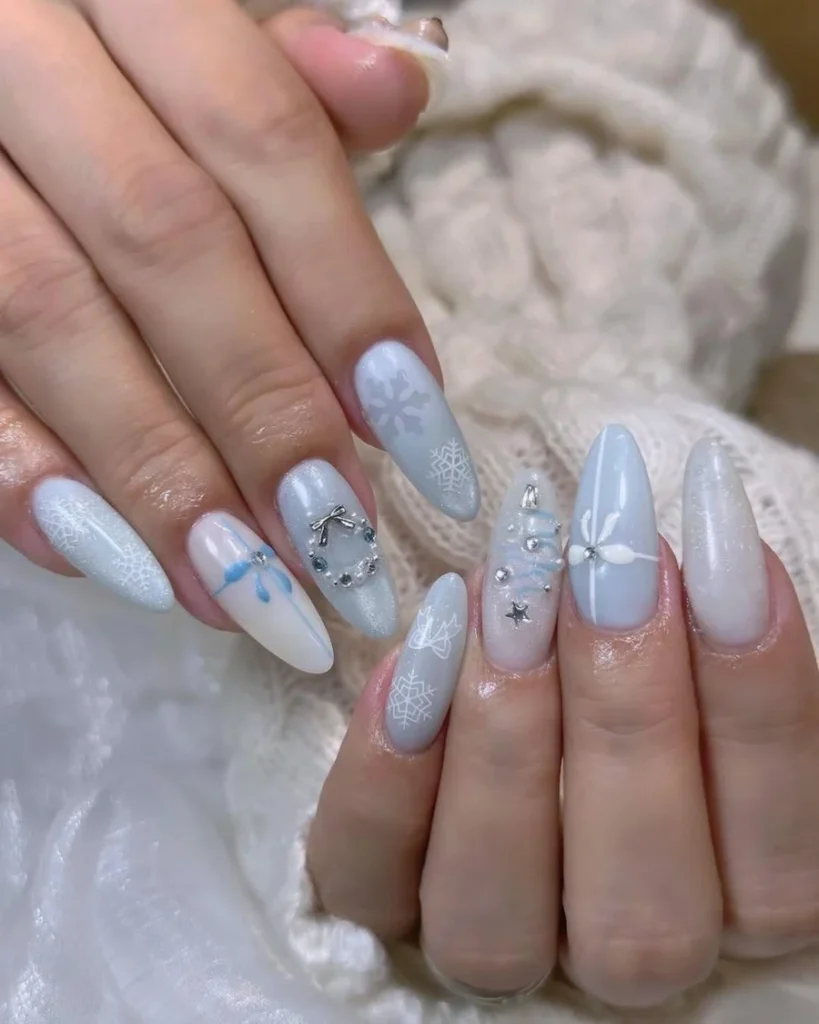
Lay pale blue first, then add white snowflakes with a fine liner brush. Keep the bow small and centred, because a wide bow crowds an almond nail. Ask for “icy blue with white snowflakes”, and name the bow nail before art starts. Shorter nails still hold this set, while long nails give snowflakes more room. Seal glitter tips with top coat twice, so grains stay flat and the blue edge stays clean.
8. Short White Nails With Silver Glitter Tips
Square nails end just past the fingertips, with a clean straight edge on each one. Solid white covers most nails, with a smooth gloss finish across the set. Silver glitter packs onto the tips of two accent nails, with grains fading down toward the middle. One nail holds a small white snowflake, with fine arms on a glitter base. Light catches the glitter tips first, while the white nails stay calm beside them.
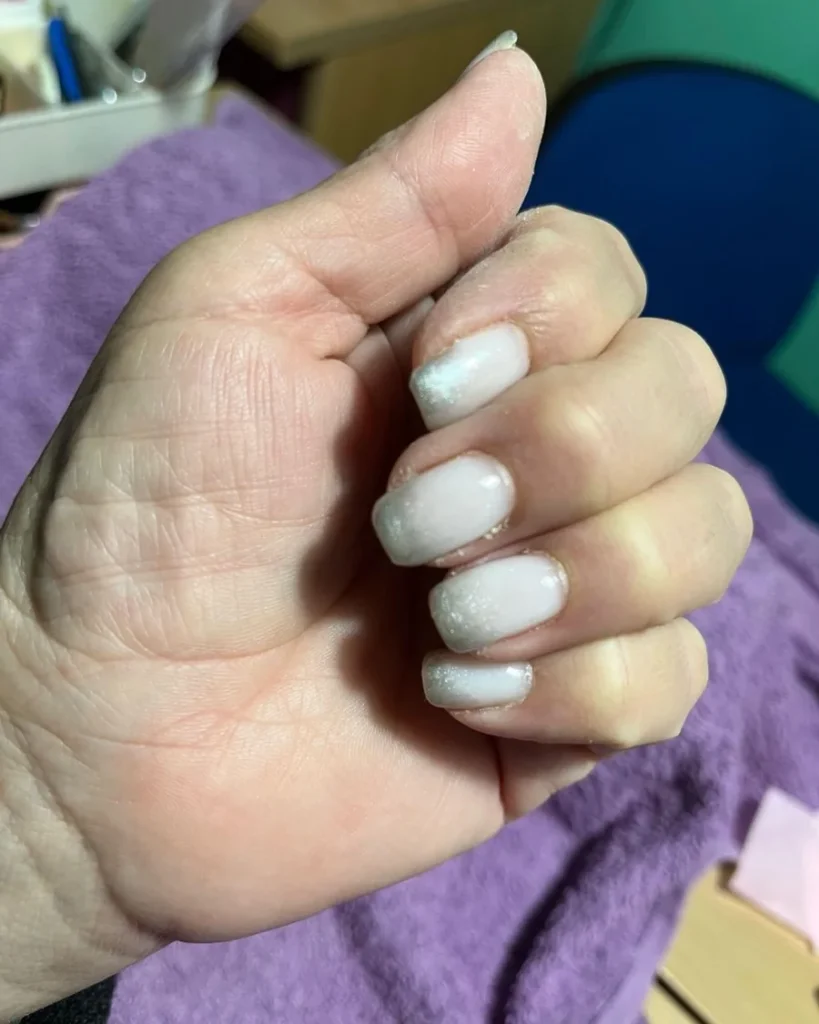
Sweep silver glitter onto the tips, then blend down with a soft brush in thin layers. Keep the glitter band narrow on short nails, since a wide band crowds the nail bed. Ask for “short white with silver glitter tips”, and name the snowflake nail first. Grow-out shows fast, so book a fill within two weeks. Rub cuticle oil, which is oil for skin round nails, in daily. Soft skin keeps the white edge neat.
9. Silver Stripe Art Over a Nude Base
Square nails hold a sheer nude base, with white snowflakes painted across several nails. Silver glitter stripes sweep diagonally over two accent nails, with grains packed along each line. Thin silver lines curl near the tips, and small silver dots sit beside the snowflakes. Gloss covers the set, but the nude base lets the white art stand out. Length ends past the fingertips, with straight free edges and square corners.
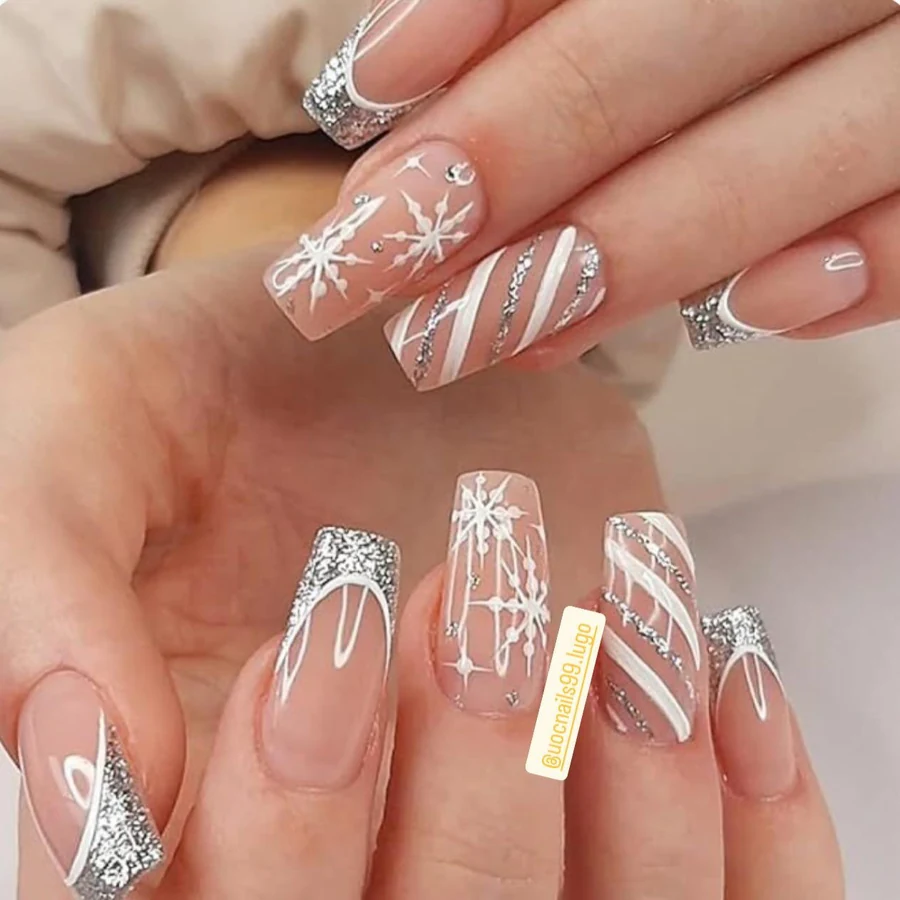
Lay the nude base first, then draw snowflakes with a fine liner brush. Keep stripes diagonal. Straight stripes can look stiff on long square nails. Ask for “silver stripe art on nude”, and show which nails hold the stripes. Shorter square nails suit this art too, while long nails give stripes more room to sweep. Seal each stripe with top coat, so glitter grains stay flat and do not lift at the edges.
10. Glossy White Nails With a Silver Tree Accent
Glossy white covers long almond nails from cuticle to tip, with a bright shine on each one. One ring finger holds a slim silver tree, with fine lines and a small star at its top. Other nails also stay plain white, with no extra art on them. Length ends past the fingertips, with a smooth almond curve on each nail. Light moves across the gloss, and the silver tree catches it first.
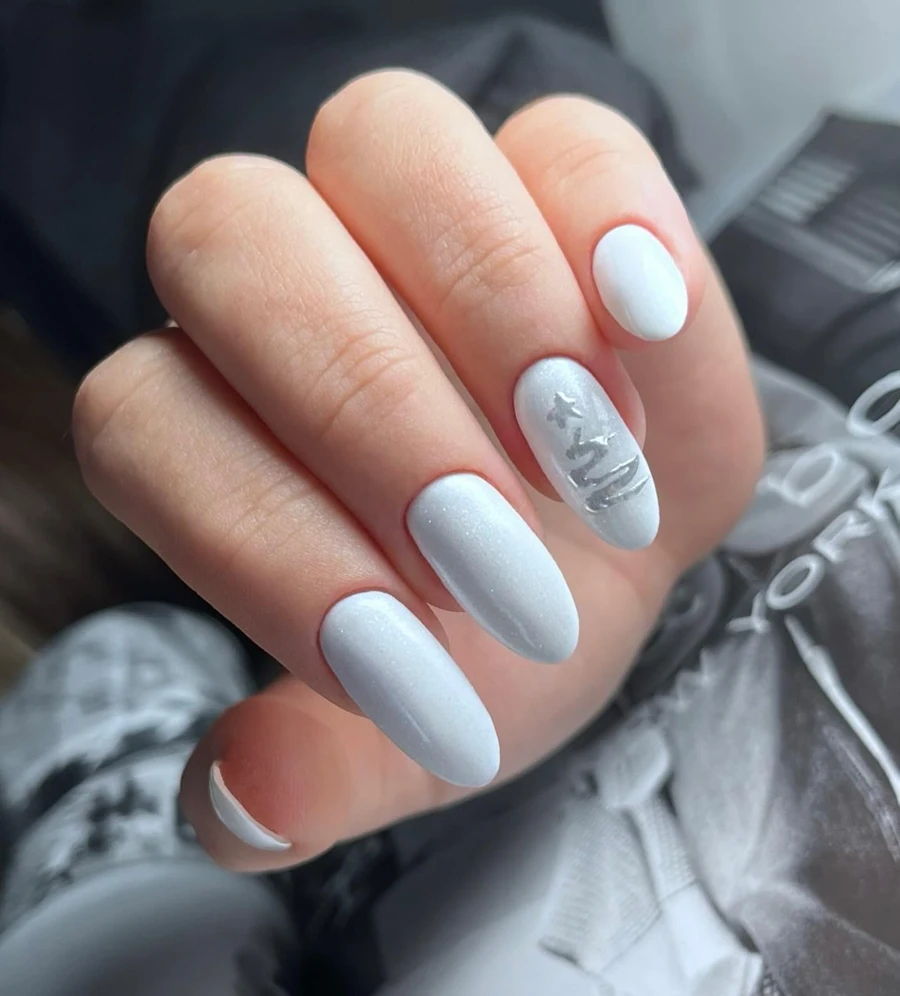
Brush solid white in two thin coats, then draw the tree with a fine liner brush. Keep the tree slim and centred, since a wide tree crowds an almond nail. Ask for “one silver tree accent”, and keep the rest plain for balance. Short almond nails suit this set, while long nails give the tree more height. Avoid thick top coat over the tree, so fine lines stay crisp and do not blur.
11. Short White Half-Moon Nails With a Bare Arc
Short oval nails hold solid white polish, with a small bare arc left near each cuticle. Natural pink shows through the arc, and the white edge curves round it in a clean line. Gloss covers the set, but the white looks bright against the bare skin of the arc. Length ends just past the fingertips, with a soft oval curve on each nail. One thumb shows the arc widest, while smaller nails hold narrower arcs.
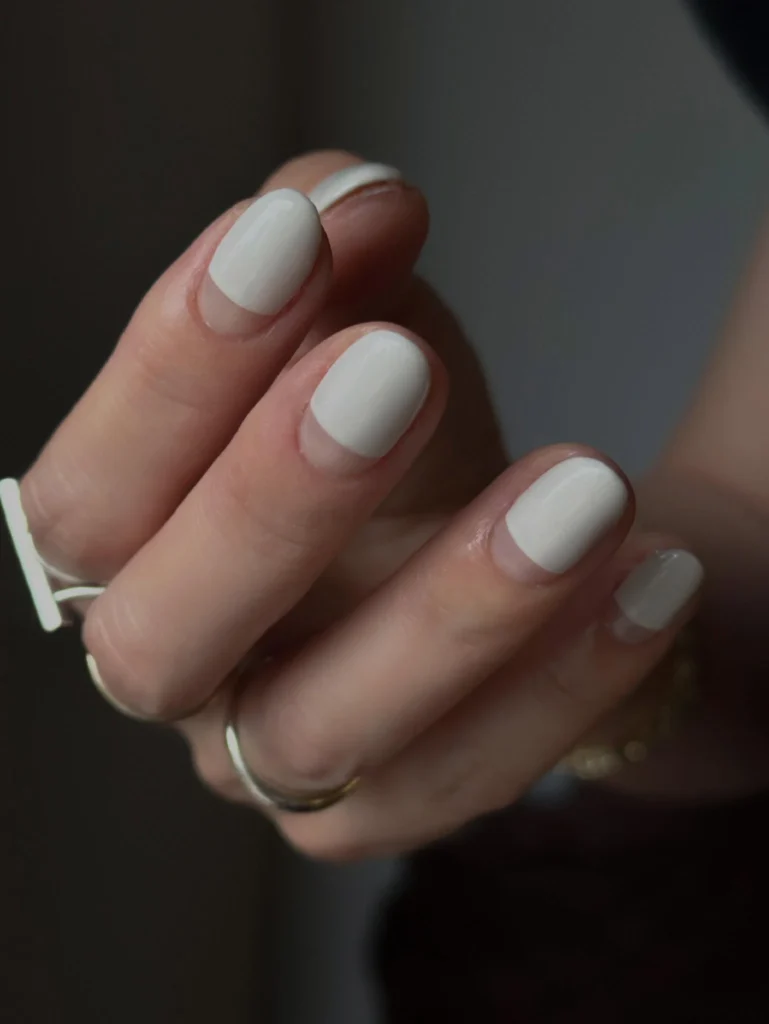
Brush white from the middle of the nail down, then shape the arc with a clean brush. Small brushes give a neater curve than wide ones. Cleanup at the cuticle stays light. Ask for a “half-moon with a bare arc”, and keep the arc small on short nails. Grow-out shows at the arc first, so plan a fill within two weeks. Use a thin top coat, because a thick layer can flood the bare arc and dull its edge.
12. White Nails With a Silver Reindeer Accent
Solid white covers long square nails, with a bright gloss finish across the set. One accent nail holds a silver reindeer shape, with thin antlers and a small body in outline. Small white snowflakes also sit on two more nails, with fine arms and tiny dots. Silver glitter covers one nail from cuticle to tip, with dense grains and a bright shine. Length ends past the fingertips, with straight free edges and square corners.
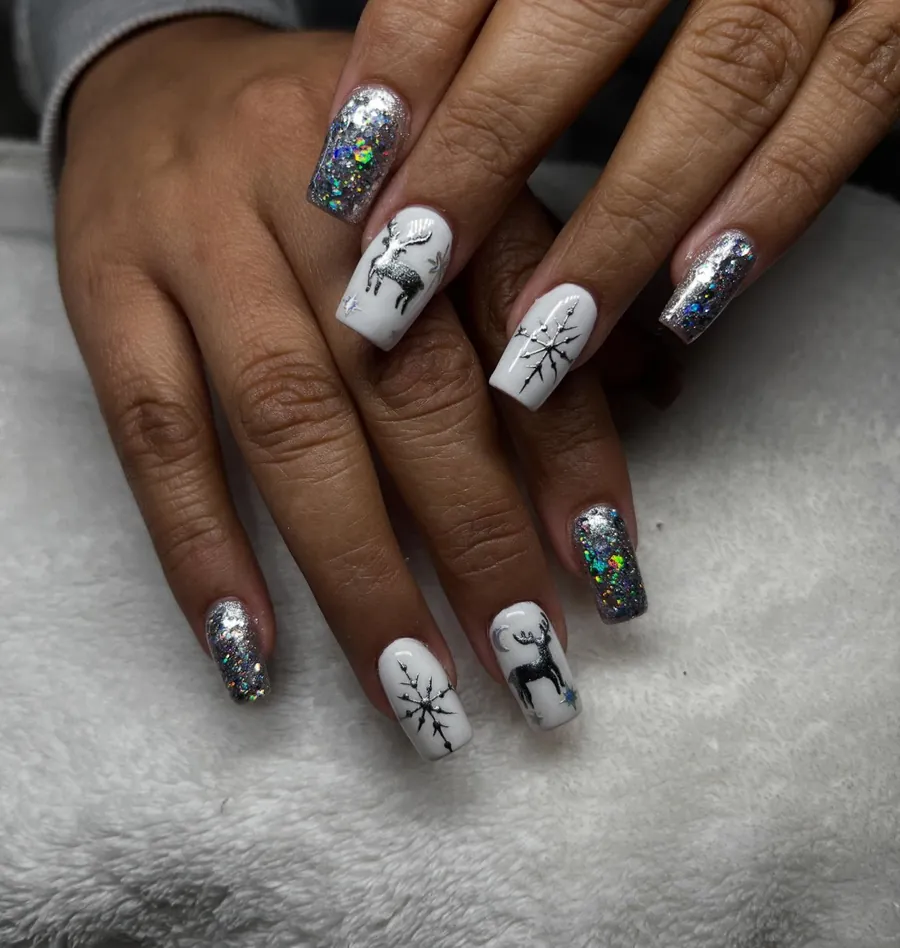
Sketch the reindeer with a fine liner brush, and keep antlers thin so they fit one nail. Ask for a “silver reindeer outline accent”, and name the glitter nail before work starts. Short square nails suit this set, because the reindeer needs height more than width. Seal the glitter nail twice, so grains stay flat and do not snag. Avoid hand cream right after curing, because oils can dull glitter shine fast.
13. Milky White Nails With Silver Crackle Lines
Milky white covers medium almond nails, with a soft glow under a gloss top coat. Thin silver lines crackle across several nails, with fine branches that split and rejoin. One nail holds a denser web of lines near its tip, but others hold only two or three. Length ends just past the fingertips, with a gentle almond curve on each nail. Light catches the silver lines first, and the milky base stays soft behind them.
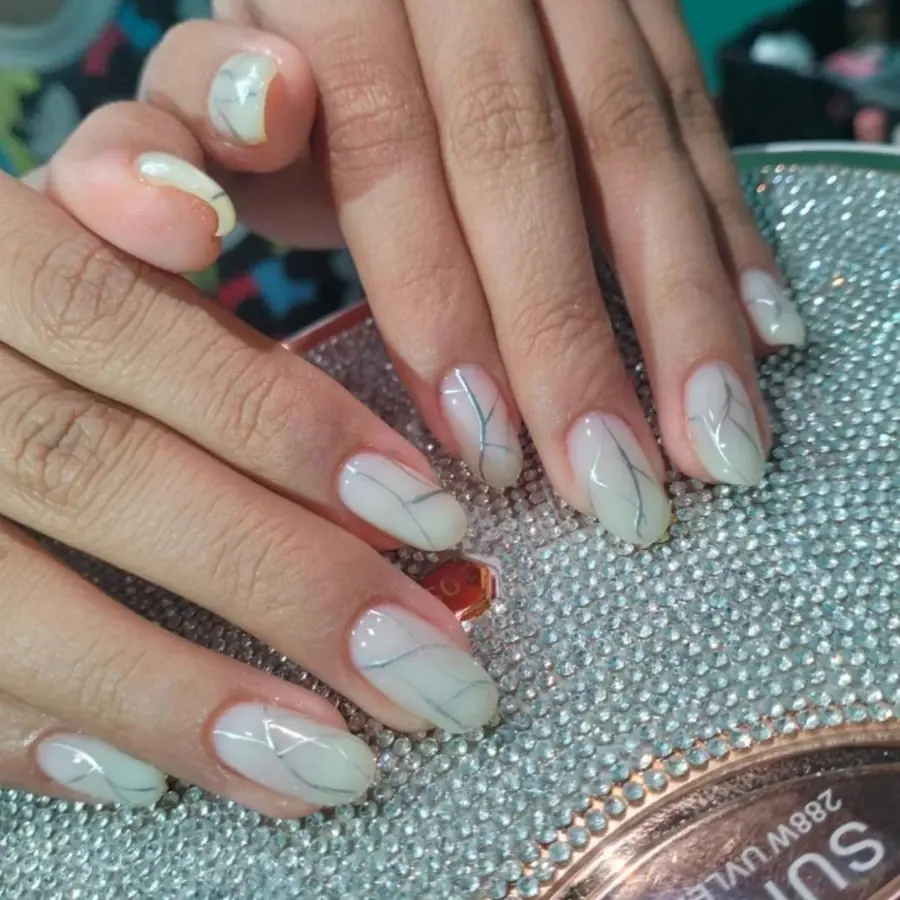
Trace crackle lines with a fine brush, and let each line branch once or twice only. Keep lines thin, because thick lines look heavy on a milky base. Ask for “silver crackle lines on milky white”, and keep the web on one nail. Medium length suits this art, while very long nails can make the lines look sparse. Seal with a thin top coat, so fine lines stay visible and do not blur under gloss.
14. Silver Glitter Nails Beside Pale Pink French Tips
Silver glitter covers several long almond nails, with dense grains from cuticle to tip. Other nails hold a pale pink base with white French tips. Small white snowflakes sit near the tips. Gloss seals the set, but the glitter nails catch light first. Length ends past the fingertips, with a smooth almond curve on each nail. One French nail holds a larger snowflake, while the rest keep smaller marks.
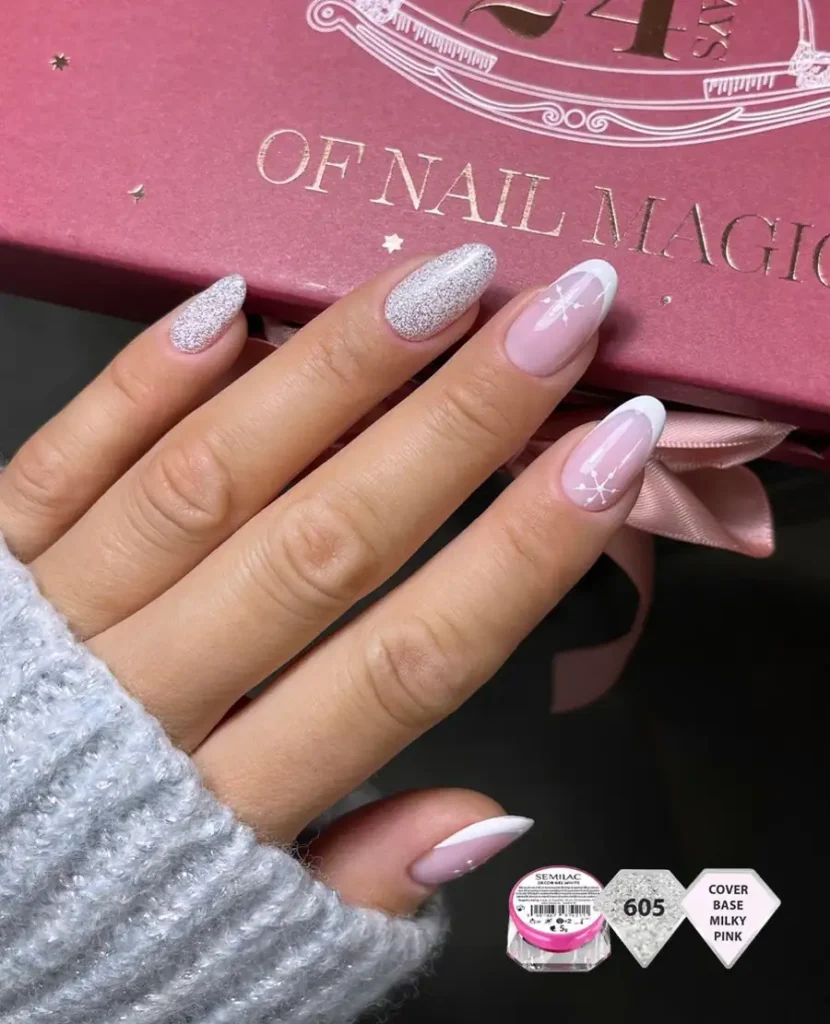
Layer silver glitter onto the glitter nails in thin layers, then seal each one twice. Paint French tips with a fine brush, and keep the white band even across all nails. Ask for “silver glitter with pink French tips”, and name the snowflake nails first. Shorter almond nails suit this mix, because glitter nails need no extra art room. File the free edge after curing, so glitter grains do not leave a rough edge.
15. Pale Blue Nails With White Snow Dots
Pale blue covers medium almond nails, with a soft wash that looks cool in daylight. White dots scatter across several nails, with varied sizes that suggest falling snow. One accent nail holds a silver reindeer face, with thin antlers and small dark eyes. Pale pink nails sit beside the blue ones, with a silver bow near one tip. Gloss seals the set, but the blue nails glow beside the paler ones.
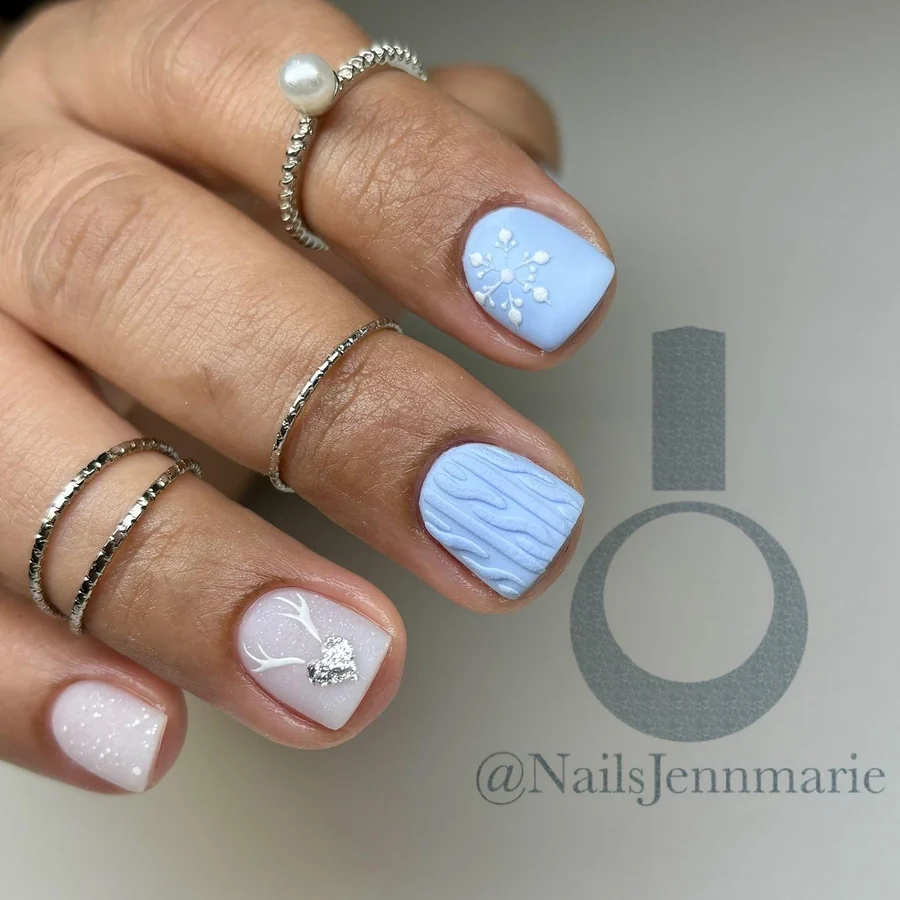
Dot white snow with a dotting tool, and vary the sizes so the fall looks natural. Keep the reindeer small and centred, because a wide face crowds an almond nail. Ask for “pale blue with white snow dots”, and name the reindeer nail before art starts. Medium length suits this set, while short nails need fewer dots per nail. Seal dots with top coat, so they stay round and do not smear during wear.
16. White Almond Nails With Silver Grey Swirls
Almond nails hold white polish, with soft grey-silver swirls that curve across each nail. Thin lines loop and cross, with some swirls tight near the cuticle and others wide near the tip. Gloss seals the set, but the swirls catch light as hands turn. Length ends past the fingertips, with a smooth almond curve on each nail. One nail holds a denser swirl near its centre, while the rest keep lighter marks.
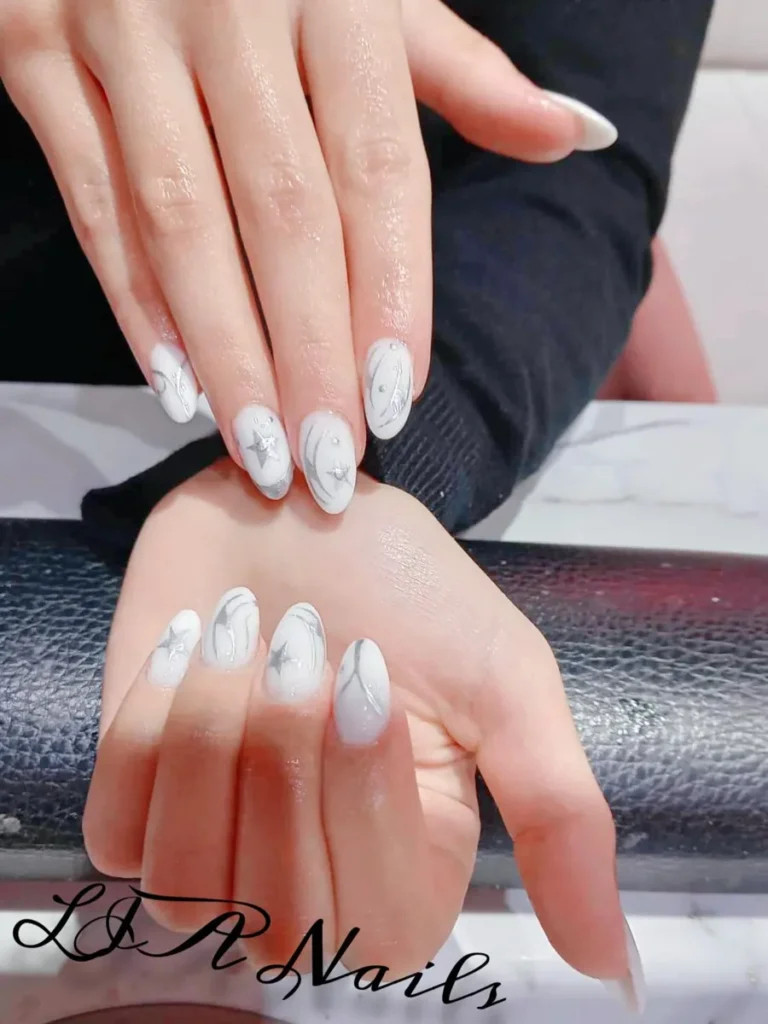
Curl swirls with a fine liner brush, and keep each line thin so it stays soft. Let lines cross once only, because too many crossings look messy on white. Ask for “silver grey swirls on white”, and keep the densest swirl on one nail. Long almond nails suit this art, while short nails need fewer swirls per nail. Seal with a thin top coat, so fine lines stay crisp and do not blur.
17. White Stiletto Nails With a Silver Glitter Fade
Stiletto nails end in sharp points, with a white base that fades into silver glitter at the tips. Glitter grows denser toward each point, with fine grains packed near the free edge. Length ends well past the fingertips, with a narrow taper on each nail. Gloss covers the set, but the points catch light first. One nail holds a denser glitter band, while the rest keep a softer fade.
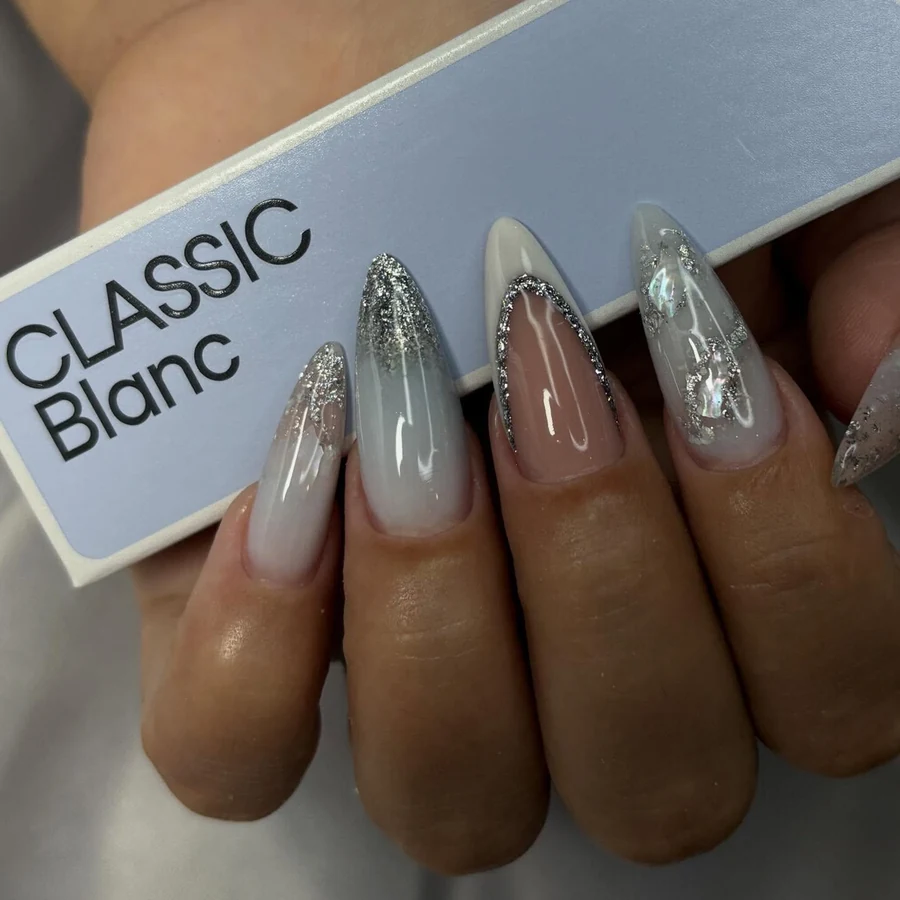
Press silver glitter onto the tips, then blend down toward the middle in thin layers. Keep the fade gradual, because a hard glitter line looks harsh on a sharp point. Ask for a “silver glitter fade on white stiletto”, and keep points even across all nails. Short stiletto nails suit daily wear better, because long points chip sooner at the tip. Seal the points twice, so glitter stays flat and the sharp edge does not snag.
18. White Marble Nails With Fine Silver Veins
Long square nails hold white polish, with fine silver veins that branch across each nail like stone. Thin lines split and rejoin, with some veins pale and others bright silver. Gloss seals the set, but the veins catch light as hands move. Length ends past the fingertips, with straight free edges and square corners. One nail holds a denser vein web near its tip, while the rest keep lighter lines.
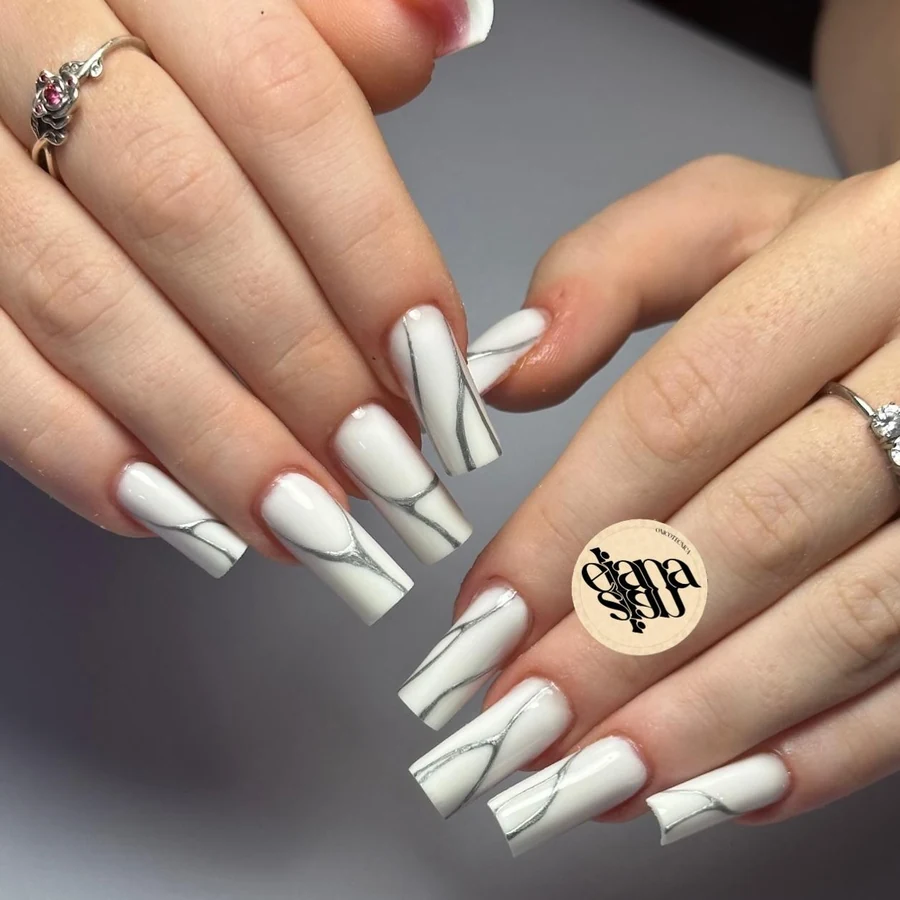
Trace veins with a fine brush over a wet white base. Drag lines thin with a clean brush. Keep veins fine, because thick lines look heavy on white marble. Ask for “white marble with silver veins”, and keep the densest web on one nail. Long square nails suit this art, while short nails need fewer veins per nail. Seal with top coat, so veins stay visible and do not blur under gloss.
19. Short White Nails With Silver Branch Lines
Short square nails hold solid white polish, with thin silver lines that branch like winter twigs. Lines split across several nails, with fine offshoots near the tips. One accent nail holds dense silver glitter at its tip, with grains fading down toward the middle. Gloss covers the set, but the branch lines catch light first. Length ends just past the fingertips, with straight free edges and square corners.
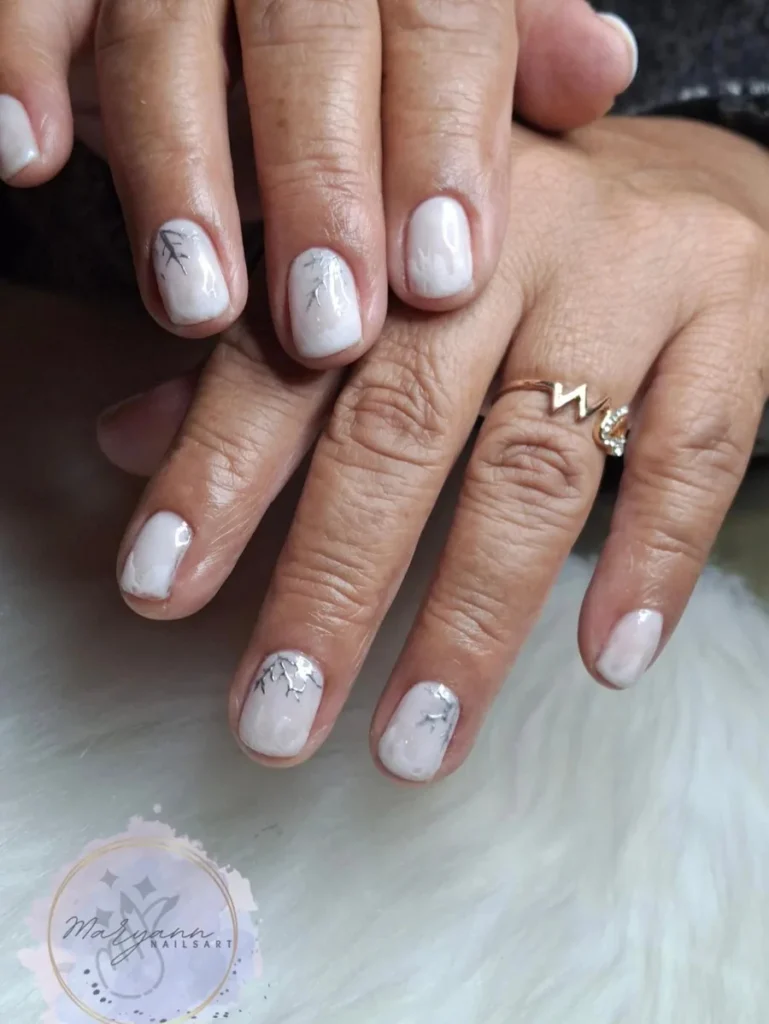
Sketch branch lines with a fine liner brush, and let each line split once or twice only. Keep lines thin, because thick branches crowd a short nail. Ask for “silver branch lines on short white”, and name the glitter tip nail first. Short nails suit this art, while long nails can make branches look sparse. Seal glitter tips twice, so grains stay flat and do not lift at the edges.
20. Nude Nails With Silver Glitter Tips and Snowflakes
Coffin nails hold a sheer nude base, with silver glitter packed onto the tips. Glitter fades down toward the middle, with grains growing sparse as they blend. White snowflakes sit on two nails, with fine arms and small silver dots at each centre. Small clear stones sit near the cuticle of one accent nail, with a tiny silver bow beside them. Gloss seals the set, but the glitter tips catch light first.
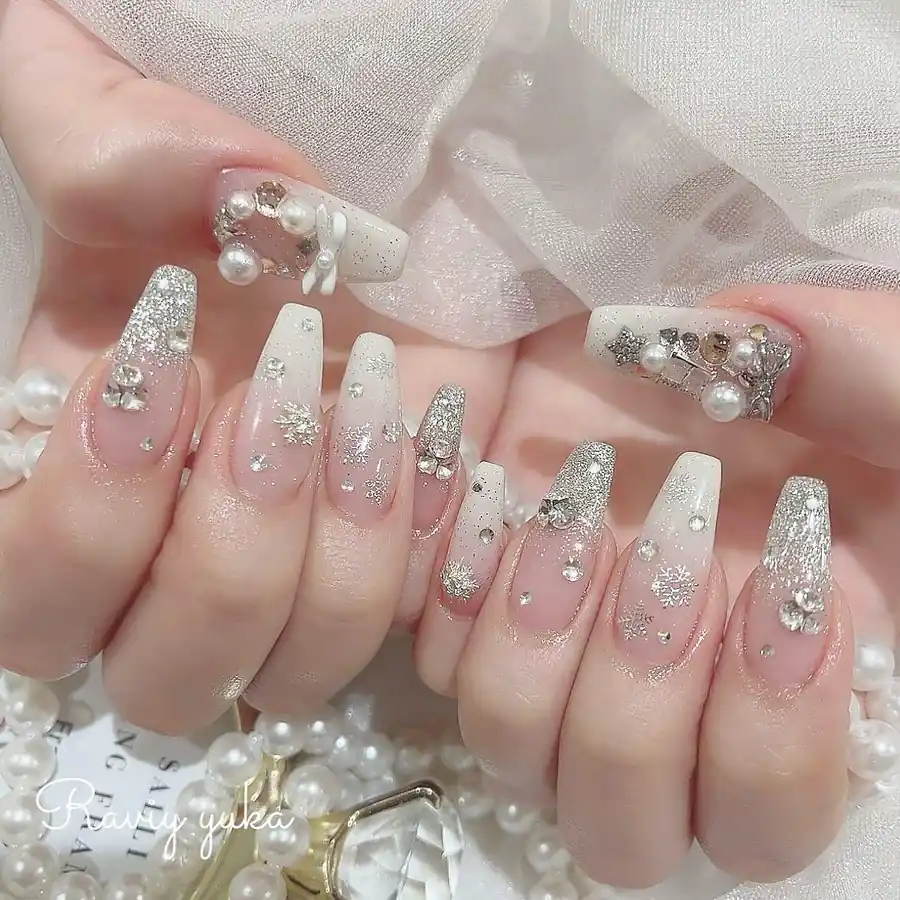
Sponge silver glitter onto the tips in thin layers, then blend the lower edge with a soft brush. Place stones with a wax pencil, and seal them with top coat so they stay put. Ask for “silver glitter tips on nude”, and name the snowflake nails before art starts. Coffin nails suit this set, while almond nails give glitter less room to fade. Keep stones small, because large stones lift sooner and catch on fabric.
21. Pale Blue Icicle Lines on White Nails
Rounded-square nails hold solid white polish, with pale blue lines that drip down like icicles. Lines vary in length, with some reaching the middle and others stopping near the tip. Pale blue covers one accent nail fully, with white wavy lines across it. Gloss seals the set, but the blue lines look cool against the white base. Length ends just past the fingertips, with soft corners on each nail.
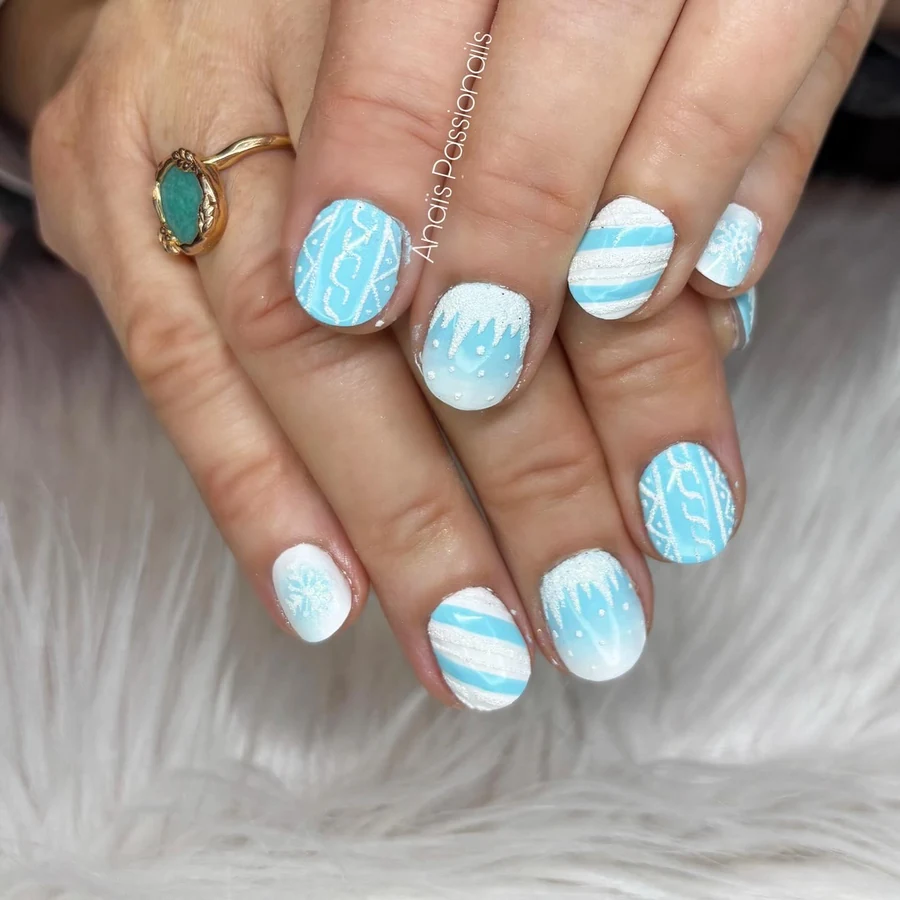
Draw icicle lines with a fine liner brush, and vary their lengths so they look natural. Keep lines thin, because thick lines crowd a short nail. Ask for “pale blue icicle lines on white”, and name the solid blue nail first. Short nails suit this art, while long nails need longer drips to match. Seal with a thin top coat, so fine lines stay crisp and do not blur.
22. A Snowman Face on a White Accent Nail
One short square nail holds a white snowman face. Two dark dots form eyes, with a small orange nose. Silver glitter dots scatter across a nearby nail, with varied sizes on a white base. Other nails also stay solid white, with a bright gloss finish across the set. Length ends just past the fingertips, with straight free edges and square corners. Light catches the glitter dots first, while the snowman face stays the clear focus.
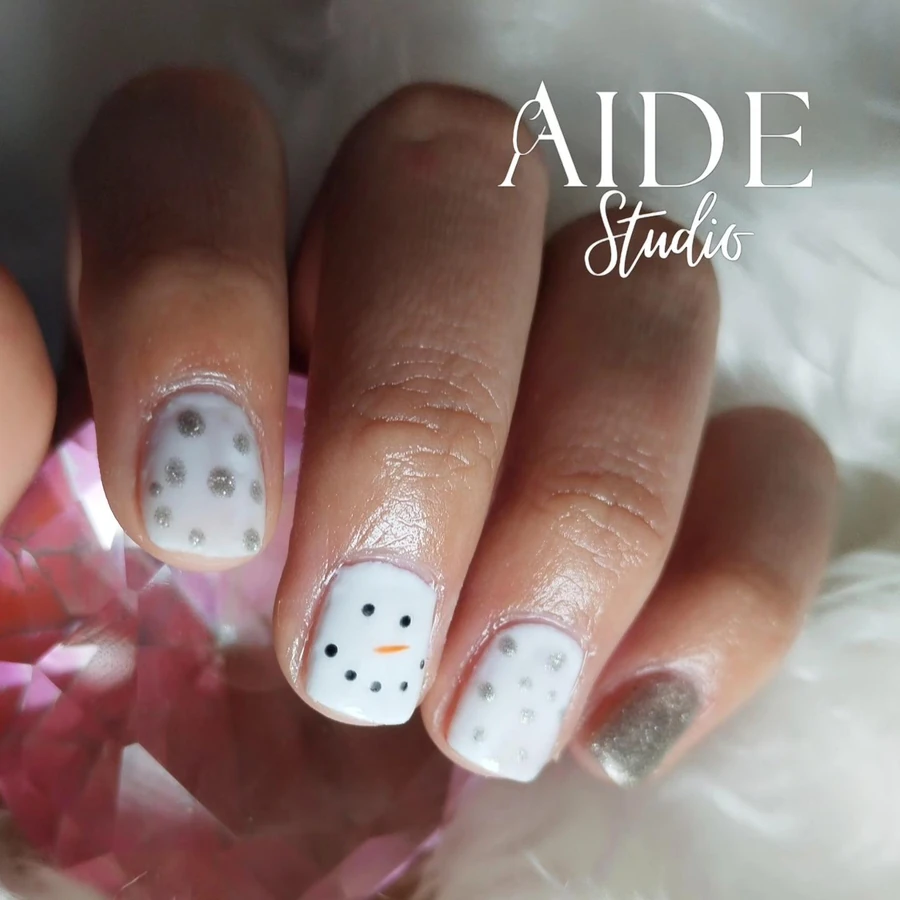
Dot the snowman face with a dotting tool, and keep the nose small so it fits the nail. Place glitter dots in varied sizes, because even dots can look flat on white. Ask for “one snowman face accent”, and keep the rest plain for balance. Short nails suit this art, while long nails give the face too much empty room. Seal the face with top coat, so dark dots stay crisp and do not smear.
23. Milky White Nails With Silver Starbursts
Soft white covers short squoval nails, with a soft glow under a gloss top coat. Silver starbursts sit on several nails. Fine rays spread from a central point, with a tiny stone at the middle. Small silver dots scatter beside the starbursts, with varied sizes across the set. Length ends just past the fingertips, with soft square corners on each nail. Light catches the starbursts first, but the milky base stays calm behind them.
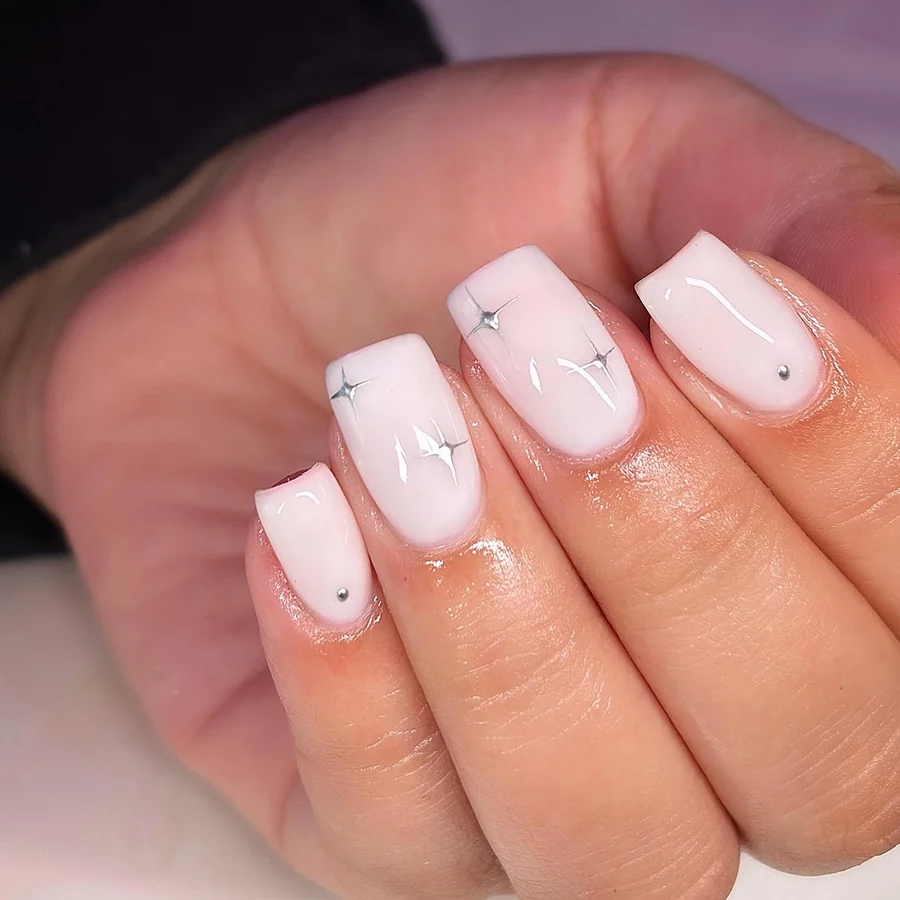
Paint starbursts with a fine liner brush, and keep rays thin so they stay neat. Place the central stone with a wax pencil, then seal it so it stays put. Ask for “silver starbursts on milky white”, and keep the largest starburst on one nail. Short nails suit this art, while long nails need more rays to fill the space. Reapply top coat after a few days, so stones stay sealed and rays stay crisp.
24. Milky White Nails With Frosted Silver Tips
Milky white covers long almond nails, with silver glitter frosting the tips of each nail. Glitter grows denser toward the free edge, with fine grains that fade down toward the middle. Small silver snowflakes sit on two nails, with fine arms and tiny dots. Thin silver lines frame the tip of one accent nail. Gloss seals the set, but the frosted tips catch light first.
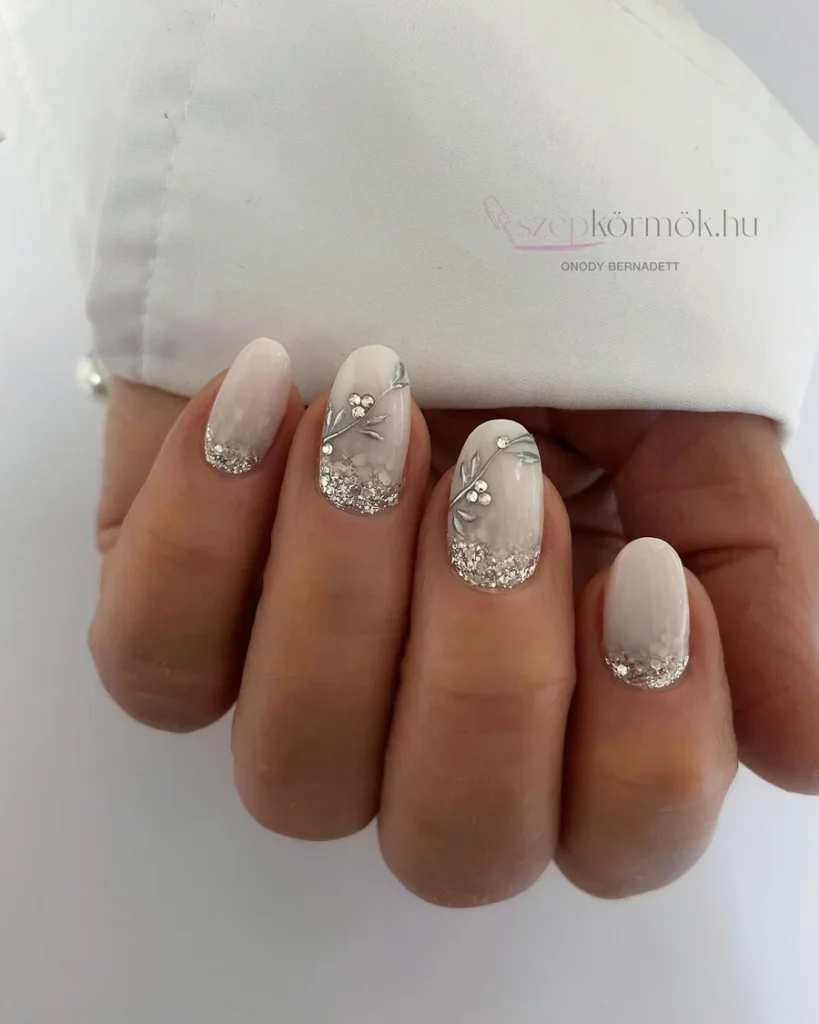
Dab silver glitter onto the tips, then blend down with a soft brush in thin layers. Keep the frosted band even across all nails, because uneven bands show fast on milky white. Ask for “frosted silver tips on milky white”, and name the snowflake nails first. Long almond nails suit this set, while short nails need a narrower frosted band. Seal tips twice, so grains stay flat and the free edge stays smooth.
Conclusion
A calm hand and one clear detail make White Christmas Nails look polished instead of busy, so pick a single accent such as a snowflake, a glitter tip, or a silver tree. Match the design to nail length first: short nails suit glitter tips and snow dots, while long almond or square nails give snowflakes and swirls more room. Seal fine silver lines with a thin top coat, book a fill within two weeks, and rub cuticle oil in nightly. Screenshot a favorite set and show it to the nail tech before the appointment starts.