

Deep wine colour sits at the heart of this set. Cream and gold keep each design light enough for December evenings. Burgundy Christmas Nails here run from quiet single-colour sets to hand-painted snowflakes, plaid, reindeer faces and mistletoe sprigs. Almond, square, oval and stiletto shapes all appear. Finishes range from high gloss to soft velvet shimmer and matte. Gold foil, glitter and fine line work add warmth without taking over. Notes below cover how each design was built and how to ask for it.
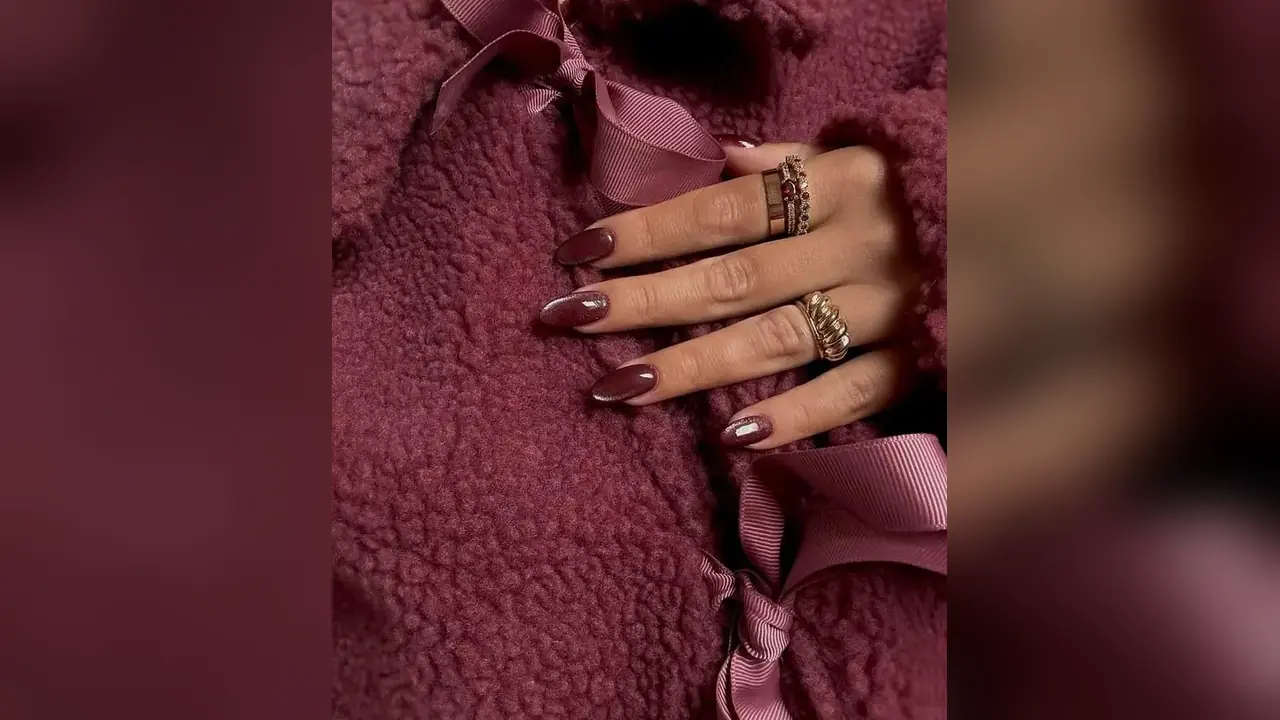
1. Velvet Wine Nails With a Soft Cat-Eye Glow
Soft light moves across these almond nails in a wide, glowing band. Deep burgundy polish holds a cat-eye shimmer , which is a magnetic shine that shifts as the hand turns. Each nail ends past the fingertip in a smooth almond point. Gold rings sit beside the nails, and the burgundy fabric behind them deepens the wine tone. No art breaks the surface, so the glow stays the whole design.
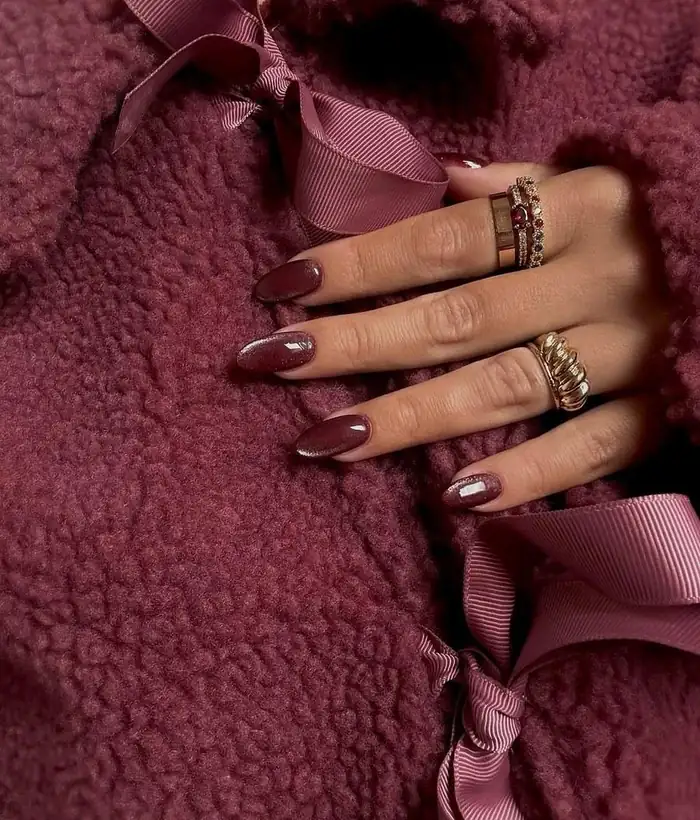
Hold a magnet over each wet nail to pull the shimmer into a band. Keep the magnet still for a few seconds, so the band sets cleanly. Two thin coats build the colour without flooding the cuticle area. Nail techs can place the band high or low, and that choice changes how long the nails look. Wipe the magnet clean between nails, because stray polish marks the next nail.
2. Cream Plaid Lines Over Glossy Burgundy Almonds
Cream plaid lines cross deep burgundy on most nails, and one solid burgundy nail breaks the pattern. Long almond nails end in soft points past the fingertips. Thin cream lines run both ways, and thicker white bands cross them at intervals. Gloss coats the whole set, so the crossing lines look sharp and clean. Small gaps of burgundy show between the lines on each nail.
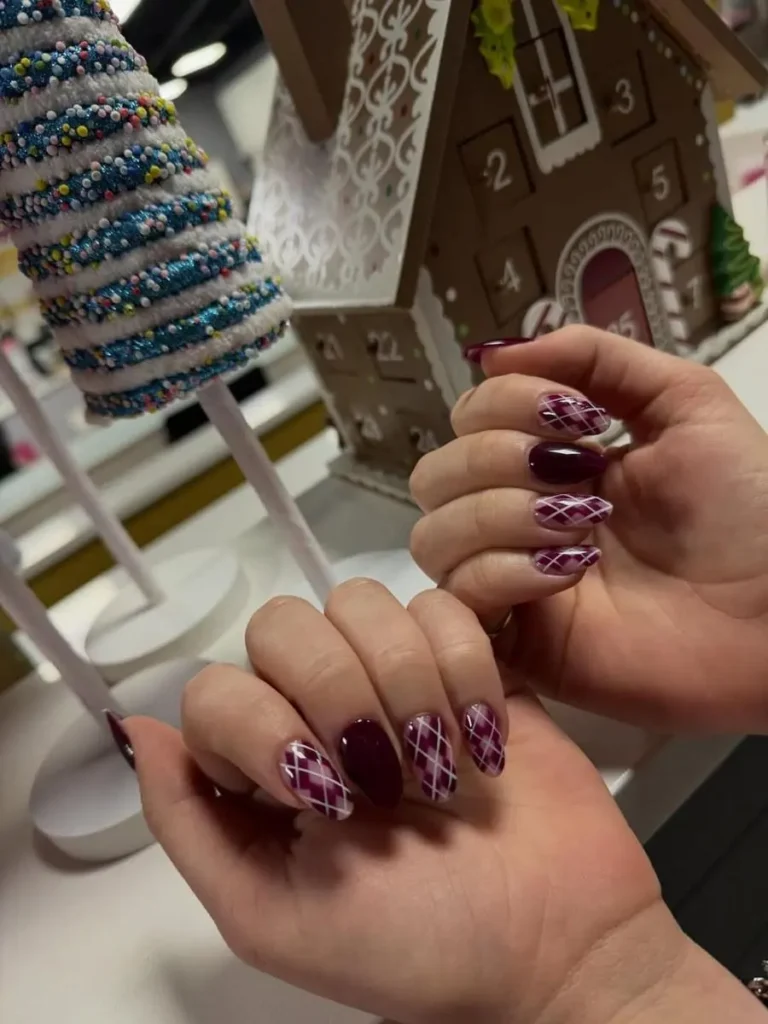
Start with a striping brush, a thin brush made for straight lines. Paint the burgundy base first and let it dry fully. Draw vertical lines next, then add the horizontal ones once the first set feels dry. Thin lines work best, because thick ones blur the plaid grid. Matte sealant can soften the gloss, and that change suits shorter nails well.
3. Snowflake Decal and a Small Red Bow on Burgundy Squares
White snowflake lines sit on one pale pink nail, and a small red bow marks the next nail. Long square nails carry deep burgundy gloss on most fingers. Pink bases soften two accent nails, and the snowflake lines stay thin and crisp. Burgundy tips edge one pink nail, while the bow loops sit flat and neat. Light catches the gloss and leaves a bright line down each nail.
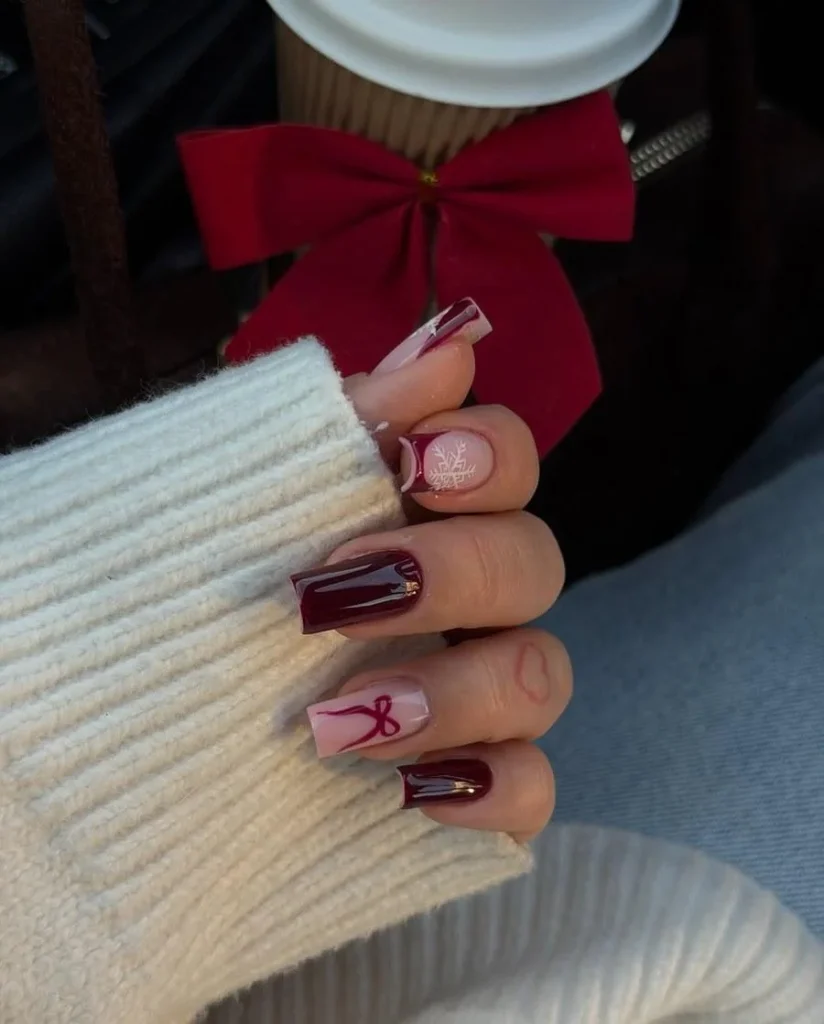
Ask for square tips filed straight across with soft corners. Snowflake lines need a fine liner brush, so book extra time for hand-painted art. Dotting tools make the small dots around each flake, and thin tape can guide the burgundy tip edge. Keep the bow flat with a thin layer of clear gel, because raised loops catch on fabric. Seal all nails with a top coat, a clear seal coat that locks the art in place.
4. Gold Glitter Tips on Short Burgundy Squares
Short rounded squares carry deep burgundy gloss, and gold glitter edges each free tip. Nails end just past the fingertip, with soft corners and a smooth curve. Dense gold sparkle packs the tip band, then fades slightly toward the centre. Light hits the glitter and scatters small bright points across the set. Each nail shows the same band width, so the set reads neat and even.
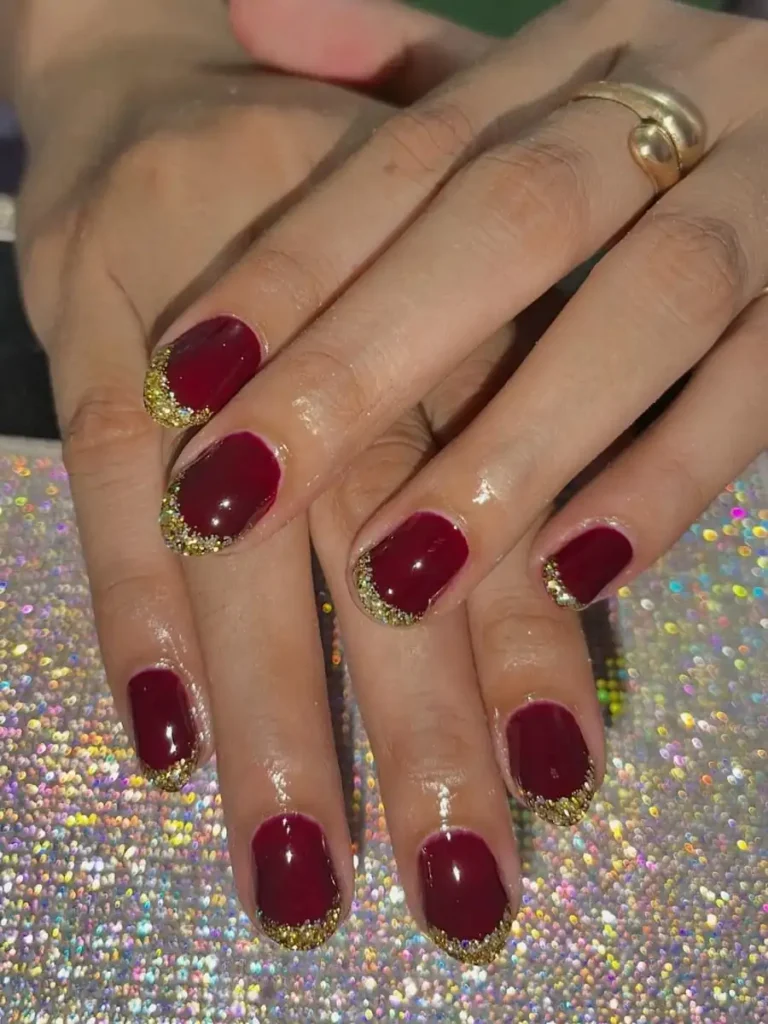
Choose a French tip, a band of colour across the free edge, in gold glitter. Keep the band narrow on short nails, because a wide band shortens the look. Sponge glitter onto the tip instead, because that method beats a brush for even cover. File the free edge straight first, then round the corners lightly. Wear gloves for washing up, so the glitter edge stays sealed longer.
5. Gold Foil Veins Across Wine-Burgundy Almonds
Gold foil veins catch light across deep wine burgundy, and the shine shifts as the hands move. Almond nails end past the fingertips in smooth points. Some nails fade from nude at the base to burgundy at the tip. Gold lines wander over the dark polish, and glitter dusts the edges of two nails. Soft white fluff fills the lower half, and the dark background keeps the focus on the nails.
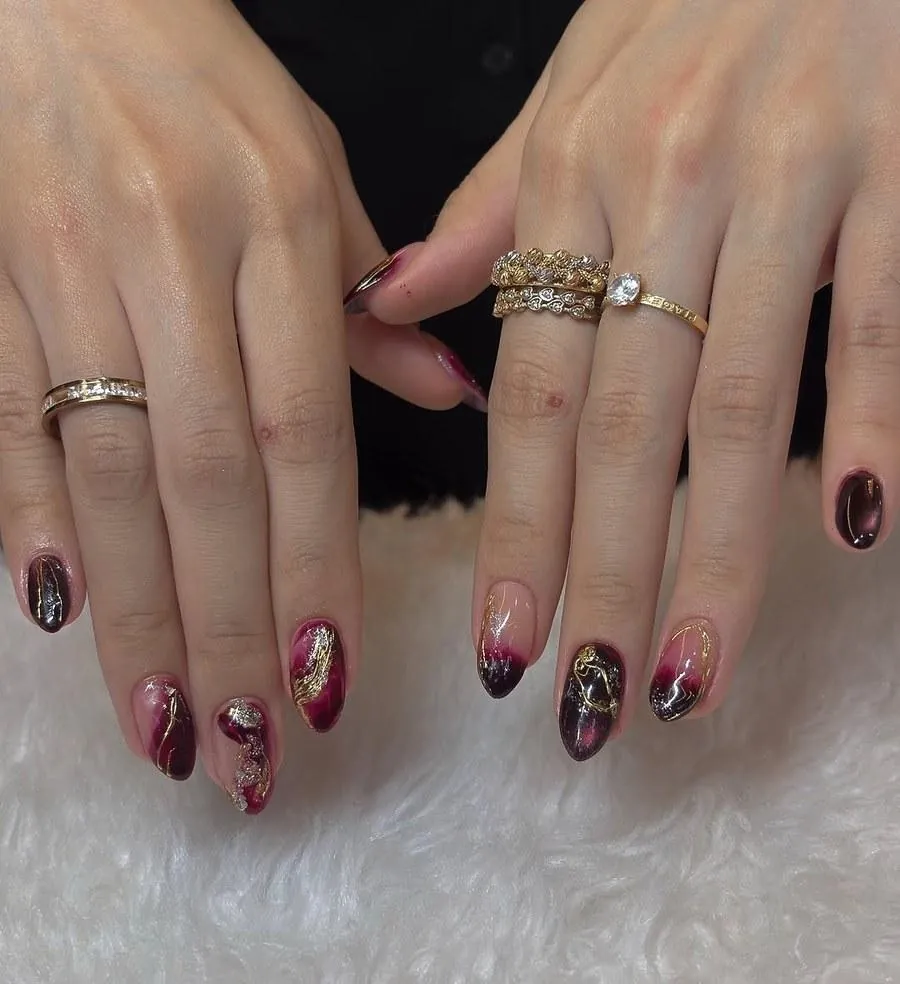
Press gold foil onto tacky polish with tweezers. Smooth the foil flat, then seal it fast, because loose edges lift within a day. Nude-to-burgundy fades need a sponge, so ask for the blend before the foil goes on. Keep foil off the very tip, as tips chip first. Nail techs can swap foil for gold glitter if the foil feels too bold.
6. Pink Fading Into Burgundy With Gold Flecks
Ombre means a soft blend from one shade into another. Pale pink melts into deep burgundy at the tips. Long square nails show the blend across the lower half of each nail. Gold glitter flecks scatter near the colour change, and the burgundy tip stays dark and rich. Light pink fills the base near the cuticle, where the nails look almost bare. Each nail ends square past the fingertip with a straight edge.
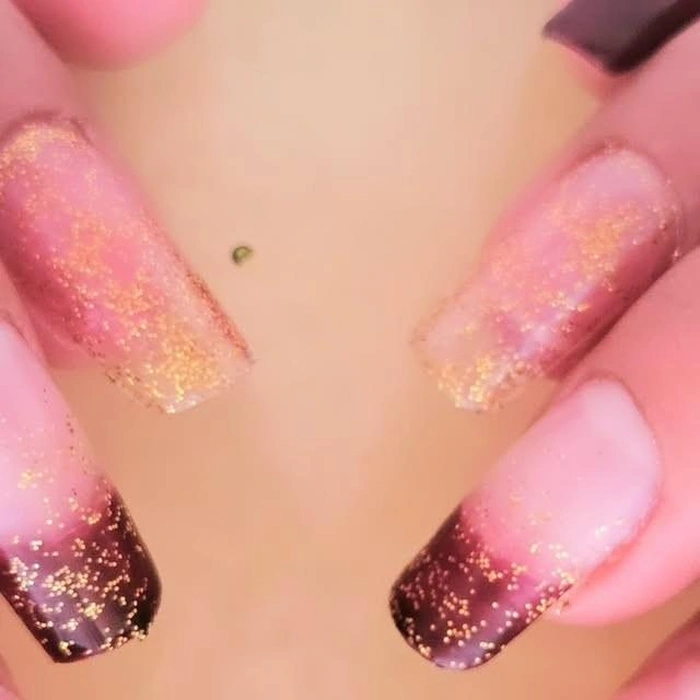
Use a sponge blend, which presses colour on with a small sponge. Dab burgundy polish onto the tip, then fade it upward with light taps. Two coats deepen the tip, and a clear seal layer smooths the blend line. Gold glitter goes on last, so it sits on top and catches light. Grow-out shows less with this blend, because the pale base matches new nail growth.
7. A Glitter Fade at the Tips of Short Burgundy Nails
Rounded oval nails end just past the fingertips with smooth tips. Deep burgundy gloss covers each nail, and glitter gathers at the tips. Silver-white sparkle fades upward from the free edge, so the base stays dark. Two hands rest crossed on soft white fluff, and the glitter catches light on every nail. Each tip holds more glitter than the base, which gives the fade its depth.

Sponge glitter onto the tip, then seal it with a clear coat. Two layers build the fade, and a clear seal coat smooths the edge. Cuticle oil, oil that softens the skin around each nail, keeps the base neat as nails grow. Rub a drop into each cuticle each night, because dry skin makes regrowth look rough. File the free edge weekly, so the short shape stays even.
8. Reindeer Faces and Gold Hearts on Nude and Wine
Nude accent nails carry hand-painted reindeer faces with burgundy antlers and red noses. Long square nails end past the fingertips with straight edges. Solid burgundy gloss covers the other nails, and gold glitter hearts sit on two nude nails. Black dot eyes and small gold flecks finish each reindeer face. Gloss coats the whole set, so every line looks smooth and bright.
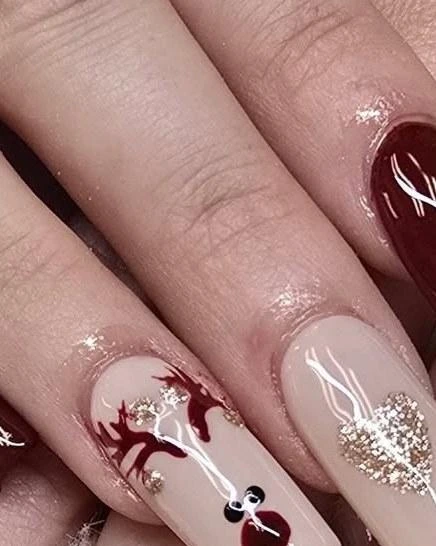
Limit reindeer faces to two accent nails, because more faces crowd the set. Fine liner brushes draw the antlers, and a dotting tool makes the eyes and nose. Keep the antlers burgundy on a nude base, so the face reads clearly. Gold glitter hearts suit the ring finger, and the solid nails balance them. Book extra time, as hand-painted faces take longer than plain colour.
9. Bare Half-Moon Crescents on Long Burgundy Almonds
Long almond nails taper to soft points past the fingertips. Deep burgundy gloss covers each nail from base to tip. Every nail shows a bare half-moon crescent at the cuticle, with no polish there at all. Dark tones blur softly behind the hand, and the gloss catches the light. Each crescent curves gently, and the burgundy edge stays crisp against it.
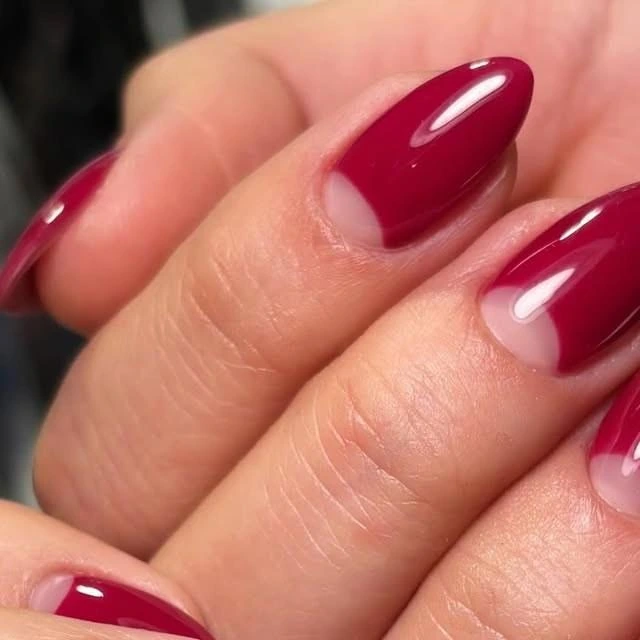
Leave a half-moon base bare at the cuticle. Long almonds suit this look, but shorter nails work too, so try a medium length first. Nail techs can paint the crescent with a small brush or leave it bare. Keep the points filed even, because one longer point throws the set off. Builder gel, a thick gel that adds strength, helps long points last.
10. Candy-Cane Stripes With a Silver Star
Diagonal white and burgundy stripes wrap two accent nails from base to tip. Almond nails end past the fingertips in smooth points. Solid burgundy gloss covers most nails, and a small silver star sits near one cuticle. One nude nail carries glitter and a striped tip to match. Pink polish tints the base of the striped nails, so the white lines stand out.
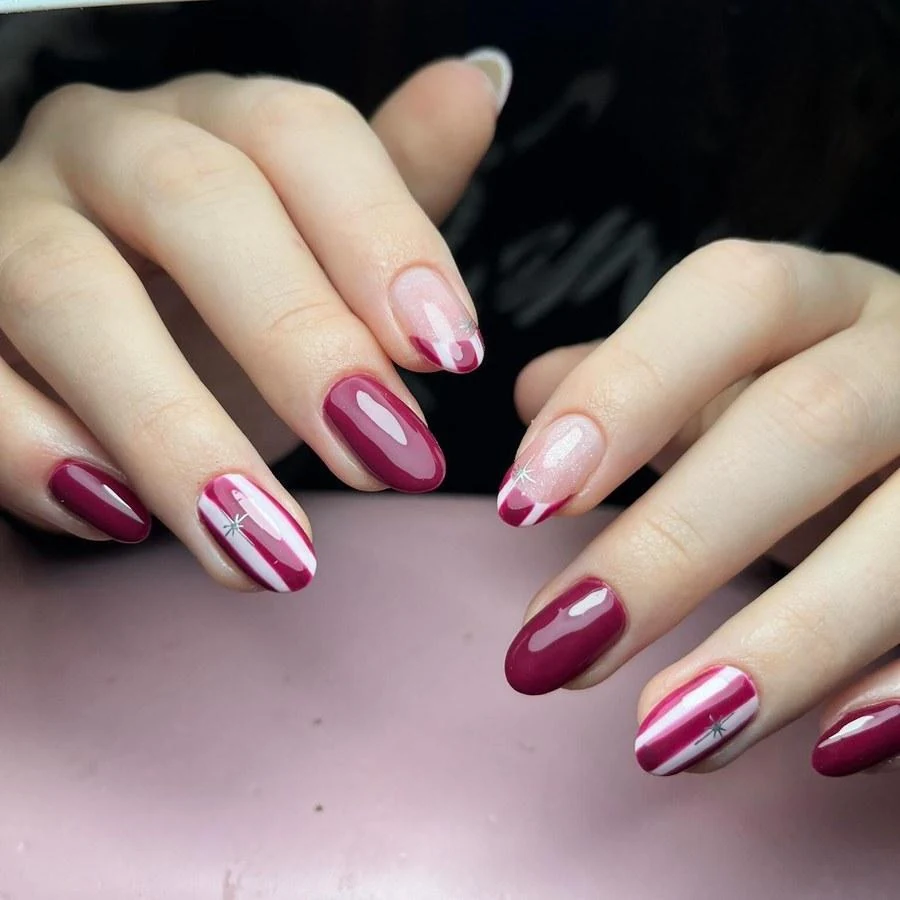
Ask for striping tape, thin tape that guides straight lines. Paint the base first and let it dry. Lay the tape in diagonals, then paint the stripes over it. Peel the tape off while the polish stays wet, because dry polish lifts with it. Silver star decals add the final mark near the cuticle. Keep stripes thin on short nails, so the pattern stays neat.
11. Gold Bows on Metallic Burgundy Almonds
Metallic burgundy shine covers long almond nails from base to tip. Gold bows sit on both ring fingers, with loops and tails in thin gold lines. Each nail ends past the fingertip in a smooth point. Flocked branches with warm lights fill the background, and the gold bows catch their glow. No other art marks the set, so the bows stay the clear focus.
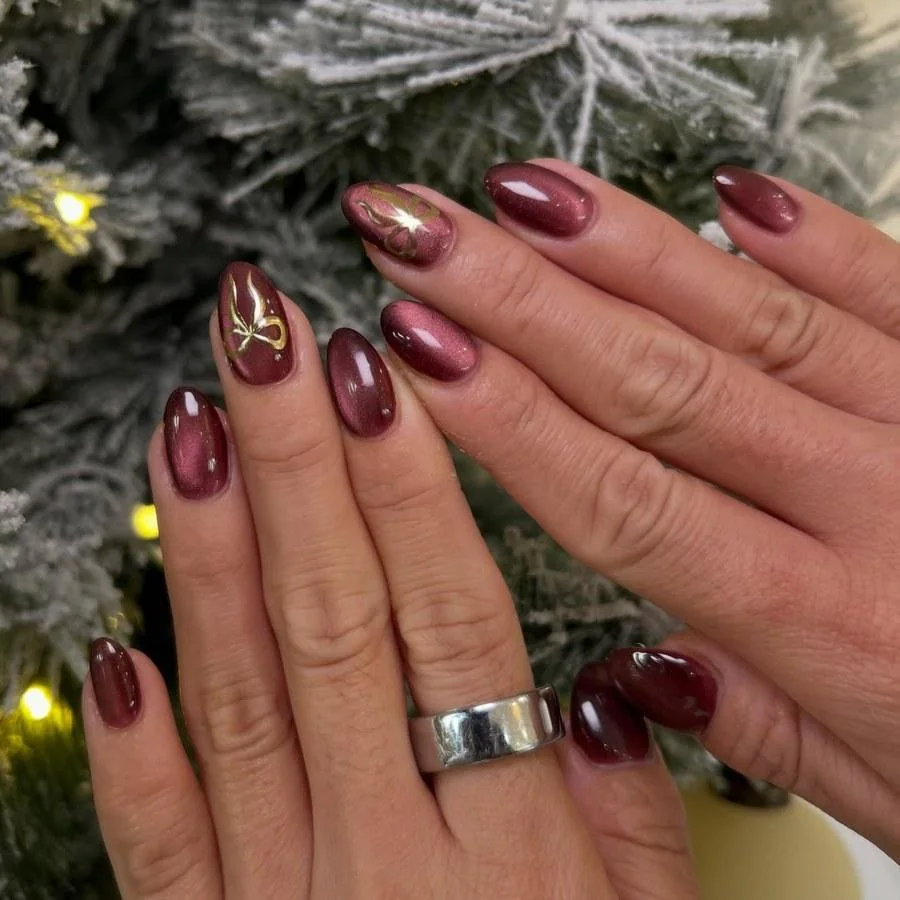
Draw bows with a fine liner brush in gold. Paint two loops first, then add the tails below them with short strokes. Thin lines read best, because thick lines turn the bow into a blob. Nail techs can add a small gold dot at the bow centre. Keep the bow on the ring finger, so the set stays calm elsewhere.
12. Holly Leaves and Berries on Stiletto Wine Nails
Holly leaves and red berries fill one long stiletto nail from base to tip. Other nails wear deep burgundy with a fine glitter shimmer. Each nail tapers to a sharp point past the fingertip. Green leaves curve along the accent nail, and three red berries cluster near the centre. Gold rings sit beside the nails, and one holds a small green tree charm.
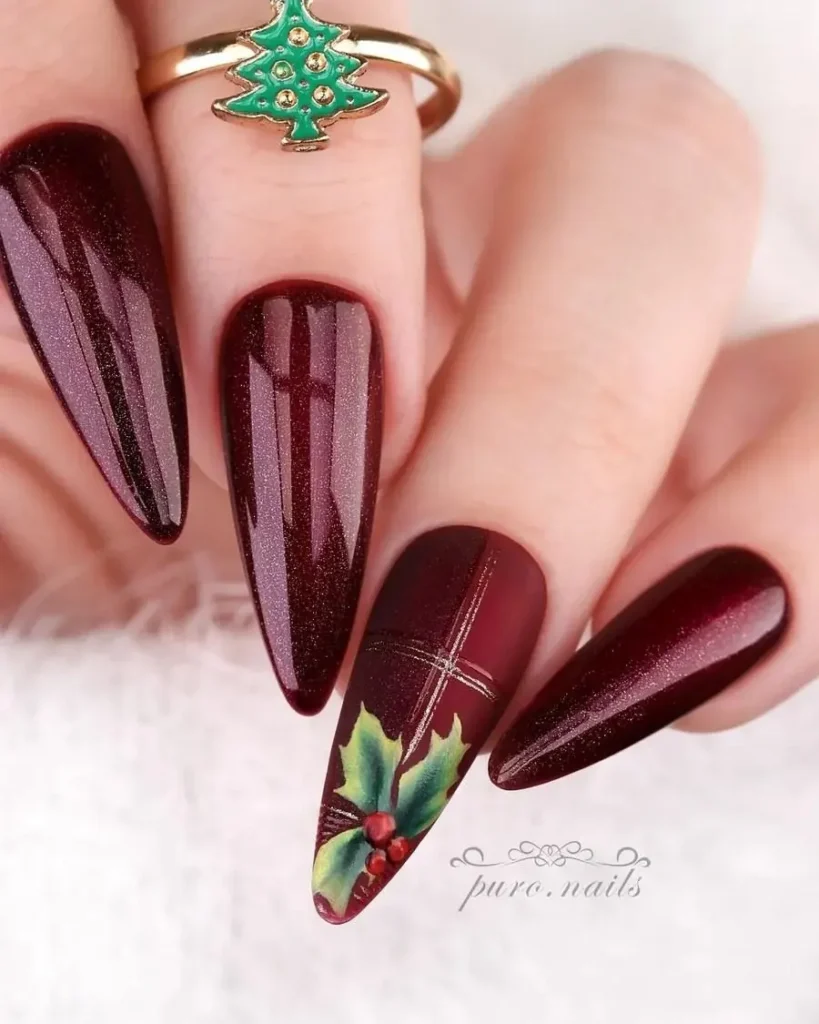
Paint holly leaves with a fine liner brush, one leaf at a time. Keep the leaves small, because large leaves crowd a narrow stiletto tip. Thick paint is a common mistake, and it cracks as the nail flexes, so use thin layers. Let each layer dry before the next, and seal the art last. Shorten the accent nail slightly if the point feels fragile.
13. Pine Sprigs and Red Berries on Short Wine Nails
Pine sprigs in green with tiny red berries sit on nude accent nails. Short oval nails end just past the fingertips with rounded tips. Deep burgundy gloss covers the other nails in a smooth, even coat. Each sprig bends gently across the nude base, and small red dots mark the berries. Plain light grey fills the background, and the green stands out against the wine colour.
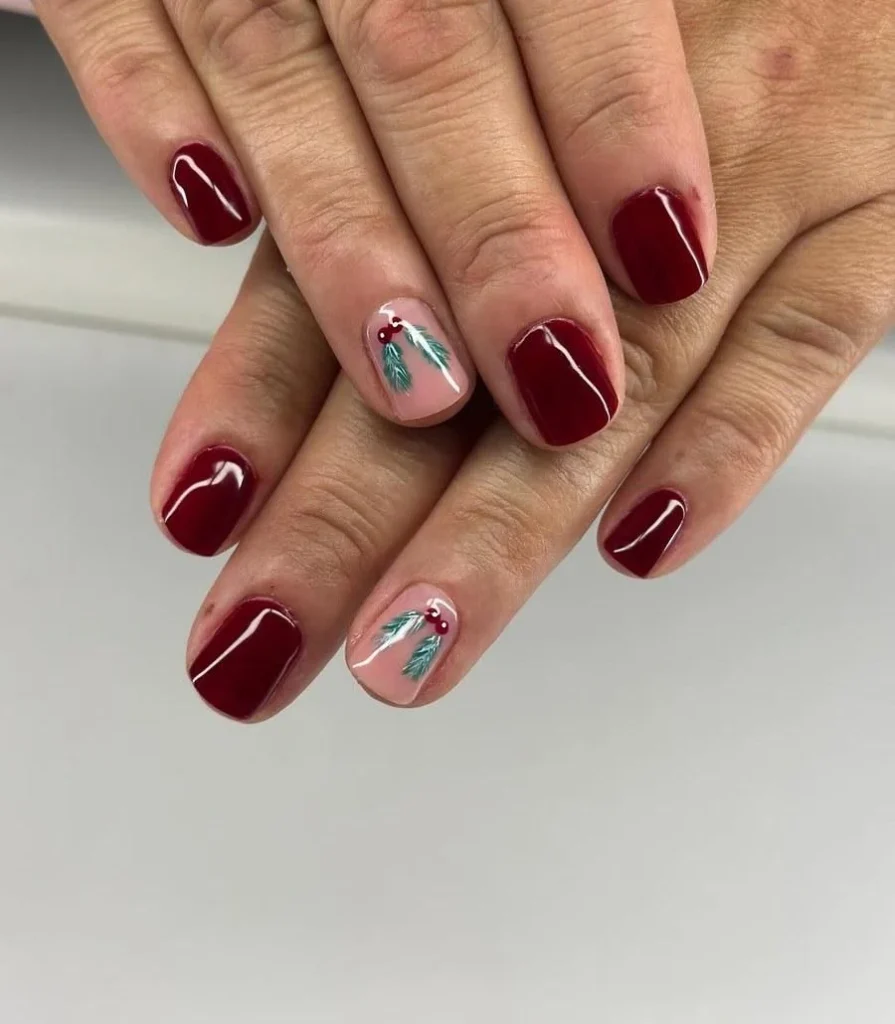
Place pine sprigs on one accent nail per hand. Short nails suit this art, because the sprig needs little room. Fine brushes paint the green stems, and a dotting tool adds the red berries. Longer nails can hold two sprigs, so ask for a second one if the nails run long. Keep the berries small, as large dots look heavy on short nails.
14. Scattered Gold Dots, Bows and Starbursts
Small gold dots scatter across burgundy and nude nails like tiny round baubles. Long almond nails end past the fingertips in smooth points. Gold foil bows and thin starbursts sit on several nails beside the dots. Cream fabric fills the background, and the gold catches soft light. Each nail holds a different mix, so no two nails look the same.
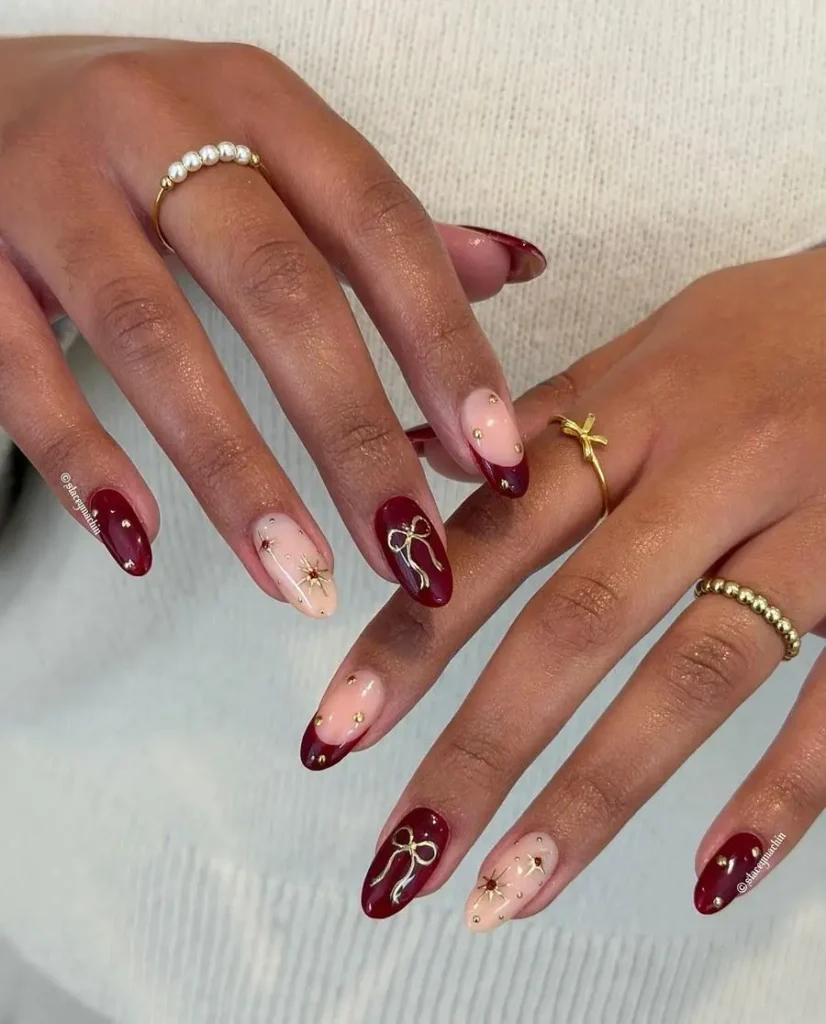
Dot gold polish onto each nail with a dotting tool. Keep the dots small, because large dots read as polka dots. Nail techs can add a bow or a starburst to one nail for variety. Check the dots after a week, as foil dots lift first at the edges. Dab a clear seal coat over any lifting dot, so it stays put longer.
15. Gold Starbursts With Rhinestone Centres
Starburst shapes in gold with rhinestone centres sit on nude accent nails. Almond nails end past the fingertips in smooth points. Deep burgundy gloss covers the solid nails, and one nail carries gold vertical stripes. Each starburst spreads thin gold rays from a small bright crystal centre. White fabric lies below the hand, and the gold catches light against the dark polish.
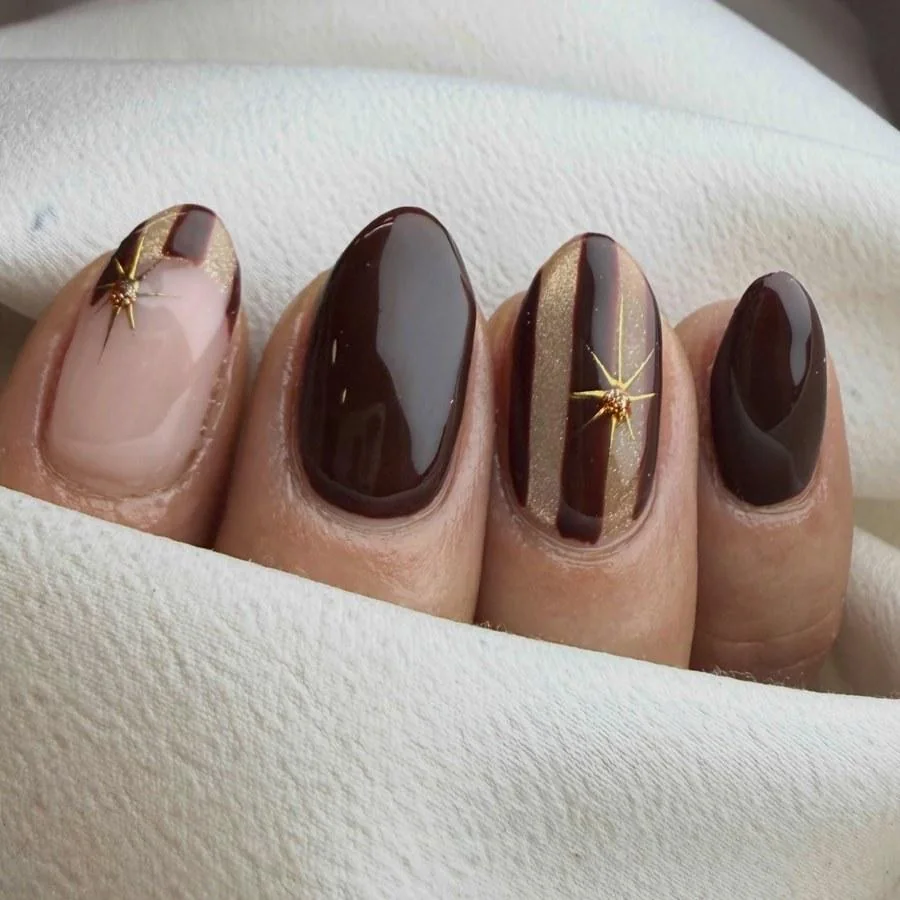
Set starbursts on two accent nails only. Dotting tools set the rhinestone centre, and a liner brush draws the rays. Gold stripes suit the nail beside the star, so the set stays balanced. Nail techs can swap the rhinestone for gold glitter if sparkle feels too much. Keep the rays thin, because thick rays blur into a solid star shape.
16. A Burgundy Tree With a Gold Star on Pale Pink
Tree shapes in burgundy with a gold star sit on one pale pink nail. Almond nails end past the fingertips in smooth points. Gold starbursts mark the solid burgundy nails, and a gold bow sits on one nail. Small gold dots scatter on the pink nails beside the tree. Light wood fills the background, and the gloss gives each nail a soft shine.
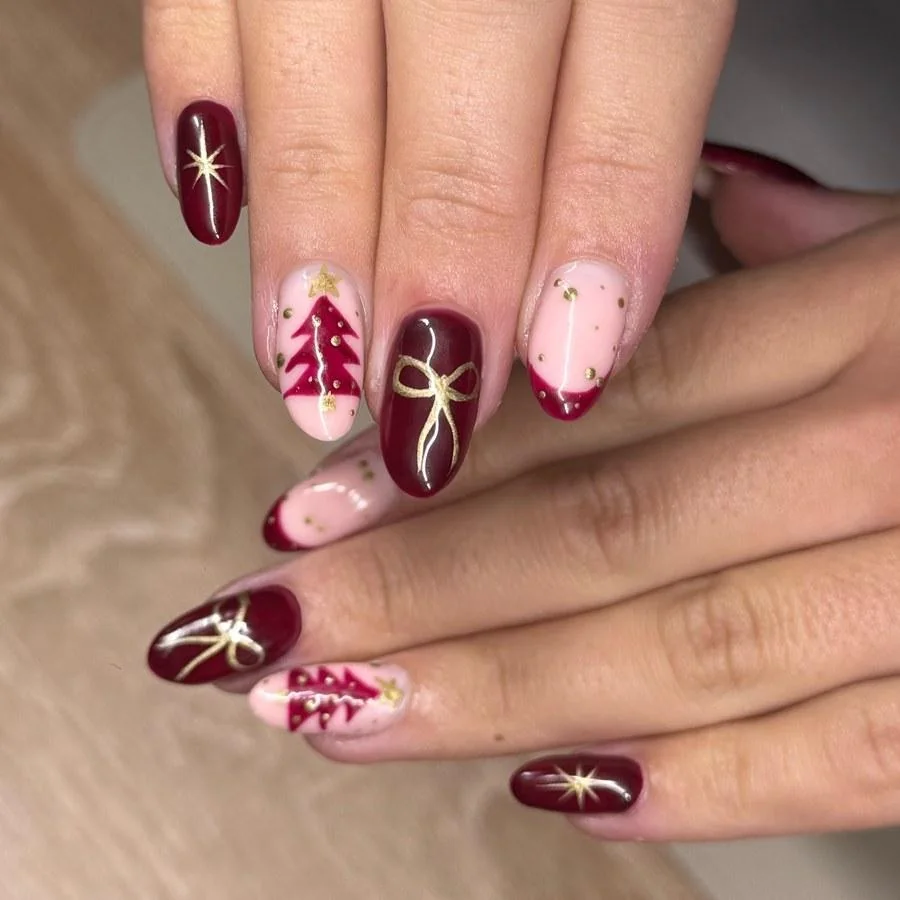
Sketch the tree with a fine liner brush on one accent nail. Paint the trunk first, then add the branches in short upward strokes on both sides. Gold star decals top the tree, so the shape reads clearly. Keep the other nails simple, because the tree needs room to stand out. Book extra time, as small trees take a steady hand.
17. Gold Glitter Ombre on Pink With Burgundy Tips
Glitter fades from dense sparkle at the tip to soft pink near the cuticle. Two ring fingers carry the fade. Almond nails end past the fingertips in smooth points. Pale pink bases cover most nails, and burgundy French tips edge the rest. Thin gold lines trace the smile line where pink meets burgundy. White towel fills the background, and the glitter catches light on every nail.
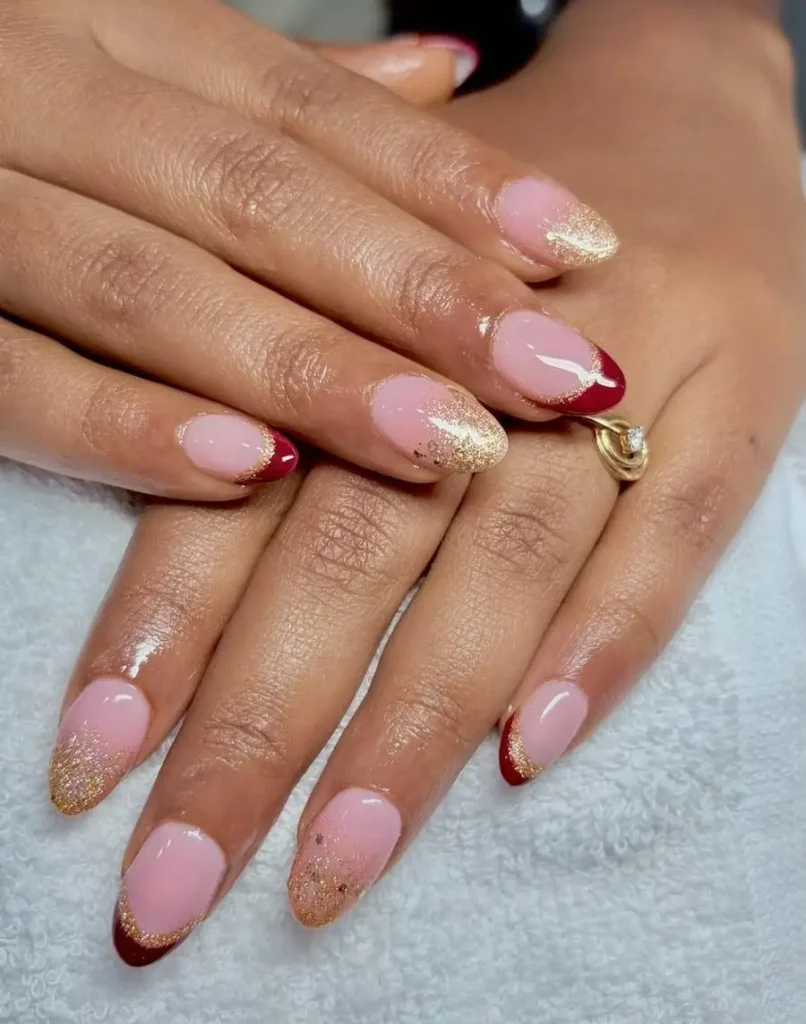
Fade gold glitter from dense sparkle to clear with a sponge. Sponge gold glitter onto the tip, then fade it down with light taps. Burgundy French tips suit the other nails, and a thin gold line marks the edge. Two coats of glitter build the fade, so ask for a second pass. Seal with a clear seal coat, because glitter edges feel rough without it.
18. Burgundy Dots on White Beside a Burgundy French Edge
Scattered burgundy dots mark white nails across the surface. Long stiletto nails taper to sharp points past the fingertips. Nude nails below them wear burgundy French tips with a clean curved edge. Each dot sits apart from the next, so the white base shows through clearly. Dark tones blur behind the hand, and the white nails draw the eye first.
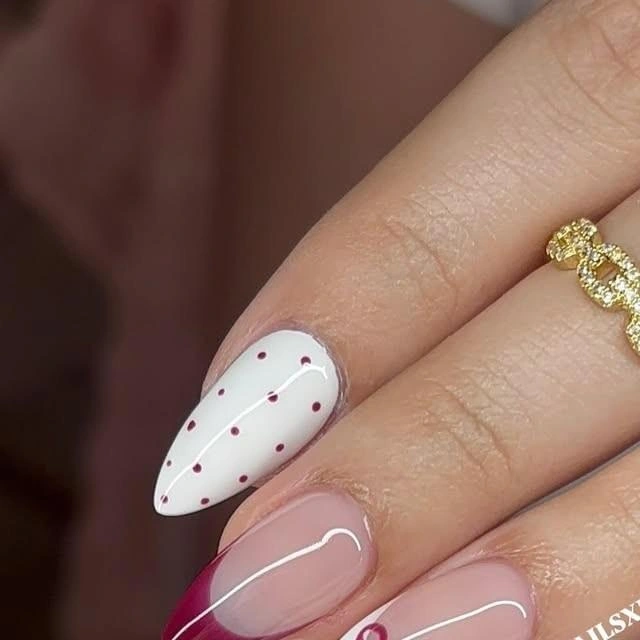
Use a dotting tool, a small tool with a round tip, for the dots. Dip it in burgundy polish, then press it lightly on the nail. Space the dots evenly, because crowded dots look messy. French tips, bands of colour across the free edge, suit the nails beside the dotted one. Seal with a clear seal coat, so the dots stay smooth.
19. Gold Ribbon Bows on Burgundy and Nude Almonds
Ribbon bows in gold outline several almond nails in thin, neat lines. Long nails end past the fingertips in smooth points. Burgundy polish covers some nails, and nude bases carry the bows on others. Red French tips edge two nails, and a small snowflake marks one more. Dark tones and a red ribbon fill the background, and the gold bows catch the light.
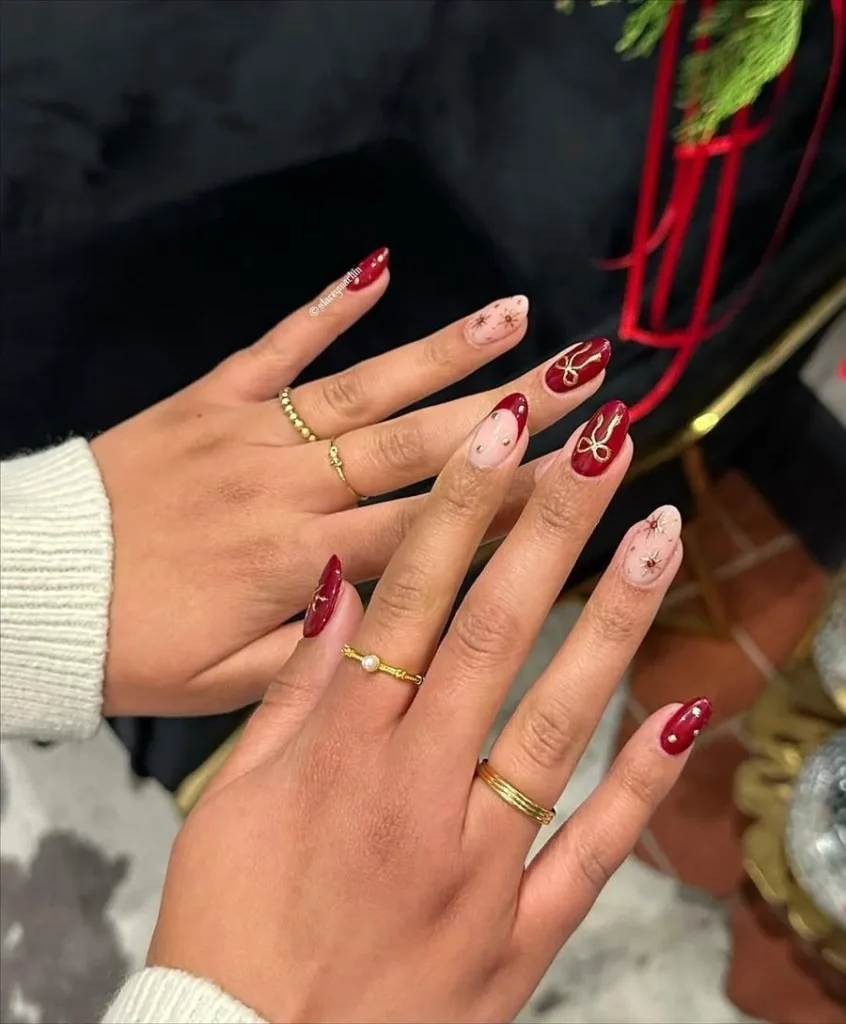
Outline ribbon bows in gold on the ring finger of each hand. Fine liner brushes make the loops, and short tails finish the shape. Red French tips suit the nails beside the bow, so the set stays festive. Nail techs can swap the gold for cream lines if gold feels too bright. Keep the bows small, because large bows crowd a narrow nail.
20. Grey-Burgundy Marble Swirls With Gold Star Charms
Grey and burgundy marble swirls fill two accent nails with soft, smoky waves. Short oval nails end just past the fingertips with rounded tips. Deep burgundy gloss covers most nails, and a pale pink nail carries gold foil. Gold star charms sit on two ring fingers beside the marble nails. Dark red velvet fills the background, and the marble swirls catch the light.
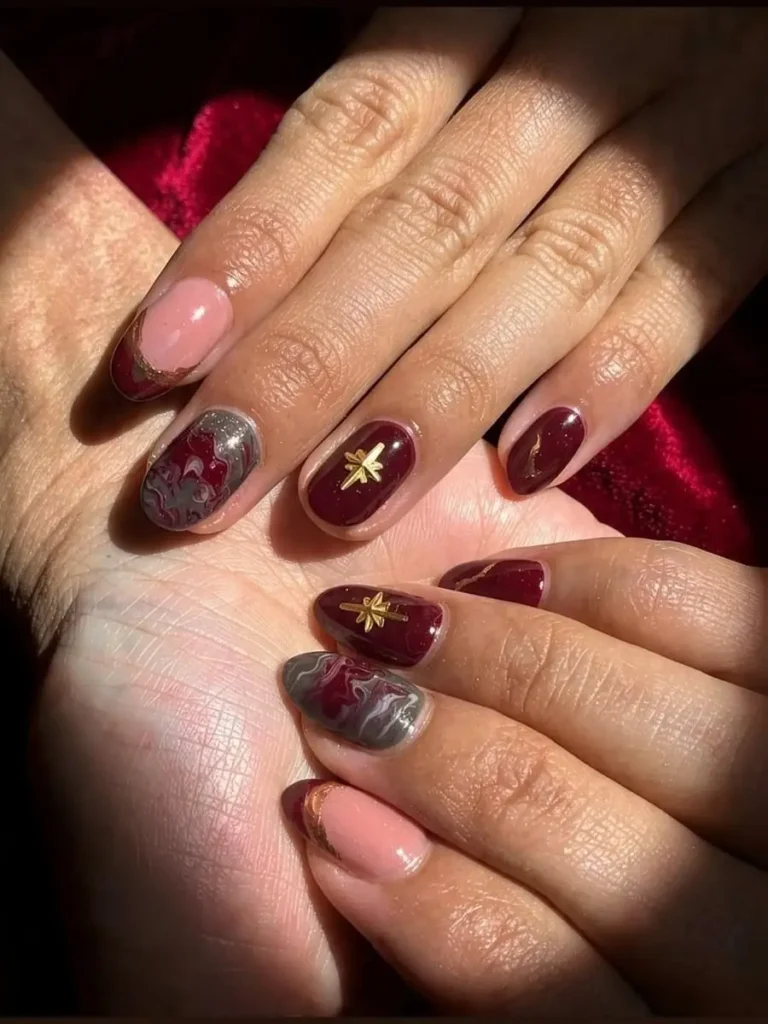
Work on a wet burgundy base to shape marble swirls. Paint the burgundy base, then drag grey and white lines through it while it stays wet. Sponges can soften the lines, so the swirls look soft and smoky. Gold foil goes on last, because it tears on wet polish. Keep the marble to two nails, as more marble hides the burgundy.
21. Long Stilettos With 3D Bows and Gold Heart Charms
Long stiletto nails taper to sharp points far past the fingertips. Burgundy and nude bases share the set, and 3D bows sit on two nails. Gold heart charms, small pearls and a thin starburst add shine to the nude nails. Each point looks smooth and even, and the gloss runs clean down every nail. Plain grey fills the background, so the charms stand out.
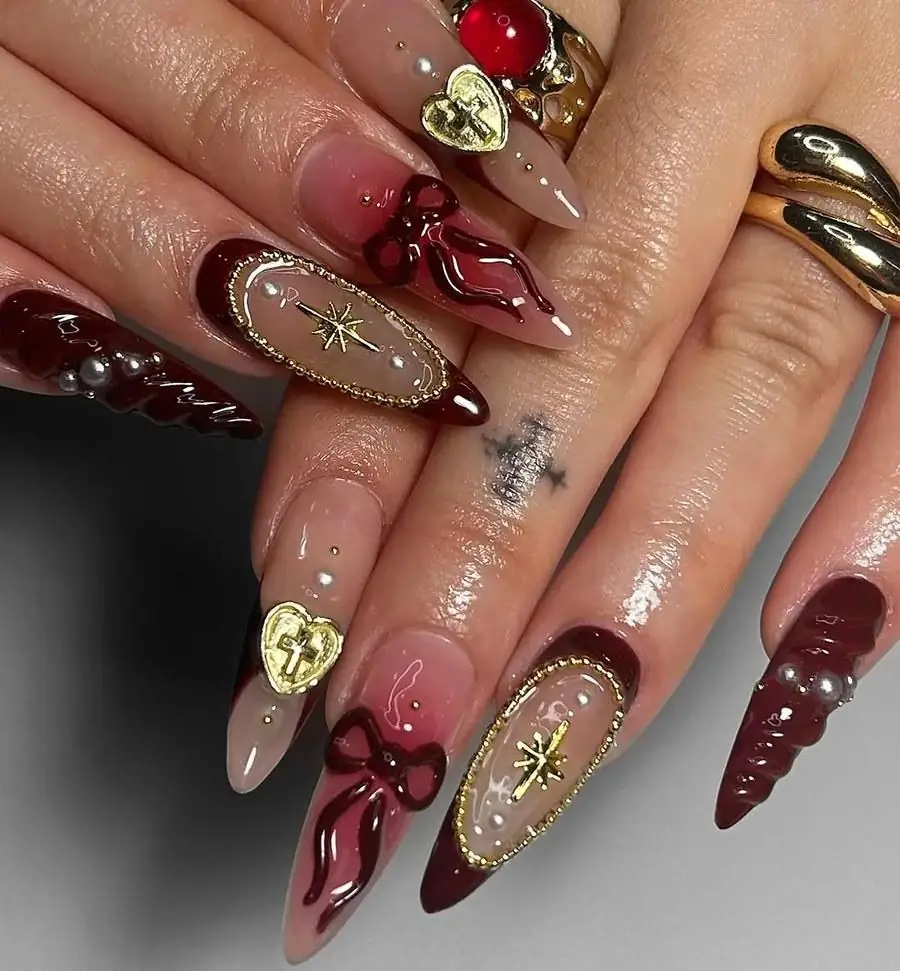
Build stiletto points with builder gel for extra strength. Thin tips snap under daily use, so ask for extra layers at the point. Keep 3D charms on two nails only, because more charms catch on everything. File the points even each week, and seal each charm with clear gel. Shorten the set if the length gets in the way of typing or fastening buttons.
22. Burgundy Glitter French Tips With a Fine Gold Line
Medium almond nails end just past the fingertips in smooth points. Nude bases cover each nail in a sheer, even layer, and burgundy glitter tips edge the free ends. Thin gold lines trace the curve where nude meets glitter. Each tip holds dense sparkle, and the gold line keeps the edge crisp. Grey fluff fills the background, and the glitter catches soft light.
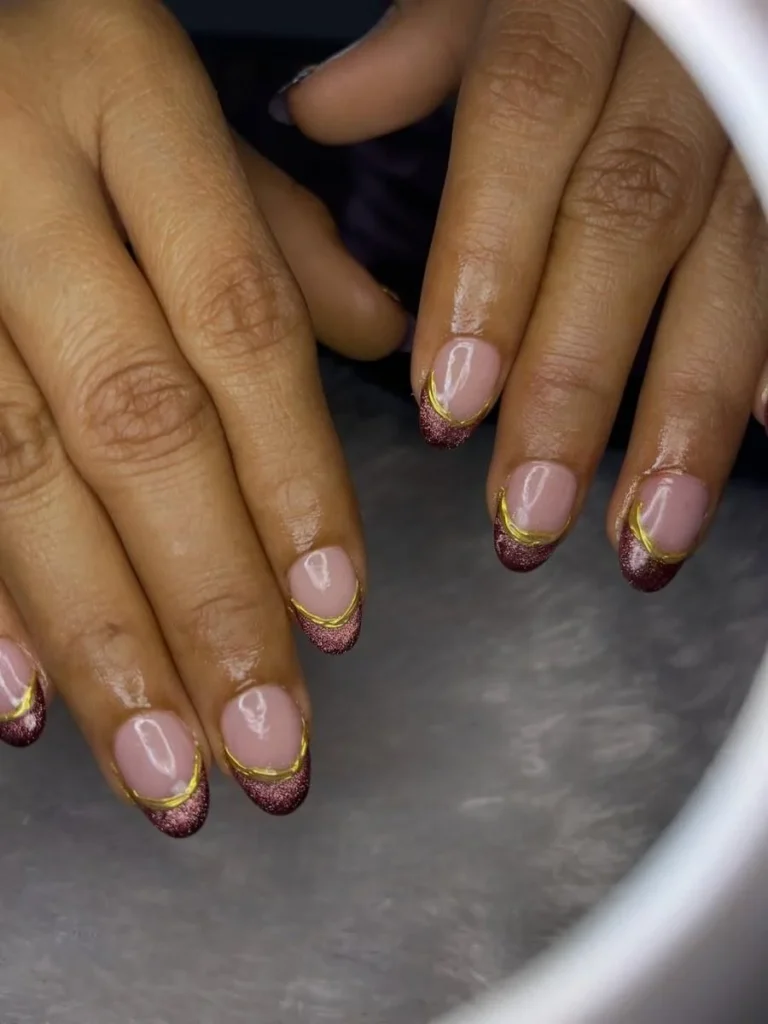
Dab burgundy glitter onto the tip, then clean the edge with a flat brush. Thin gold lines need a striping brush, a thin brush made for straight lines. Keep the line close to the glitter edge, so the curve stays neat. Wear gloves for housework, because water lifts glitter tips fast. File the free edge weekly, so the shape stays even.
23. Green Mistletoe Sprigs With Red Berries
Green mistletoe sprigs with small red berries sit on nude accent nails. Medium almond nails end past the fingertips in smooth points. Deep burgundy gloss covers the other nails in a rich, even coat. Each sprig bends across the nail, and red dots mark the berries. Dark tones fill the background, and the green stands out against the wine colour.
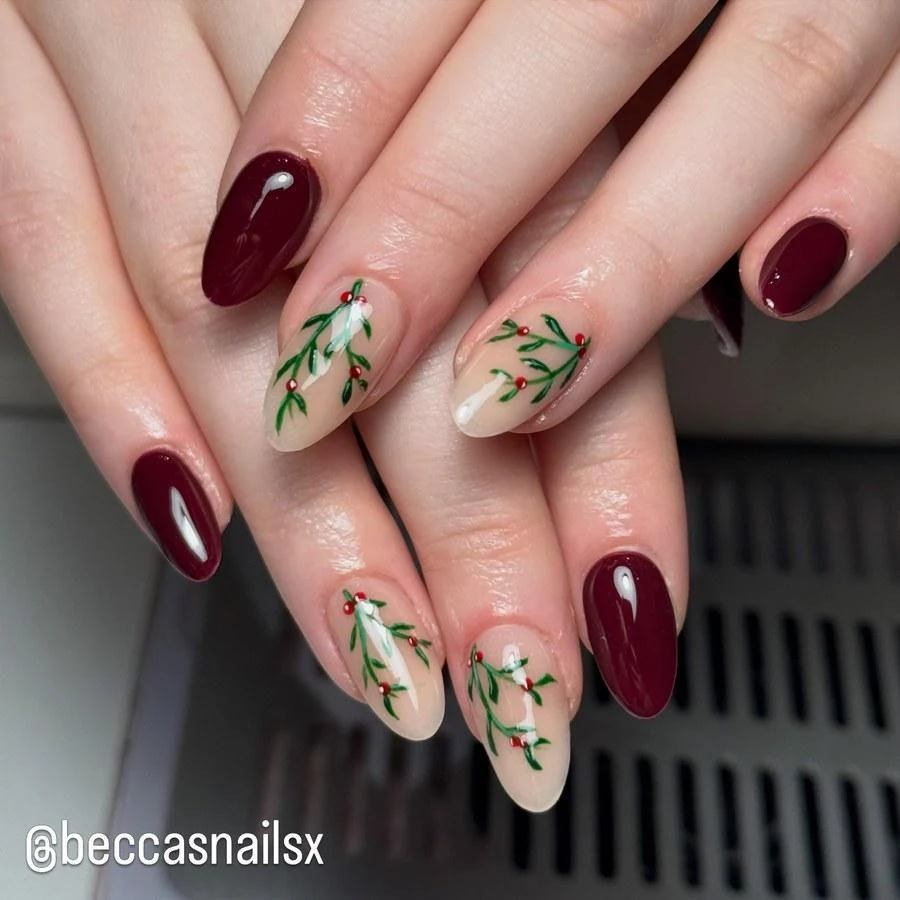
Add mistletoe sprigs to two accent nails per hand. Fine brushes paint the green stems, and a dotting tool adds the red berries. Keep the sprigs small, because large leaves hide the nude base. Seal the art with a clear seal coat, so the berries stay bright. Touch up chips fast, as dark burgundy shows chips more than pale shades.
Conclusion
Wine shades reward patience more than extra decoration. One strong detail, a bow, a sprig or a thin gold line, often carries a whole set. Burgundy Christmas Nails work best when the base colour stays deep and even. Chips then show less and regrowth blends in. Keep nails short for the first wear, then add length once the shape feels right. Cuticle oil each night keeps the skin around nails soft and the finish neat for longer.